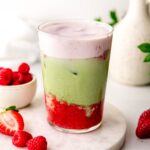
• Skip to primary navigation
  • Skip to main content
  • Skip to primary sidebar
  • Skip to footer
  • Recipes
  • About Me
  • Contact Me
  • Web Stories

coffeecopycat.com logo

menu icon
go to homepage
subscribe
search icon
Homepage link
  • Recipes
  • About Me
  • Contact Me
  • Web Stories
    • Facebook
    • Instagram
    • Pinterest
  • ×
    Home

    Coffee Copycat

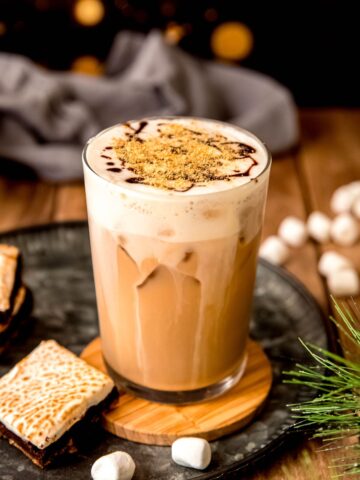
    Iced S'mores Chai (Starbucks Copycat)

    June 27, 2026

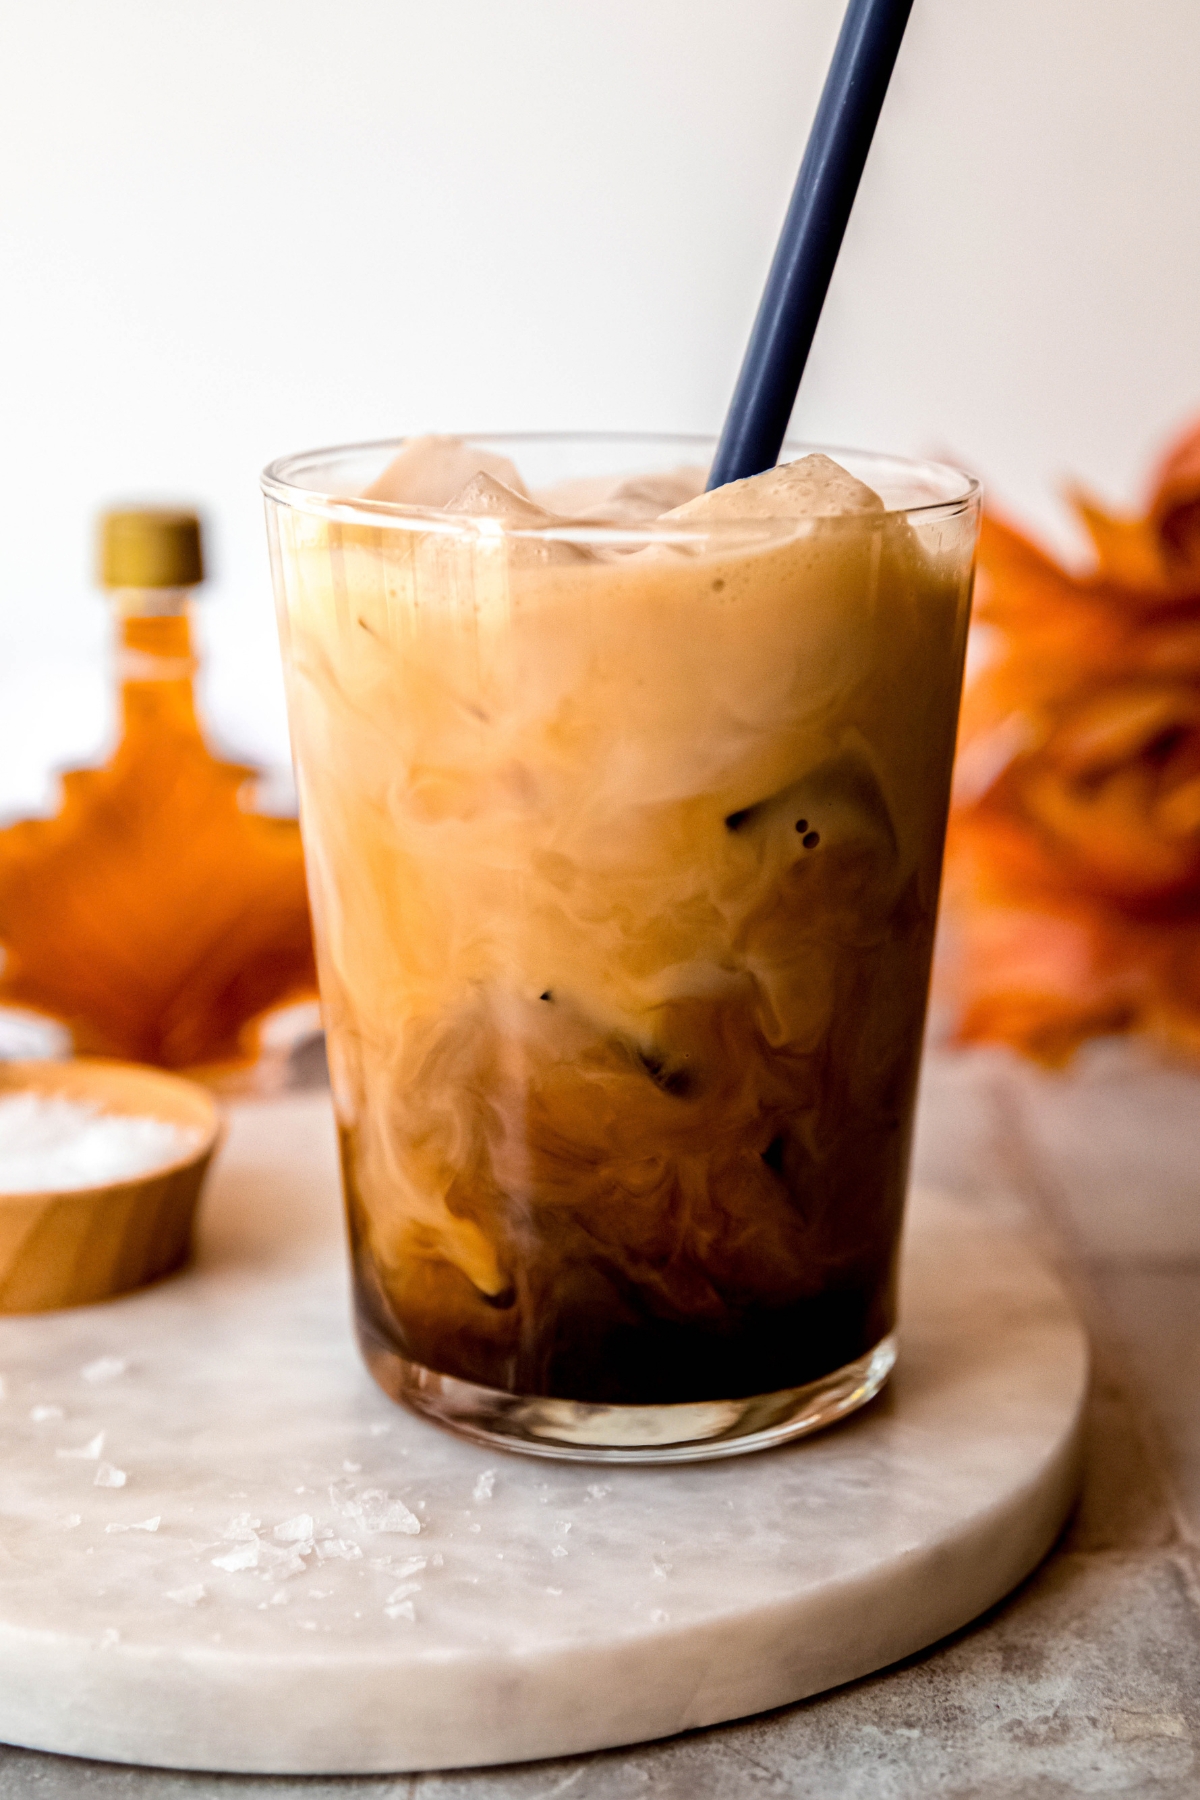
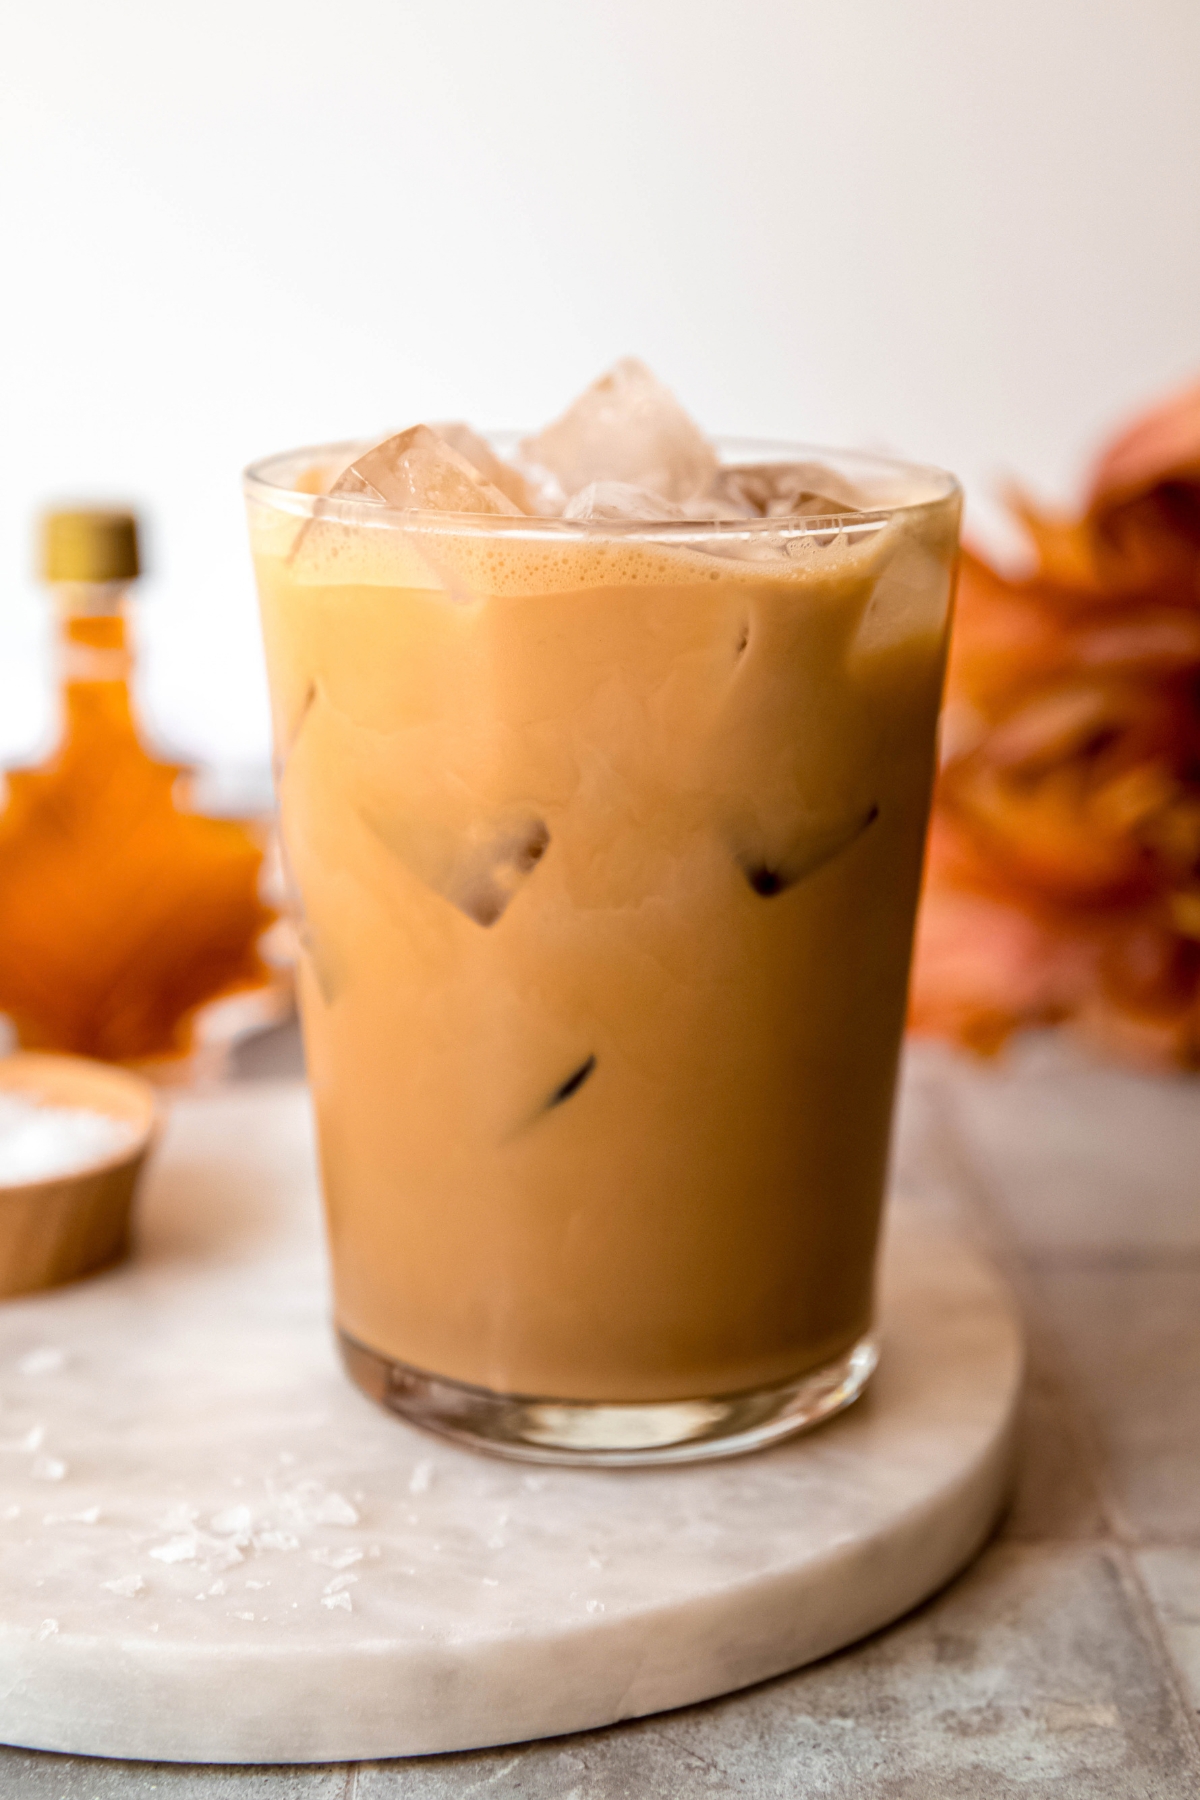
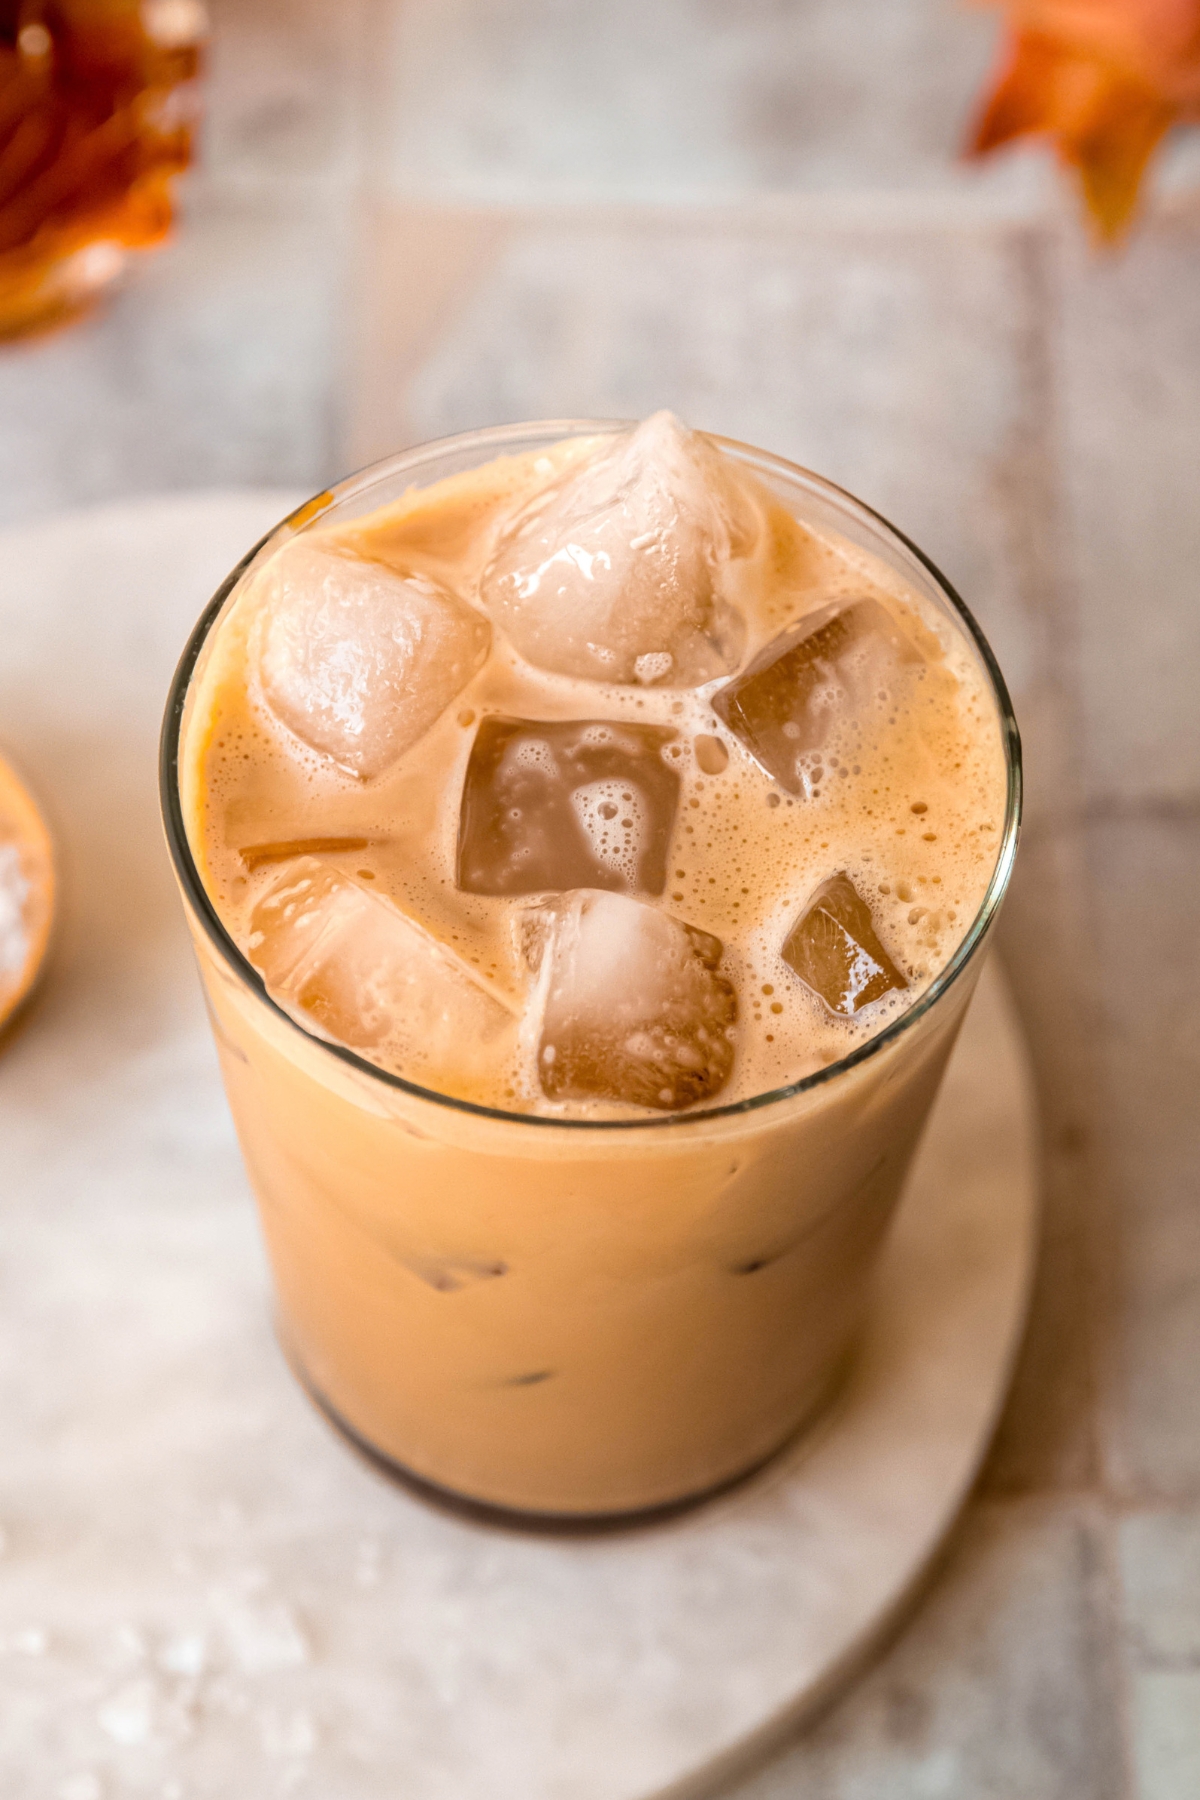
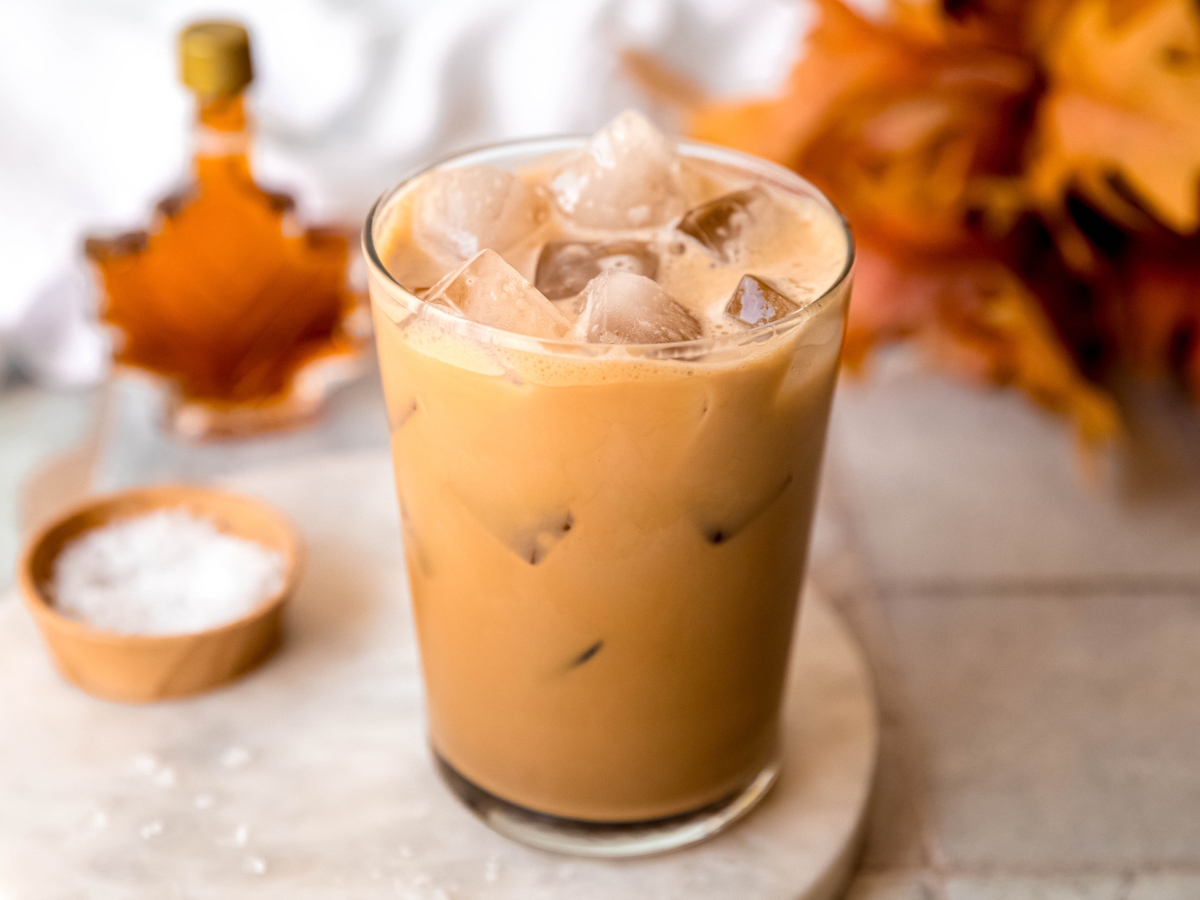
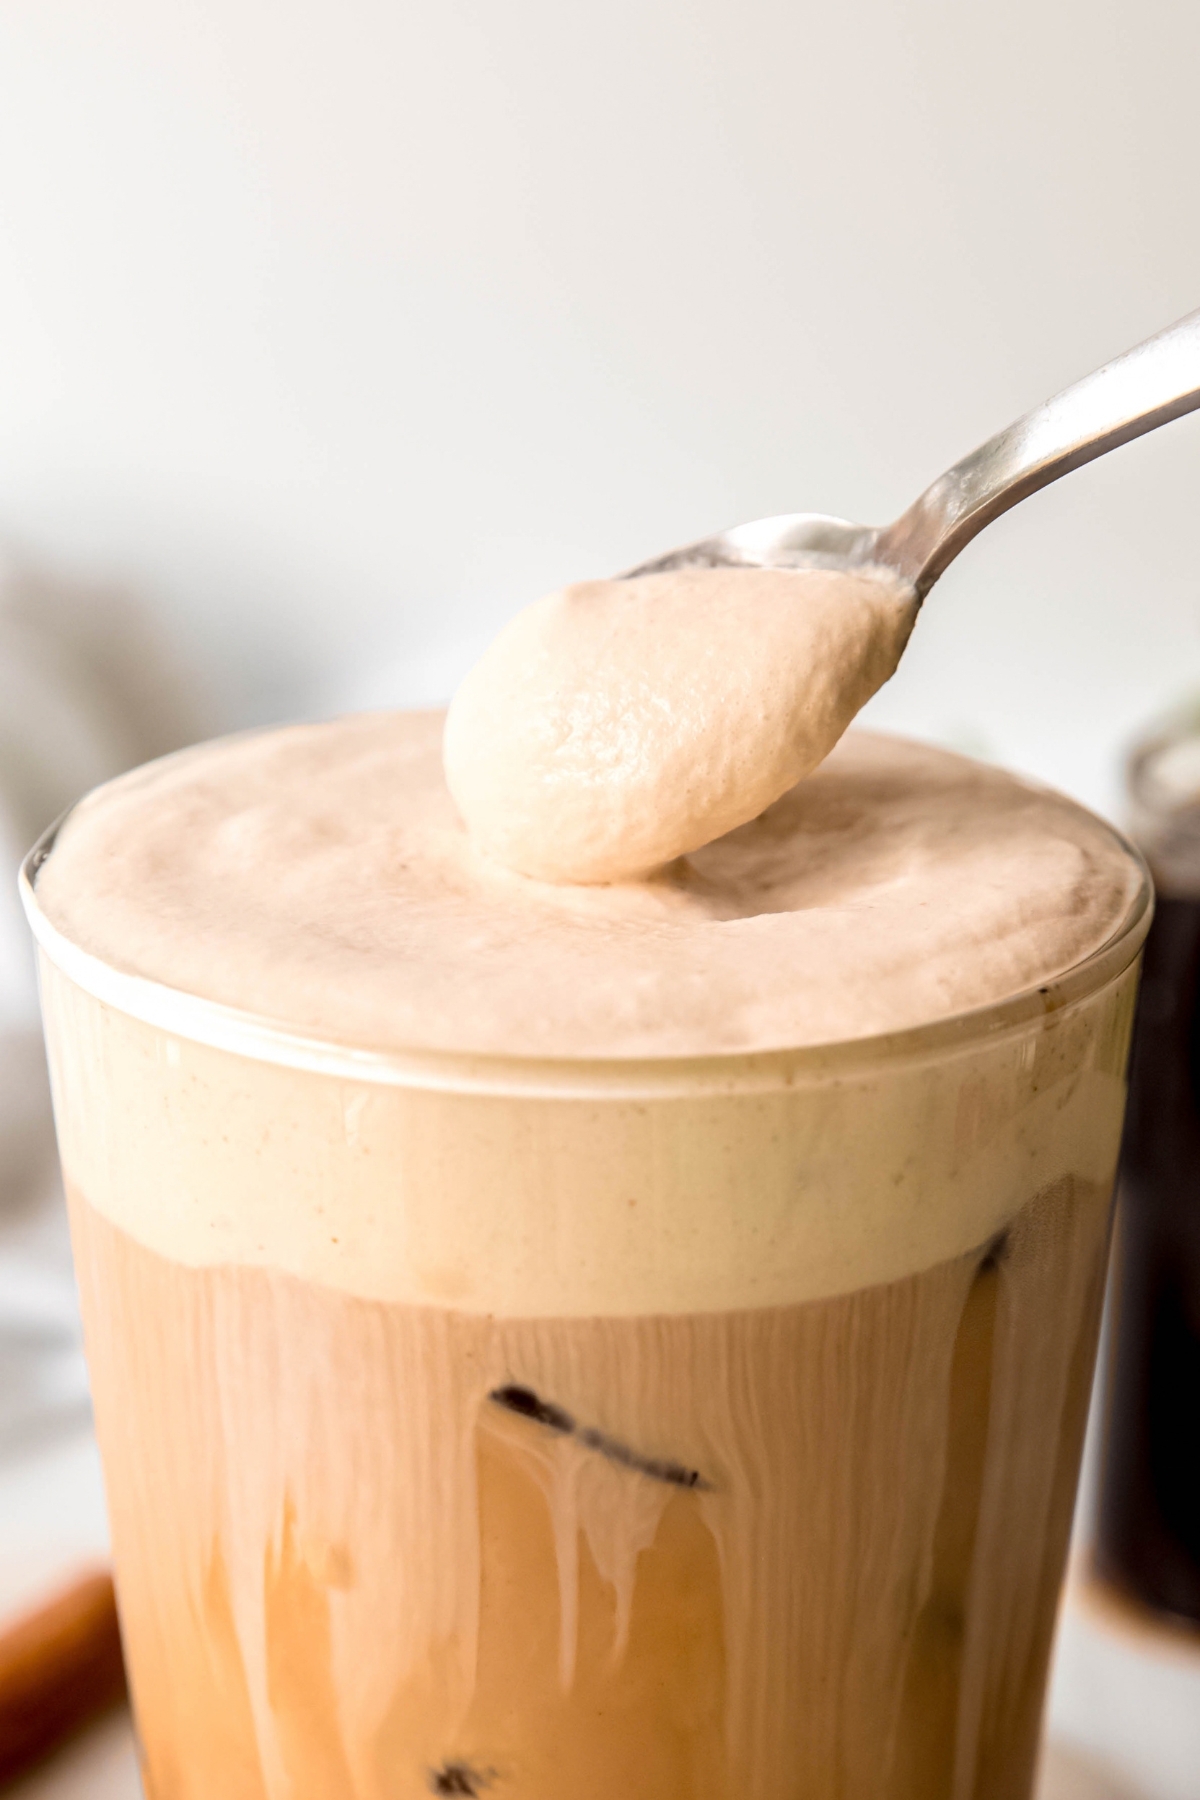
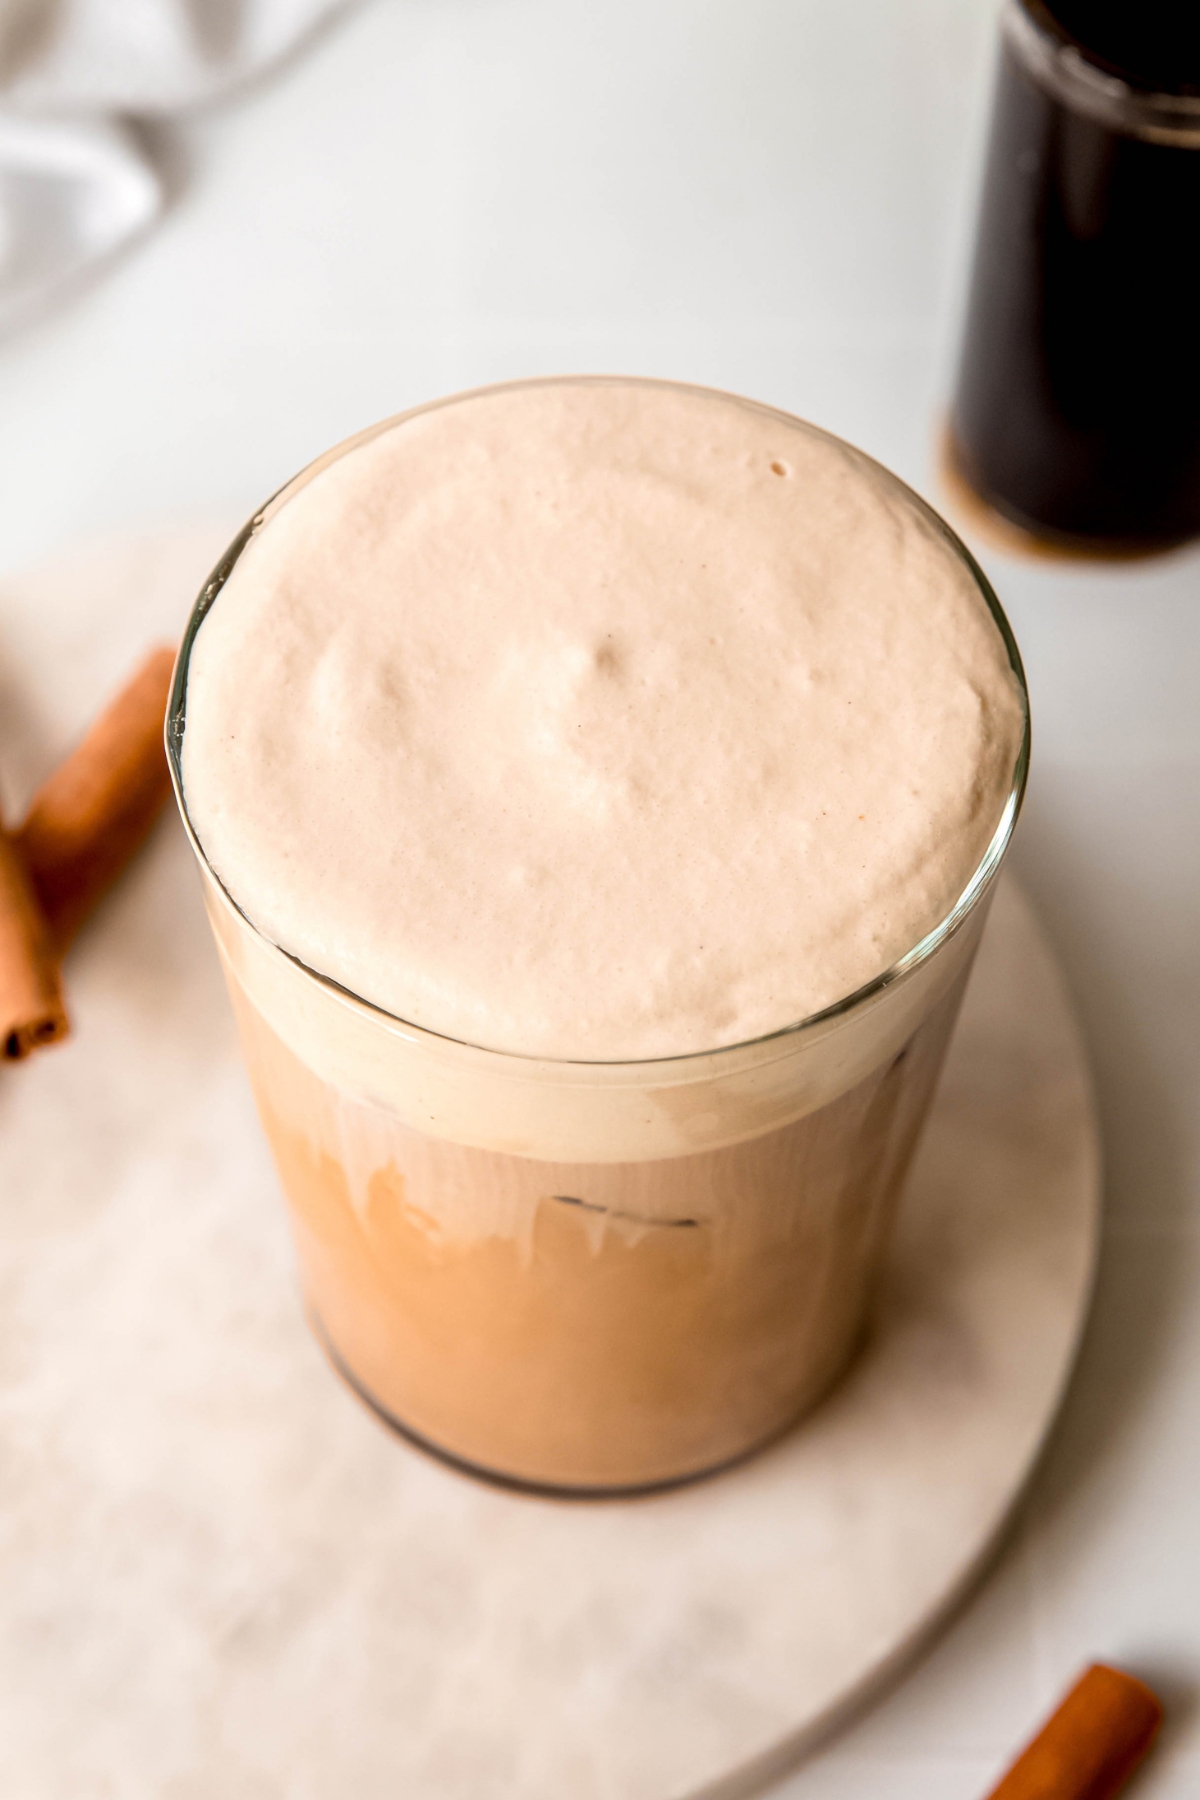
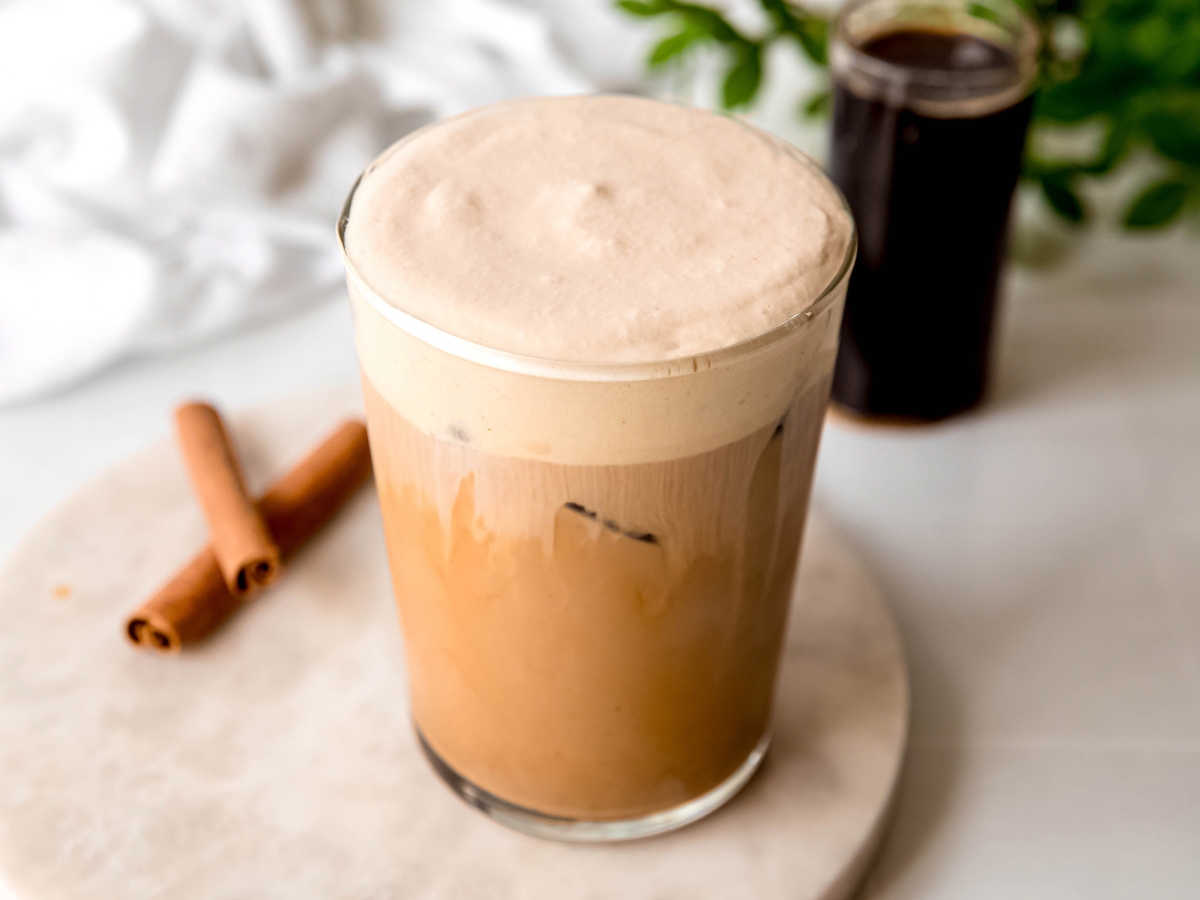
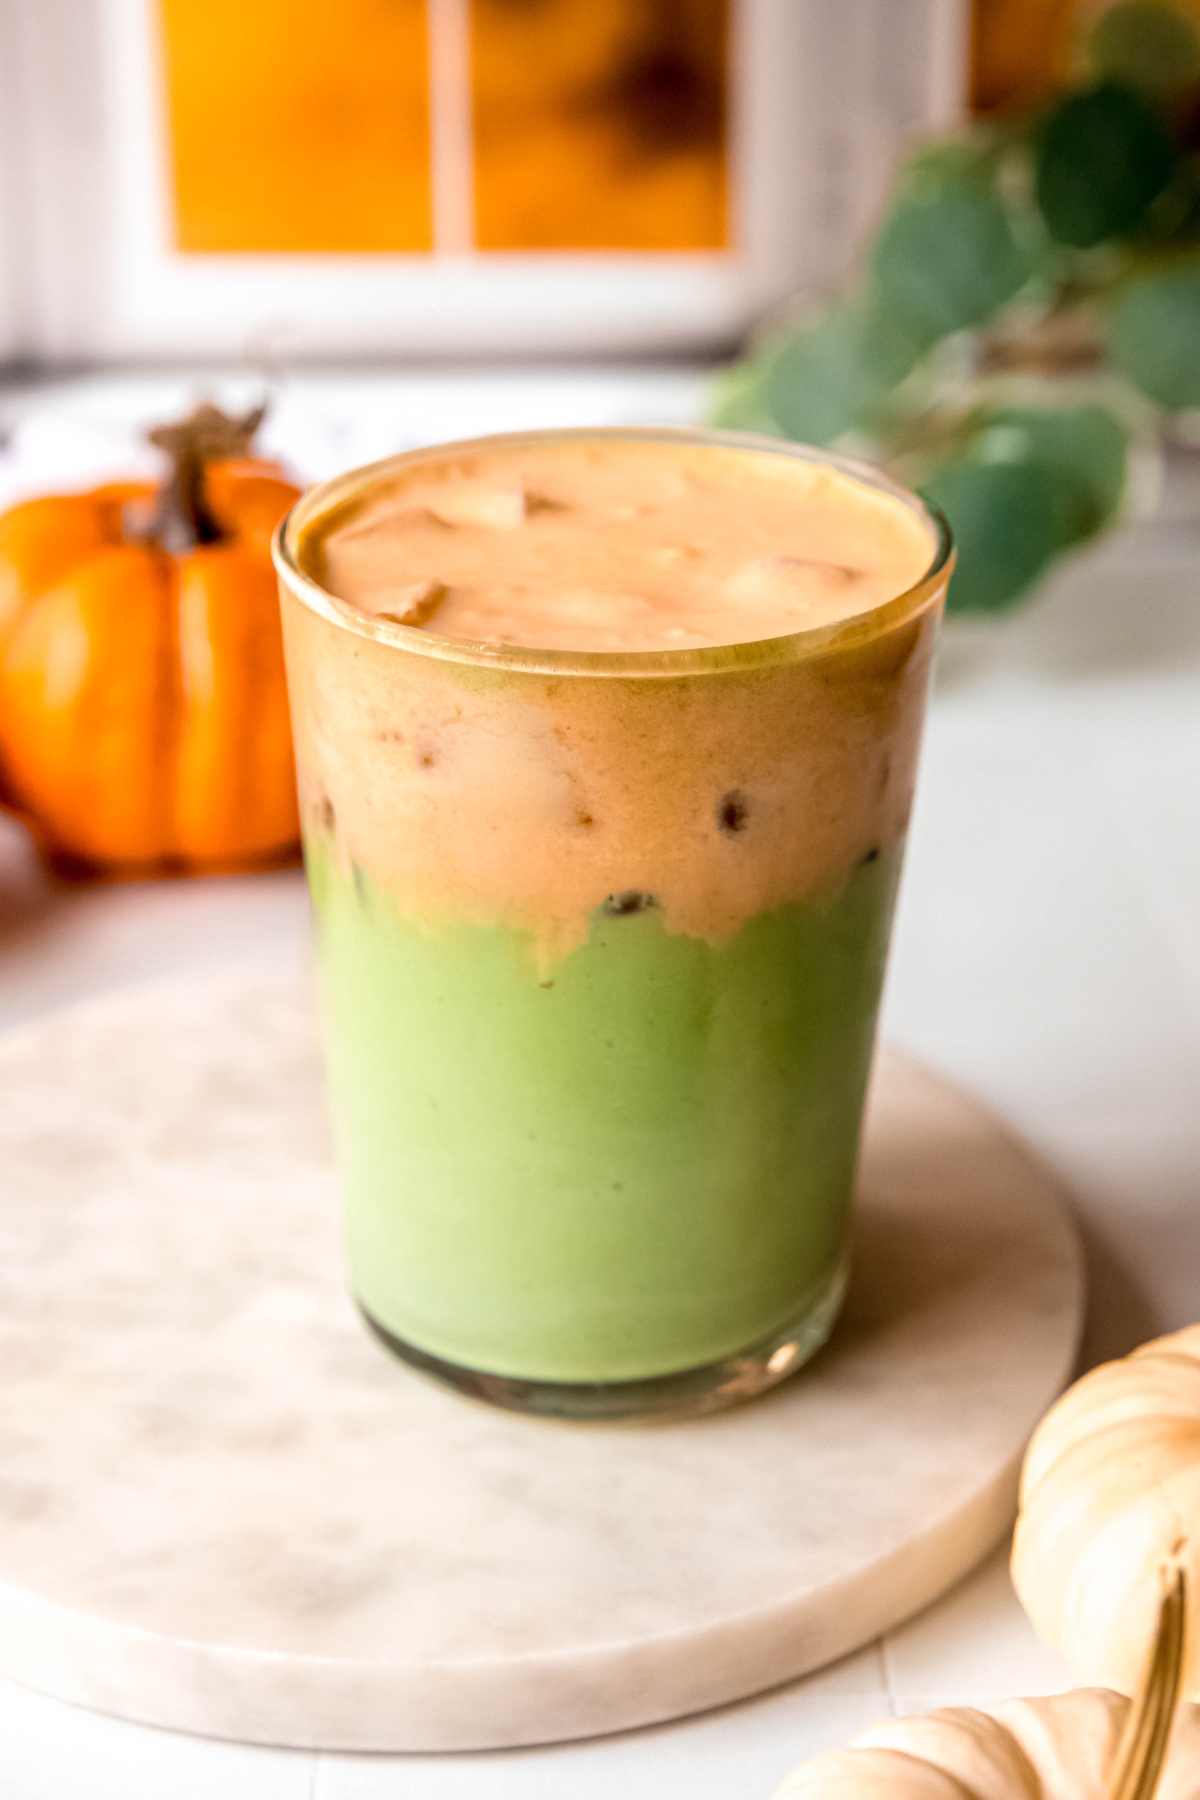
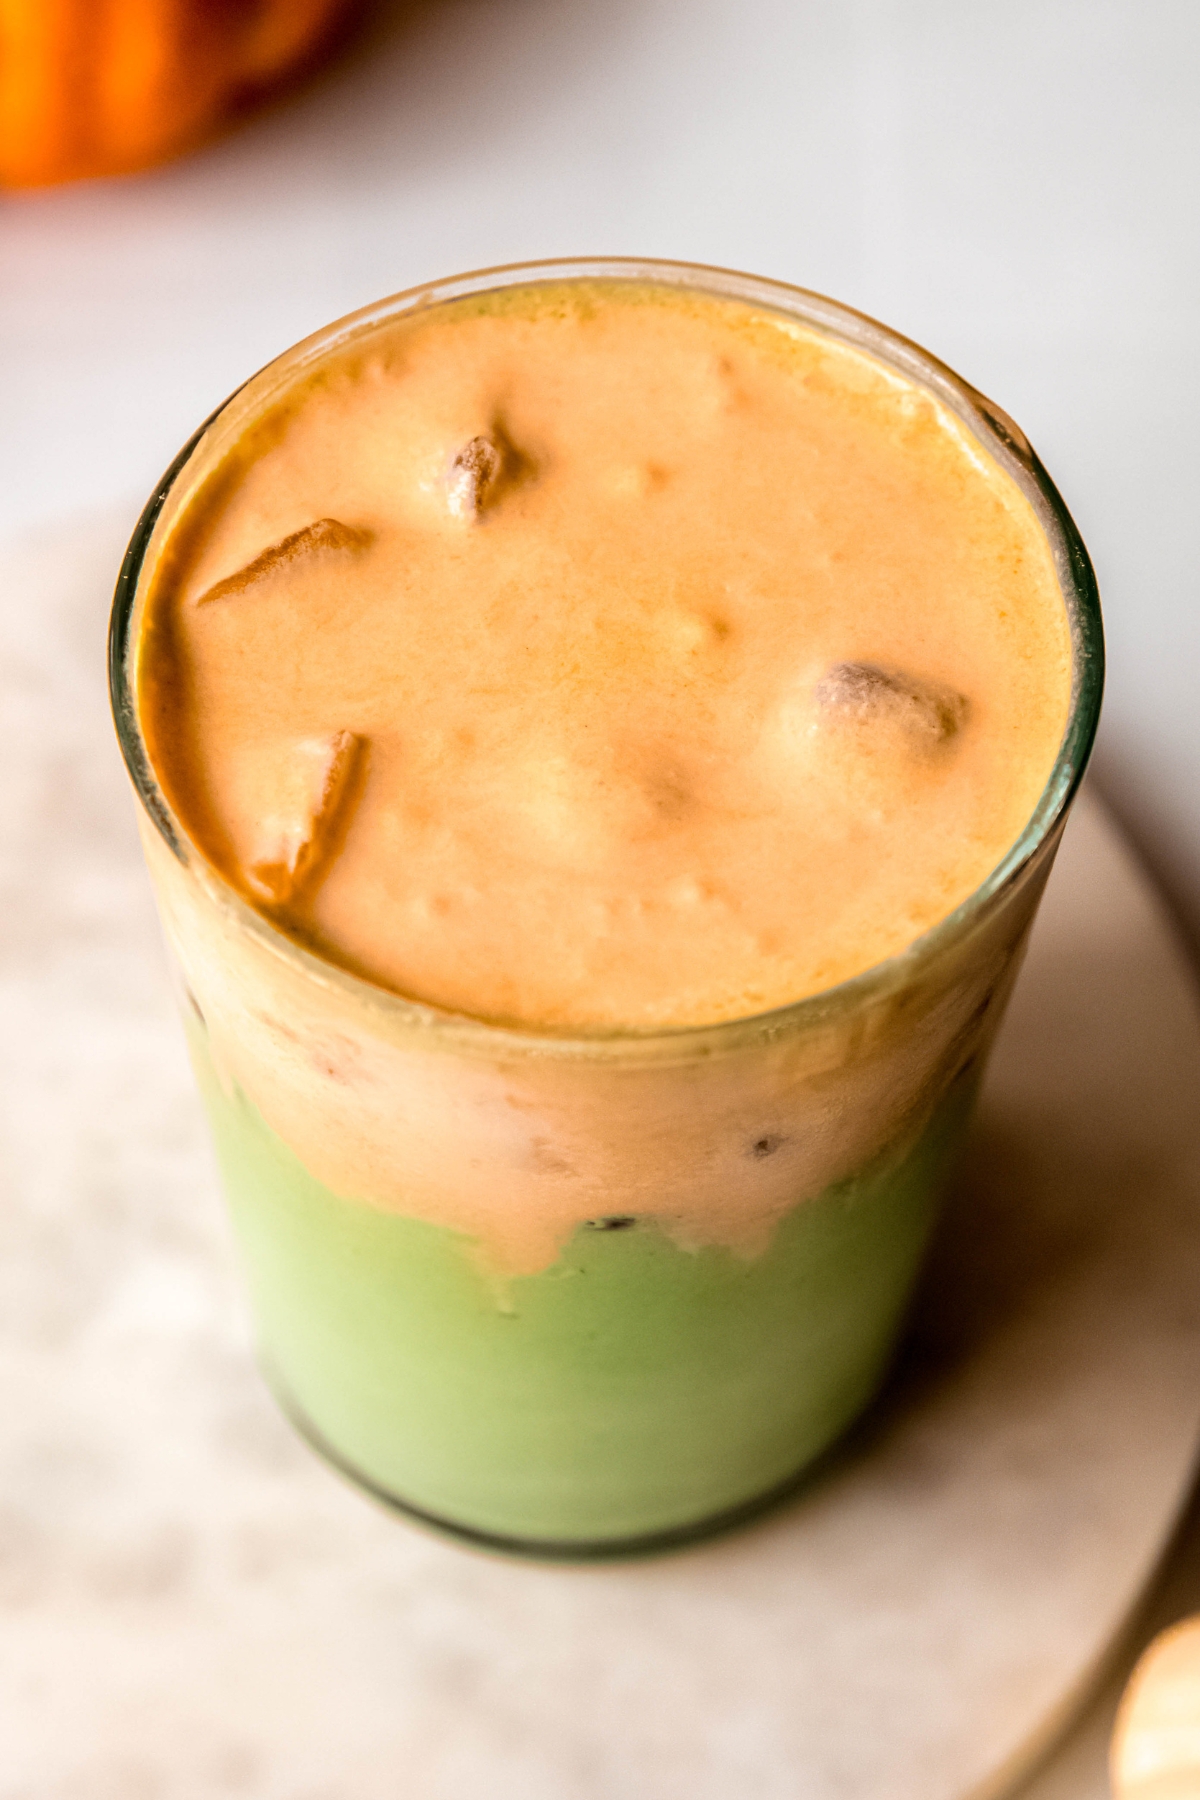
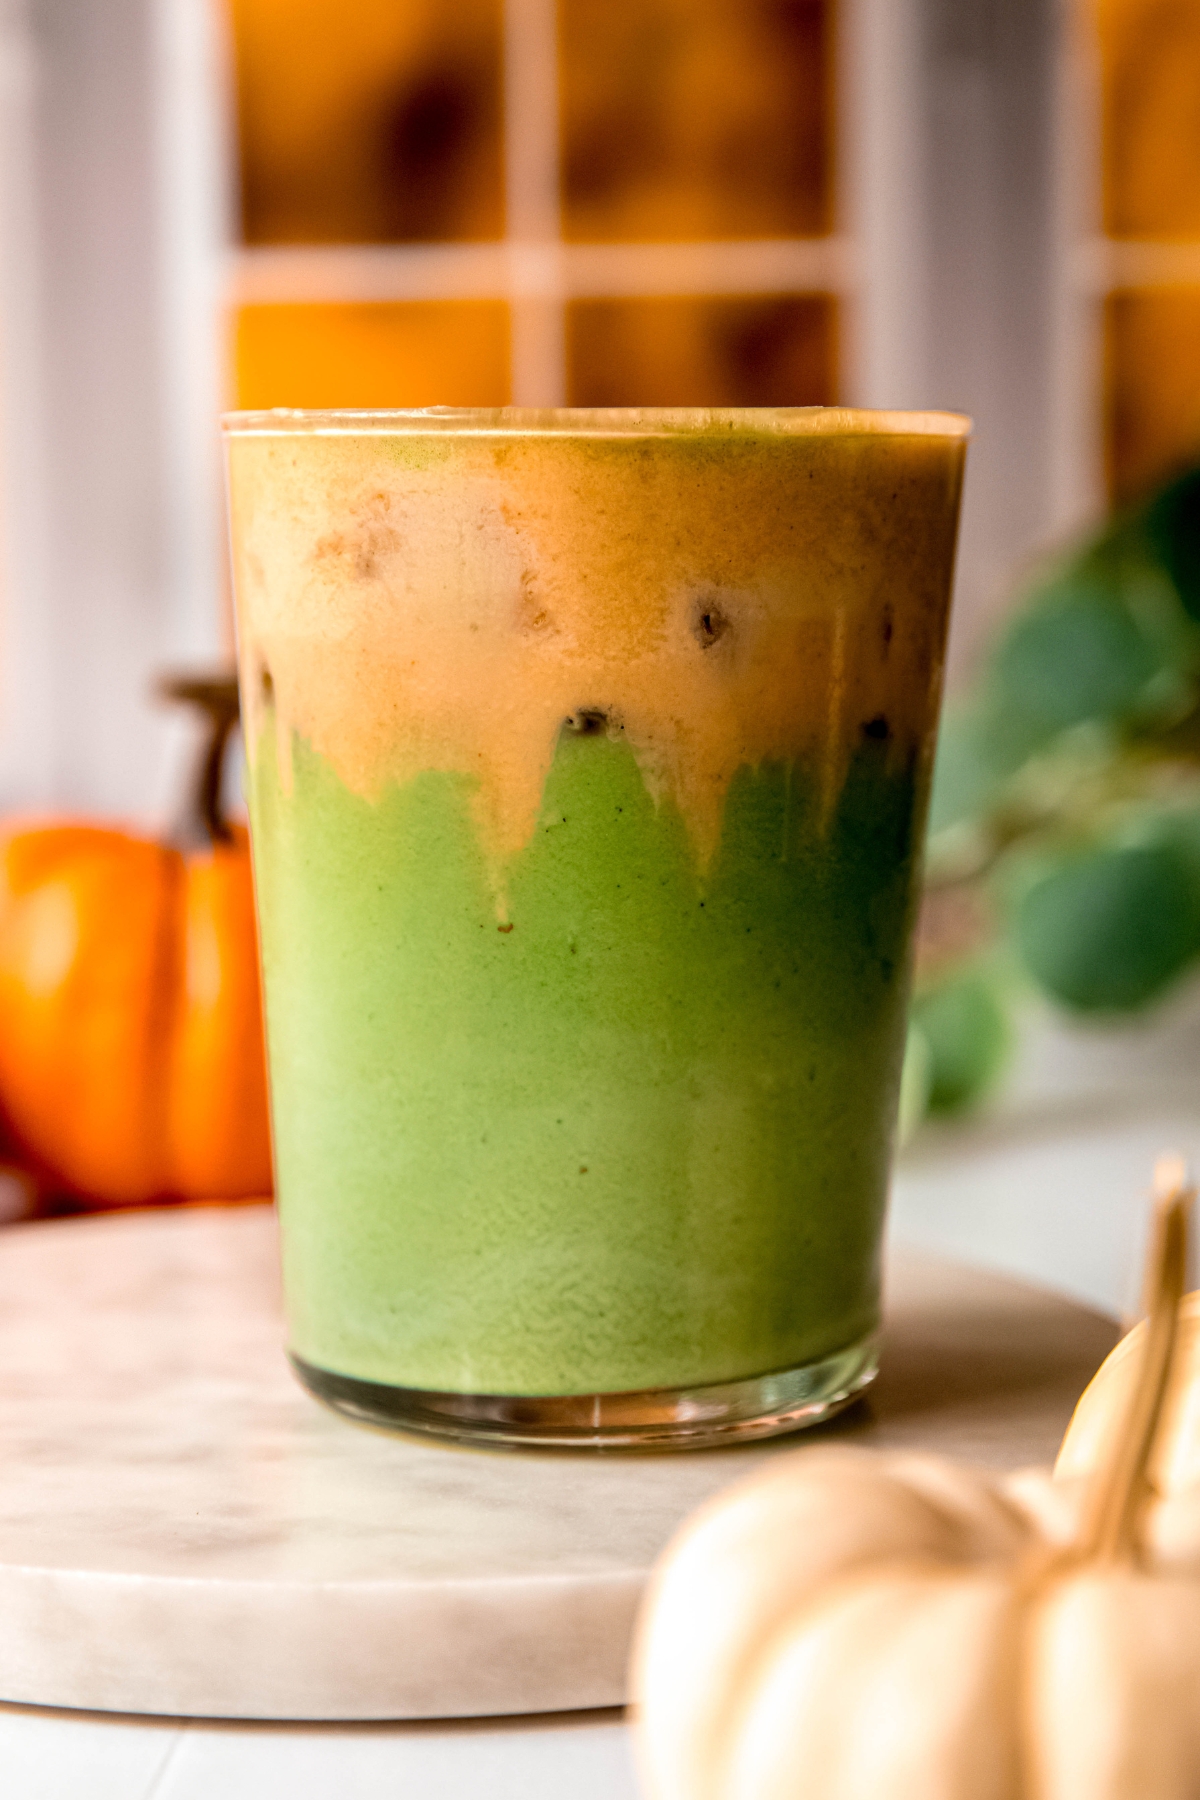
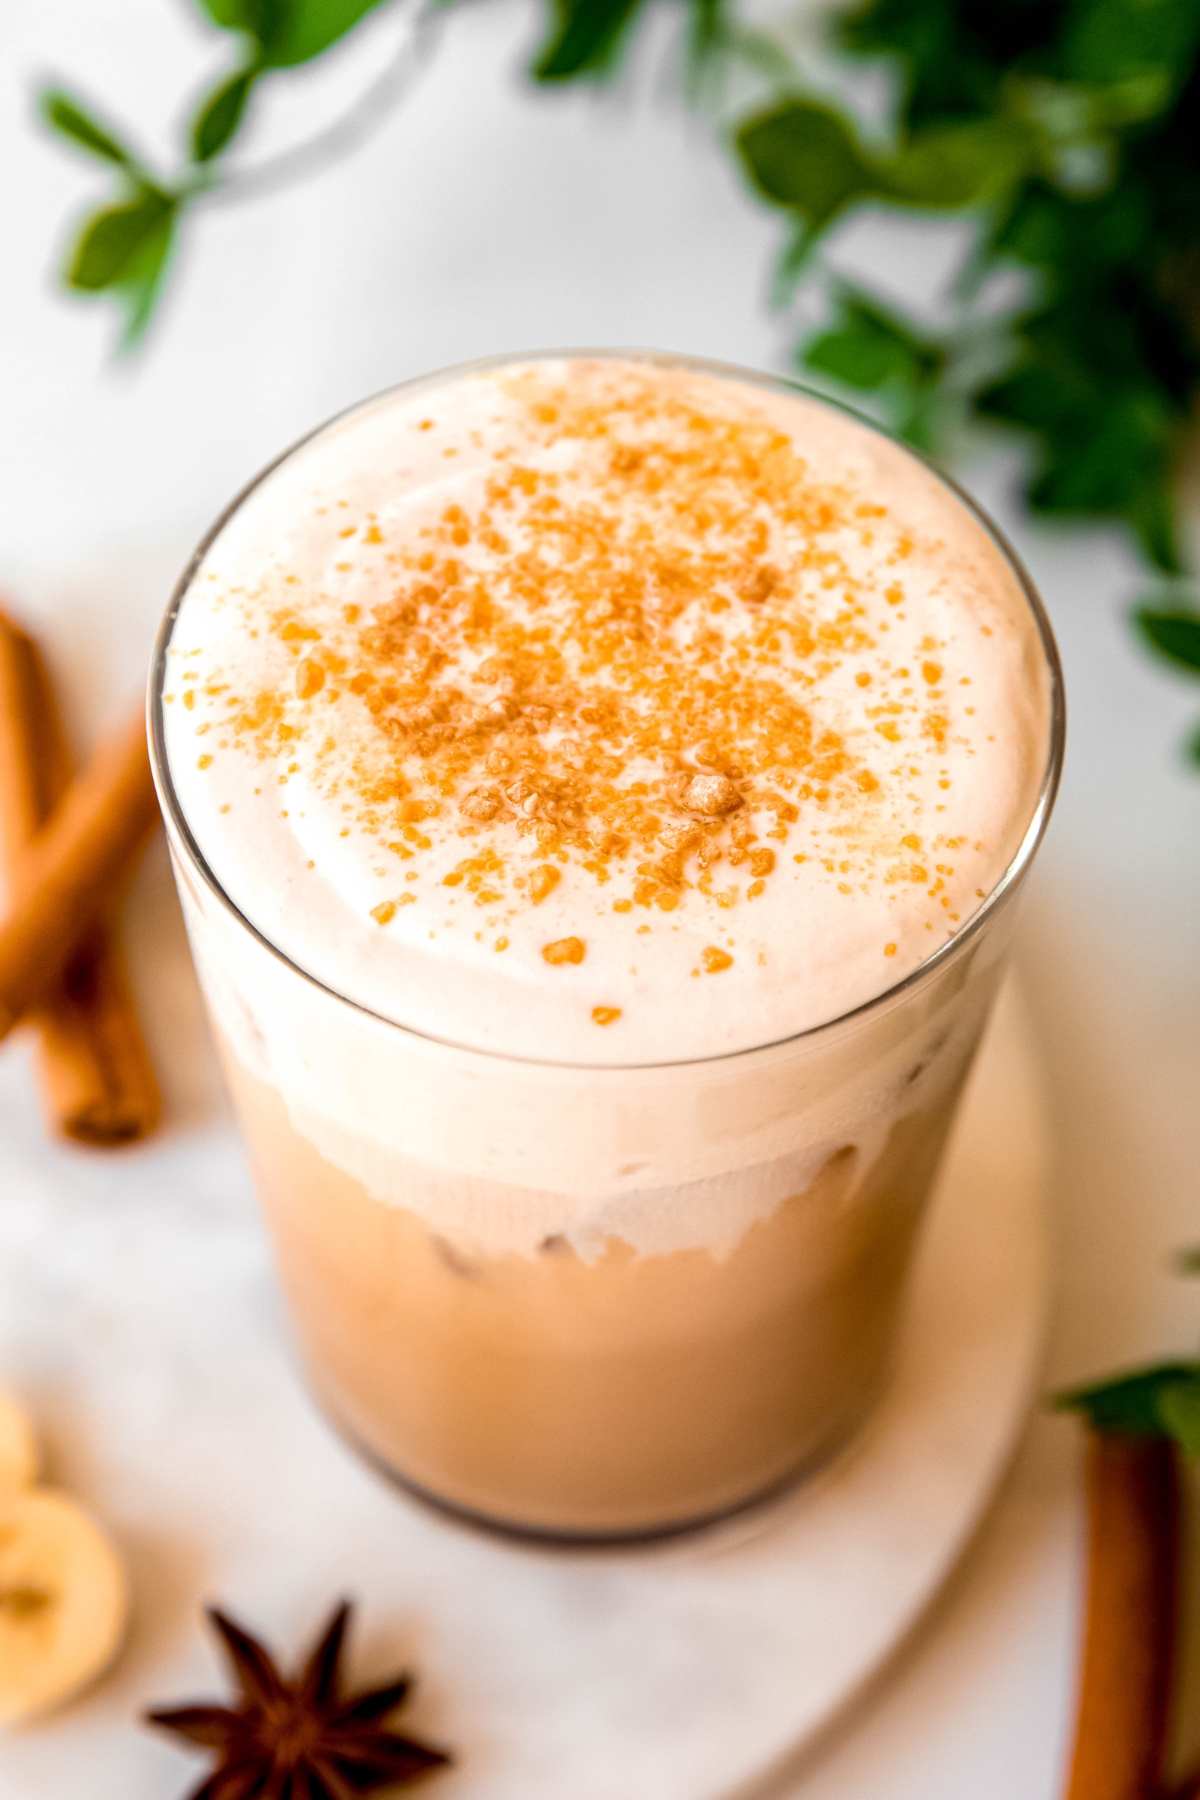
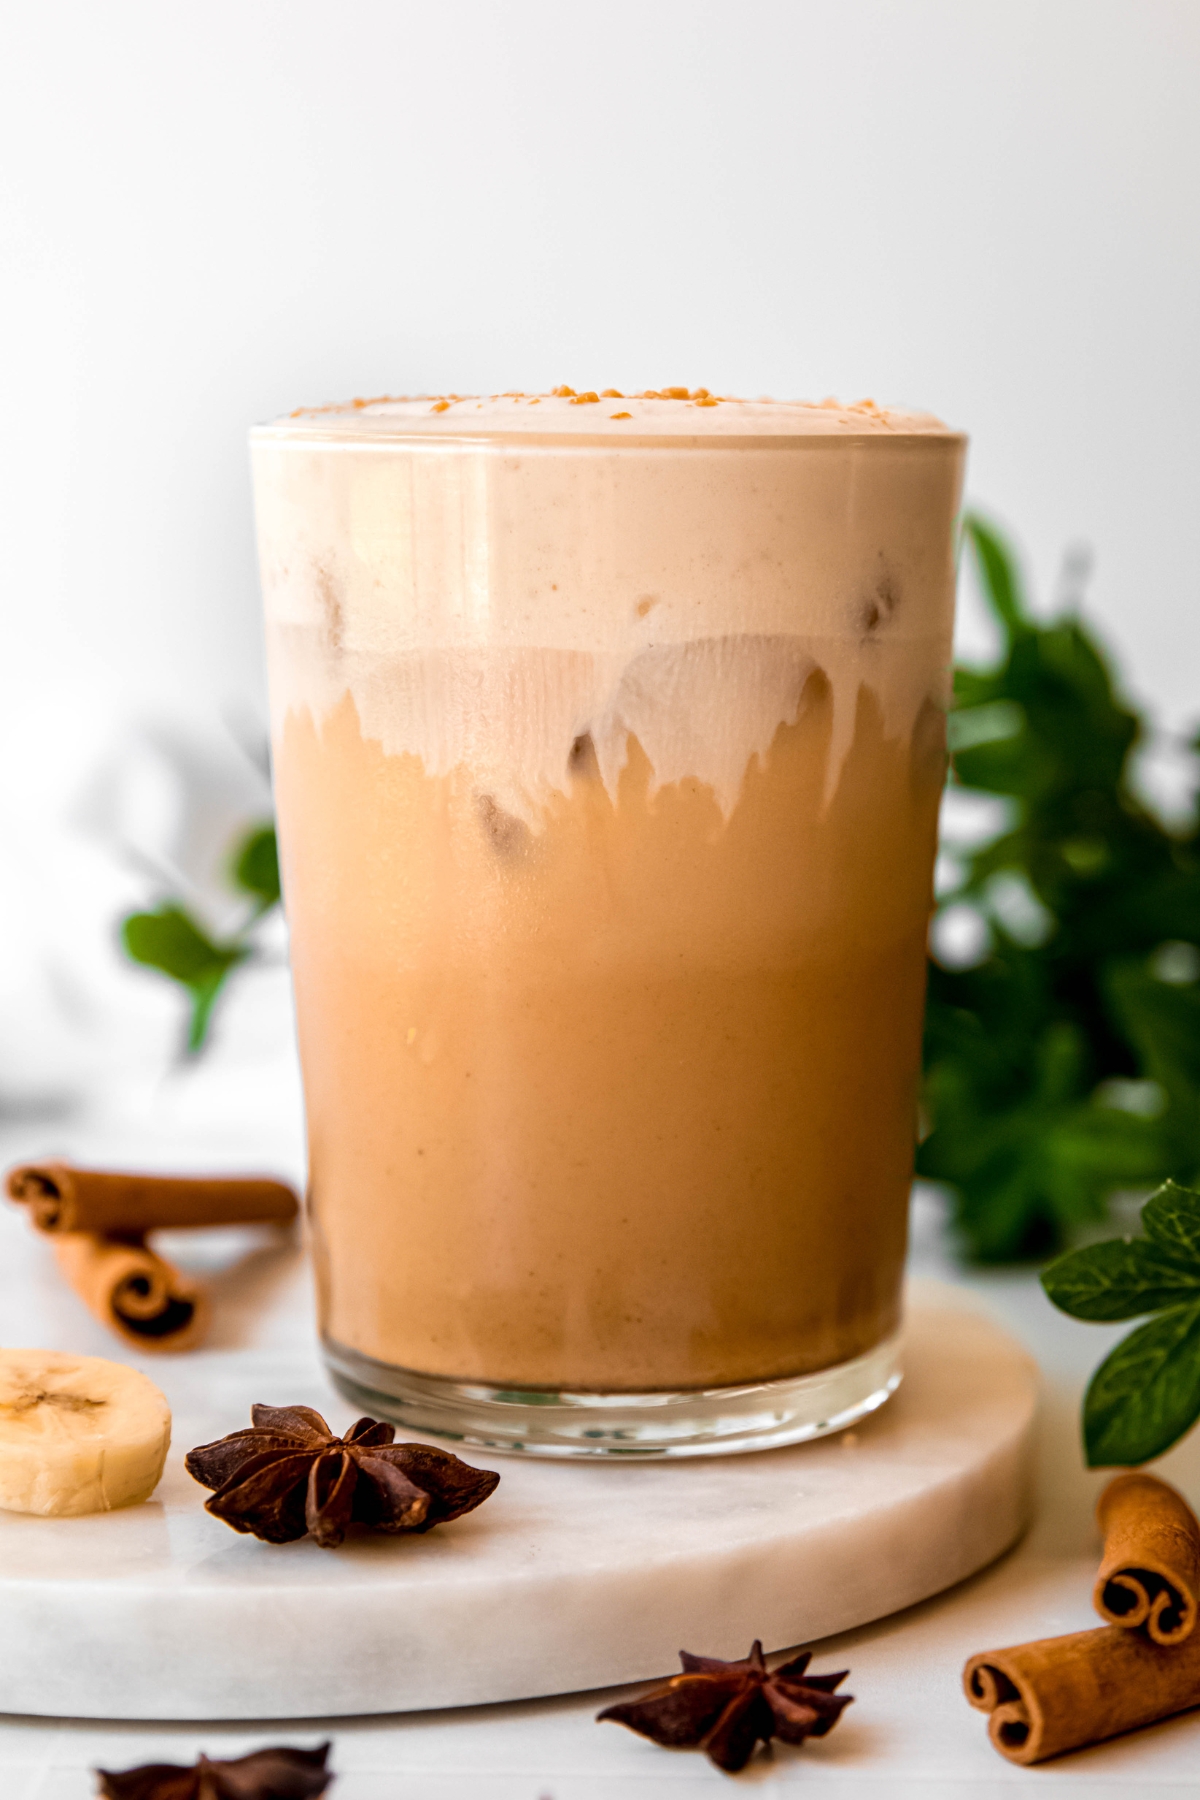
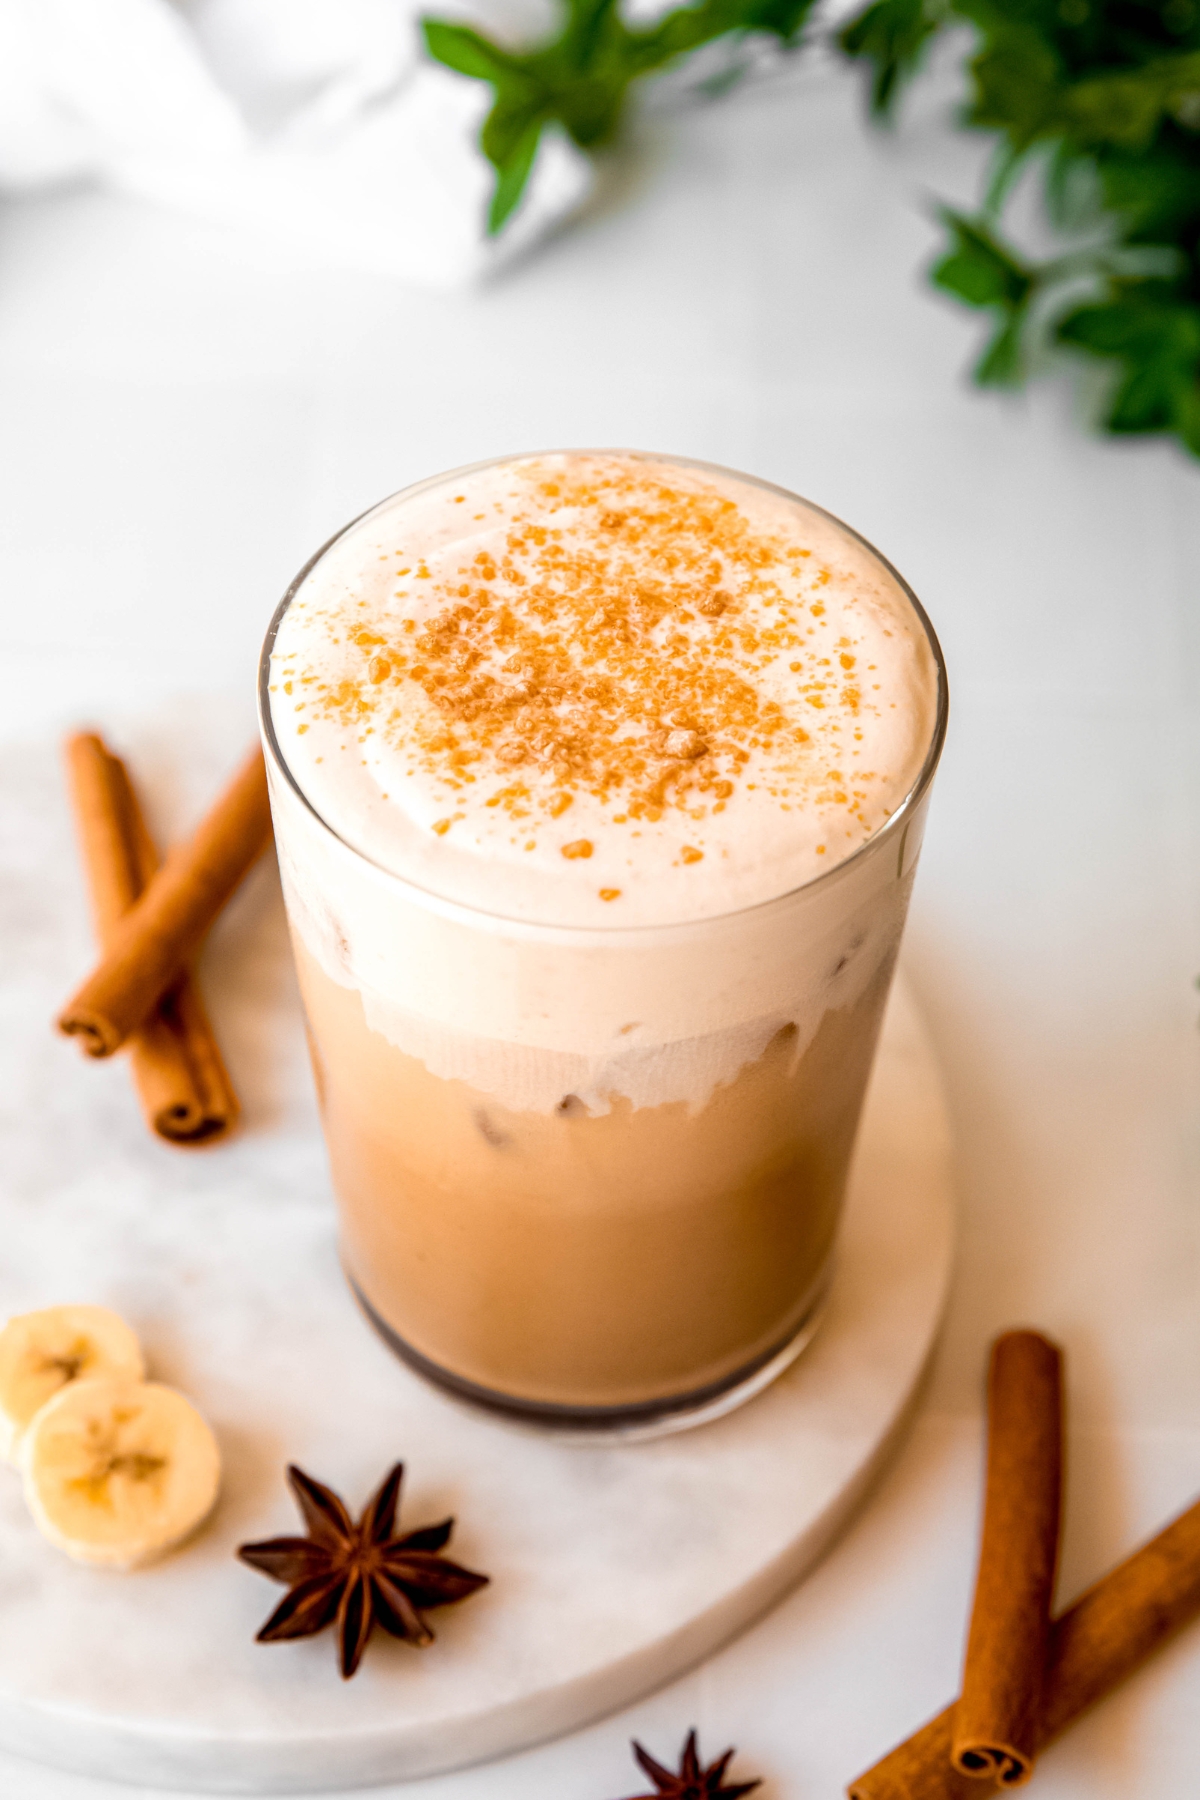
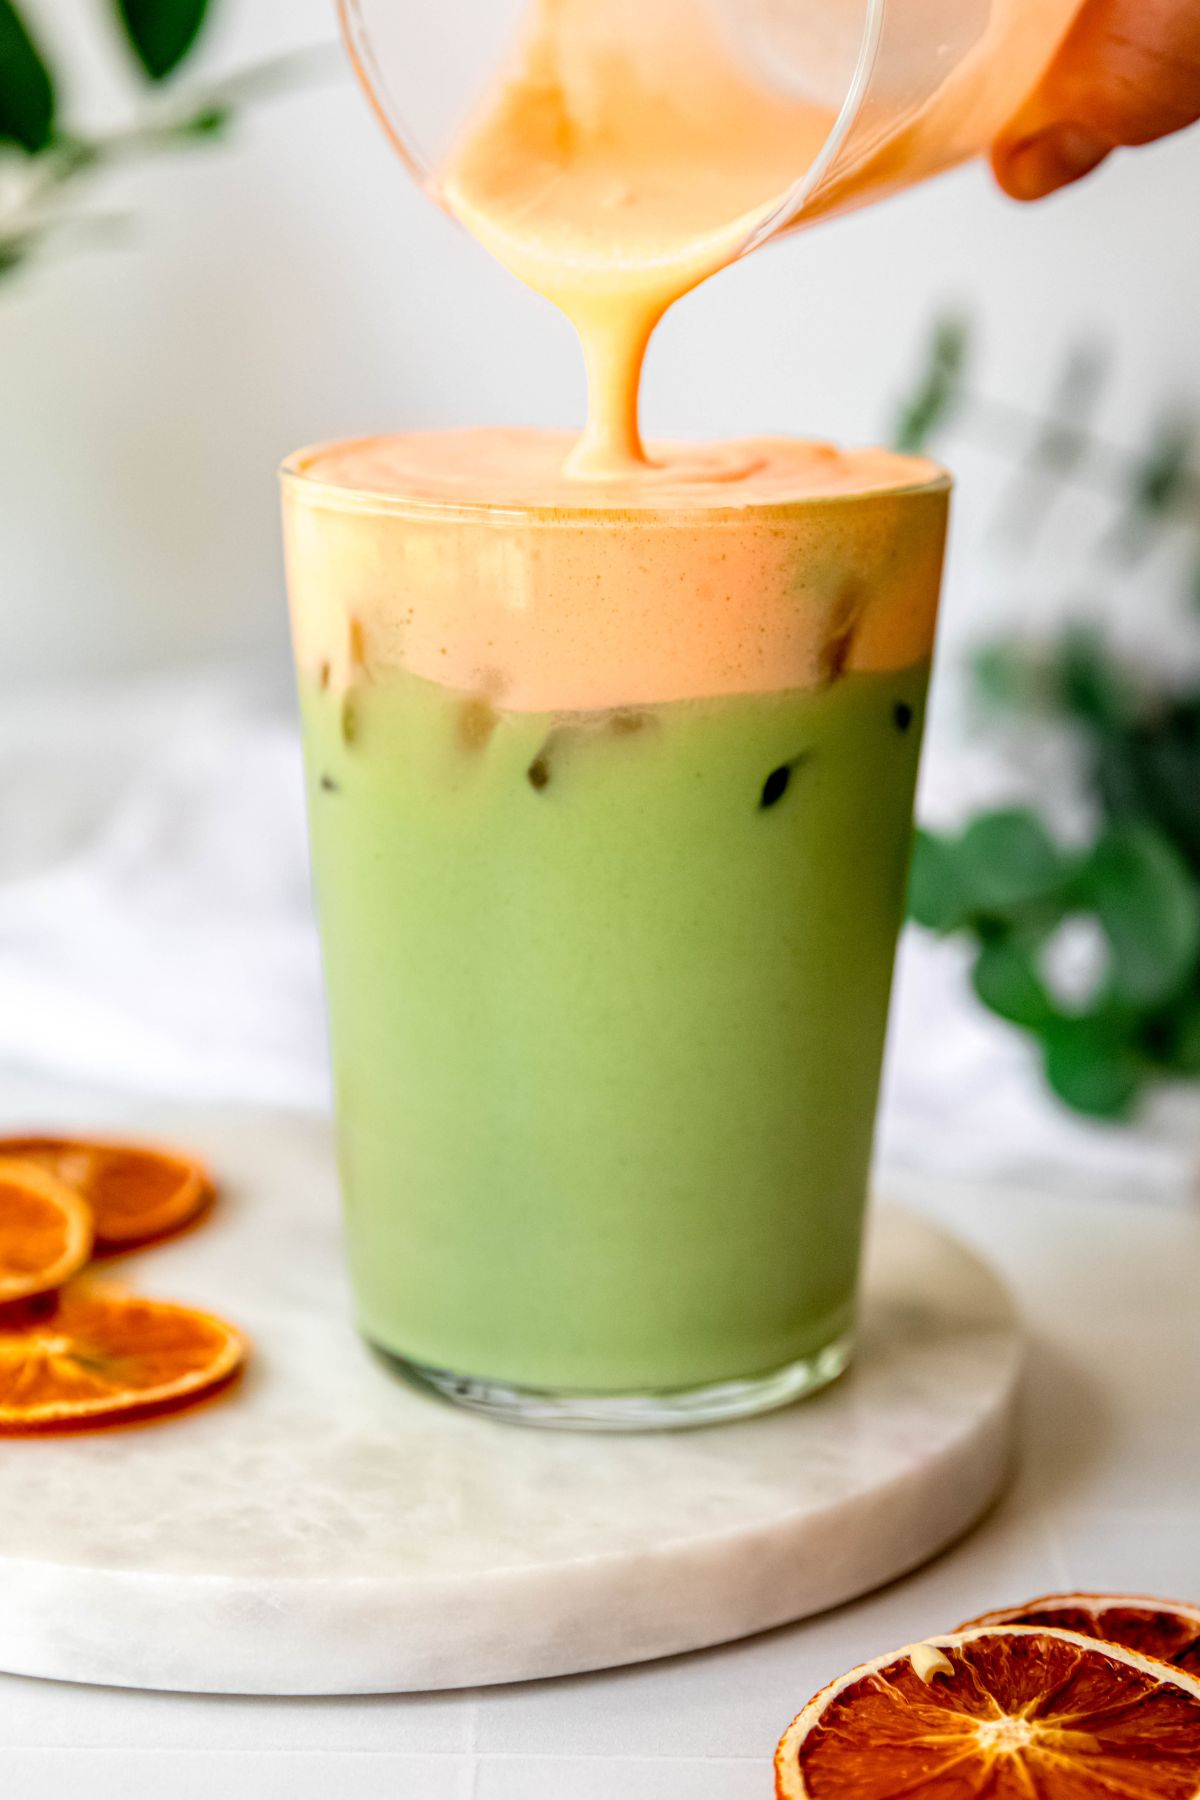
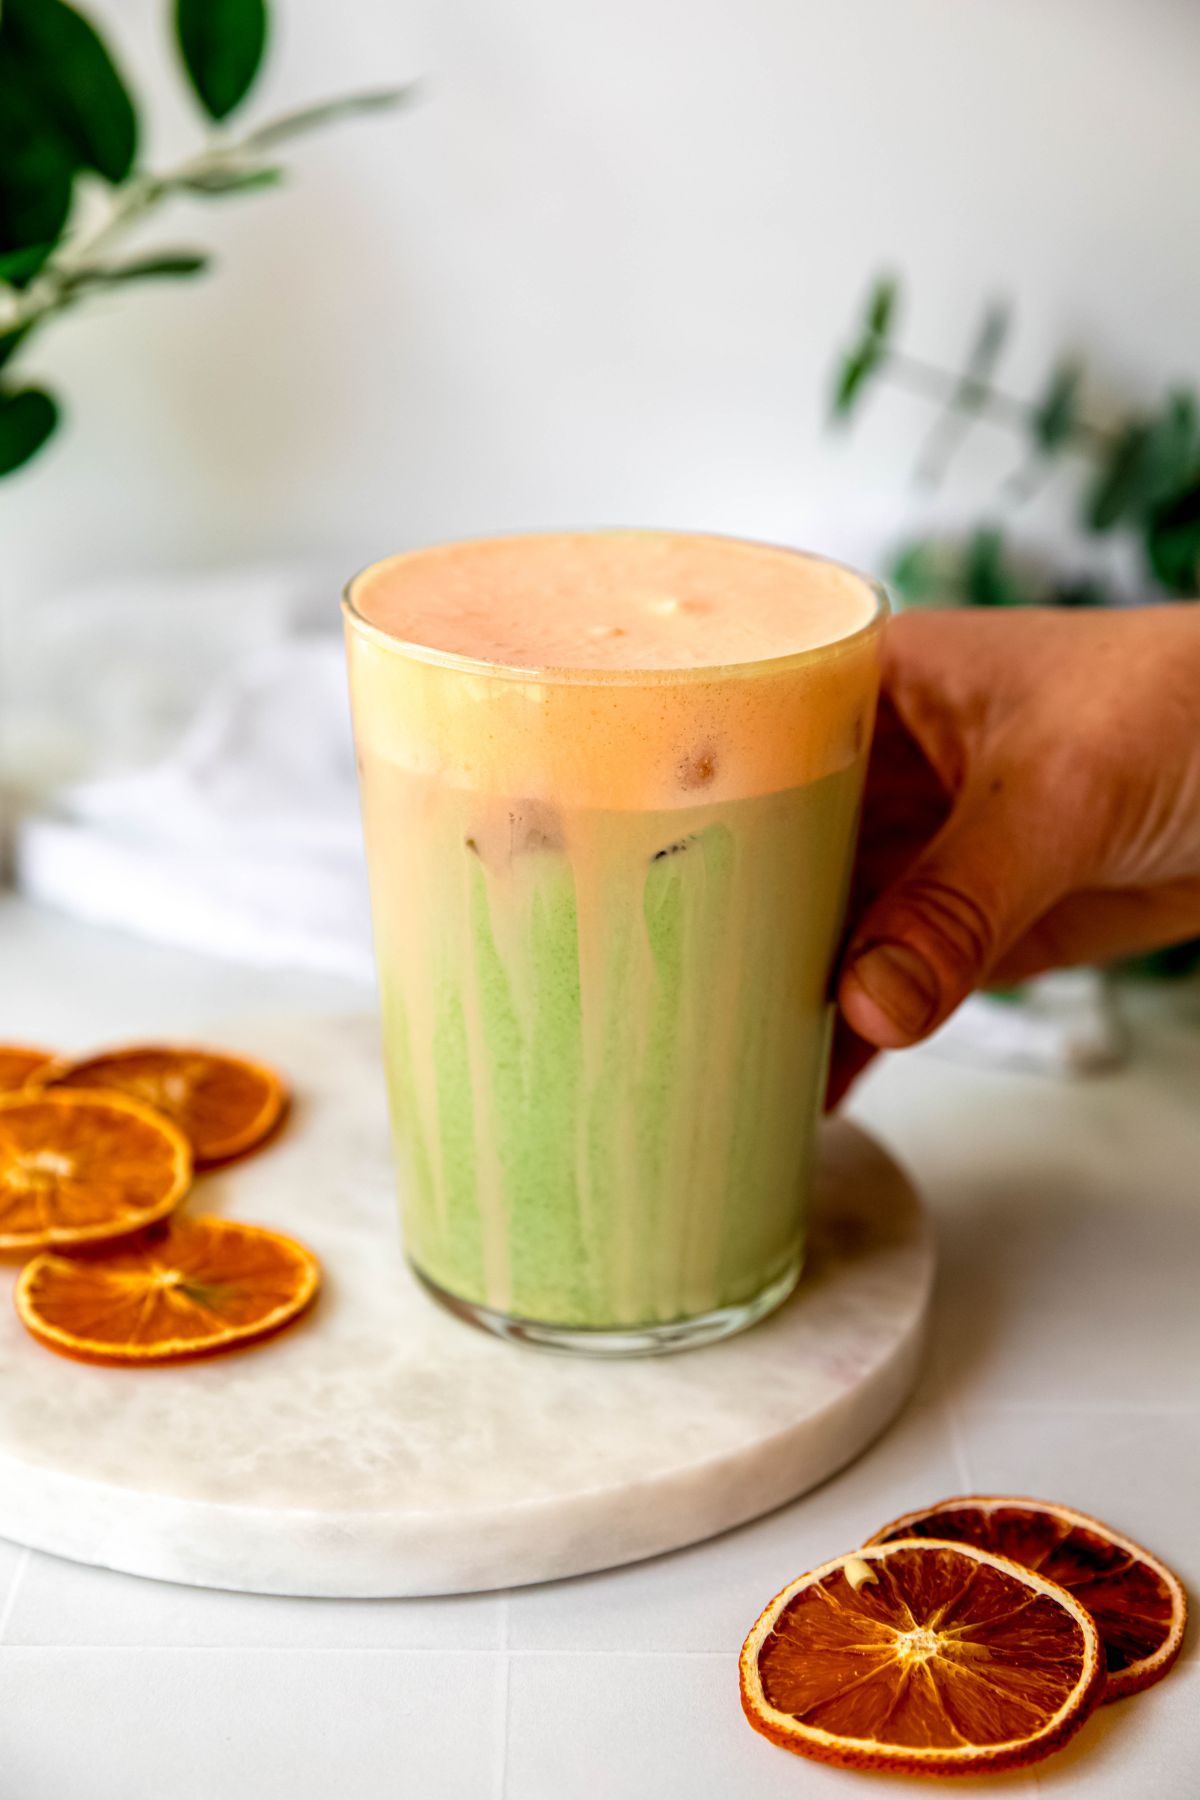
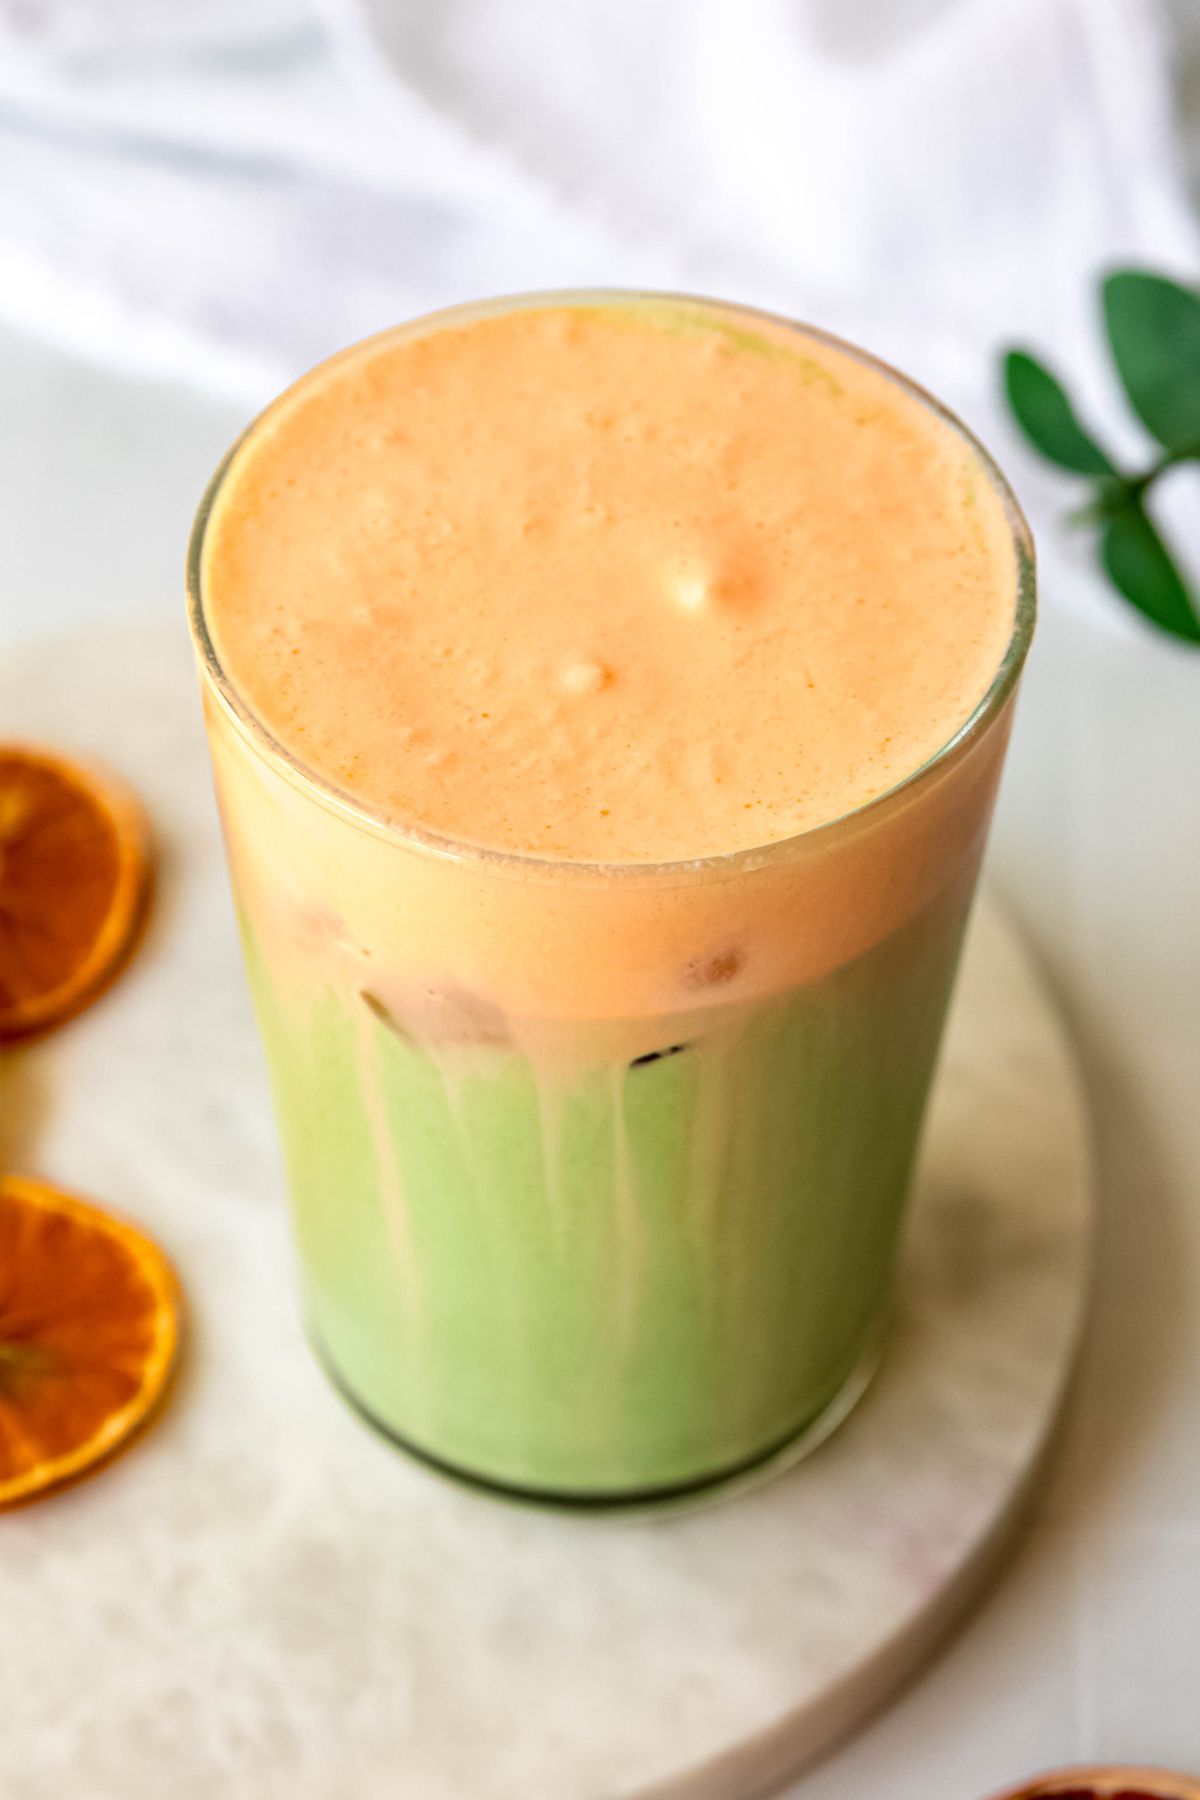
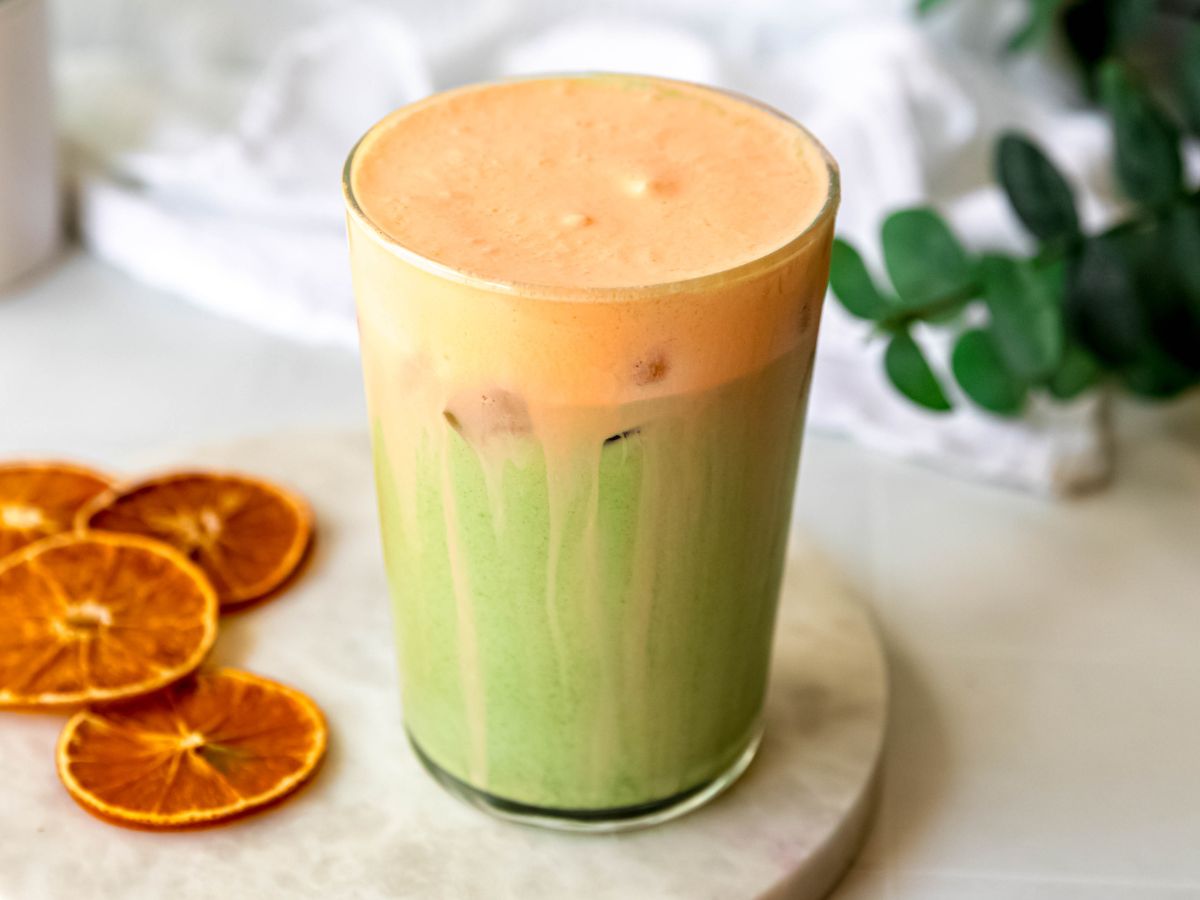
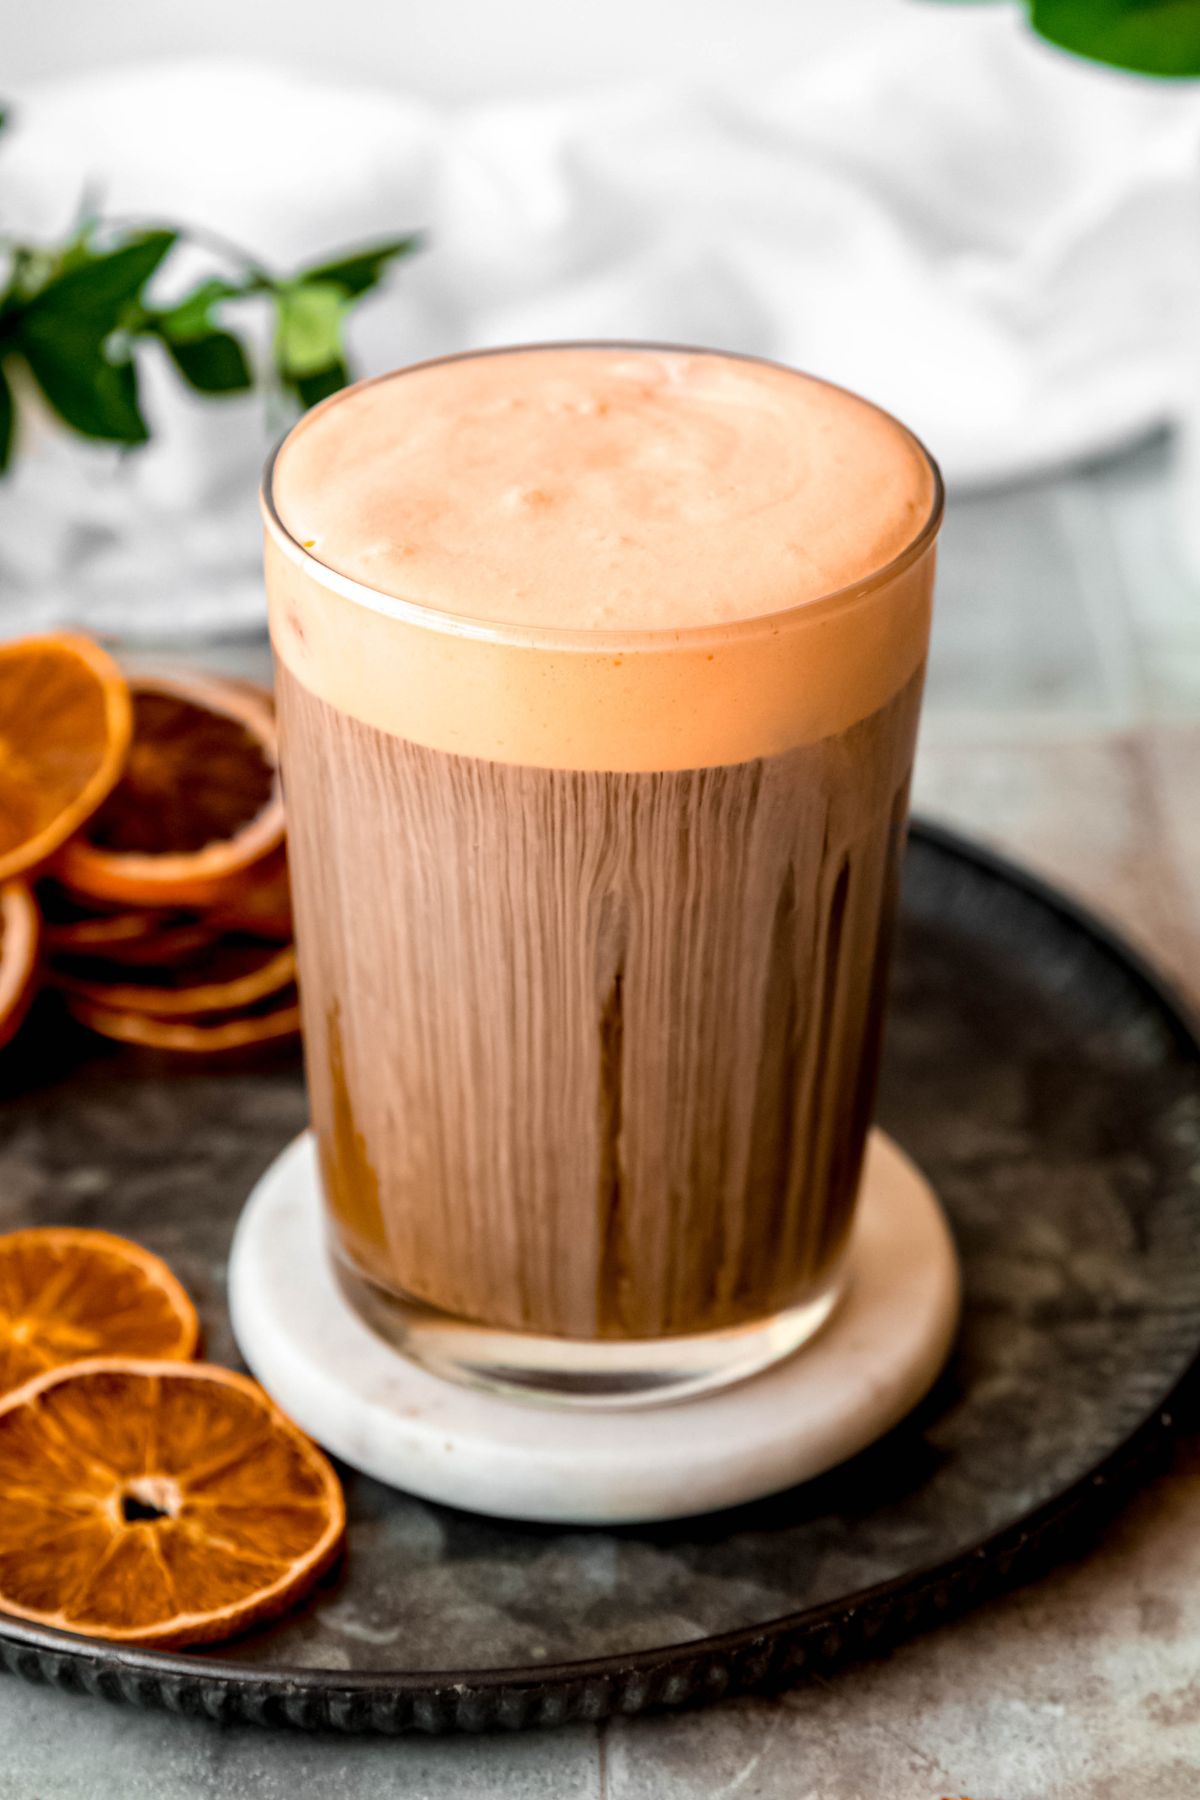
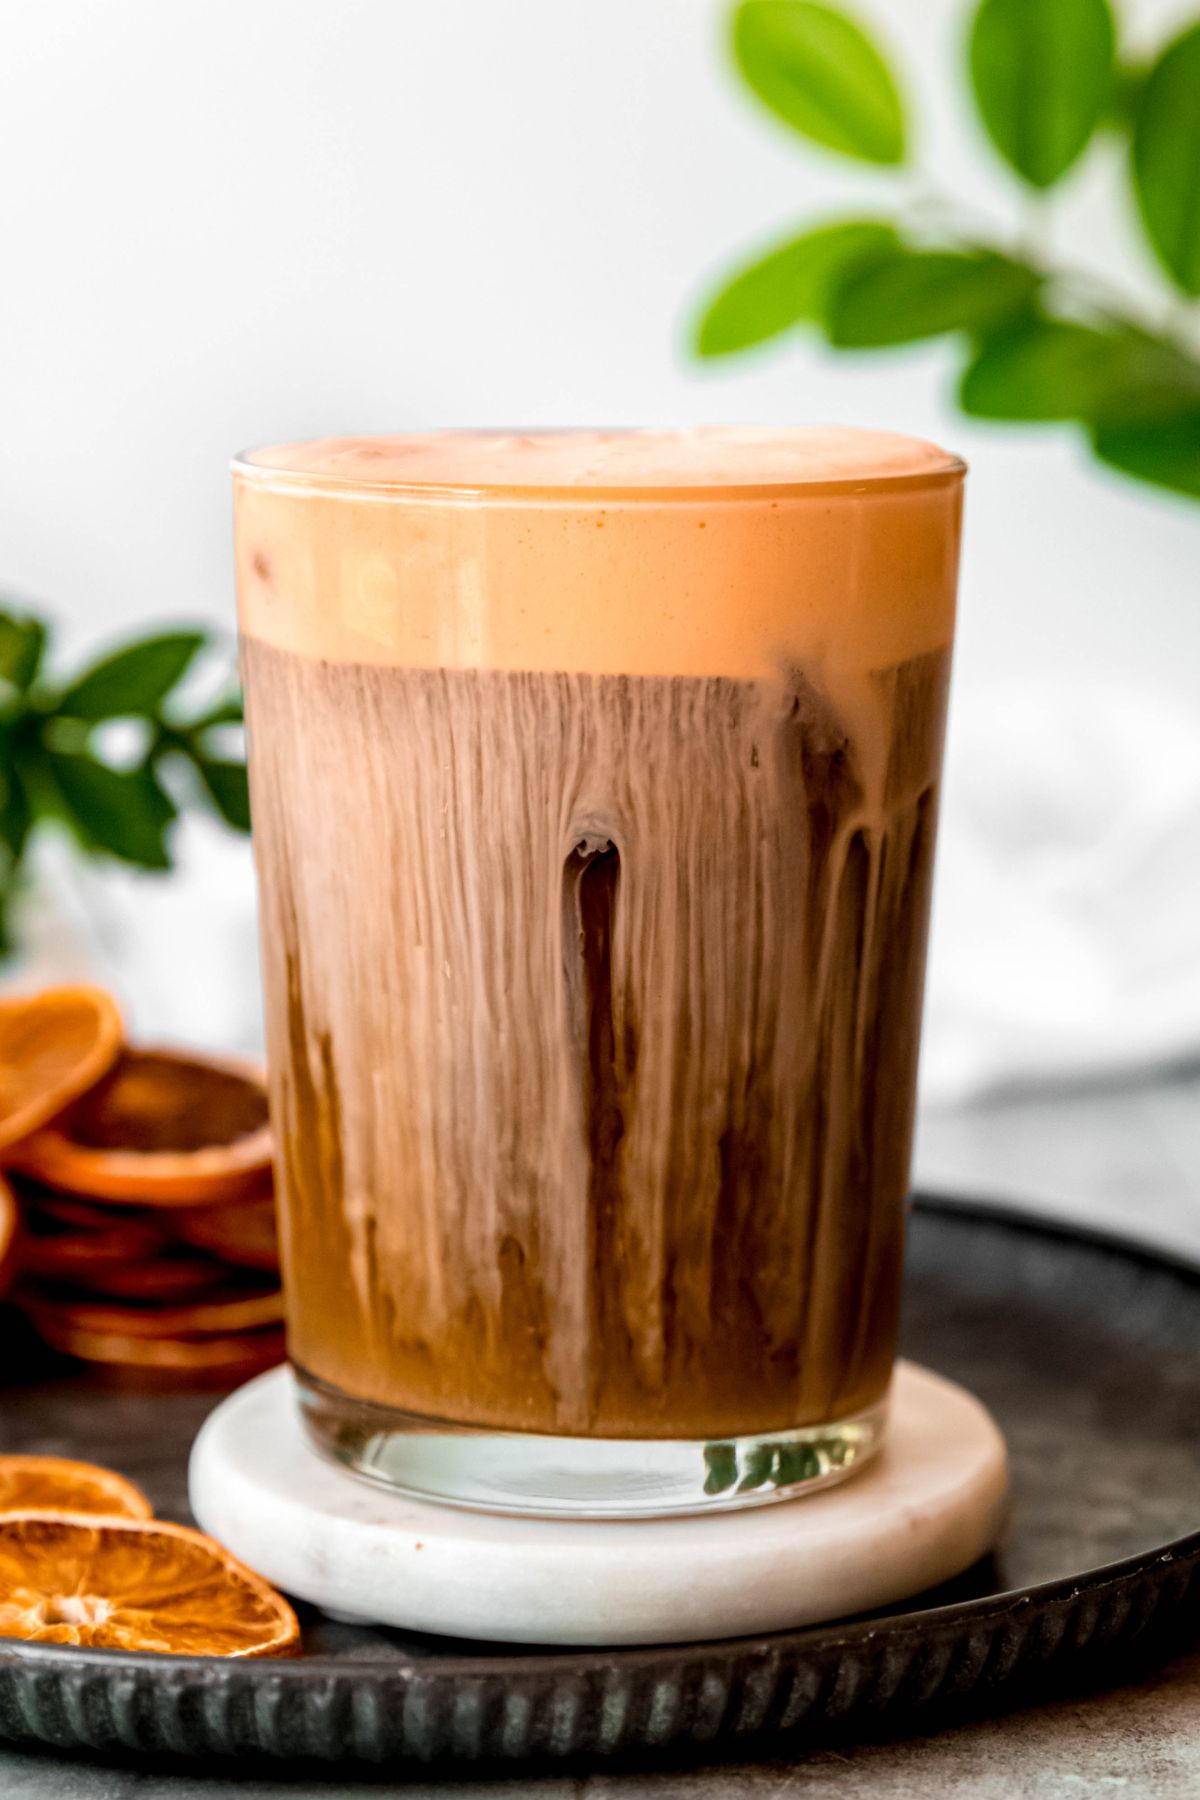
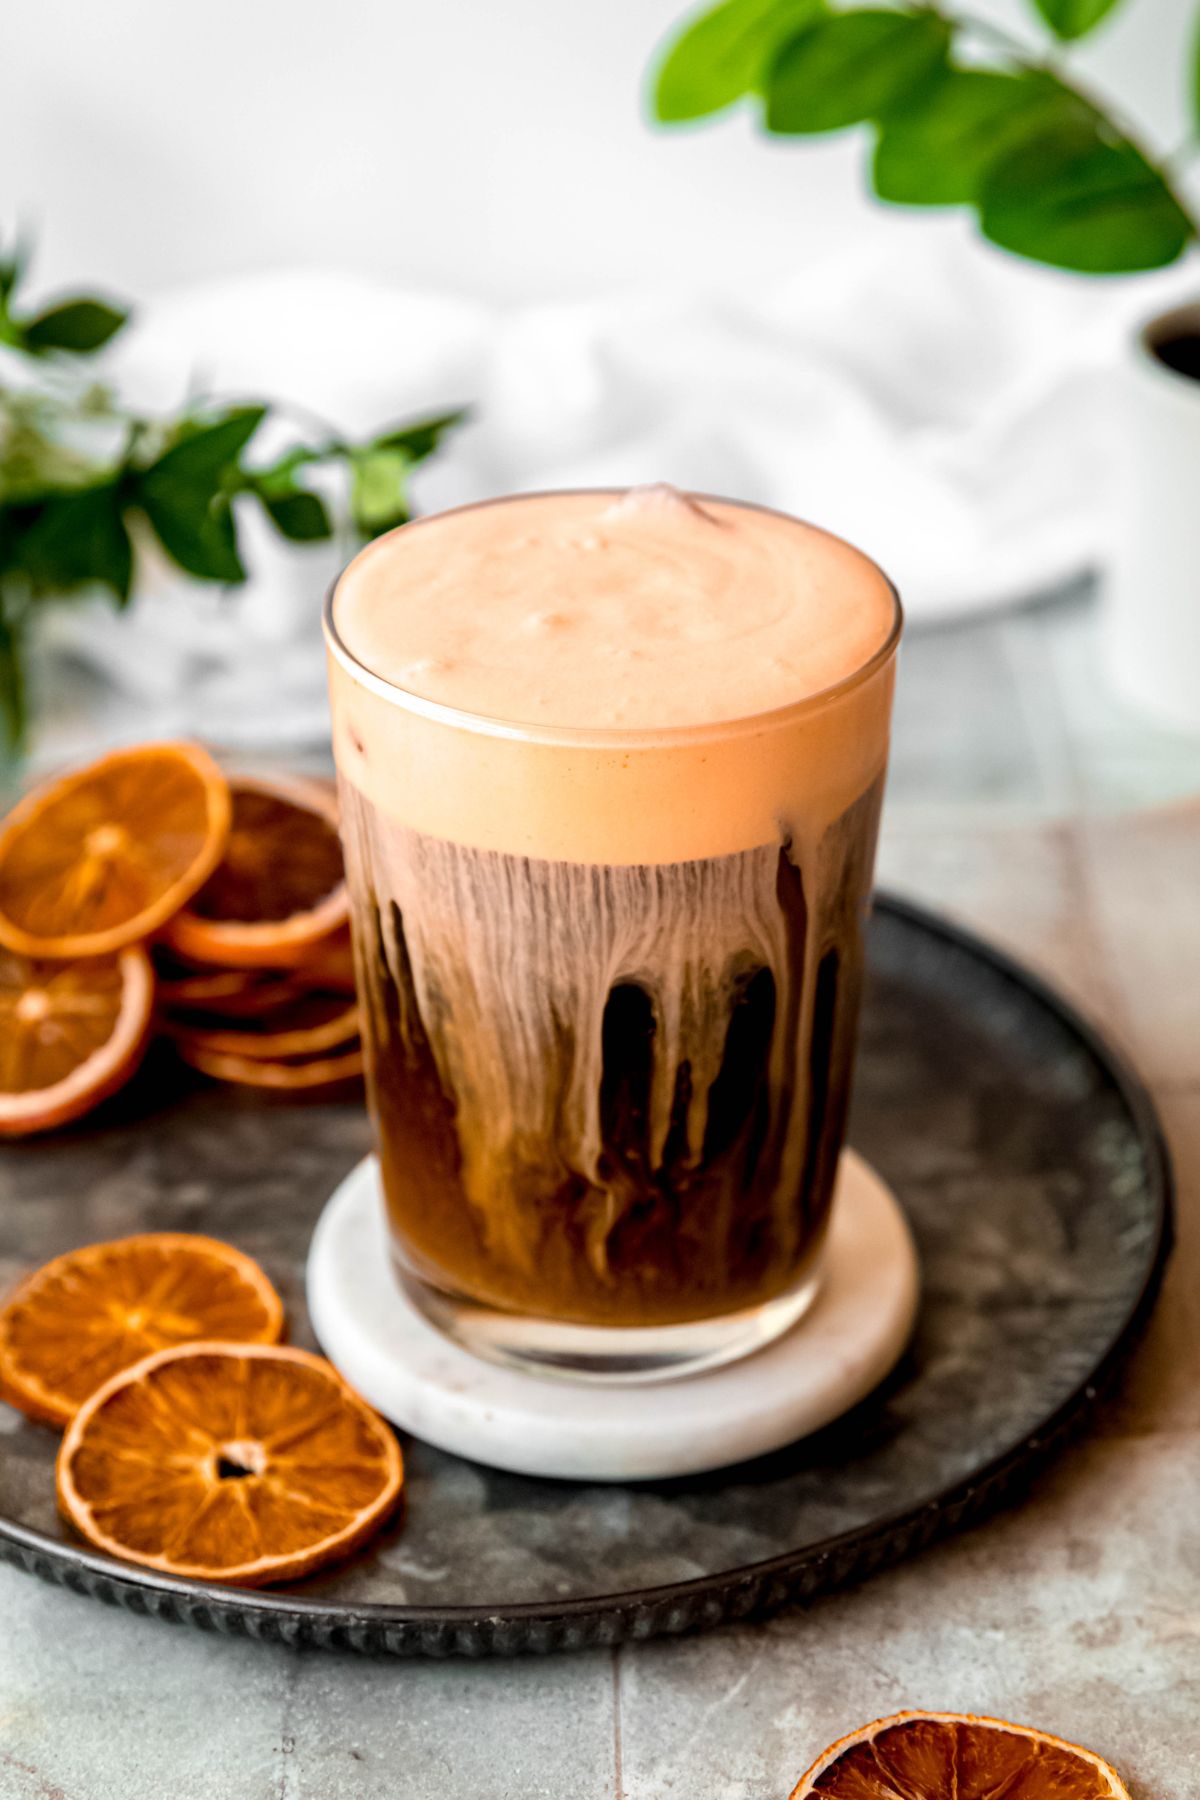
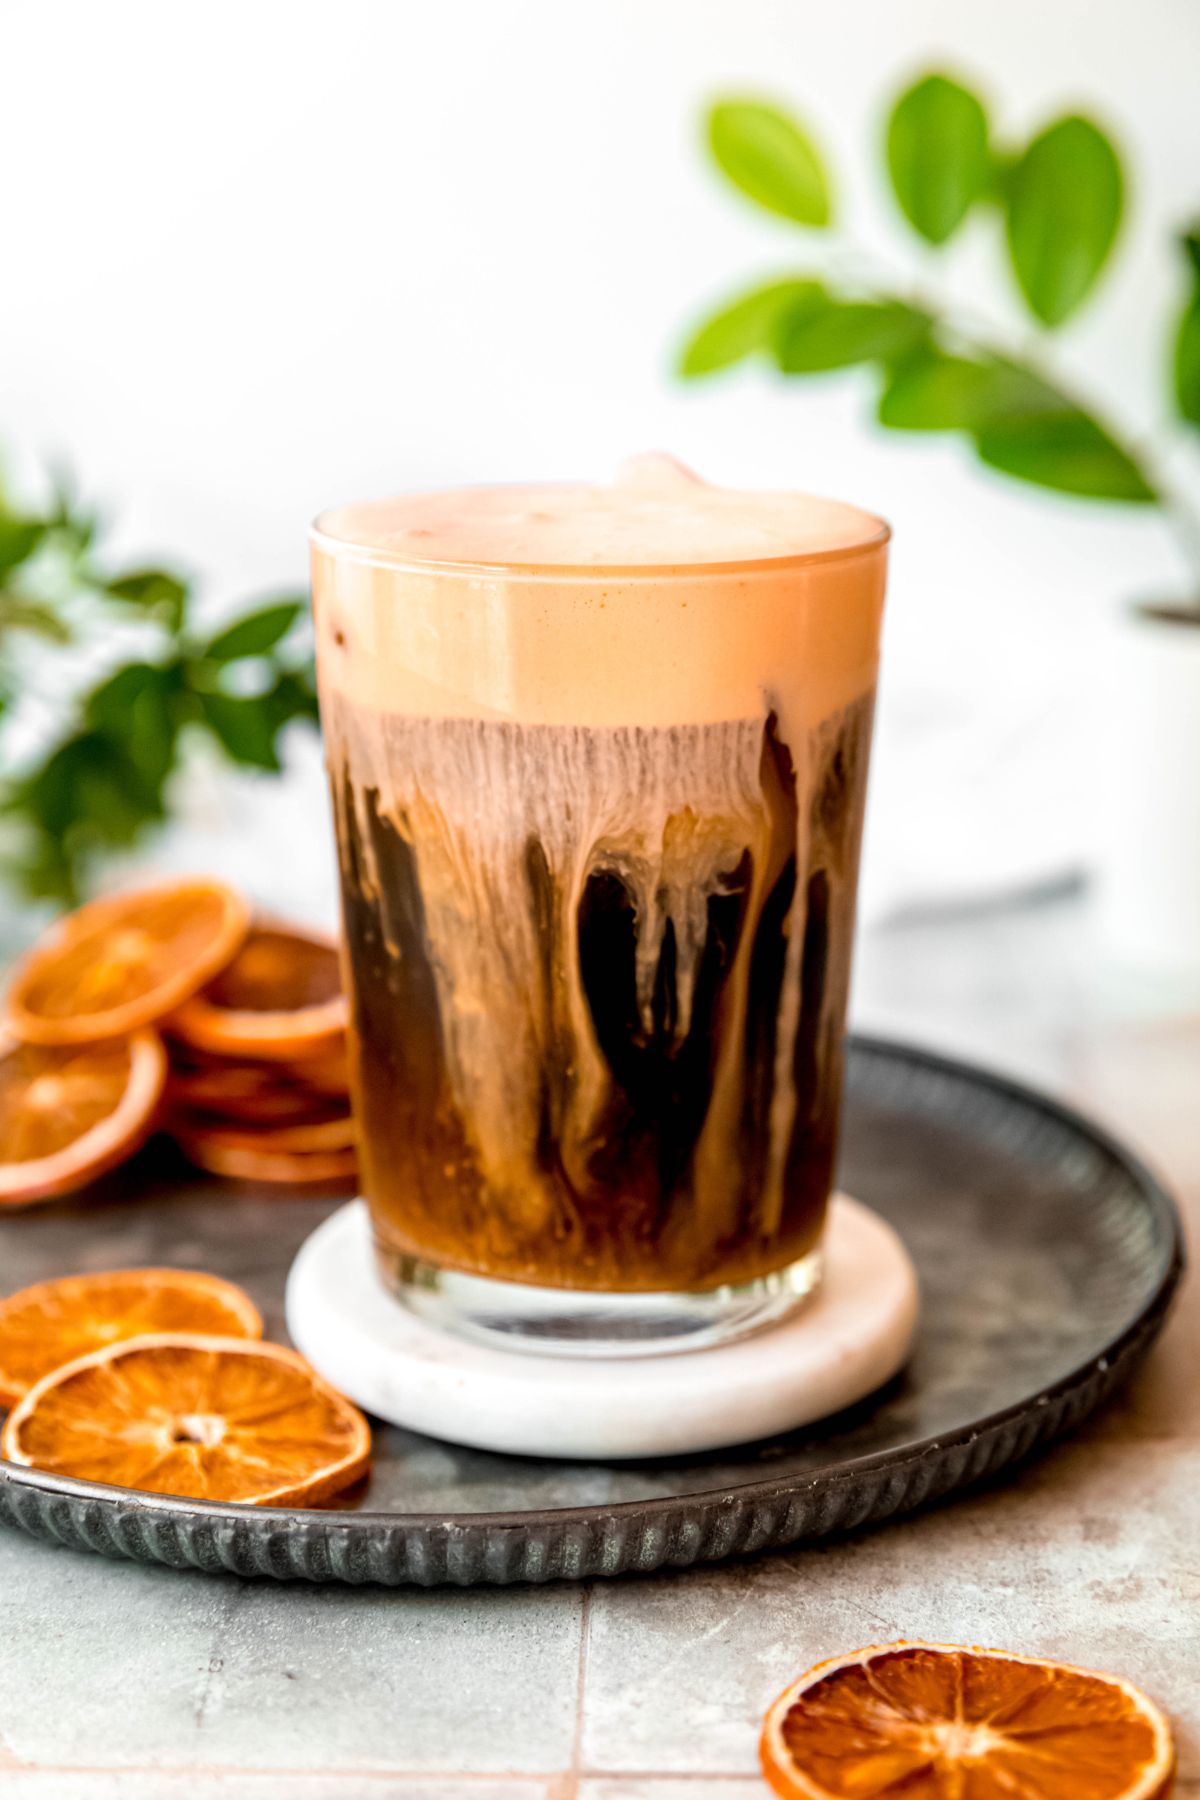
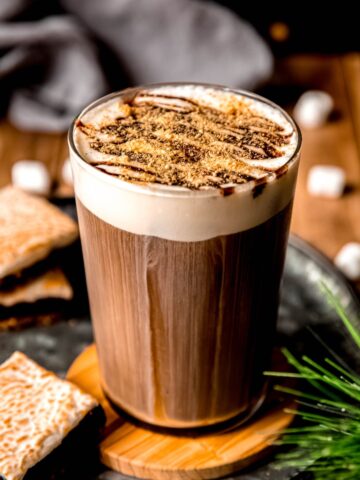
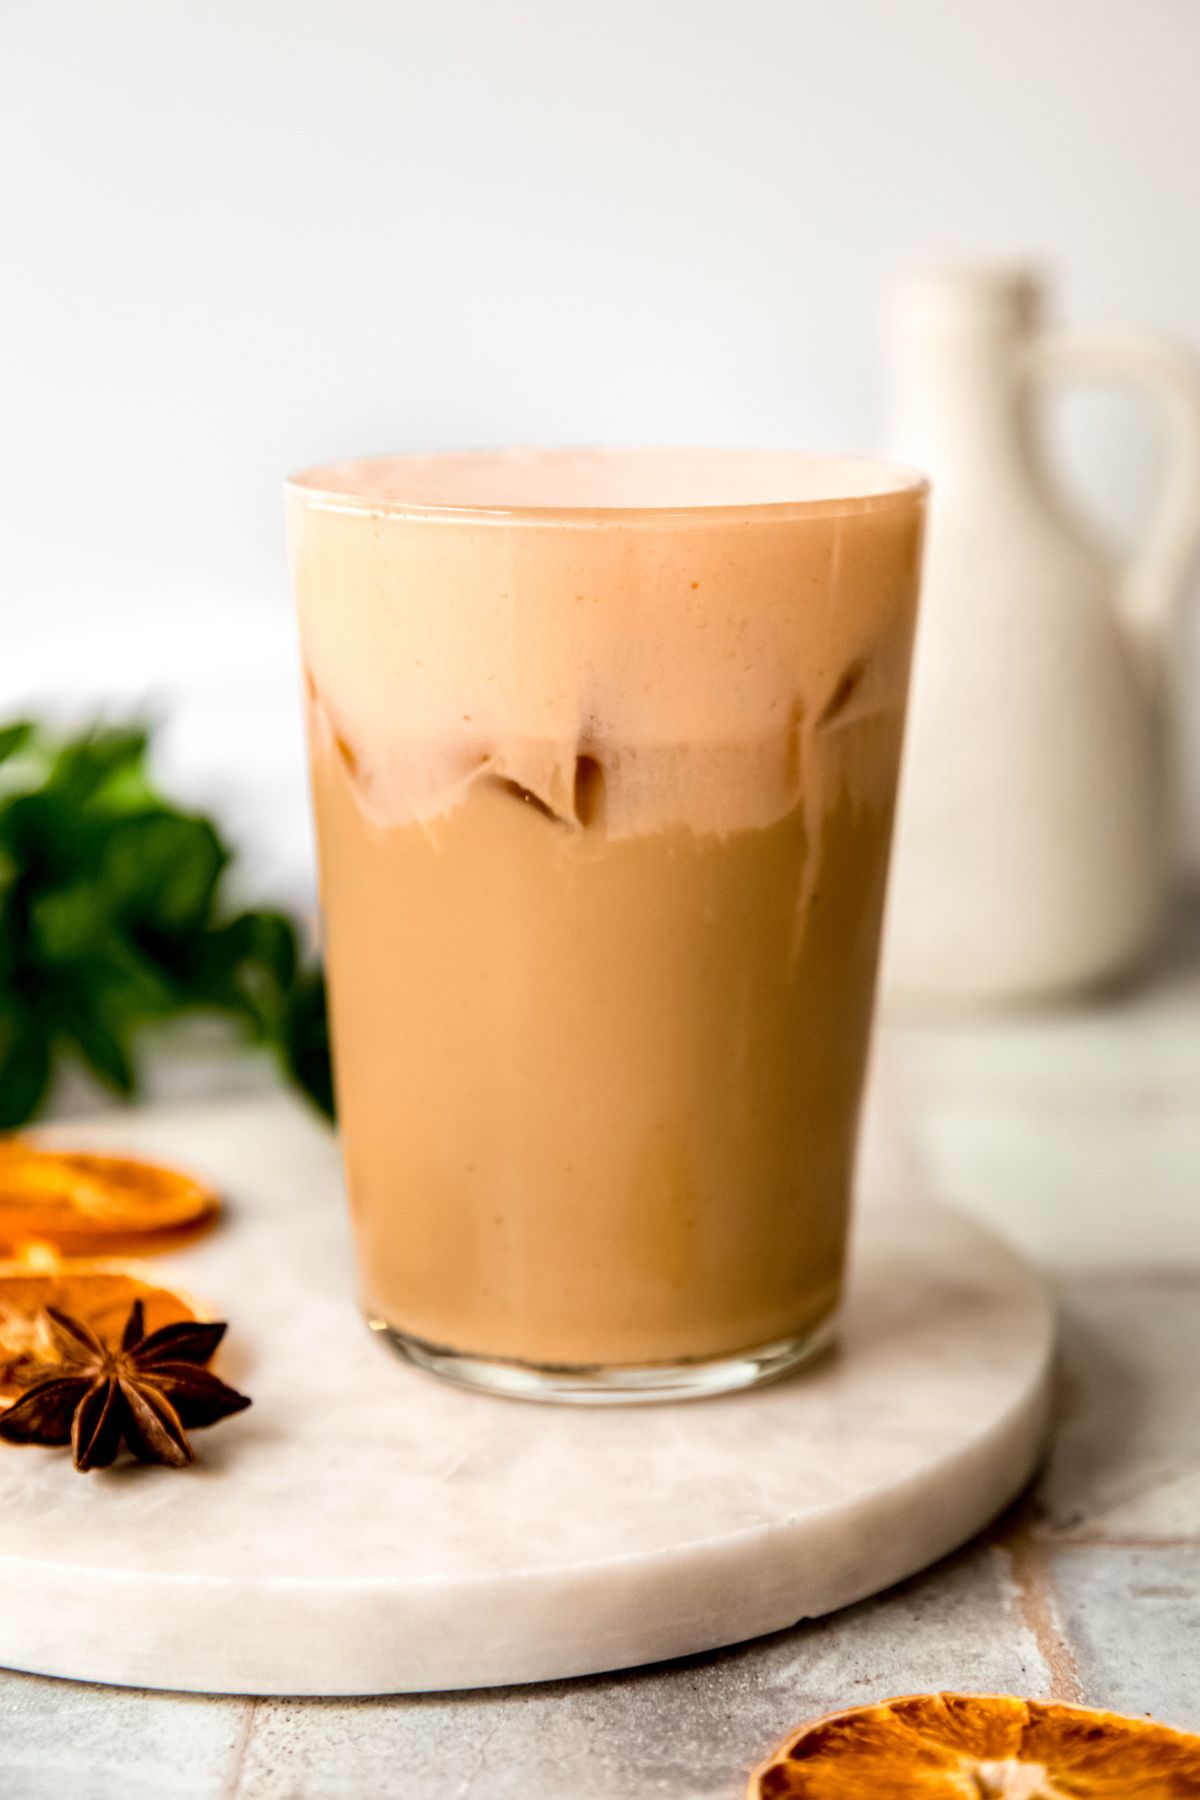
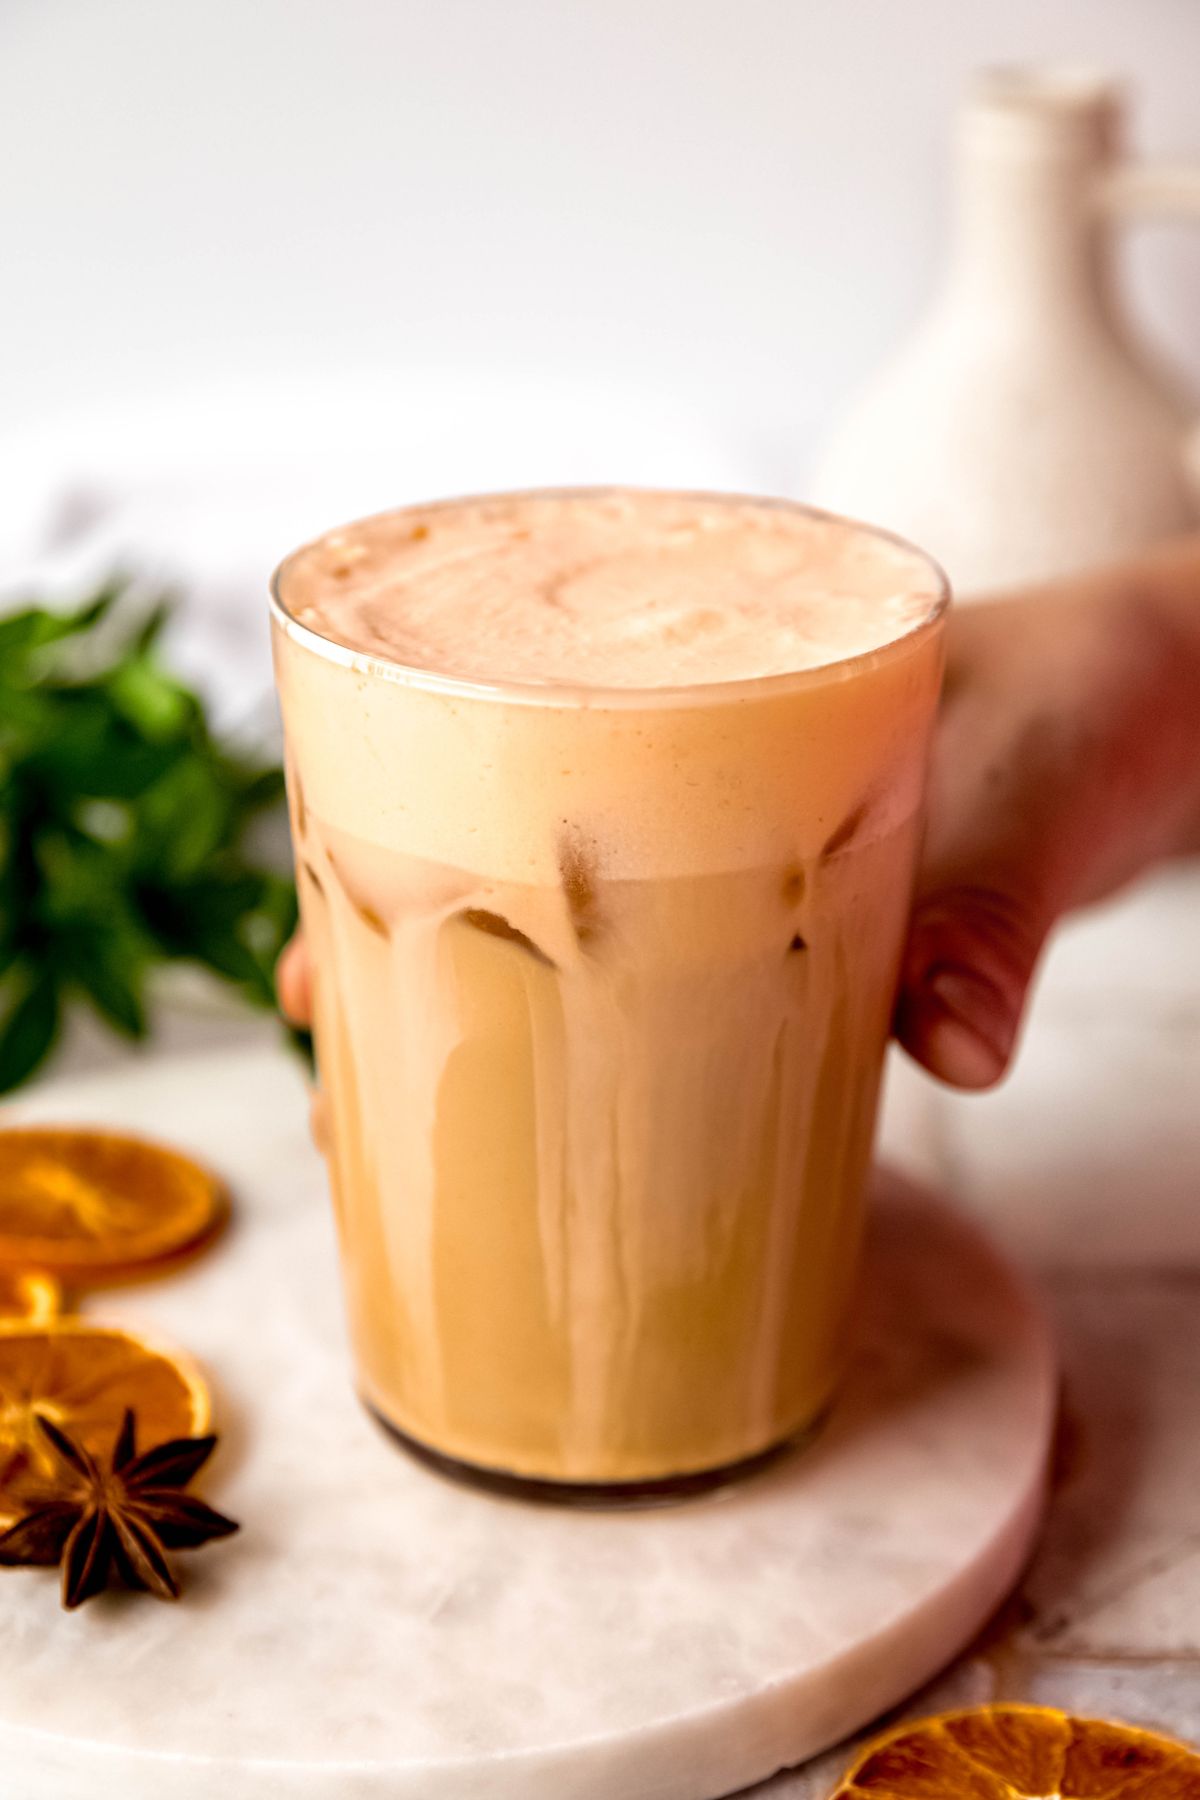
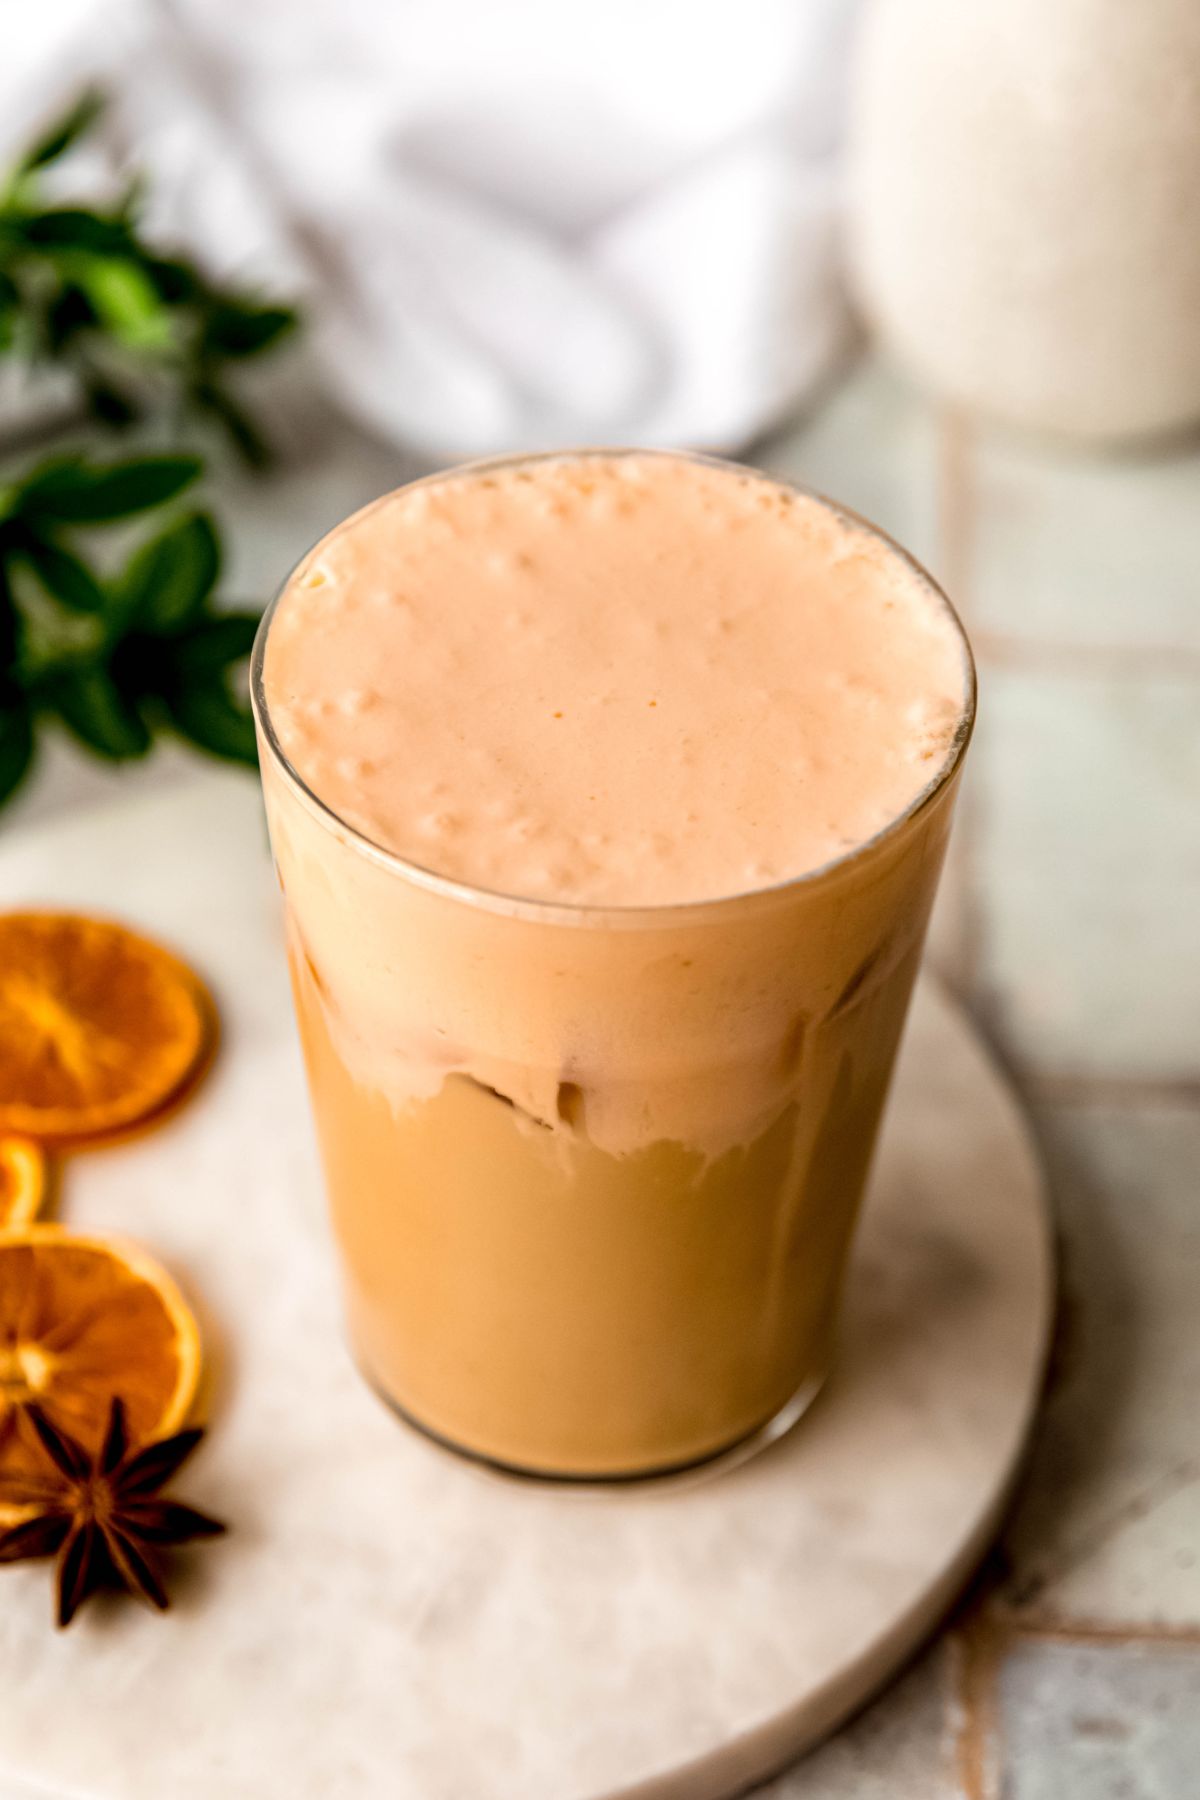
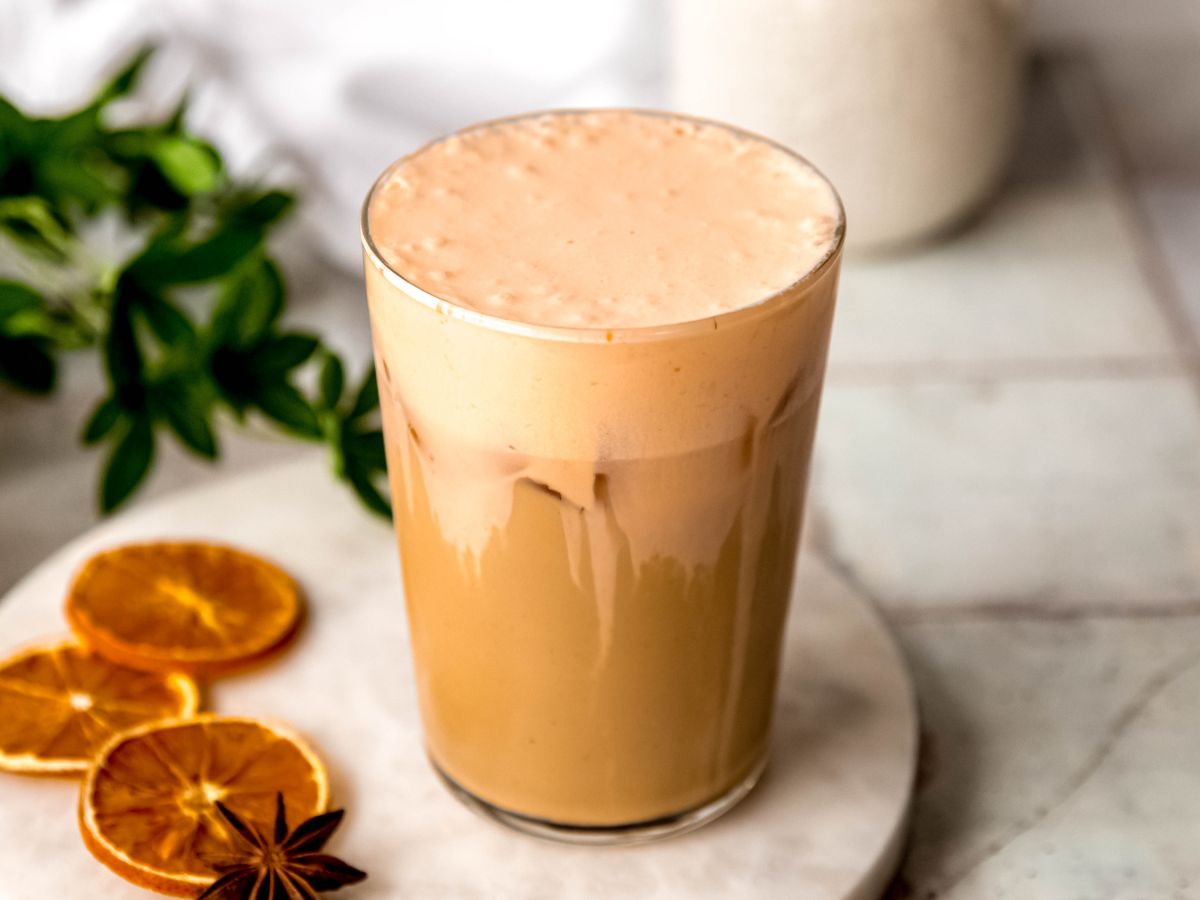
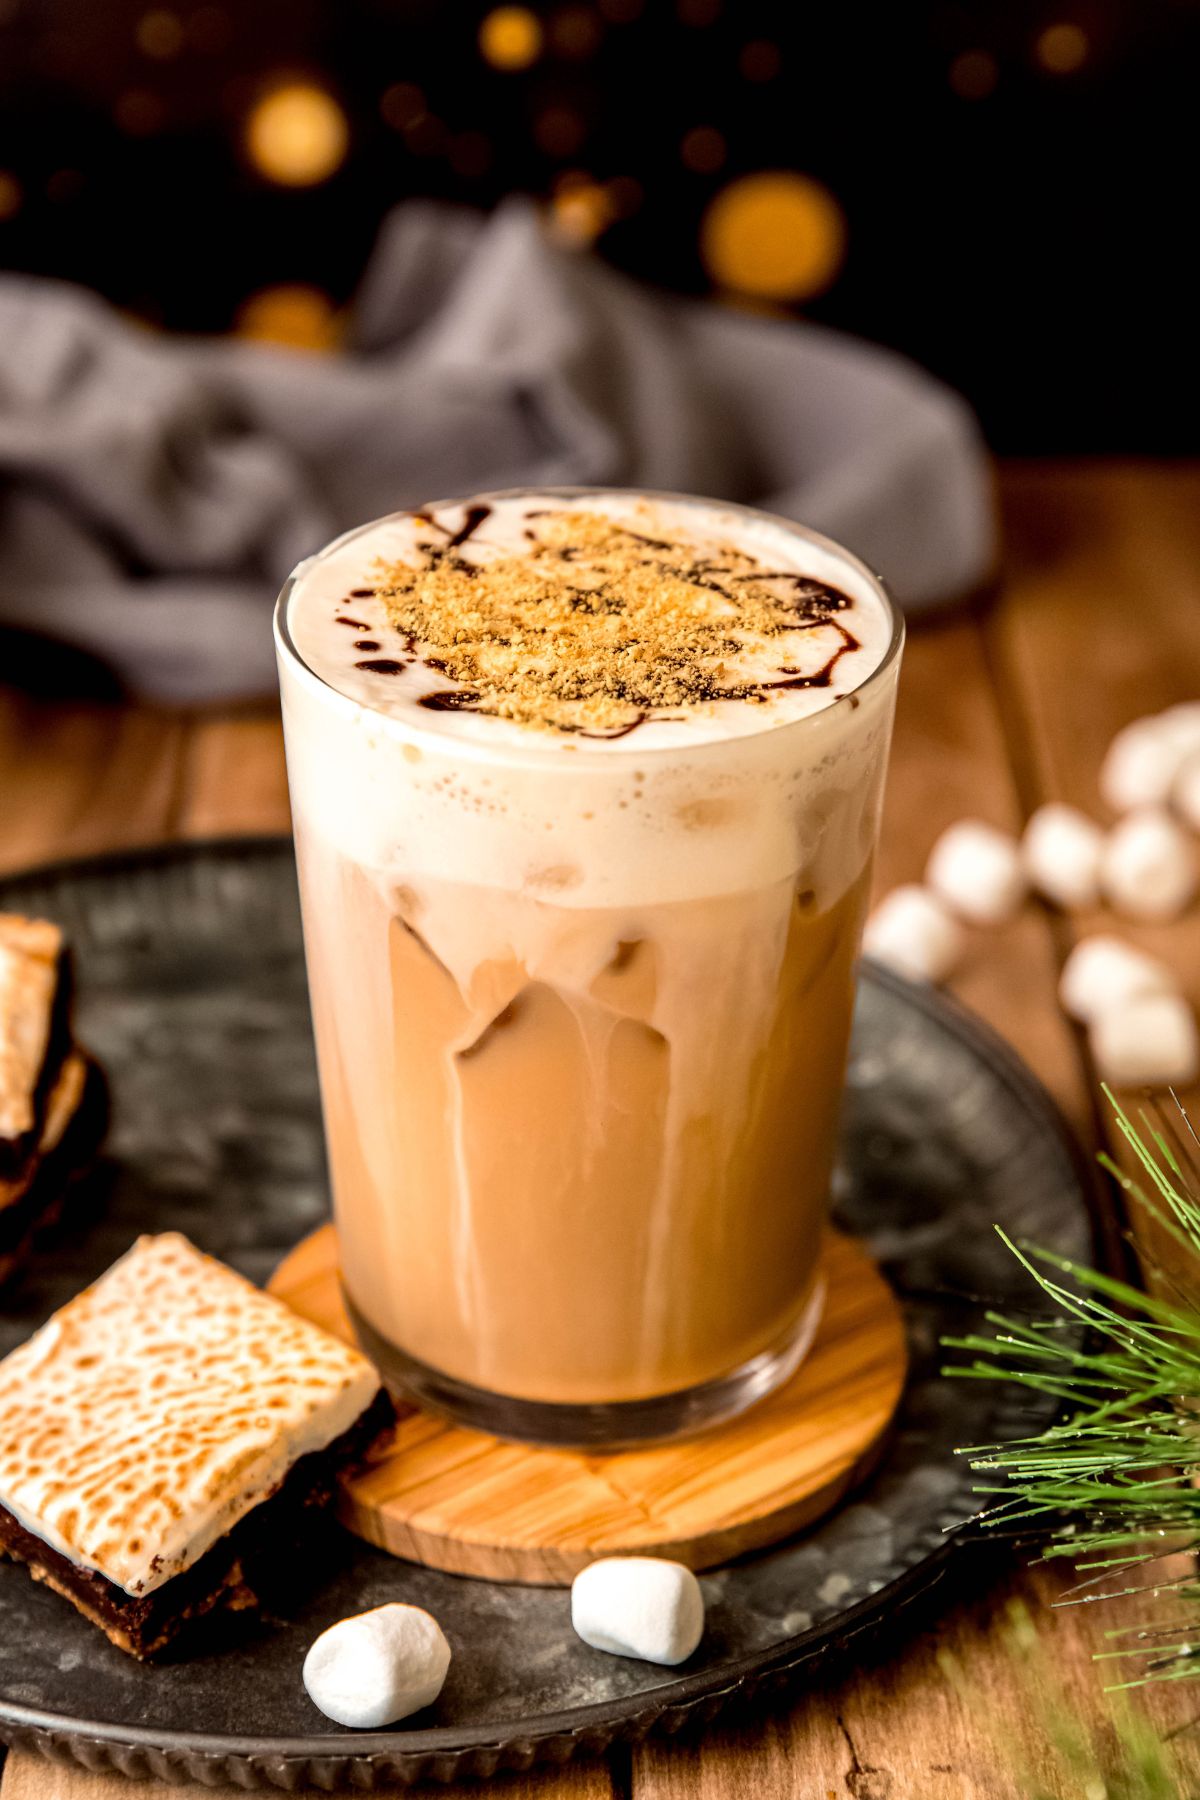
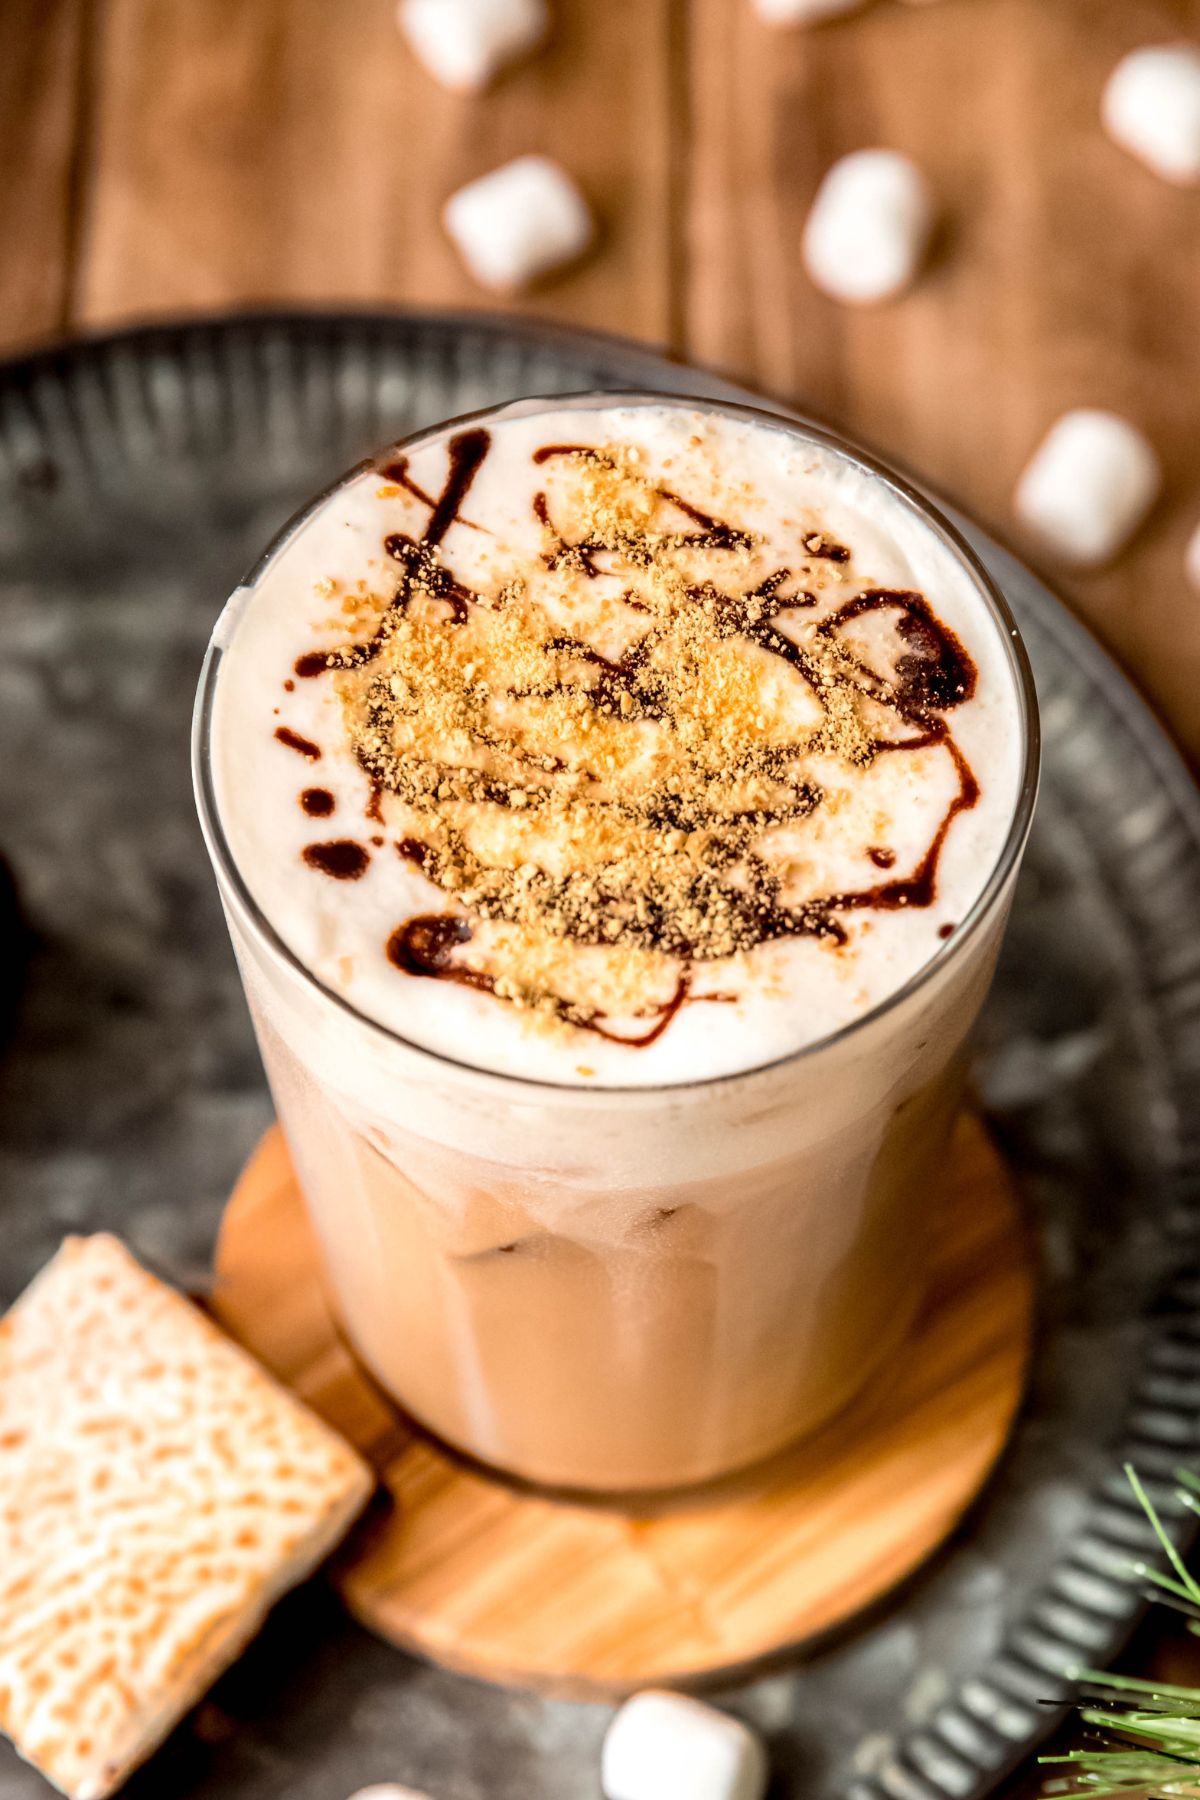
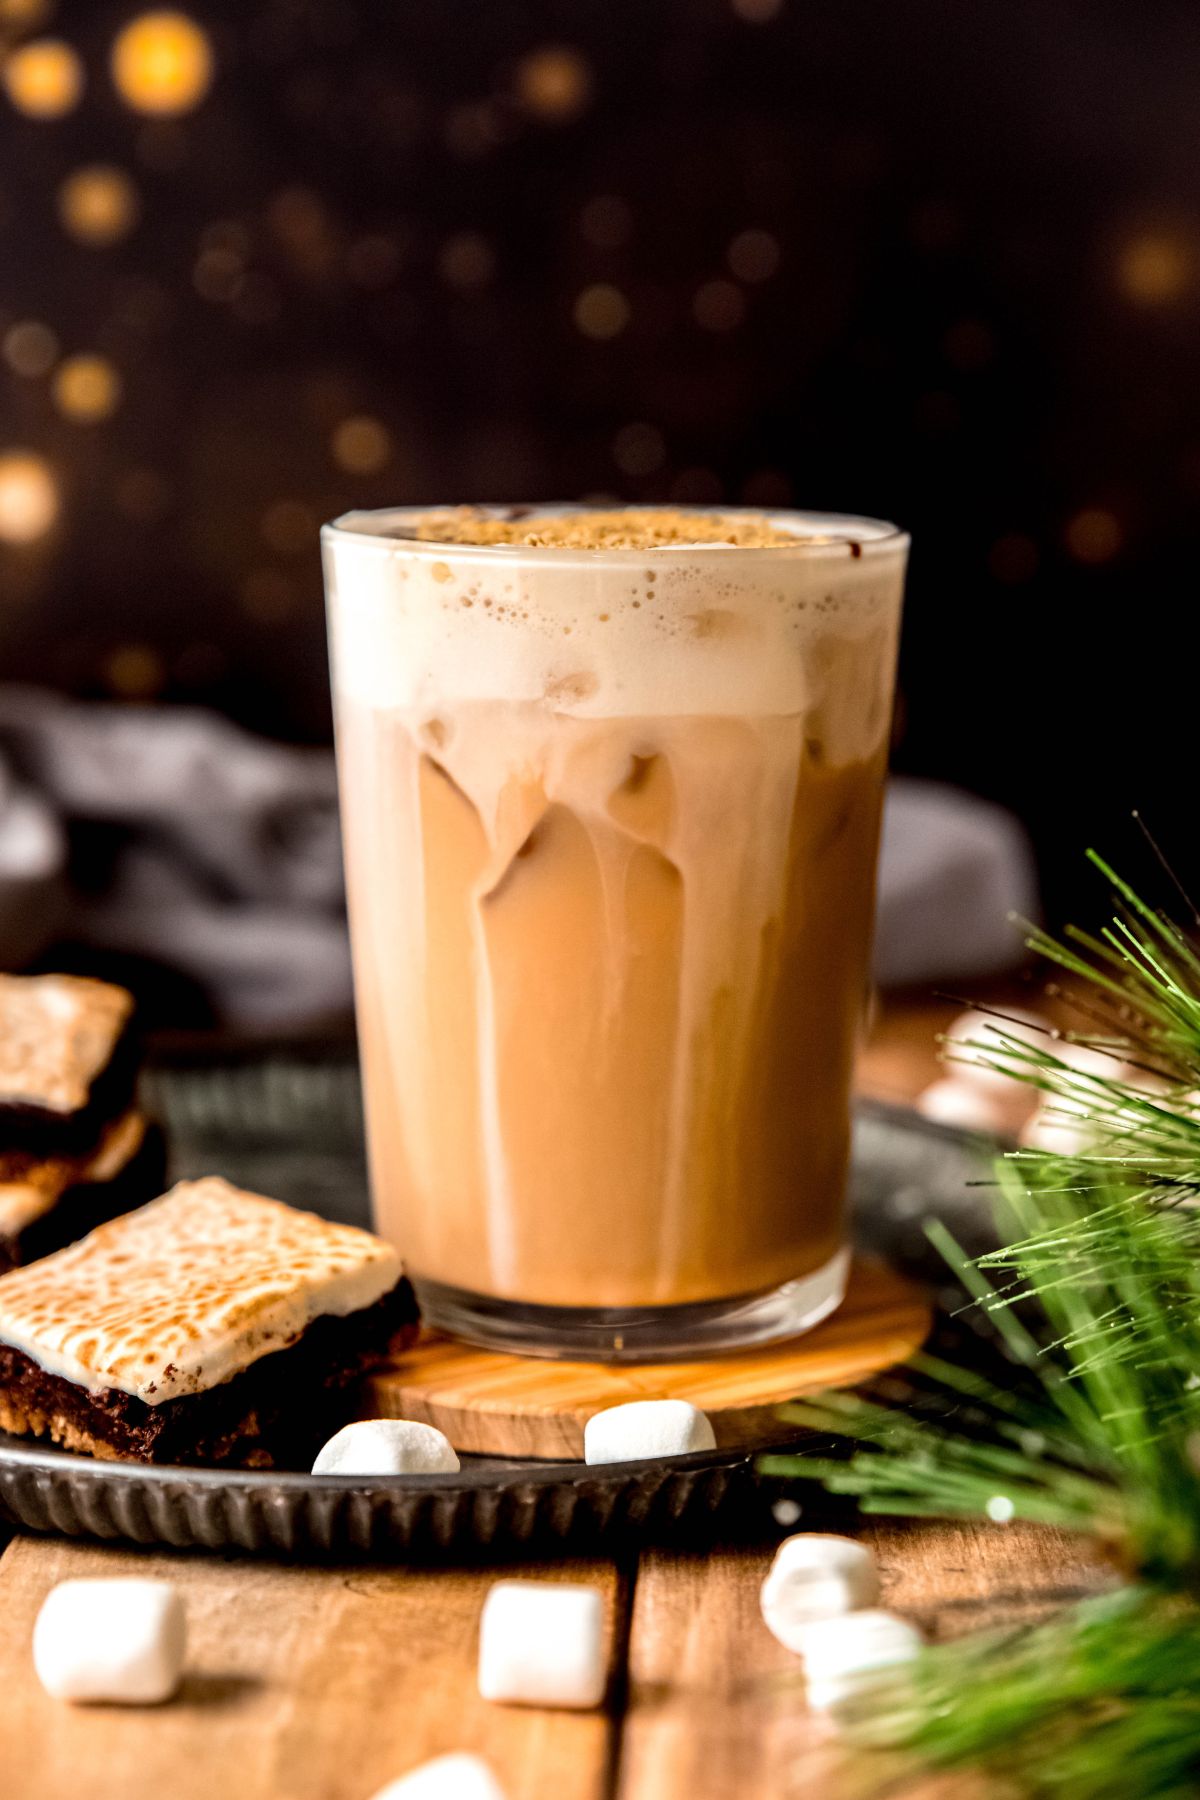
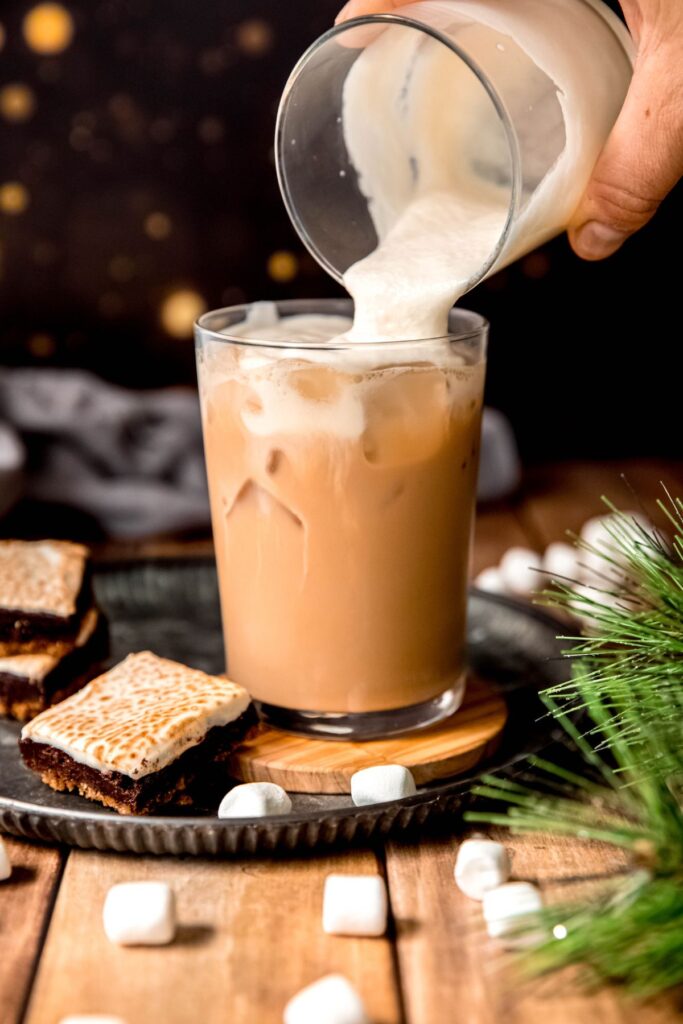
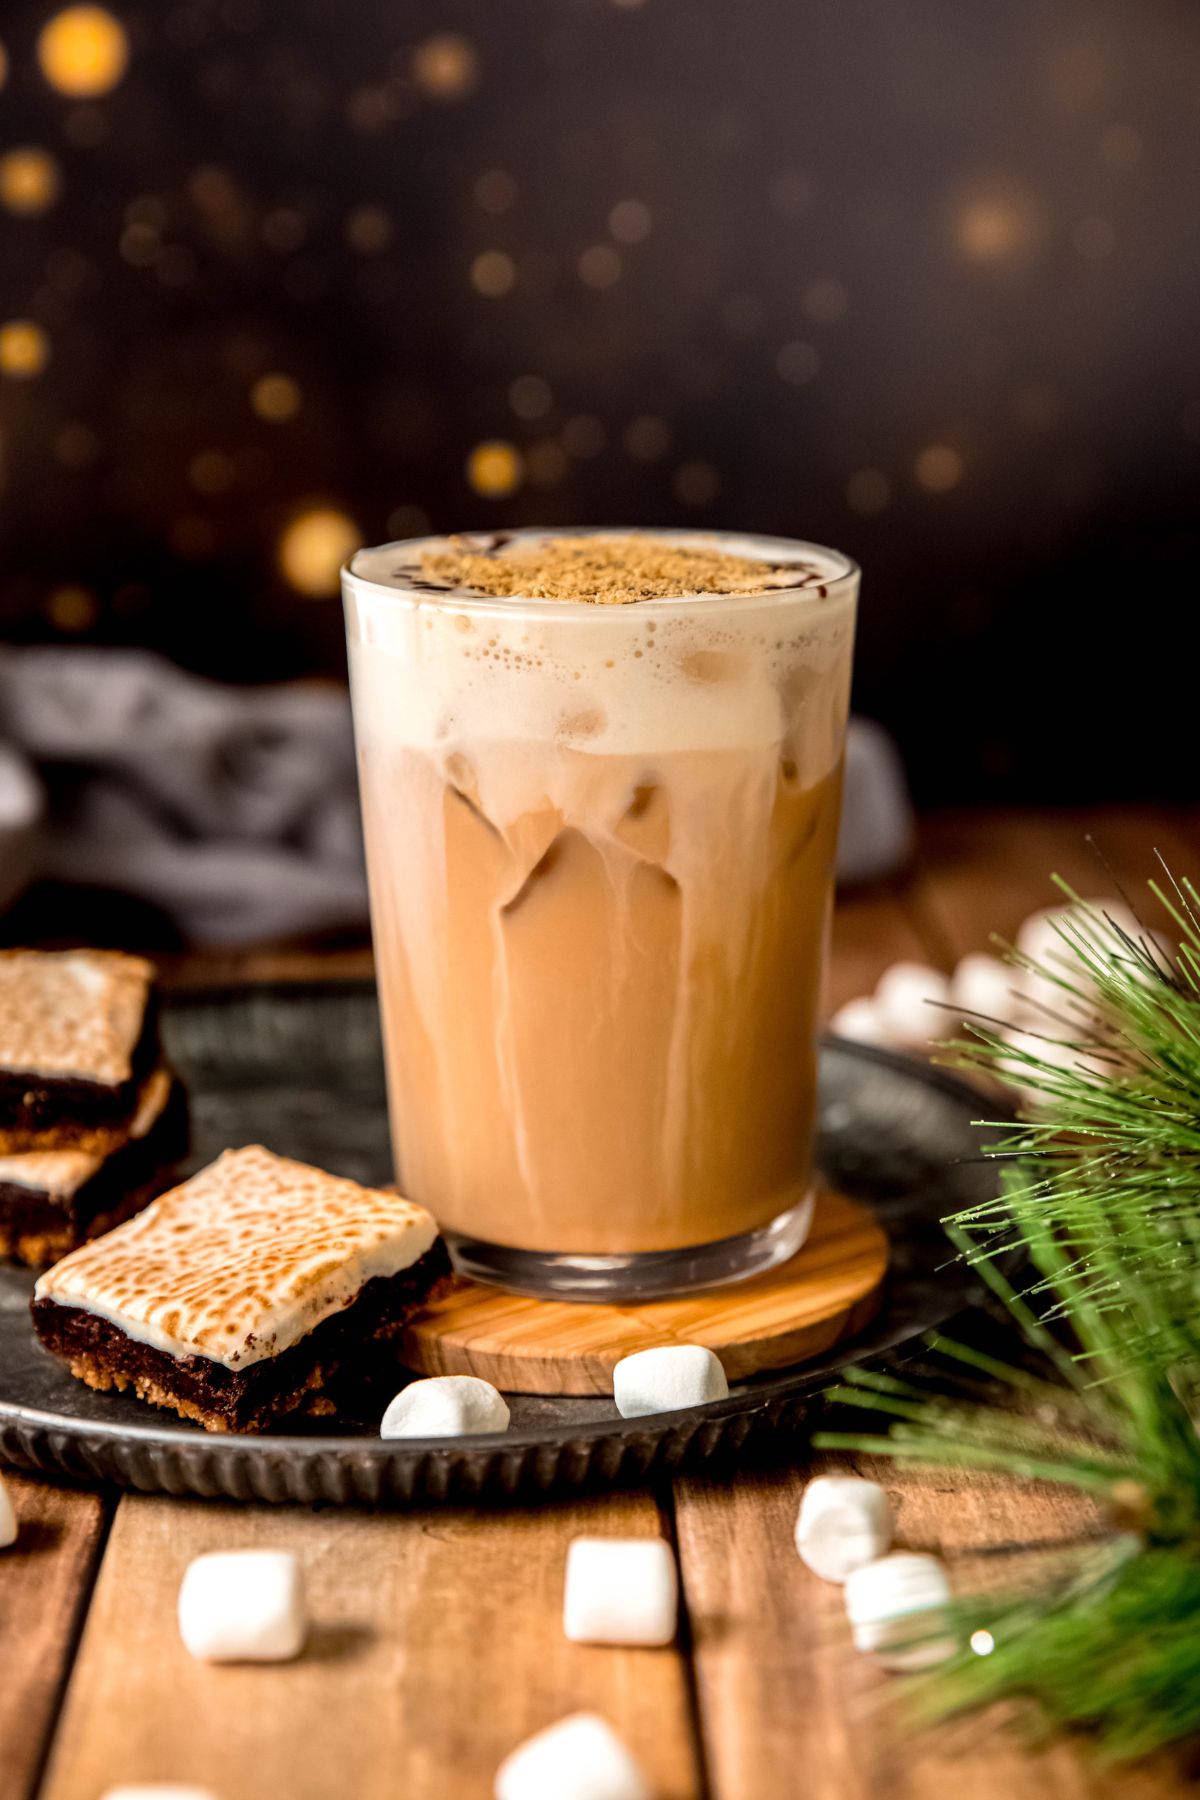
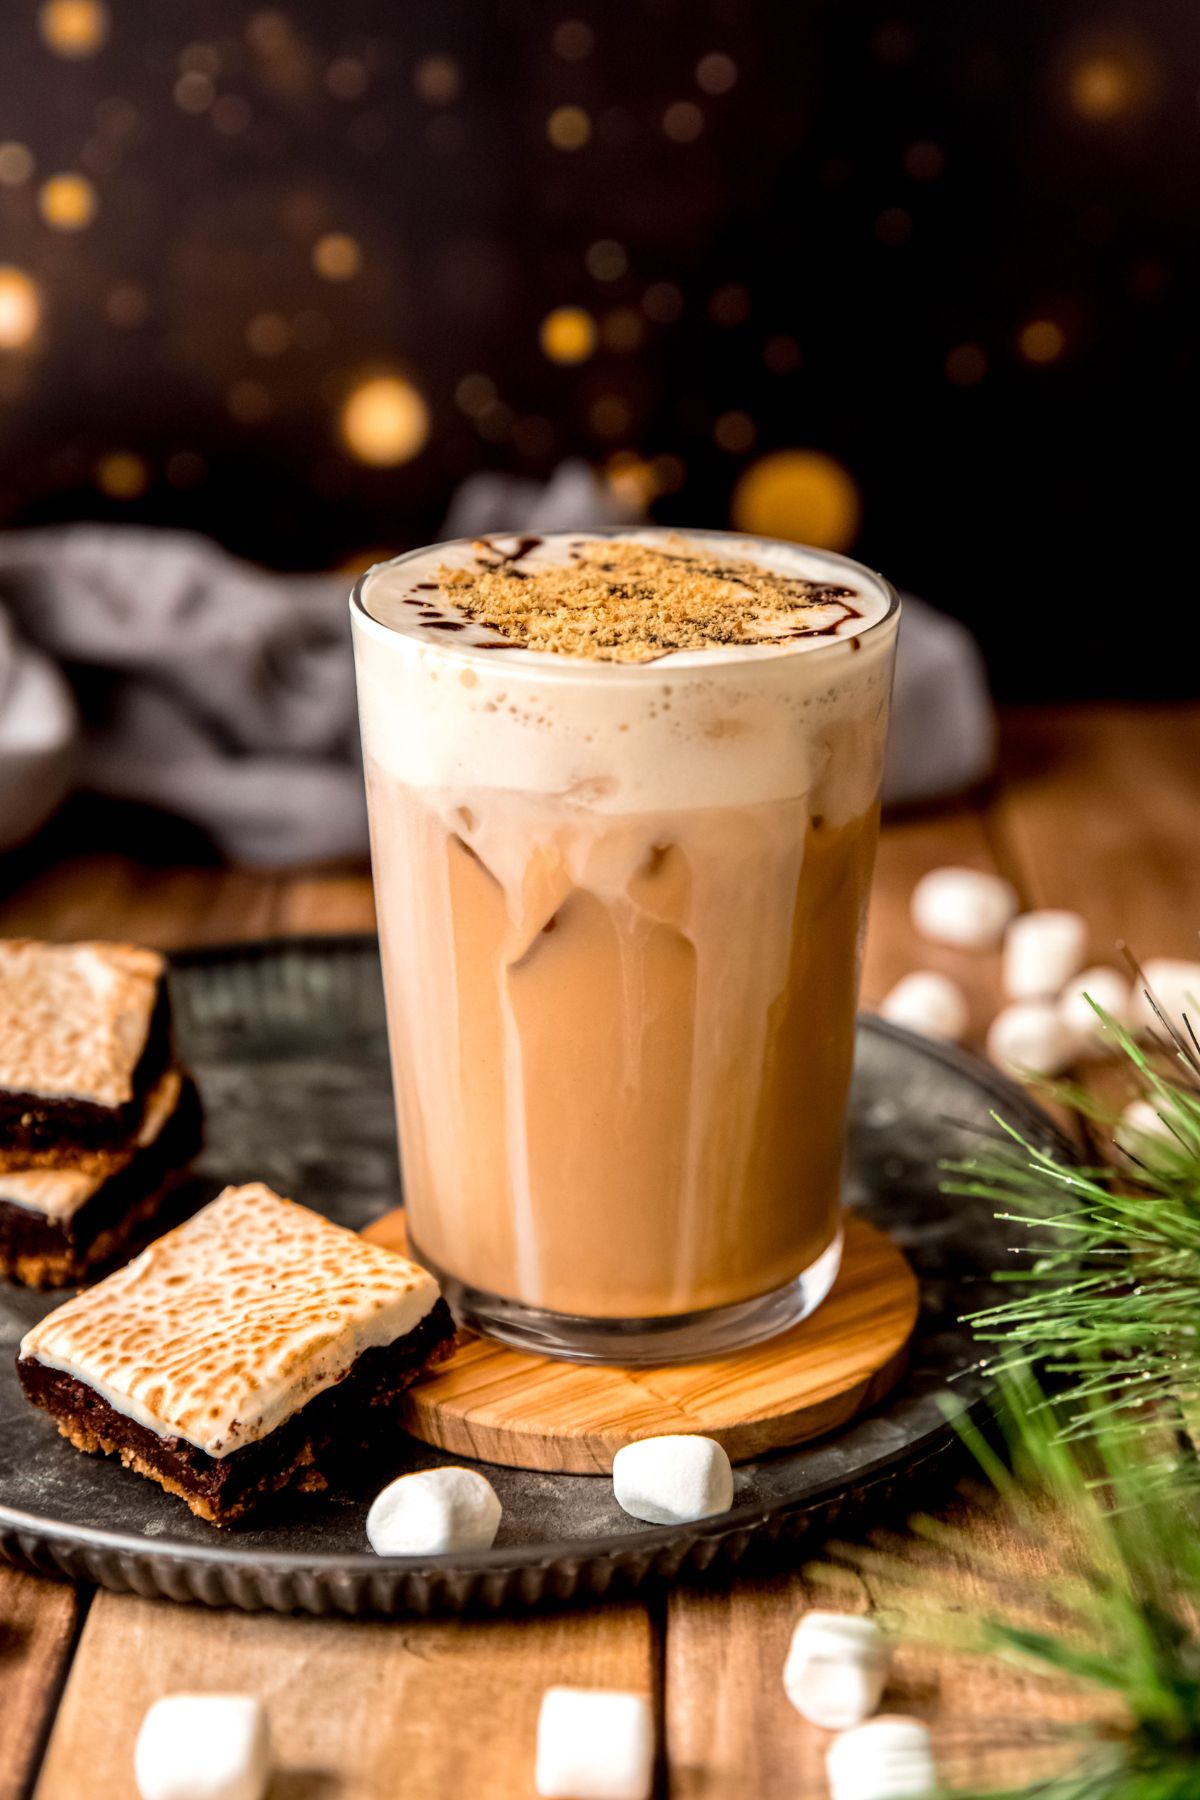
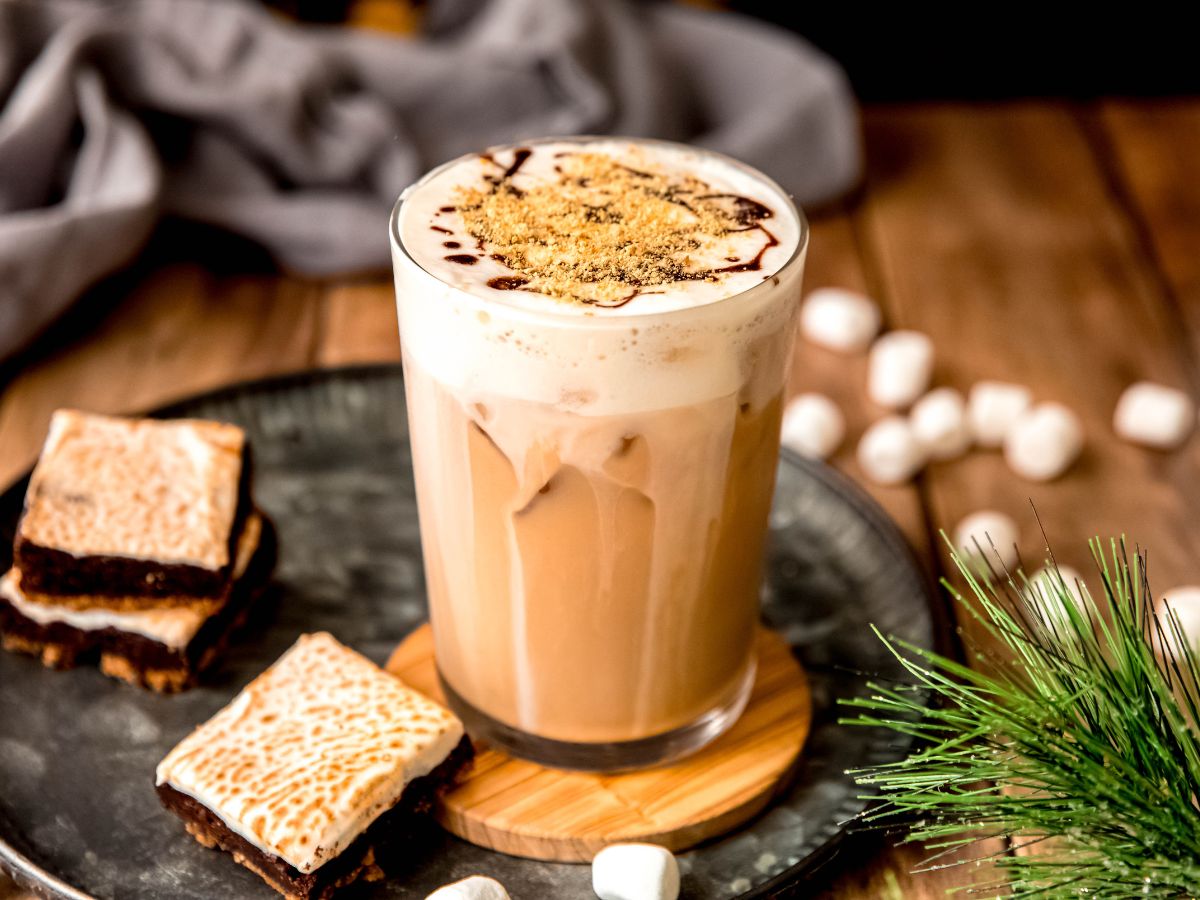
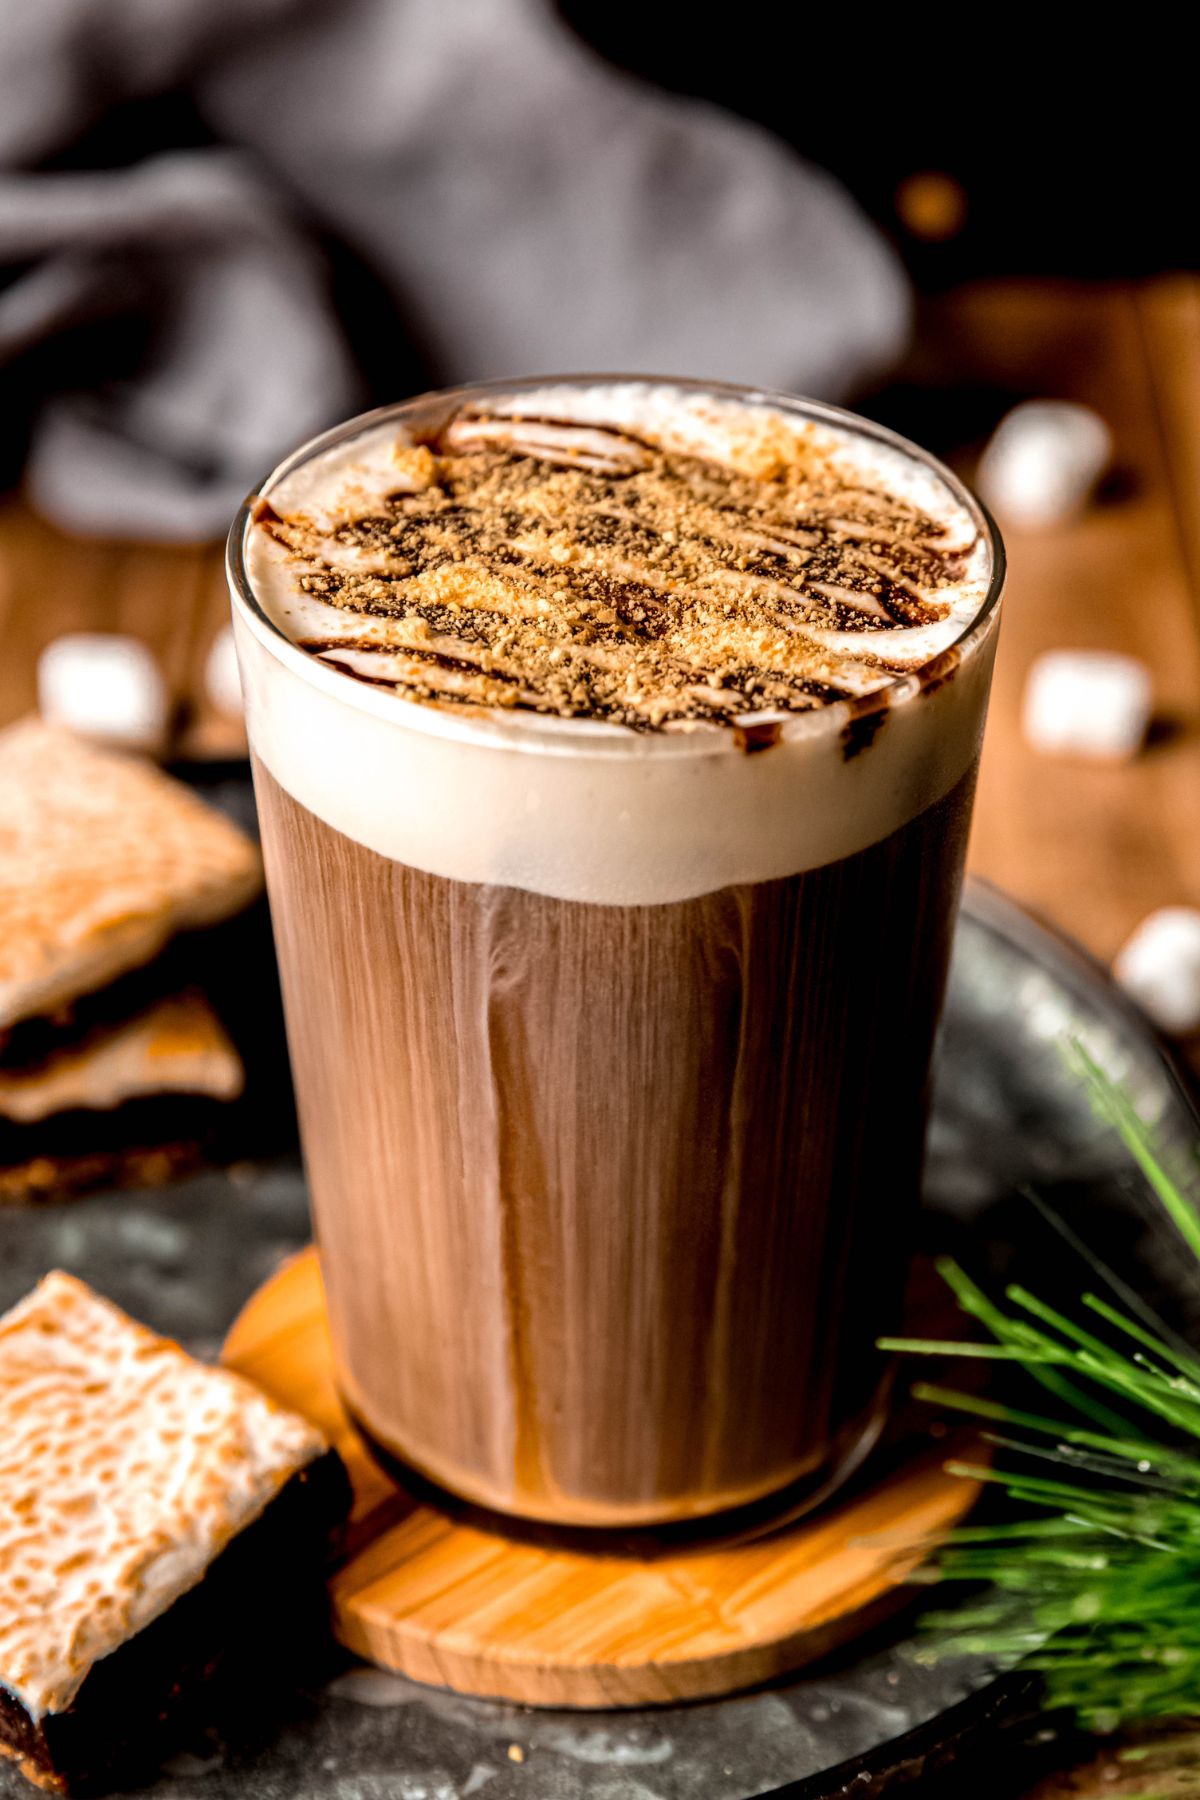
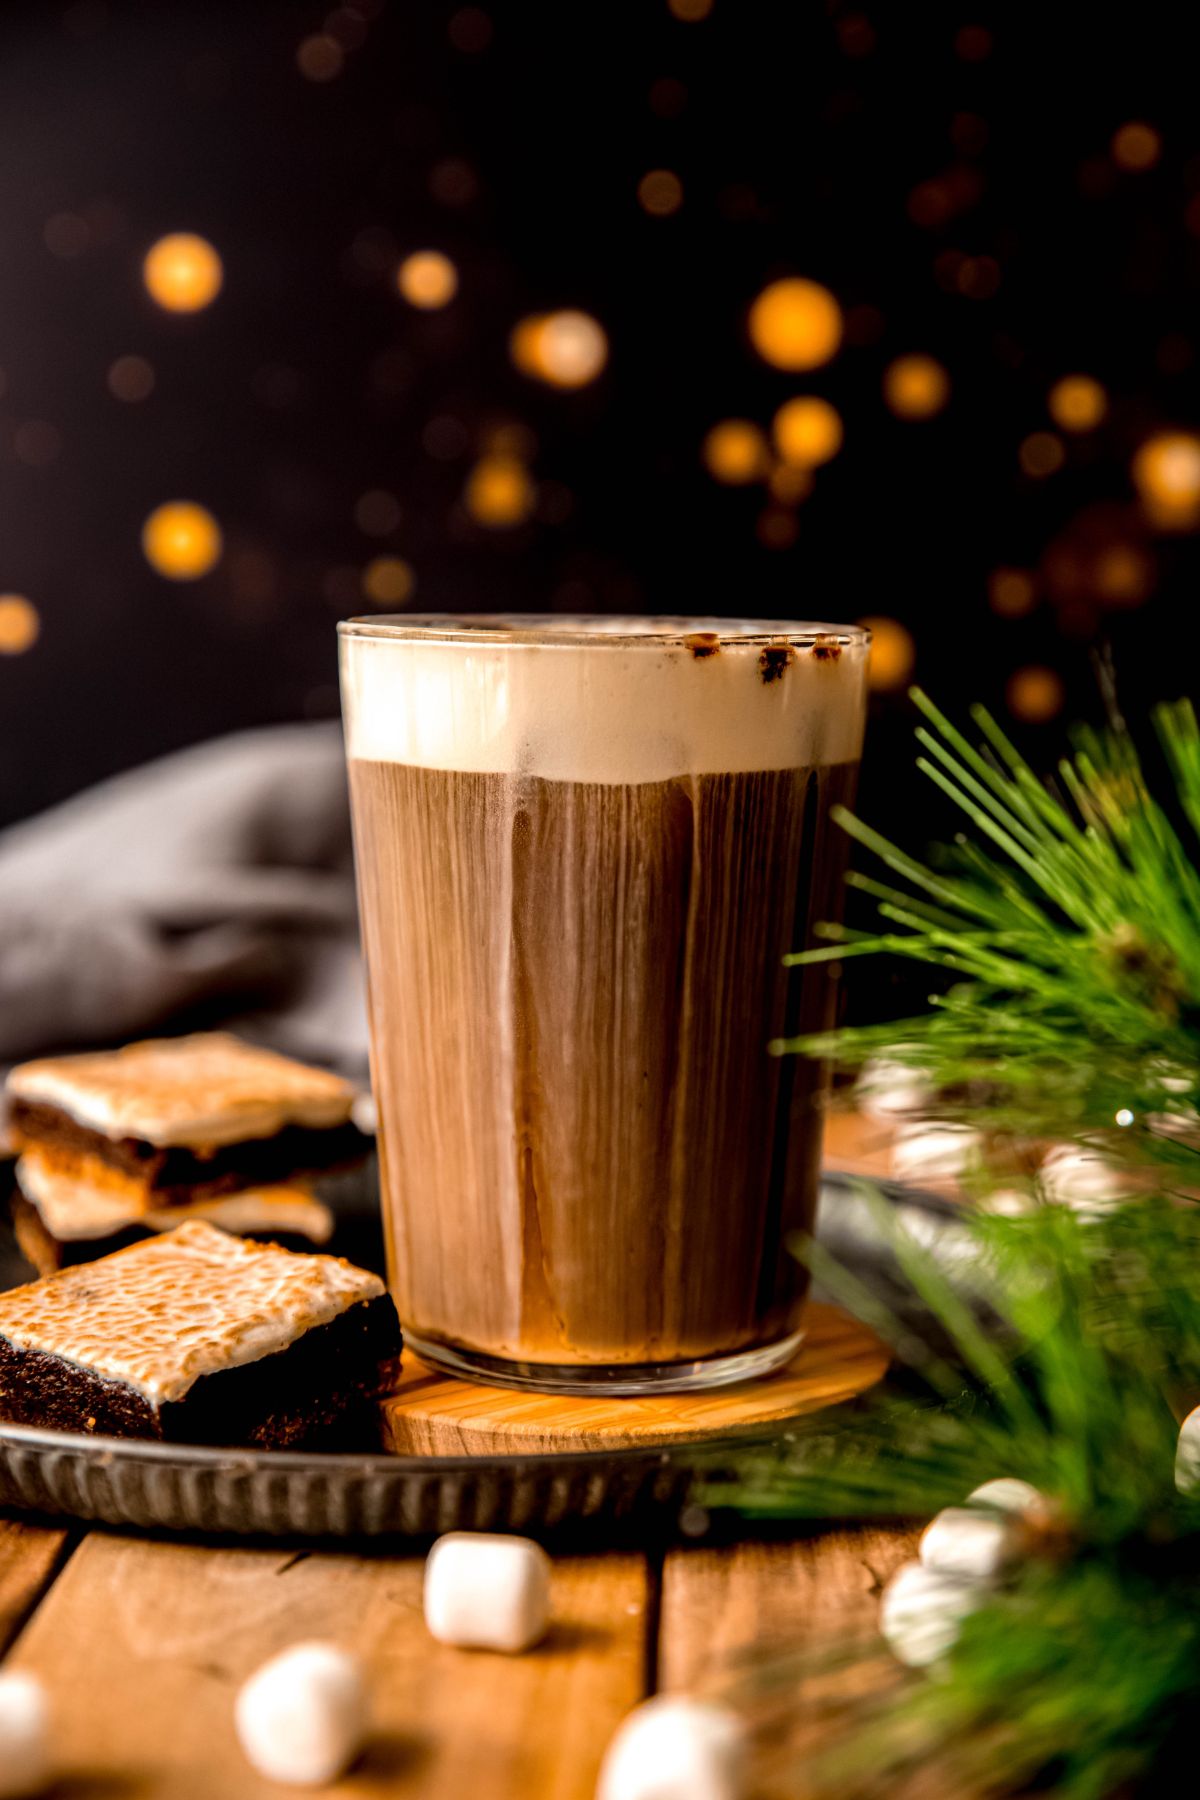
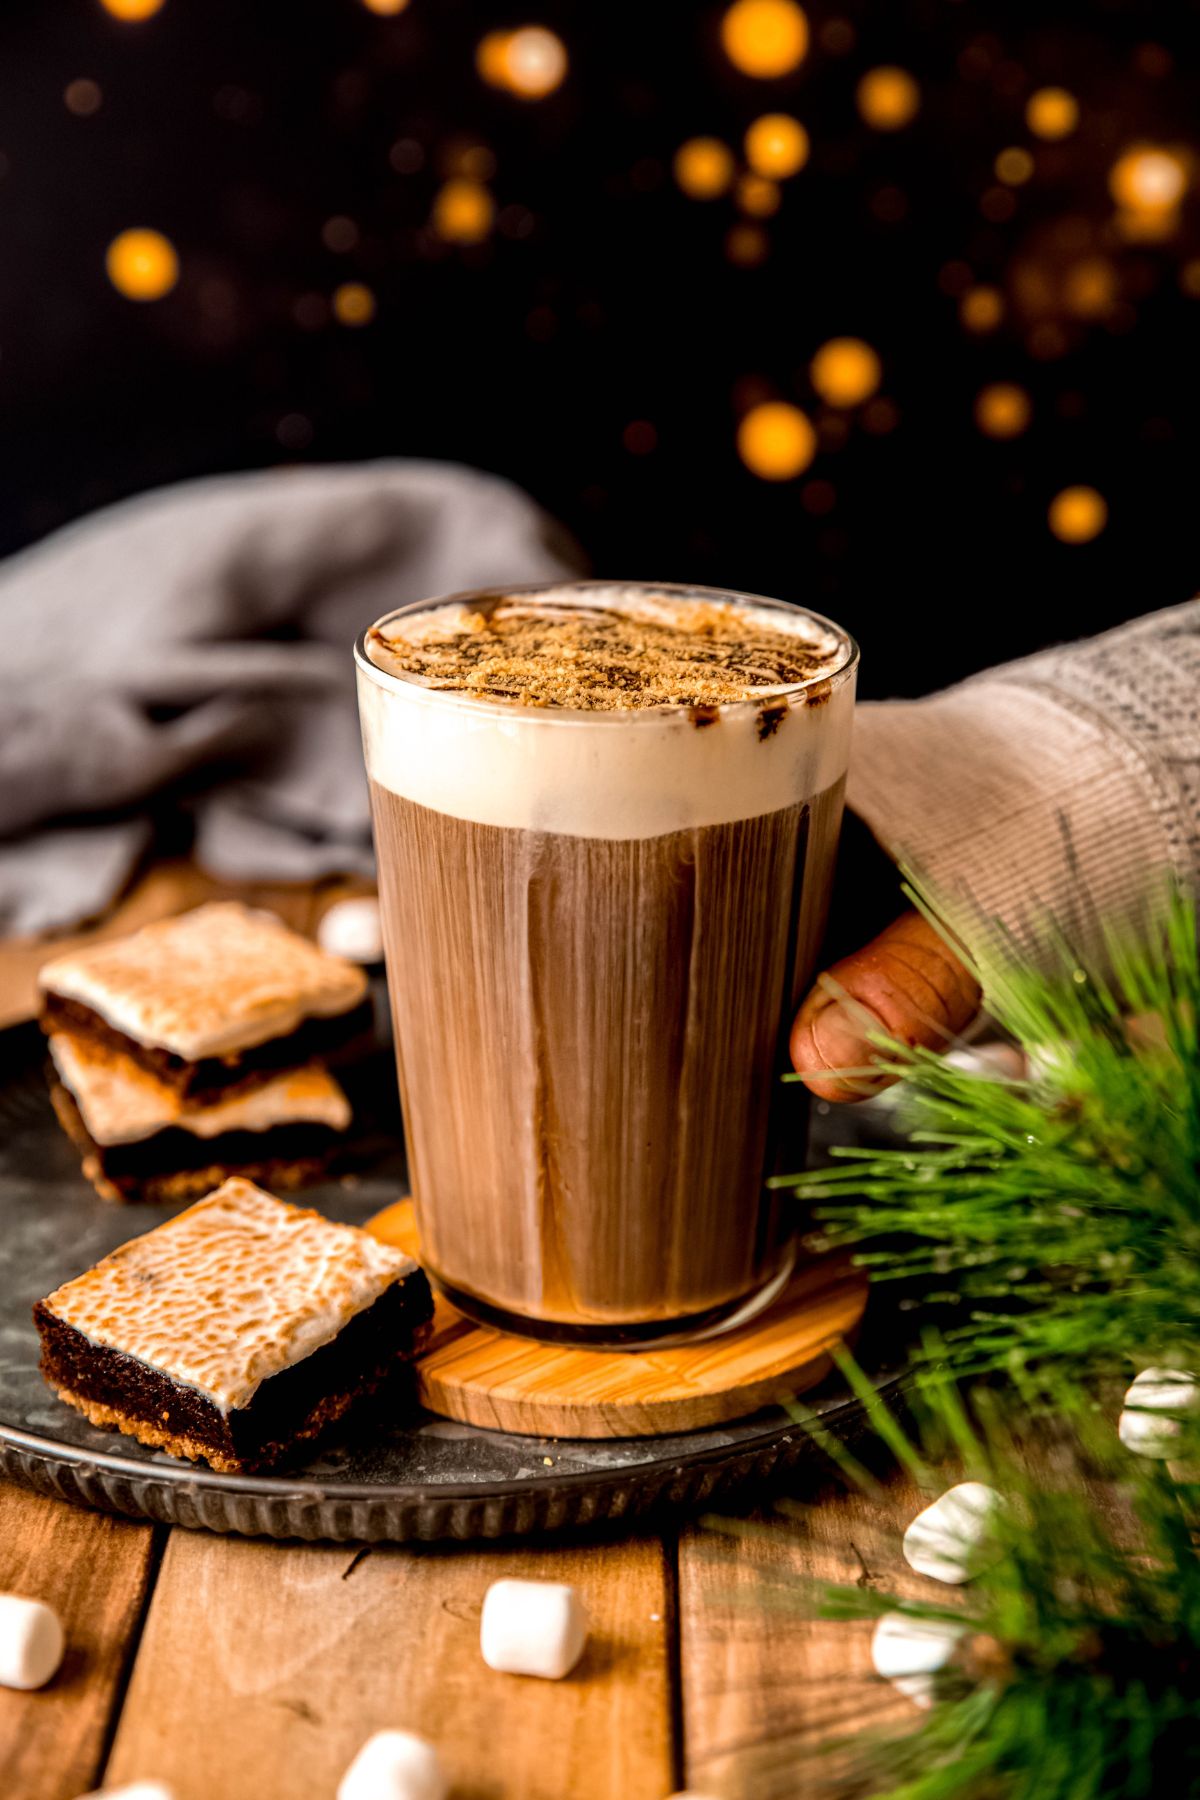
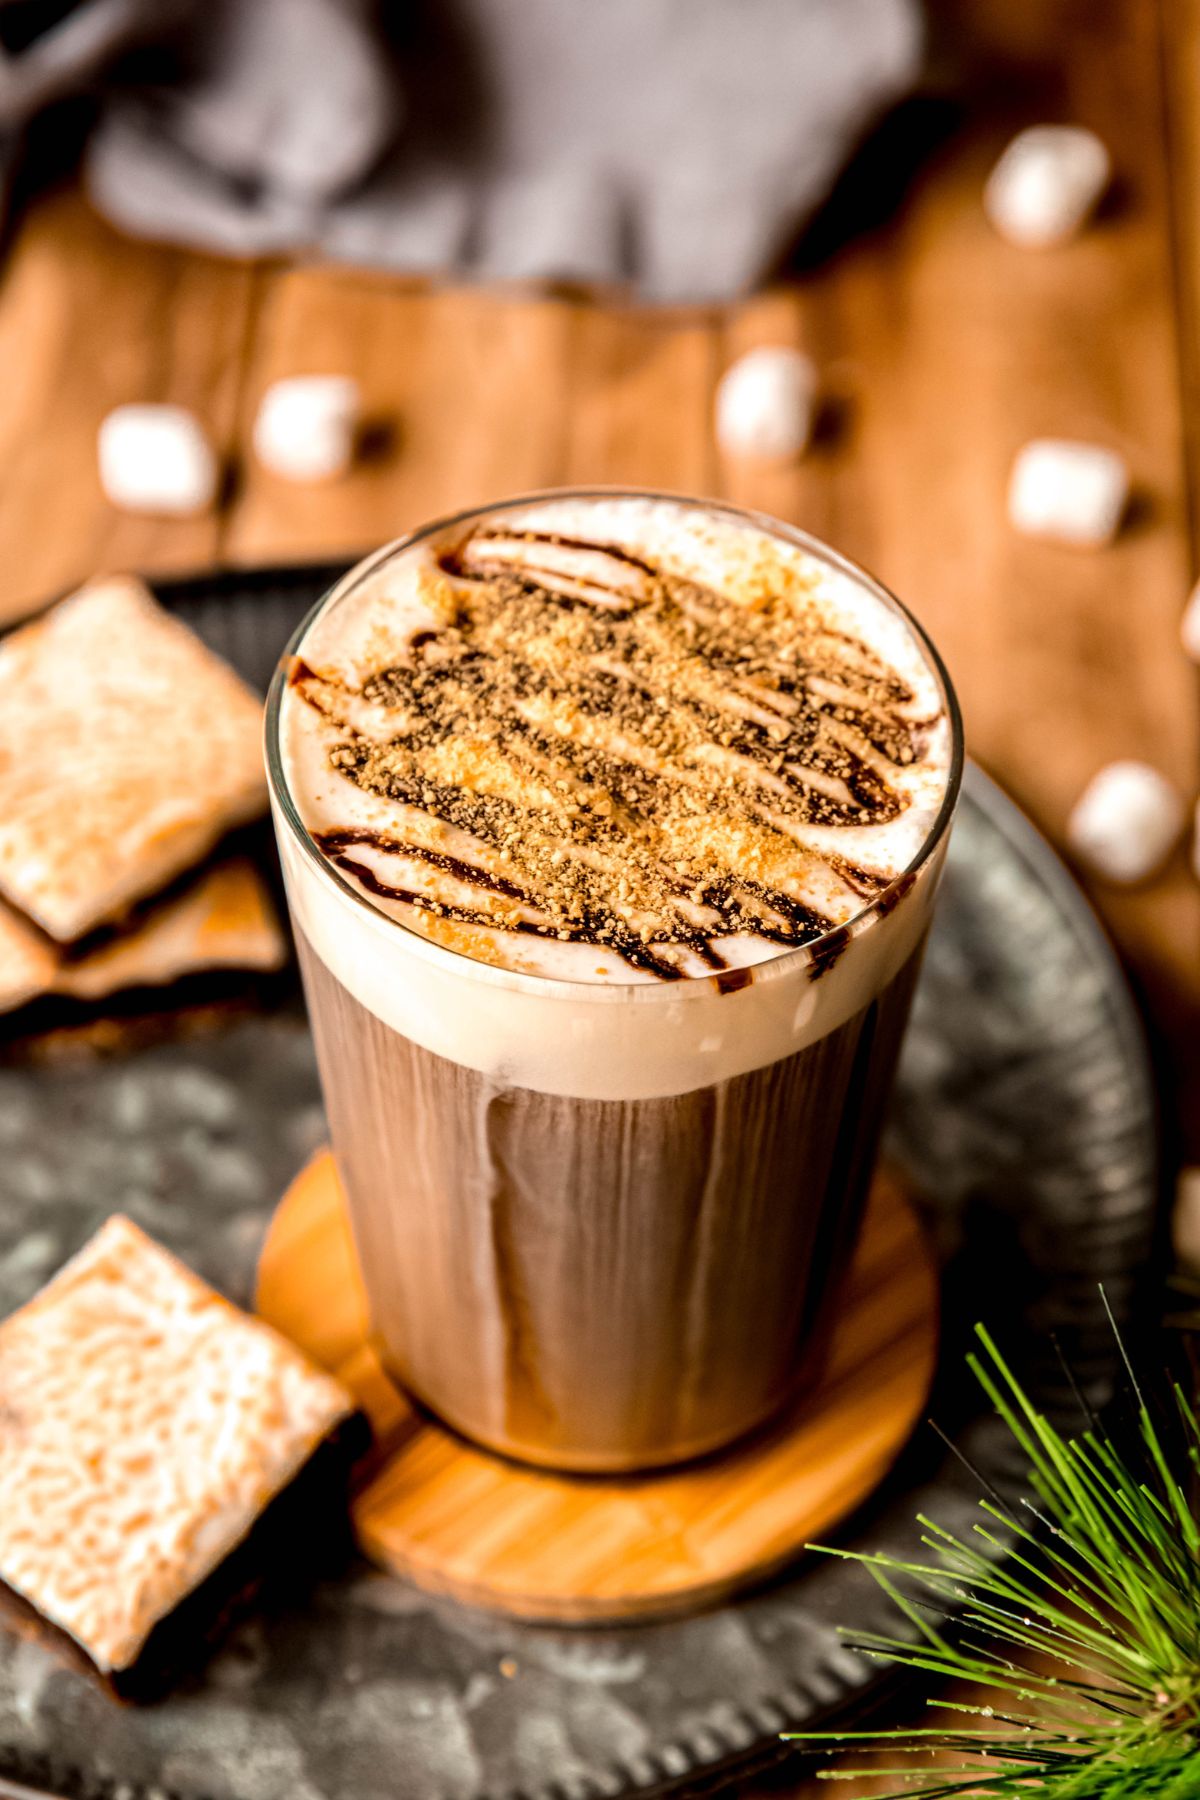
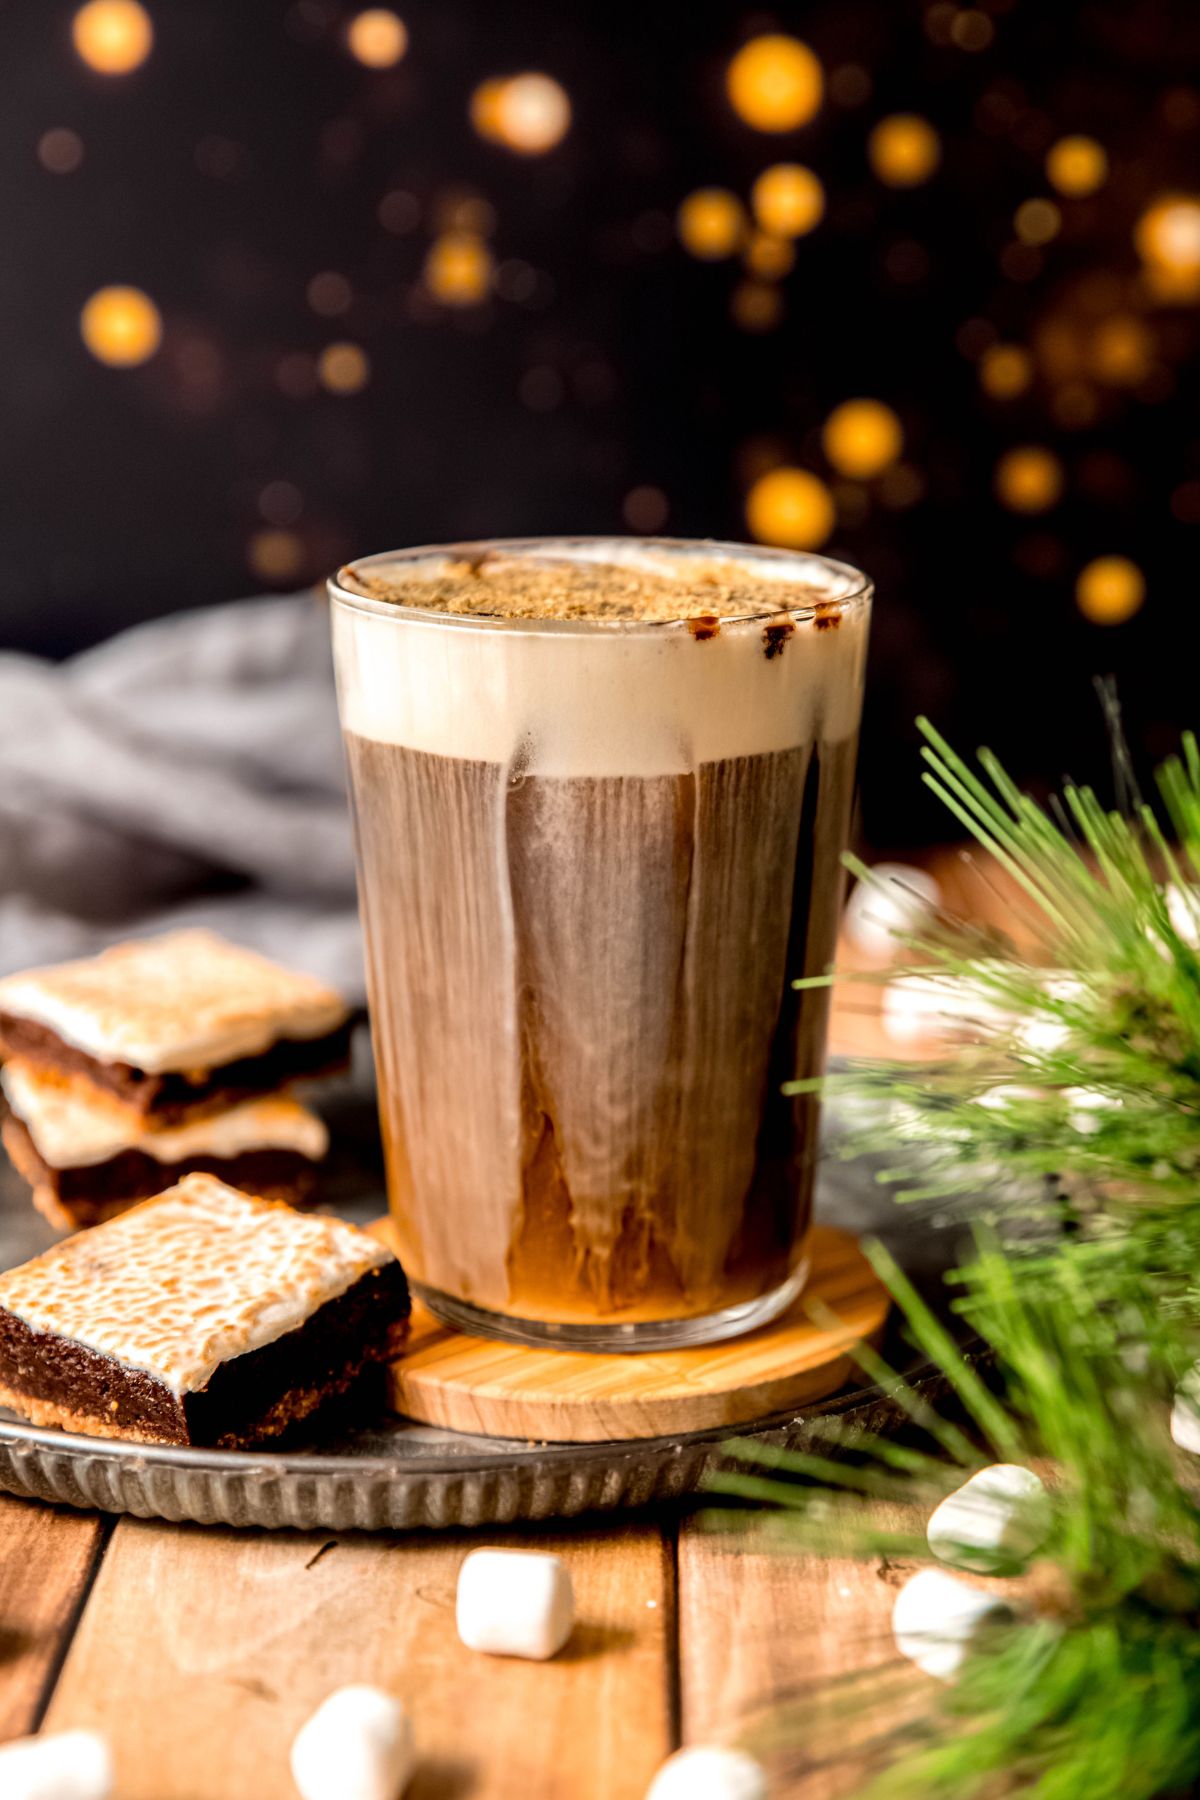
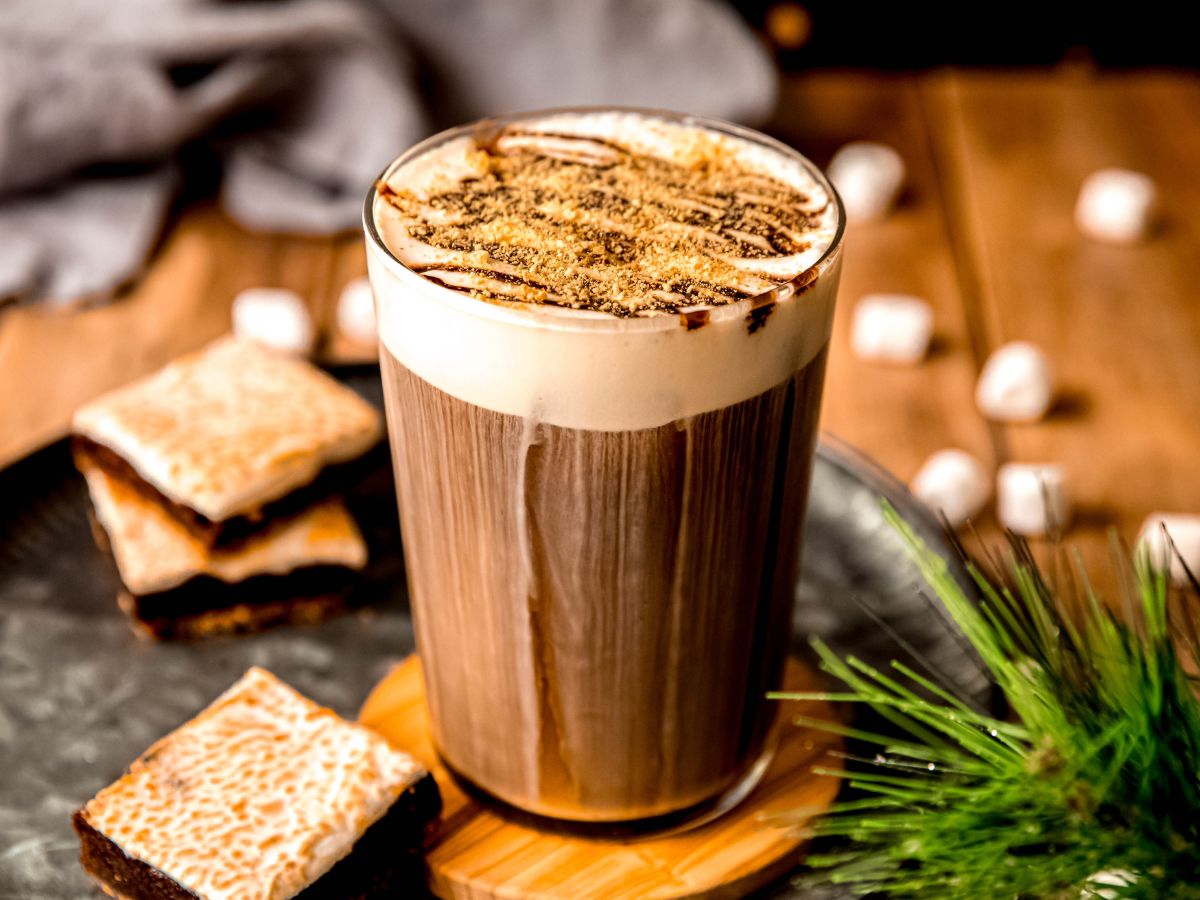
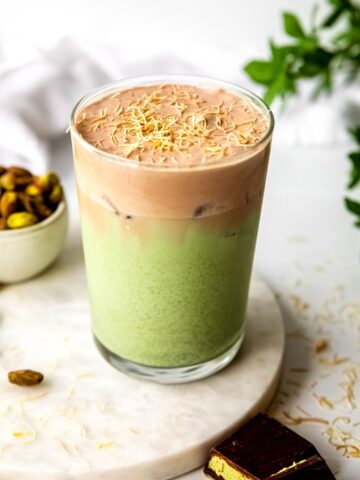
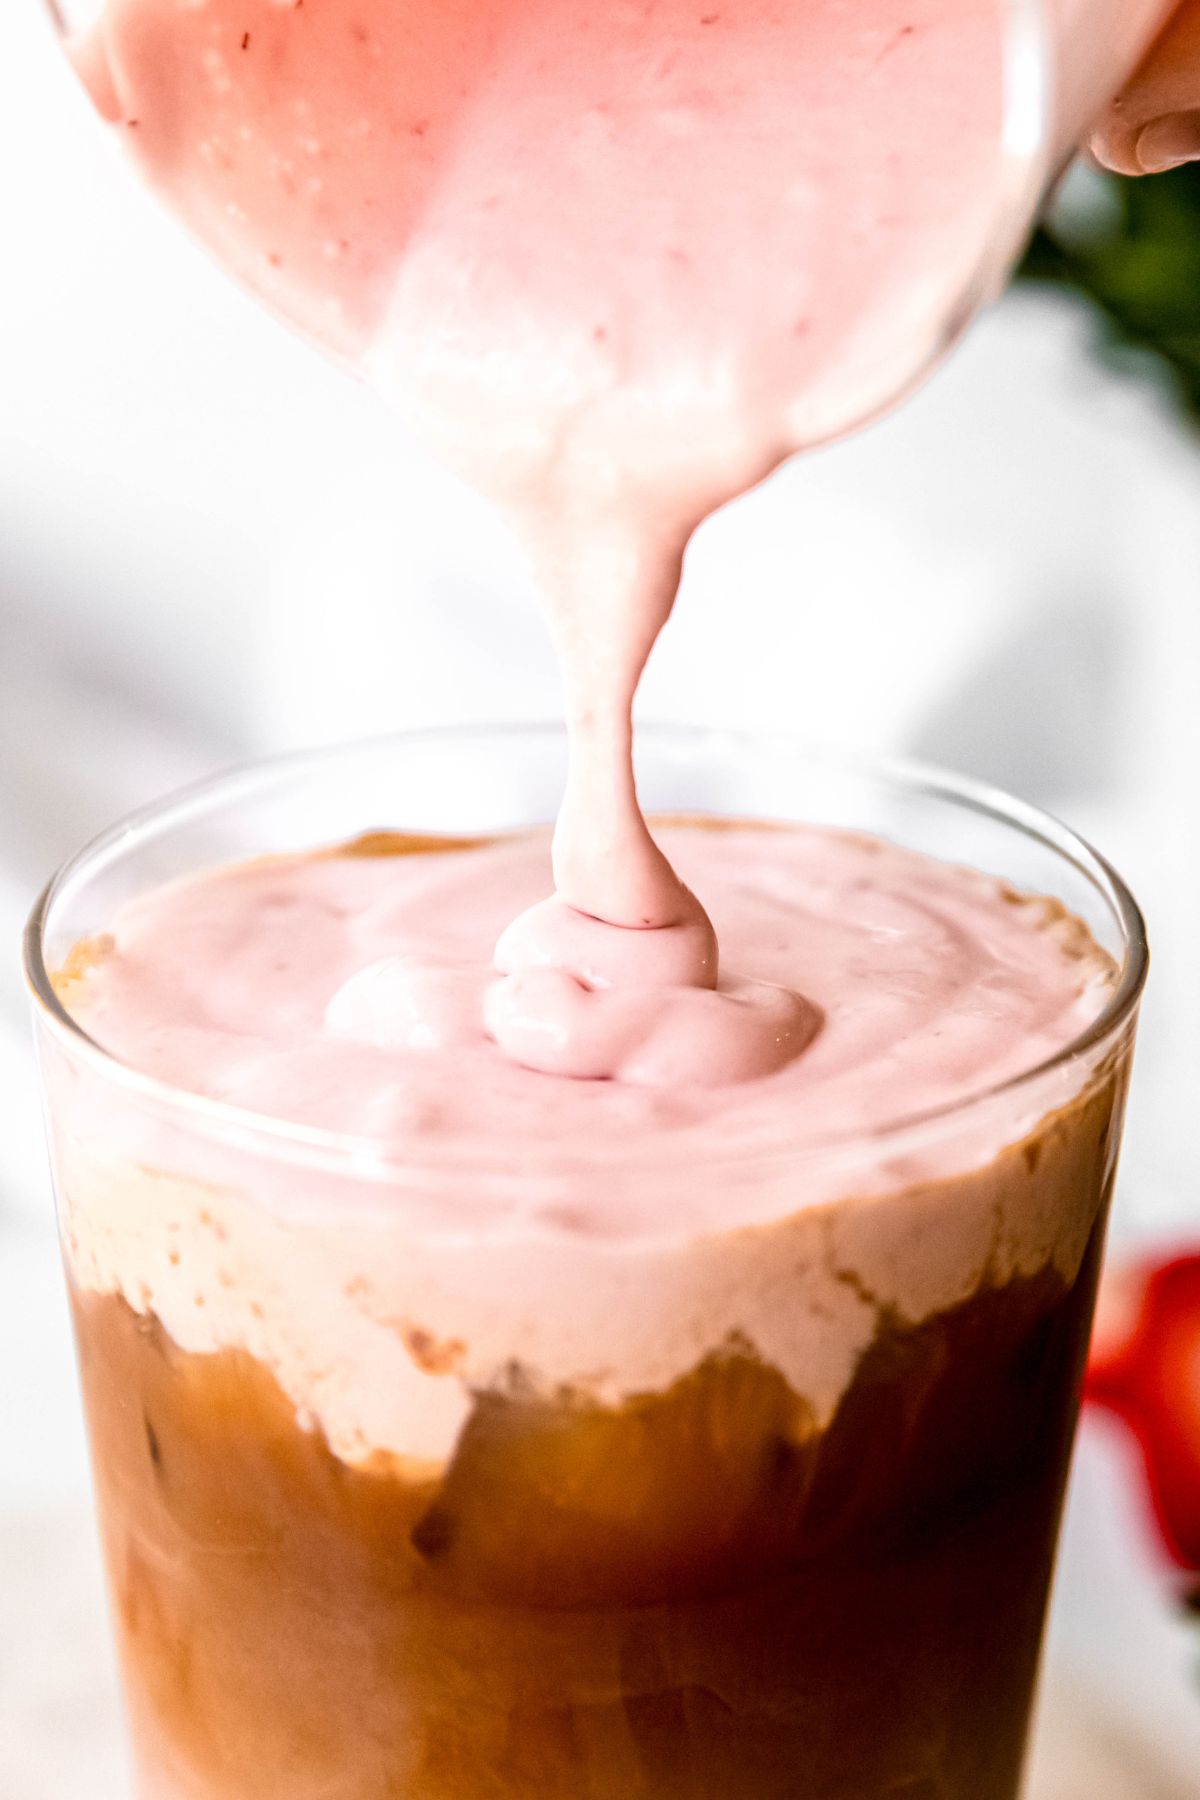
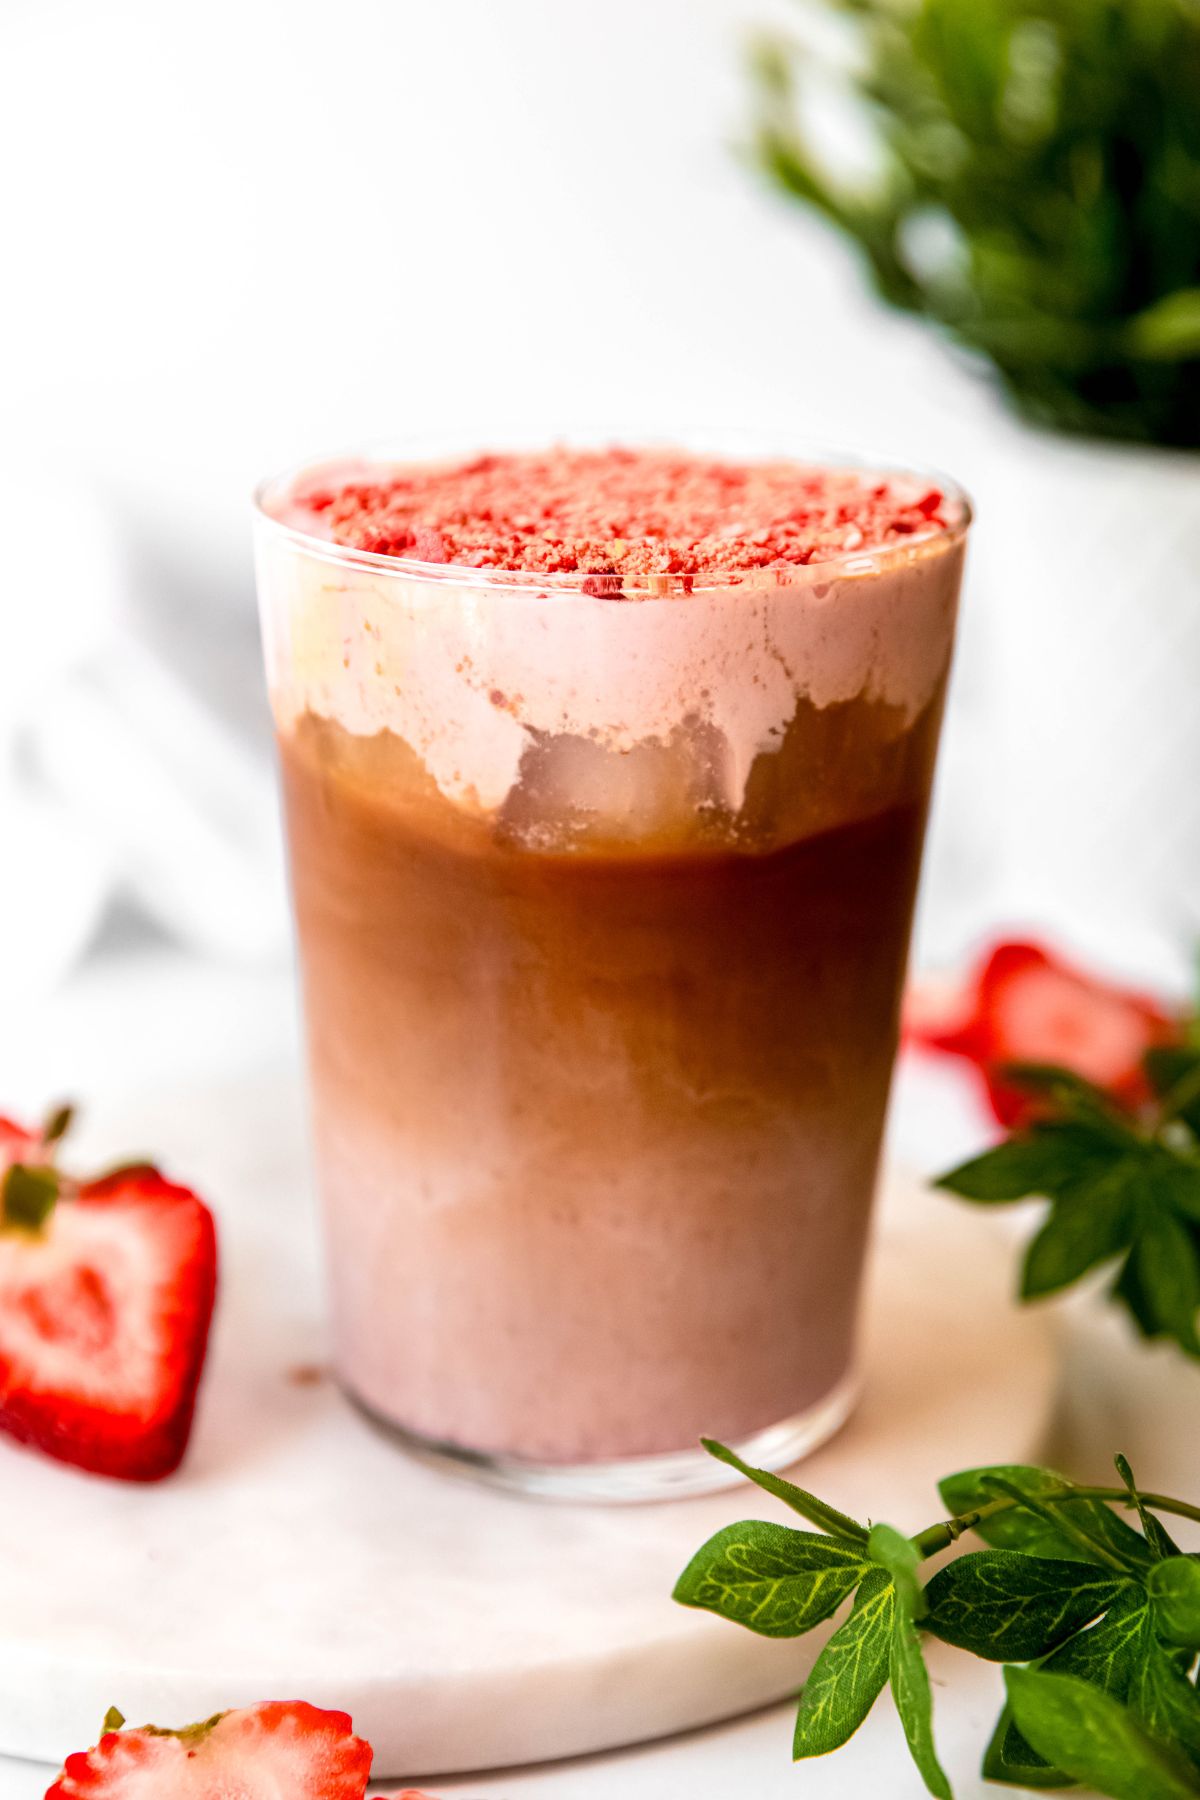
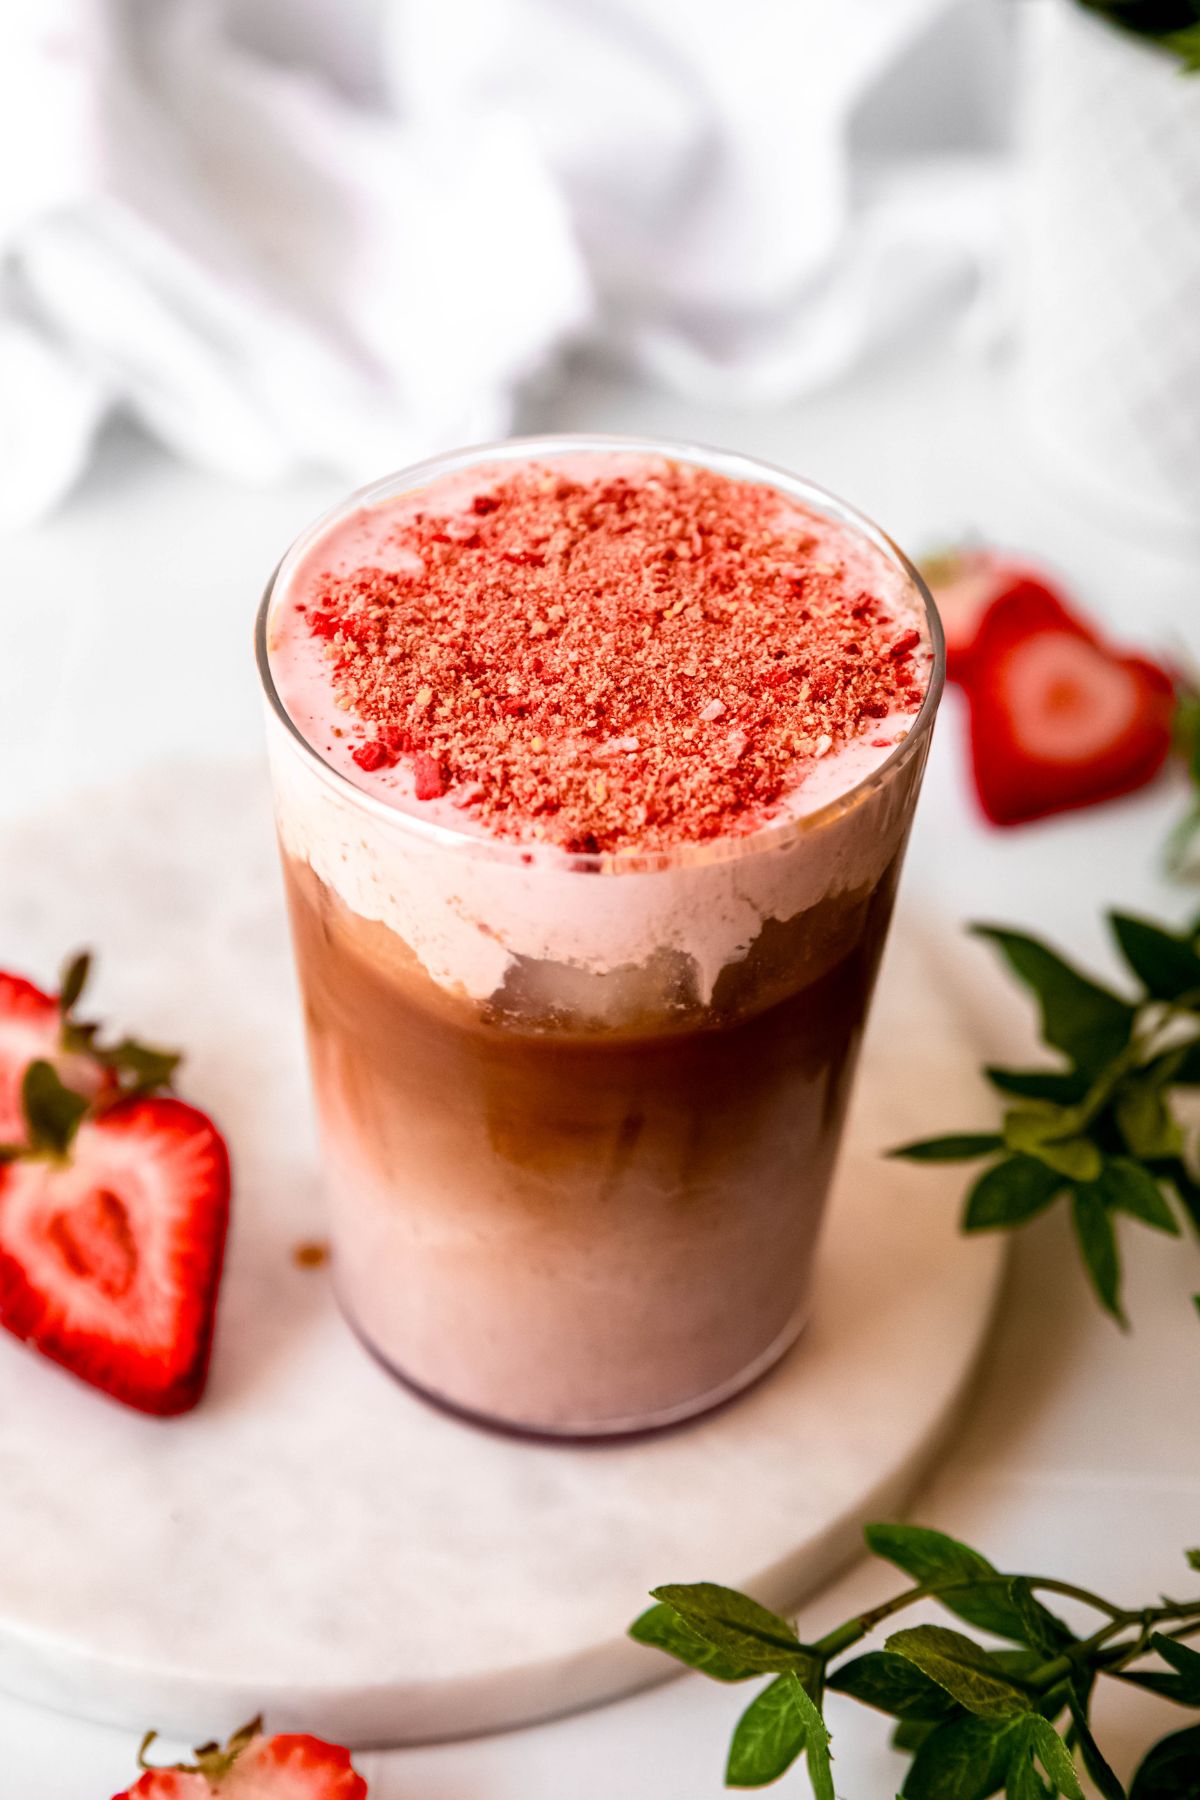
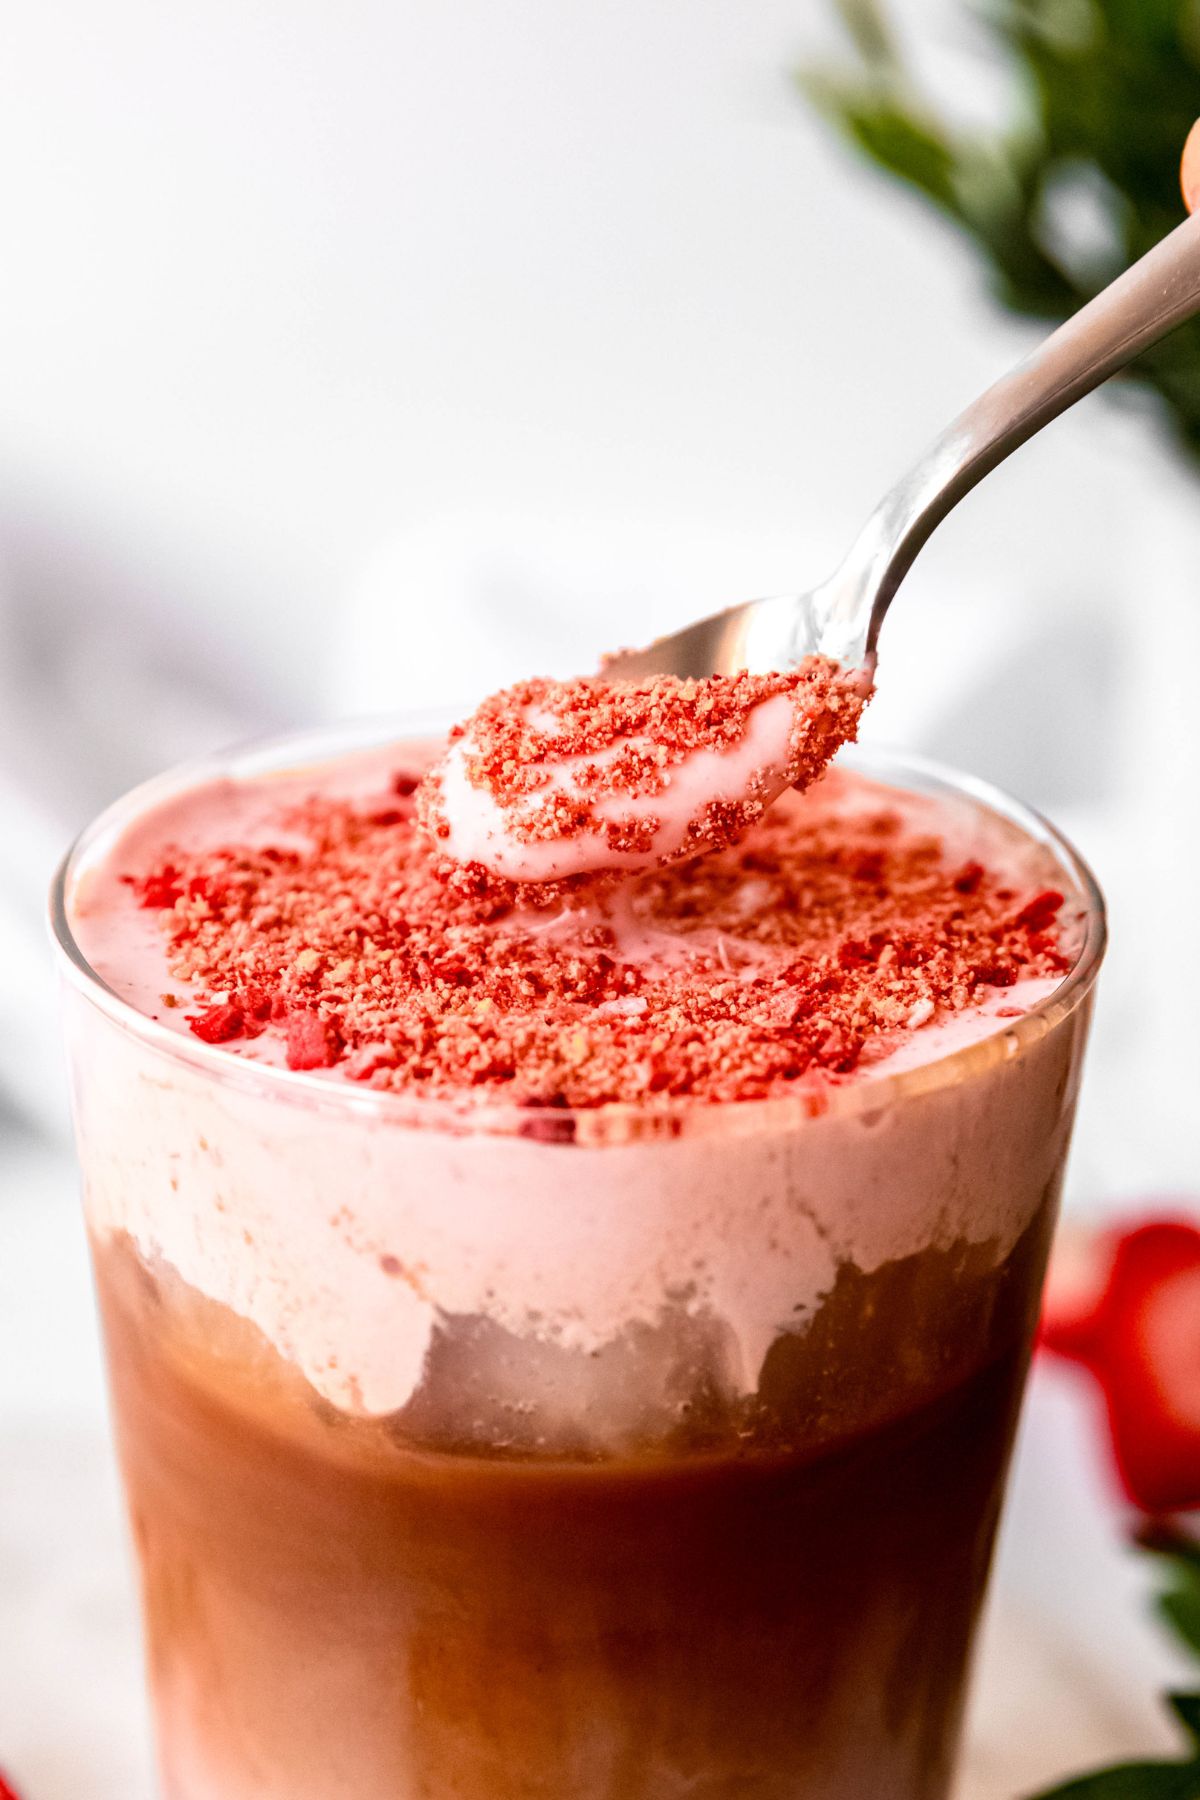
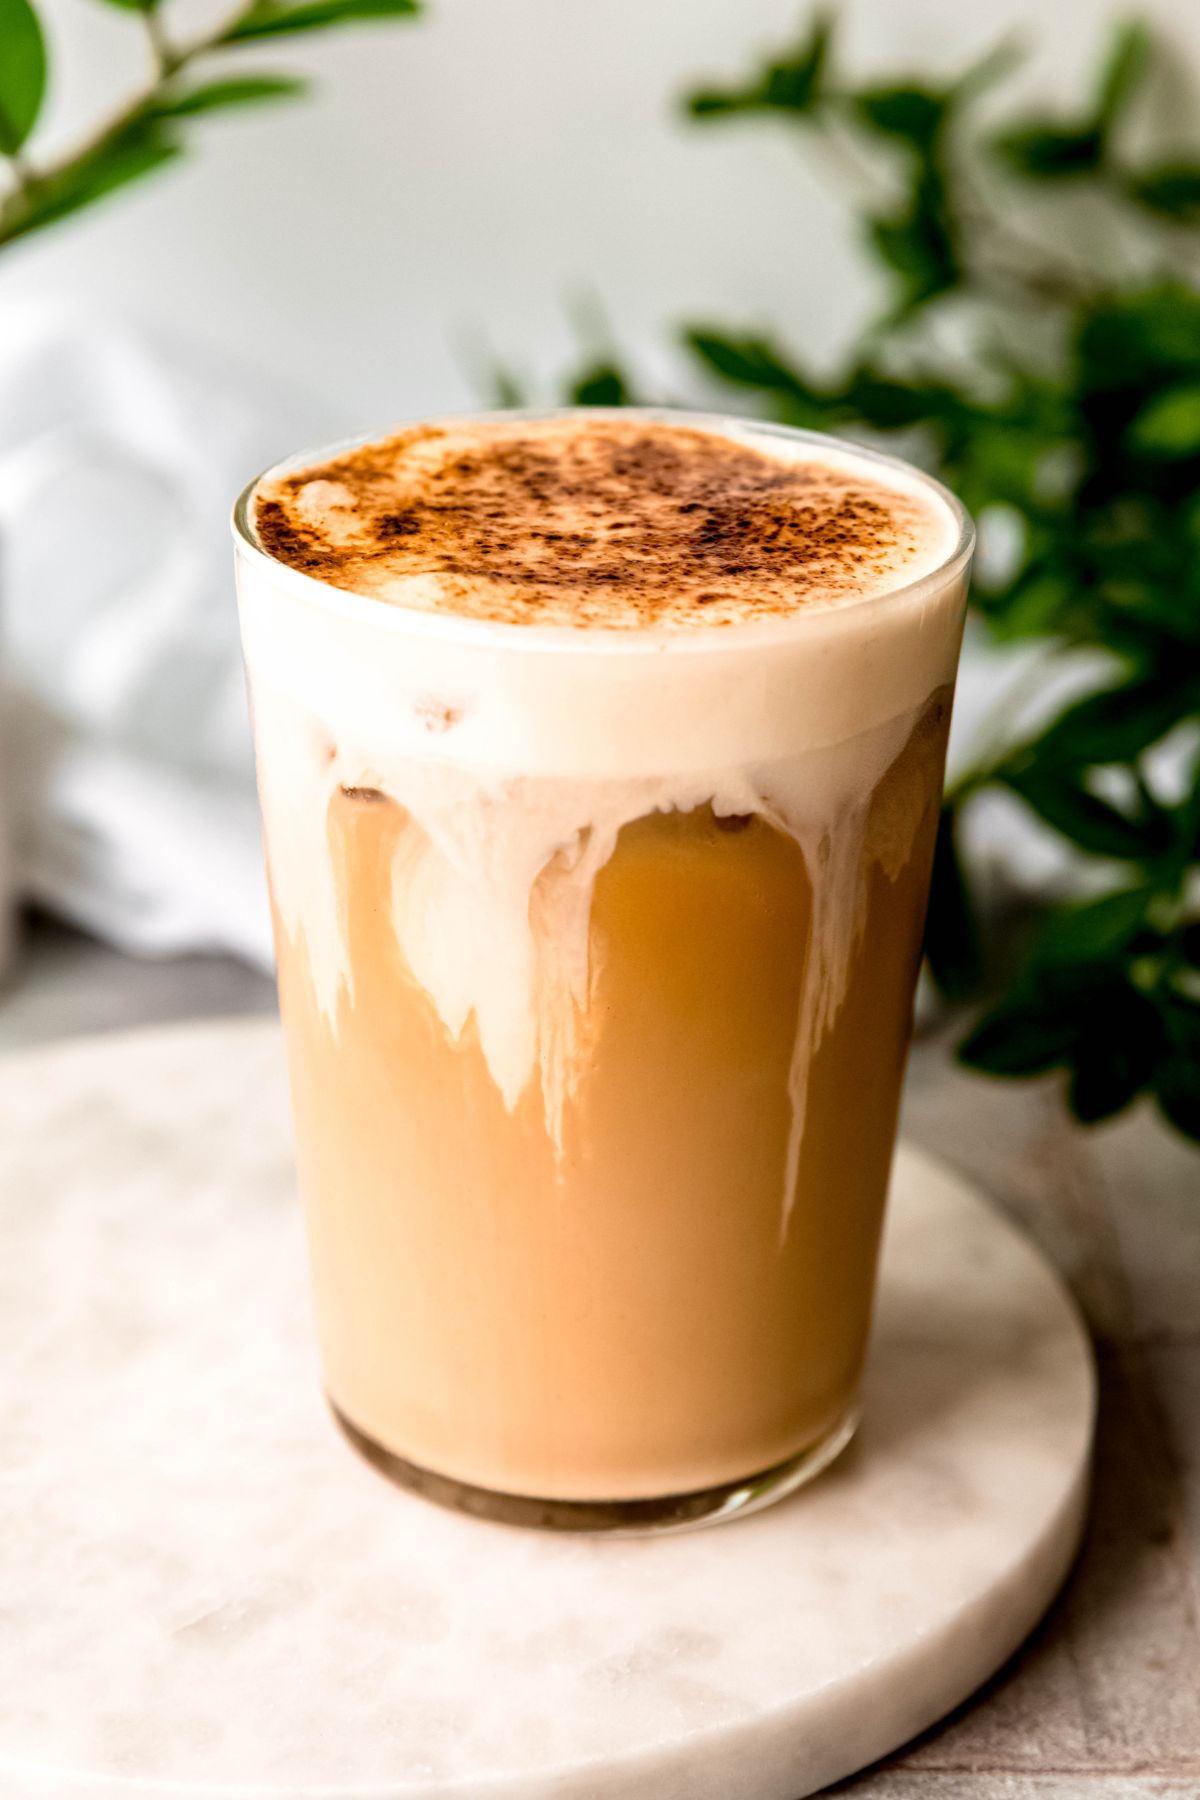
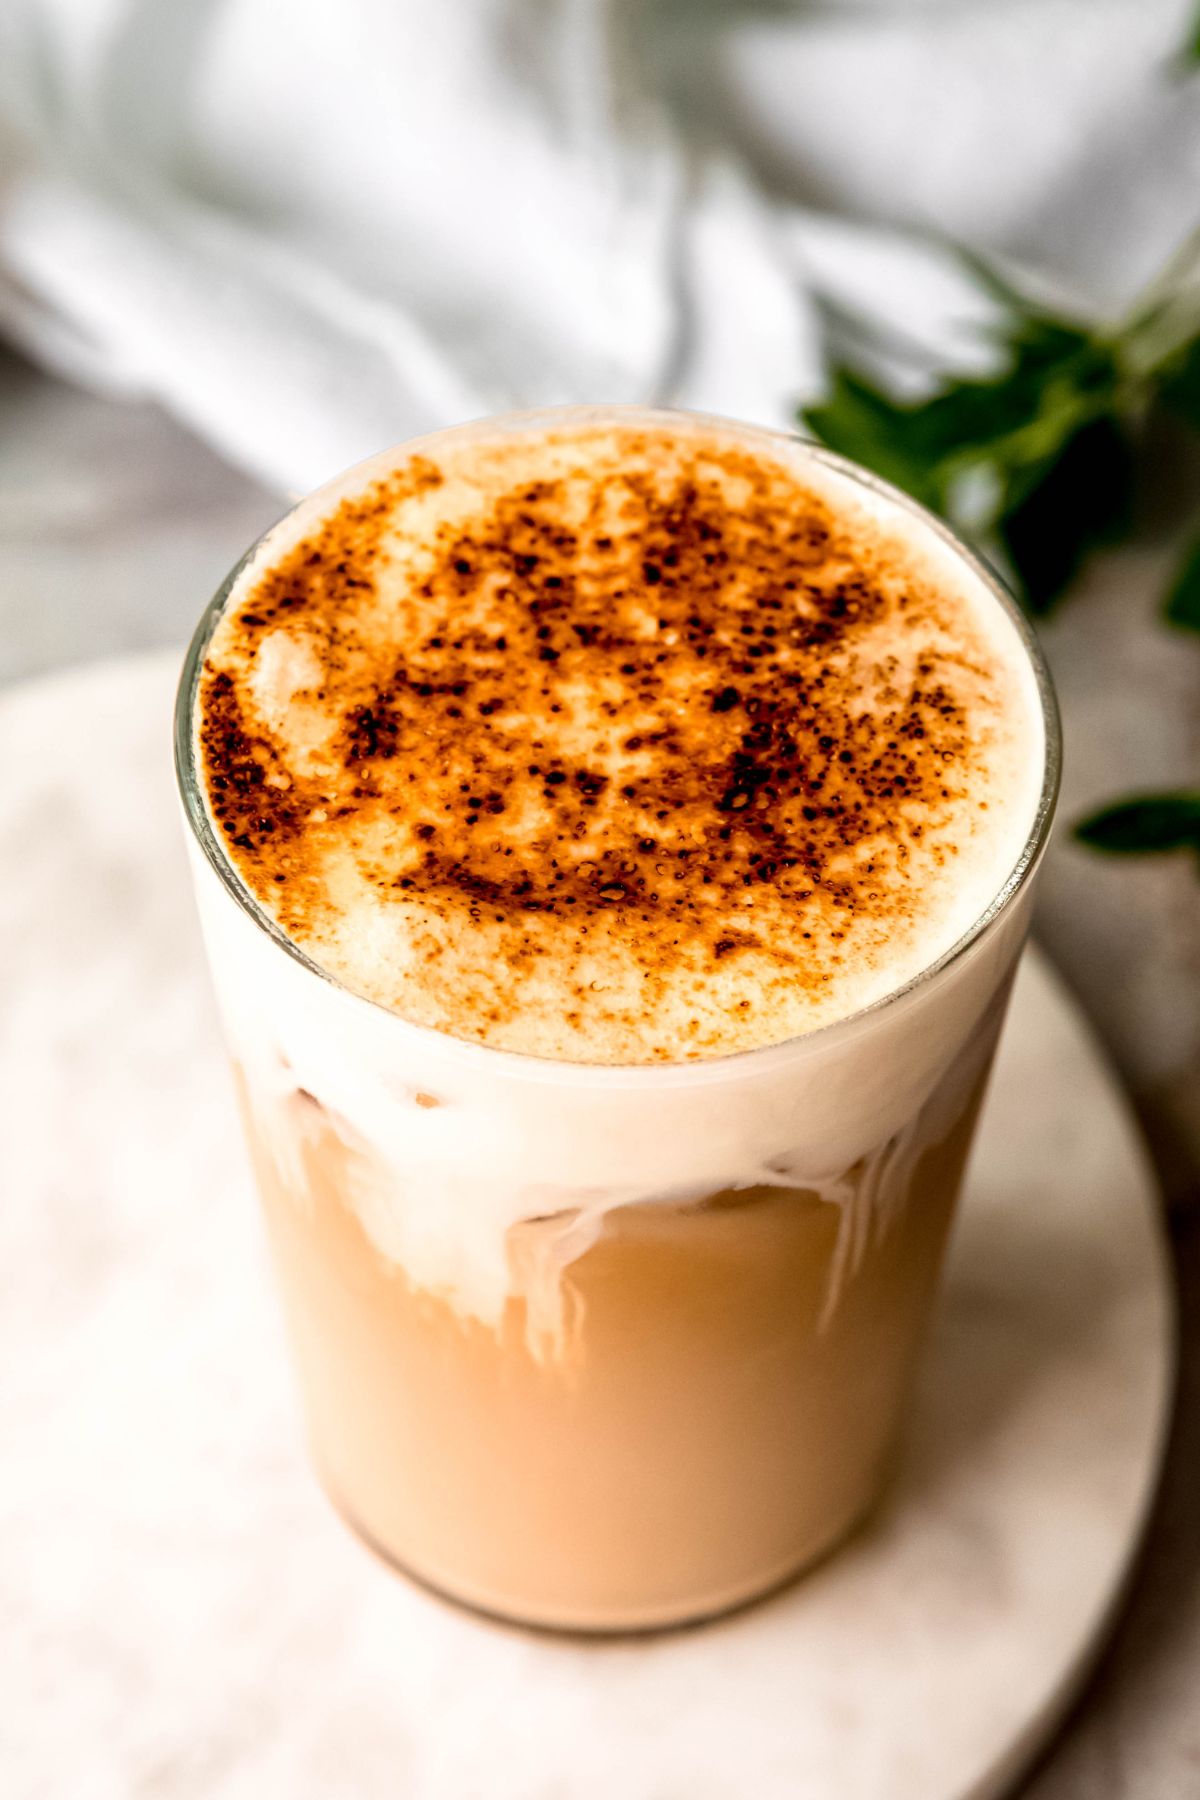
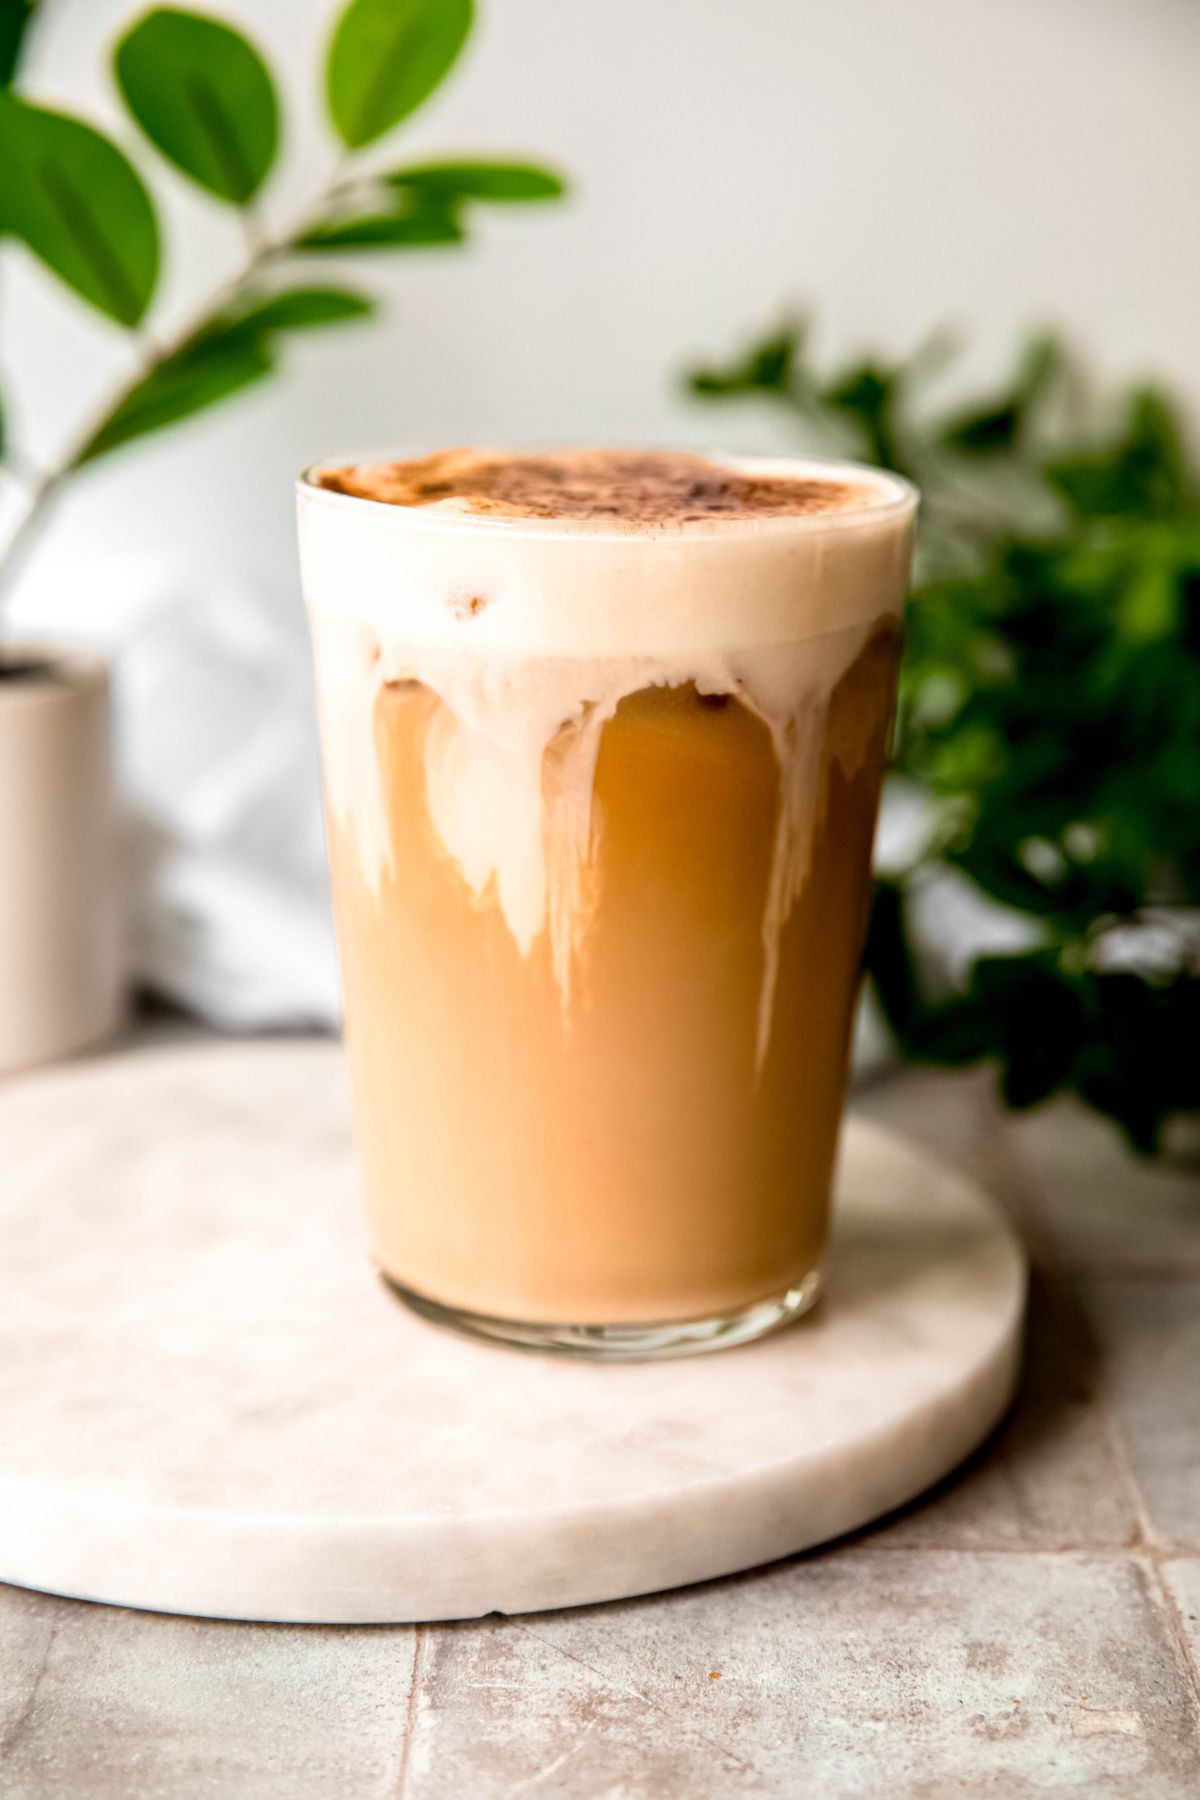
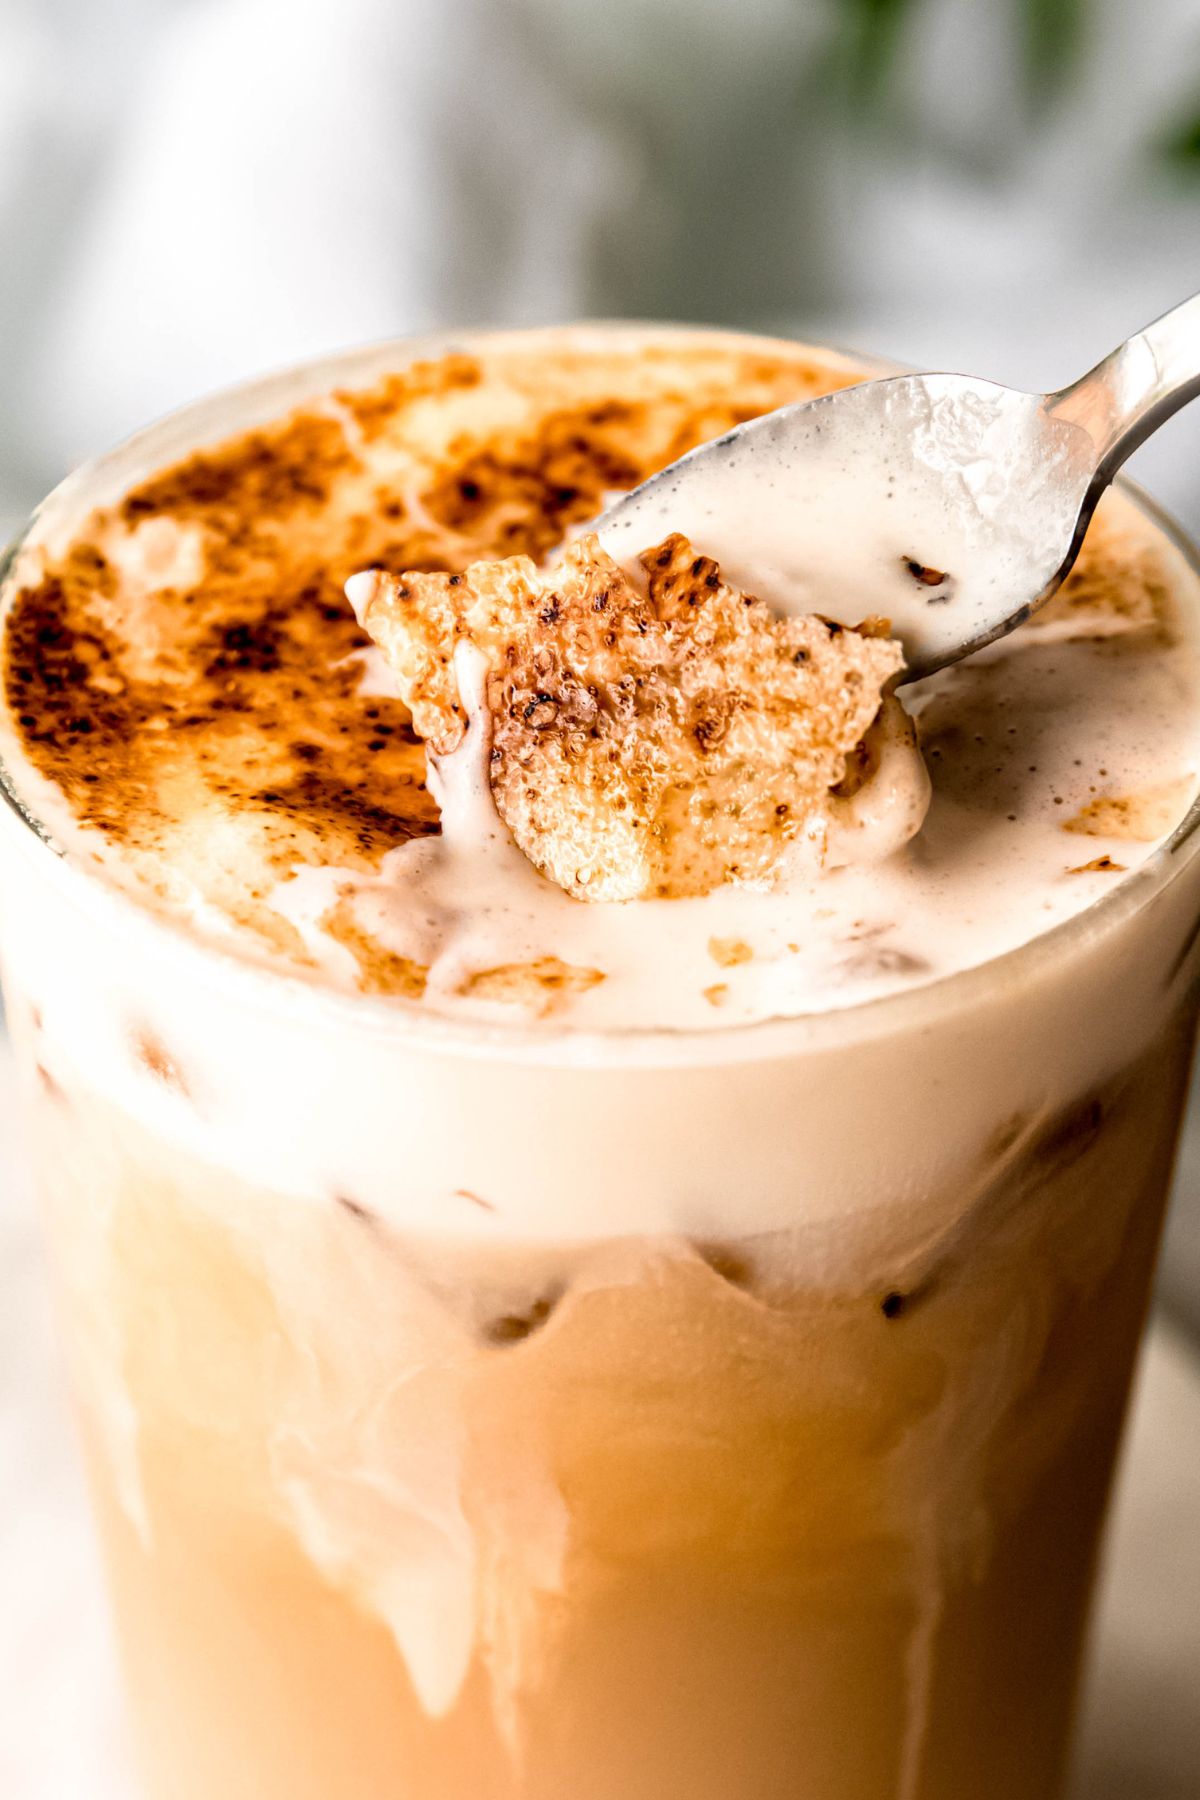
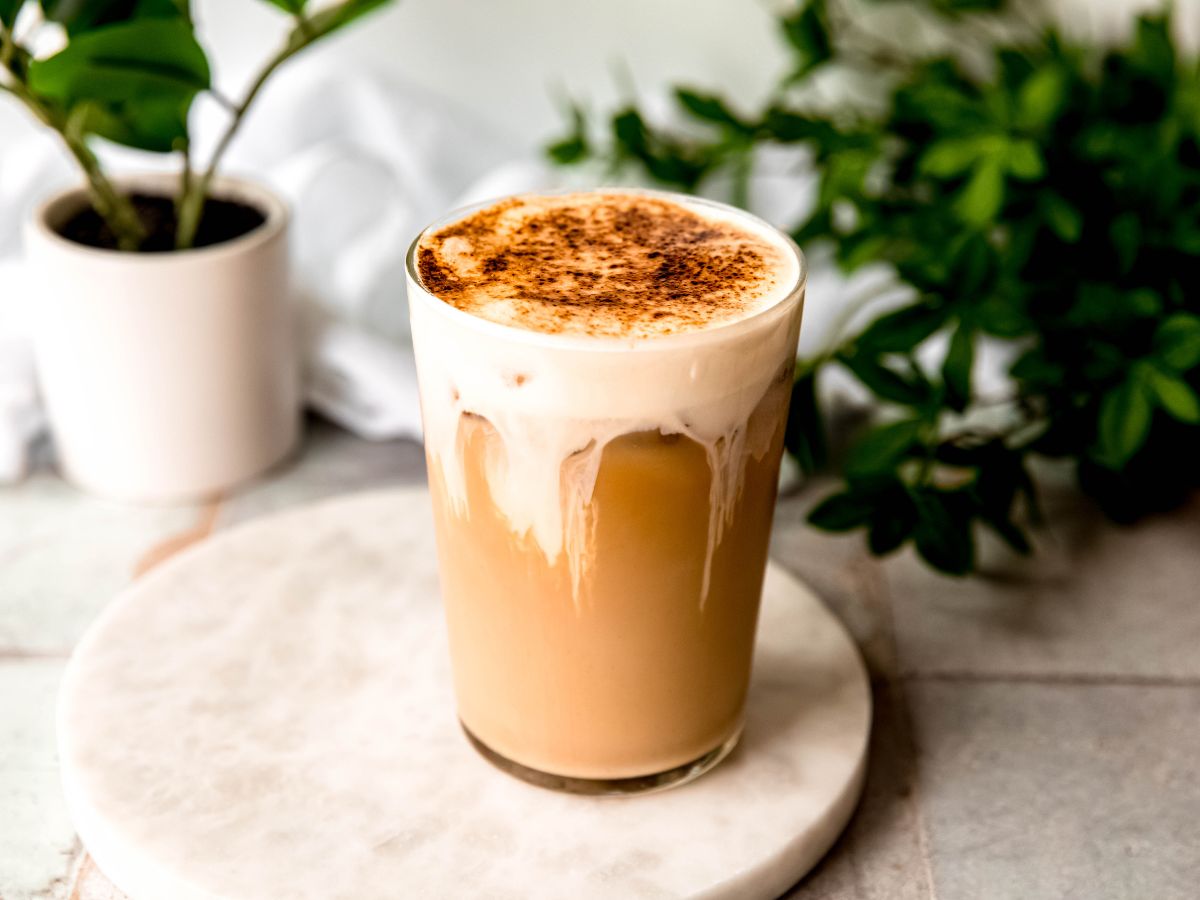
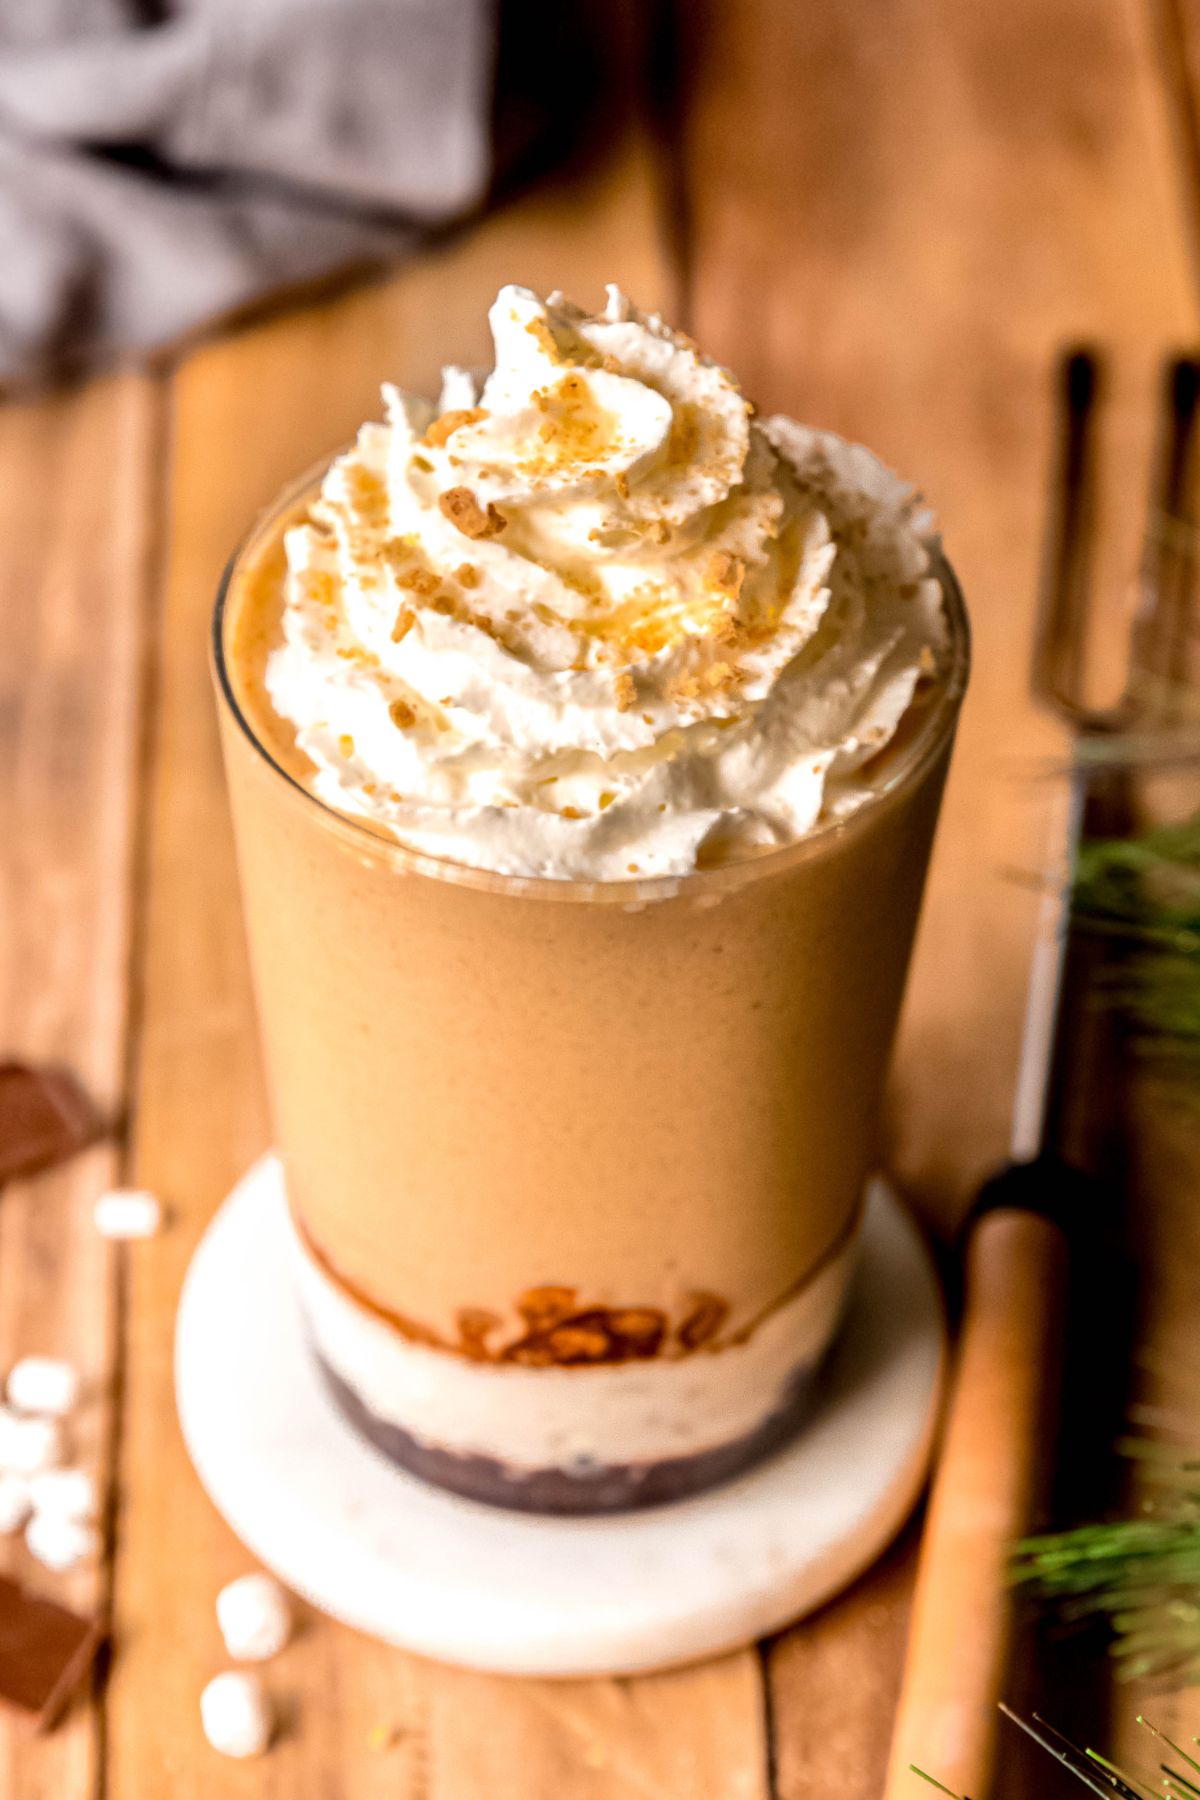
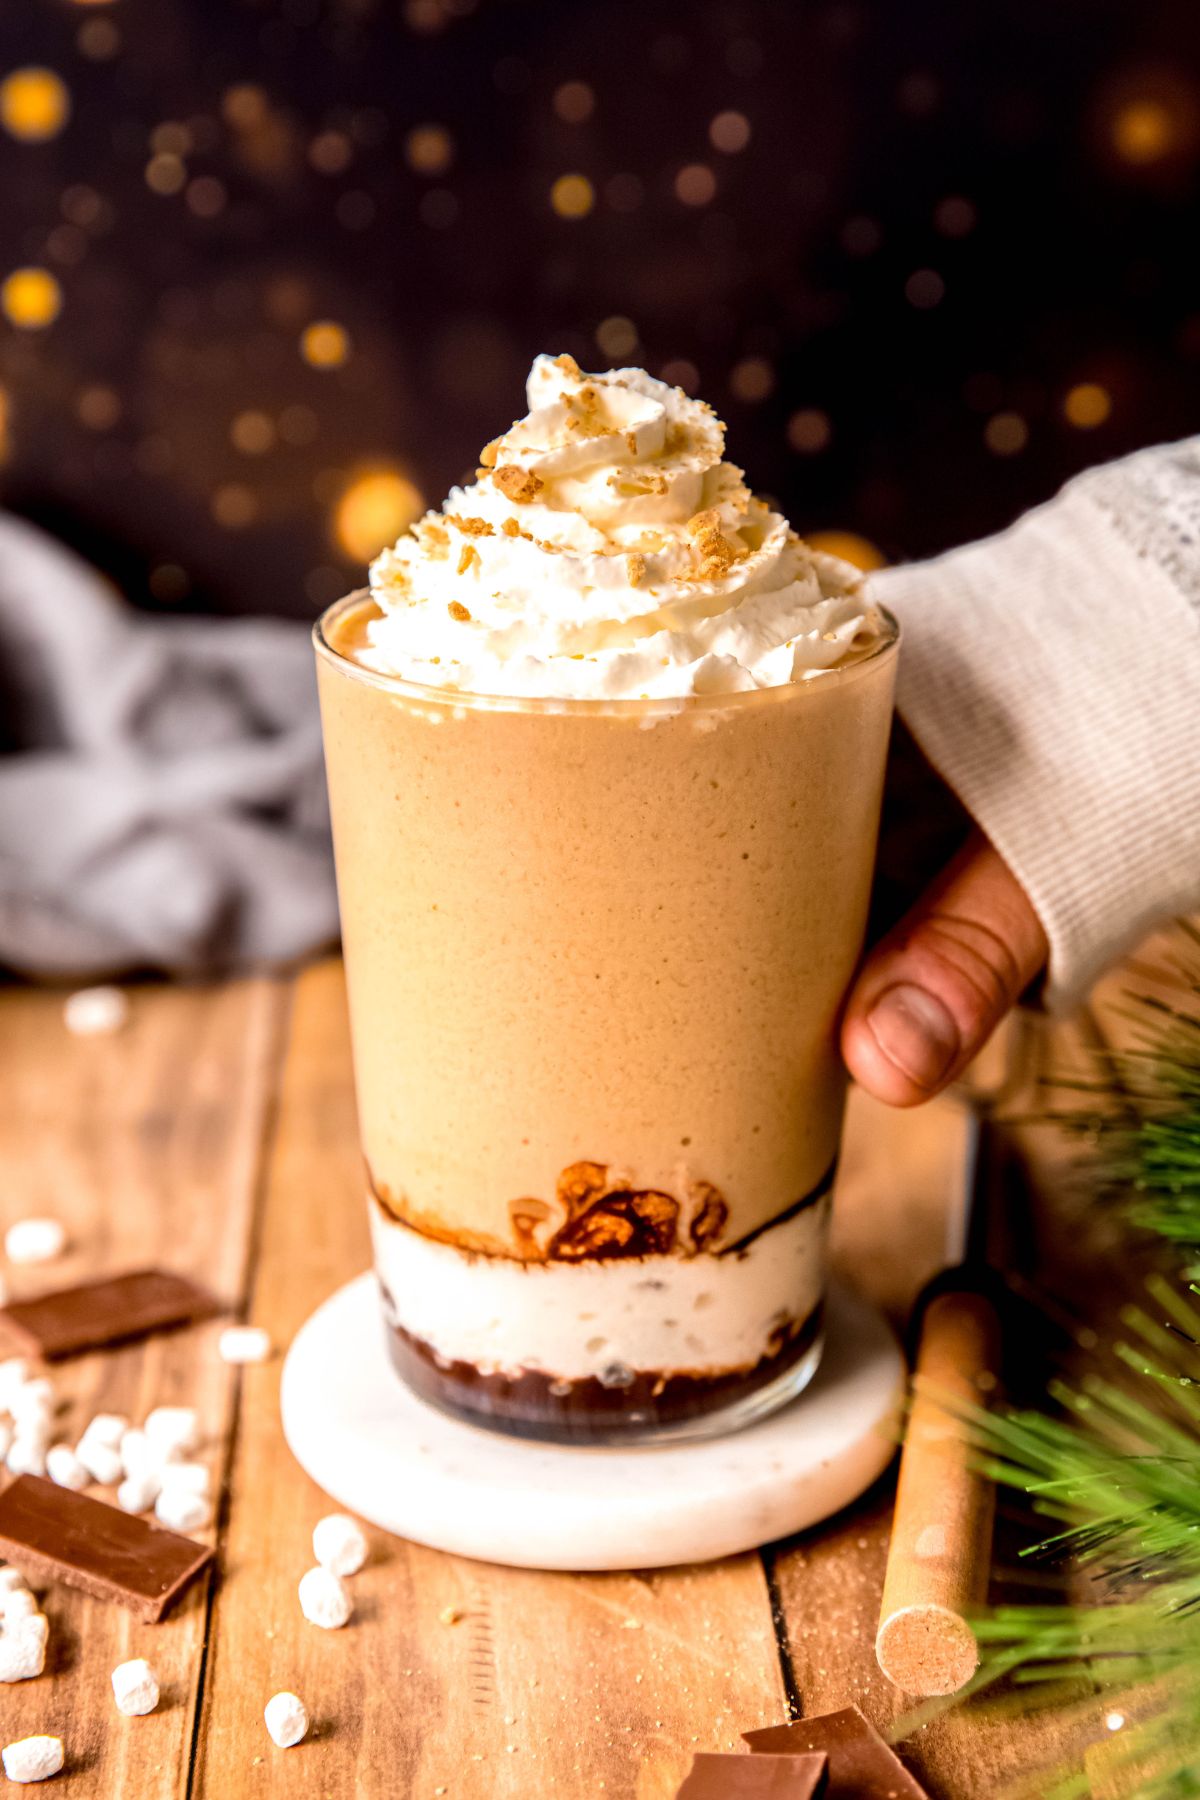
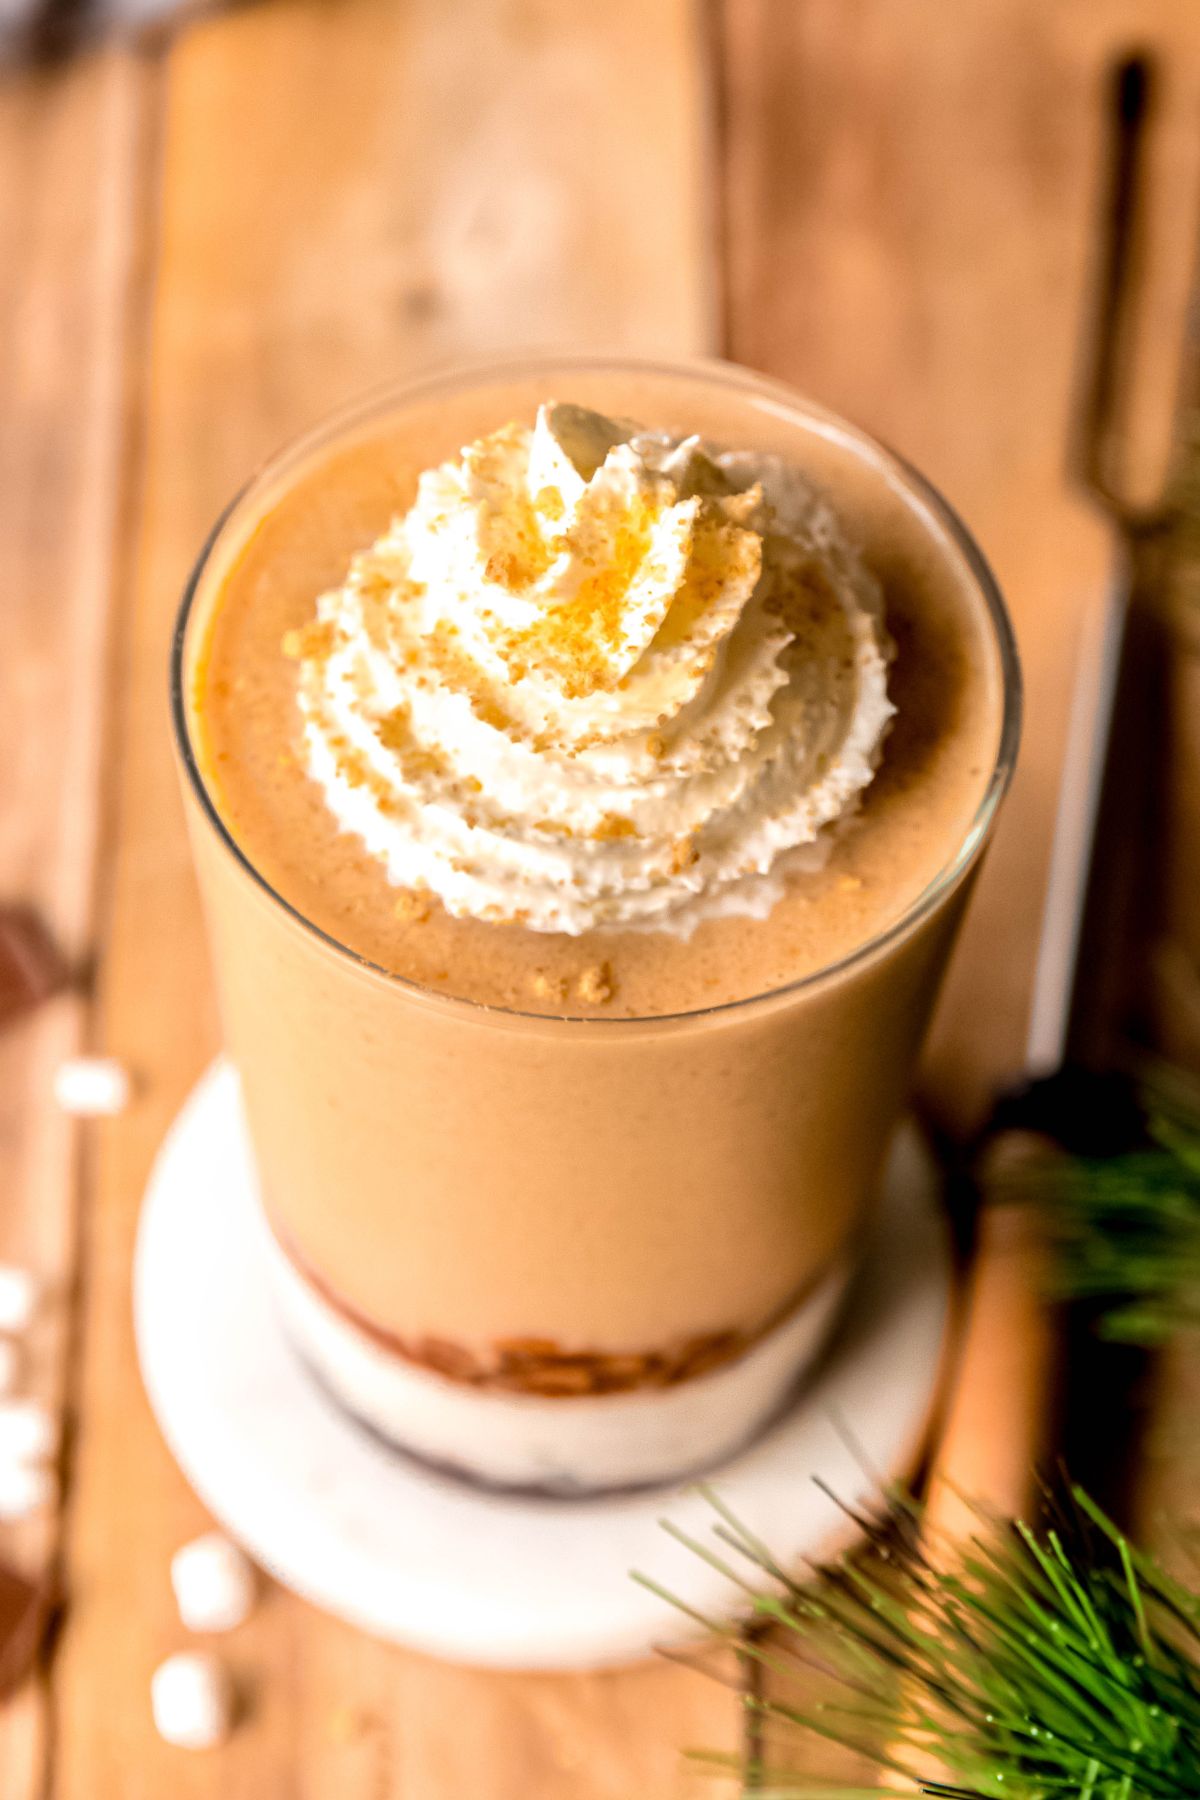
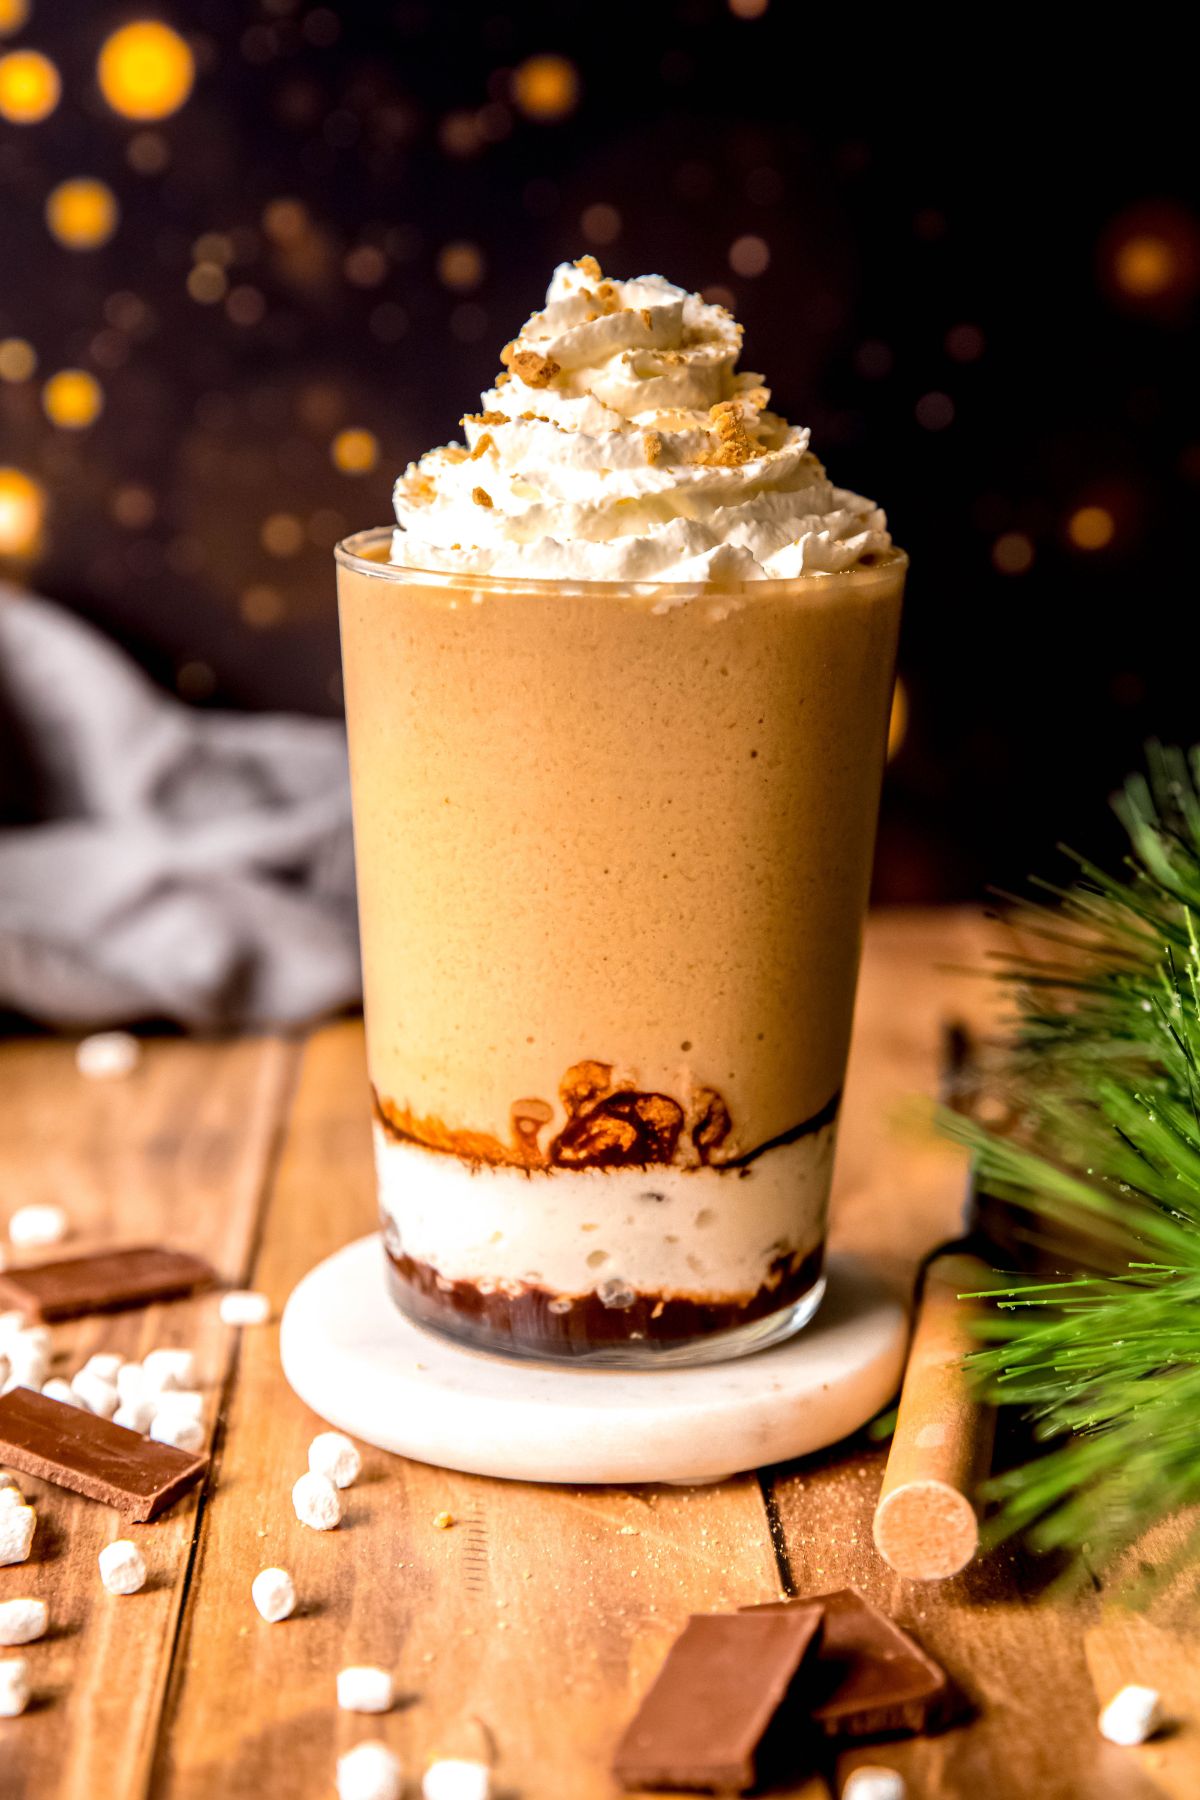
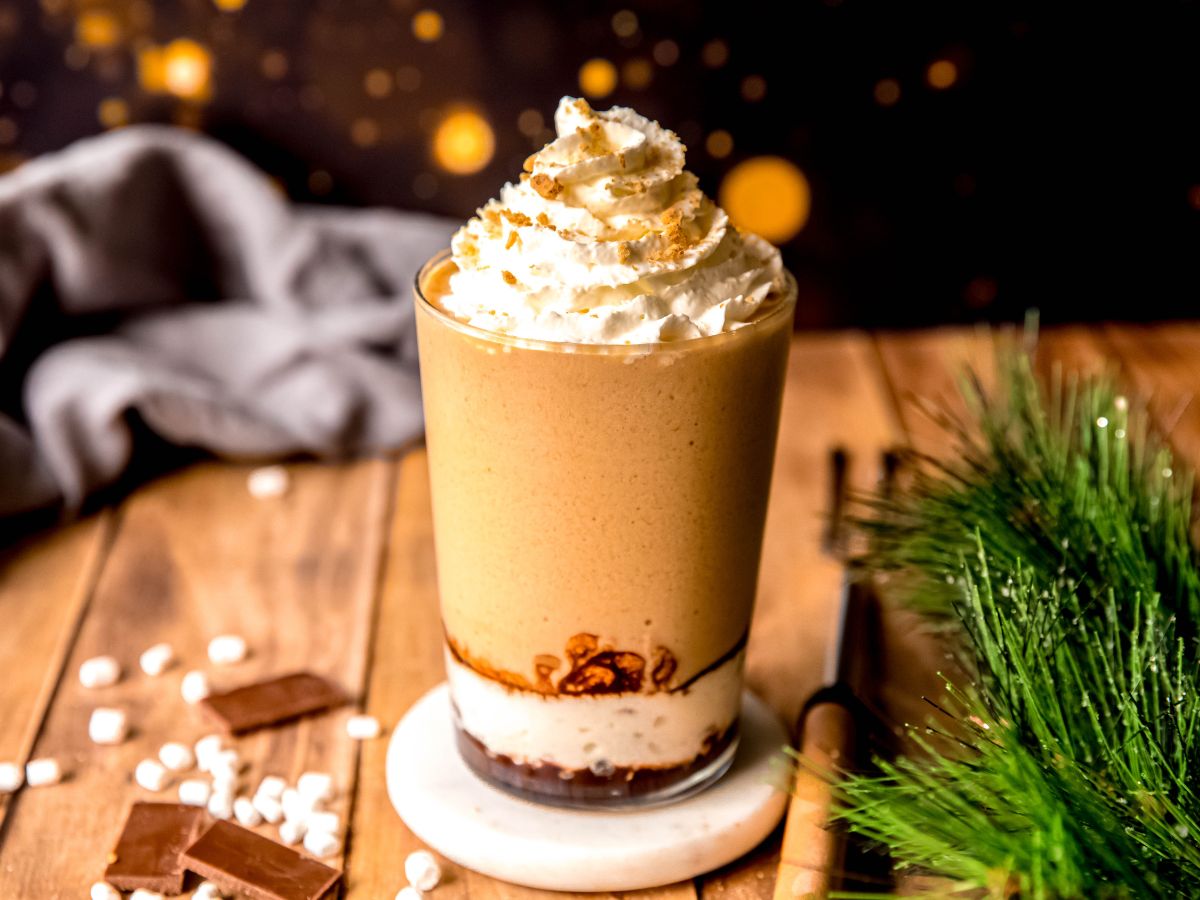
    This Iced S'mores Chai is the cozy, spiced twist on the new Starbucks S'mores lineup launching Summer 2026 — and it might just be our favorite version yet. We're talking warm chai spices, a dreamy marshmallow cold foam, a rich chocolate drizzle, and a sprinkle of crushed graham crackers on top.

    It's basically your favorite campfire treat meets a classic chai latte, and the combination is honestly unreal — this s'mores chai latte tastes like dessert and your coffee order in one. The chai brings warmth and spice, and the marshmallow brings sweetness and nostalgia, while the mocha and graham crackers tie it all together.

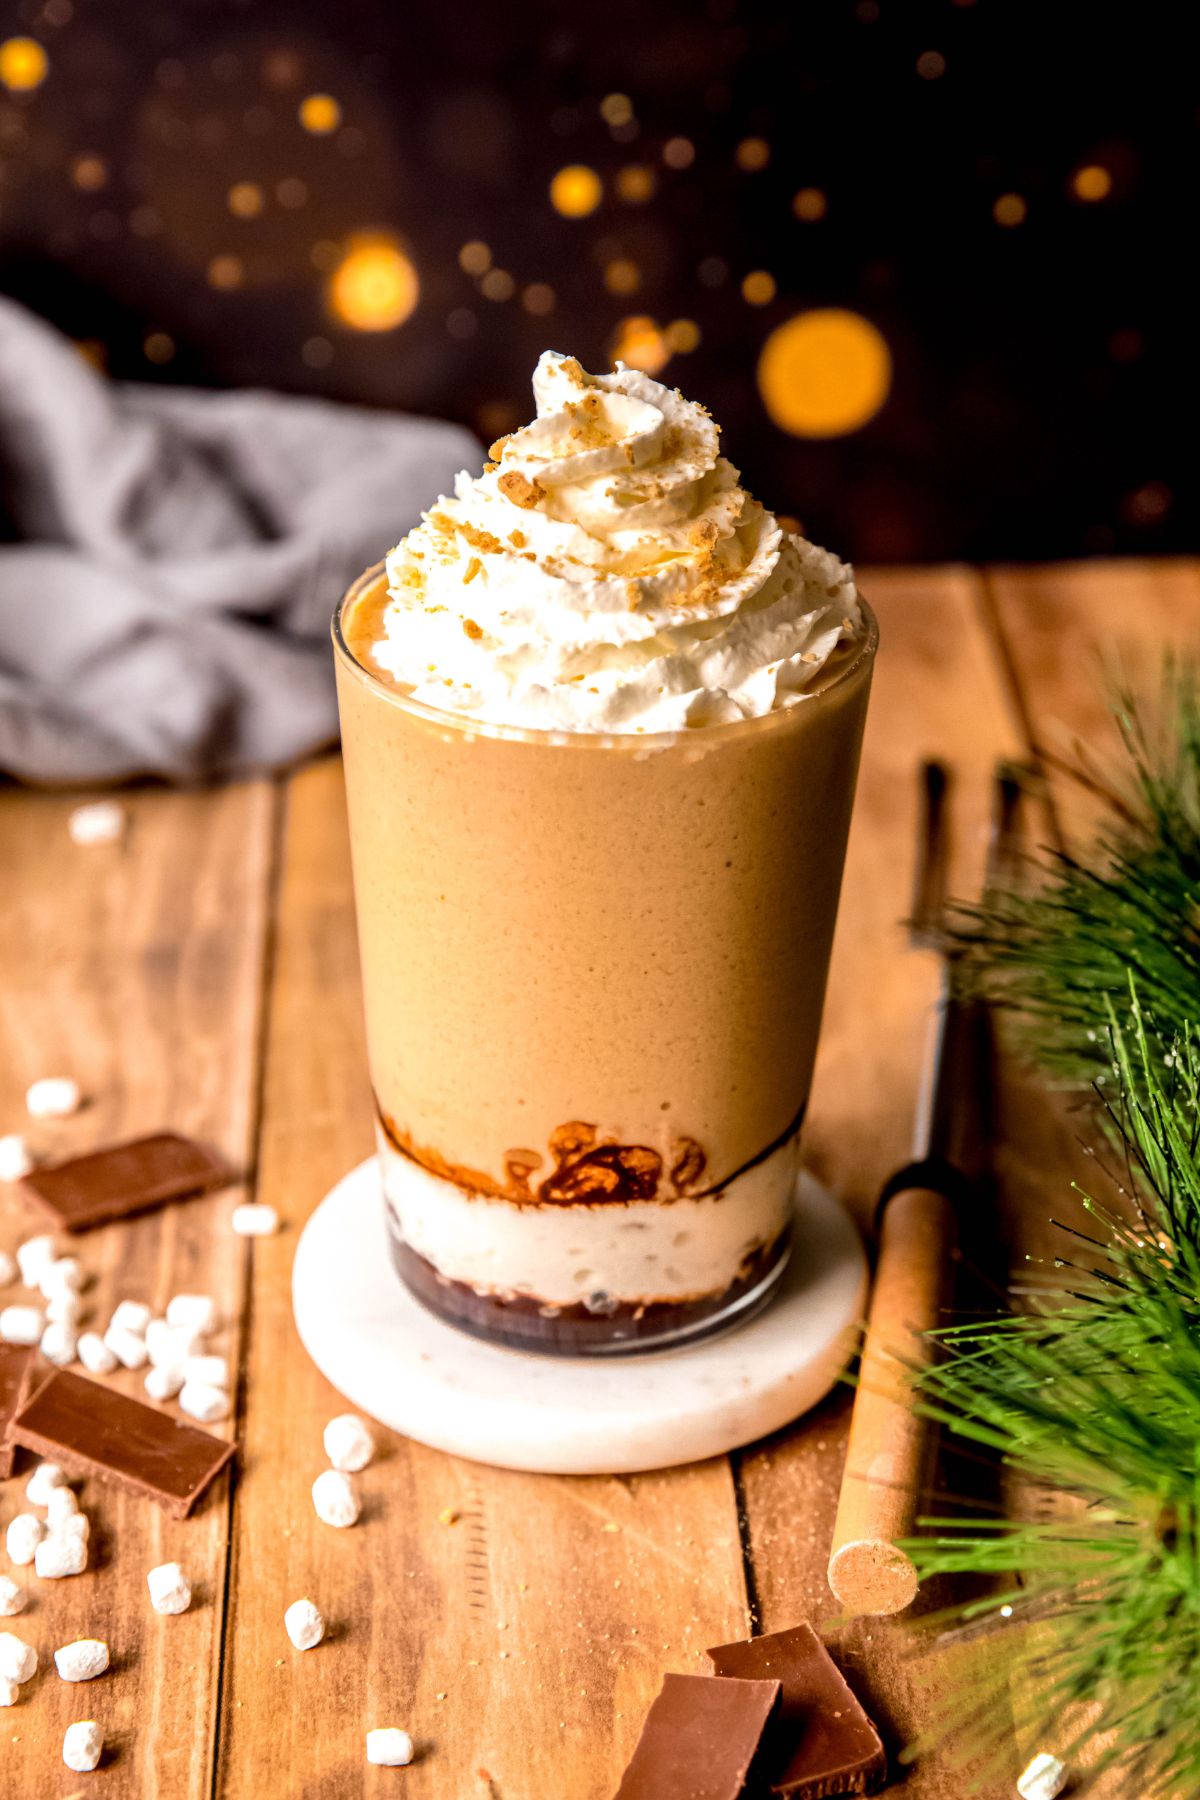
    Plus, this homemade version comes together in just 5 minutes using our Homemade Chai Tea Concentrate and Toasted Marshmallow Syrup — no waiting in line, no Starbucks prices required. And if you're loving the whole S'mores lineup, don't miss my S'mores Cold Brew and S'mores Frappuccino too — there's a version for every mood!

    Whether you're getting ready for the official launch or just craving something sweet, spiced, and a little nostalgic, this Iced S'mores Chai is about to become a new favorite. Let's make it!

    [feast_advanced_jump_to]

    What Does the Iced S'mores Chai Taste Like?

    This drink tastes like a campfire treat wrapped in warm chai spices — think cinnamon, cardamom, and ginger meeting sweet, toasty marshmallow flavor. It's spiced, cozy, and surprisingly well-balanced.

    The mocha drizzle adds a rich chocolatey layer, while the crushed graham crackers bring that classic s'mores graham cracker taste. It's a totally unique flavor combo that somehow makes complete sense the moment you taste it.

    Why You'll Love This Starbucks S'mores Chai

    • Ready in 5 minutes — Faster than any drive-through line, and so much more satisfying to make yourself.
    • Cheaper than Starbucks — New Starbucks drinks come with a premium price tag. This homemade version gives you the same flavor at a fraction of the cost!
    • That marshmallow cold foam — It's fluffy, sweet, and absolutely dreamy. Once you make it, you'll want to put it on everything.
    • Totally customizable — Adjust the sweetness, make it dairy-free, swap the syrups — this recipe is completely flexible.
    • A new Starbucks summer drink you don't have to wait for — No lines, no waiting for the official launch. This version is yours whenever the craving hits!

    Ingredients Needed

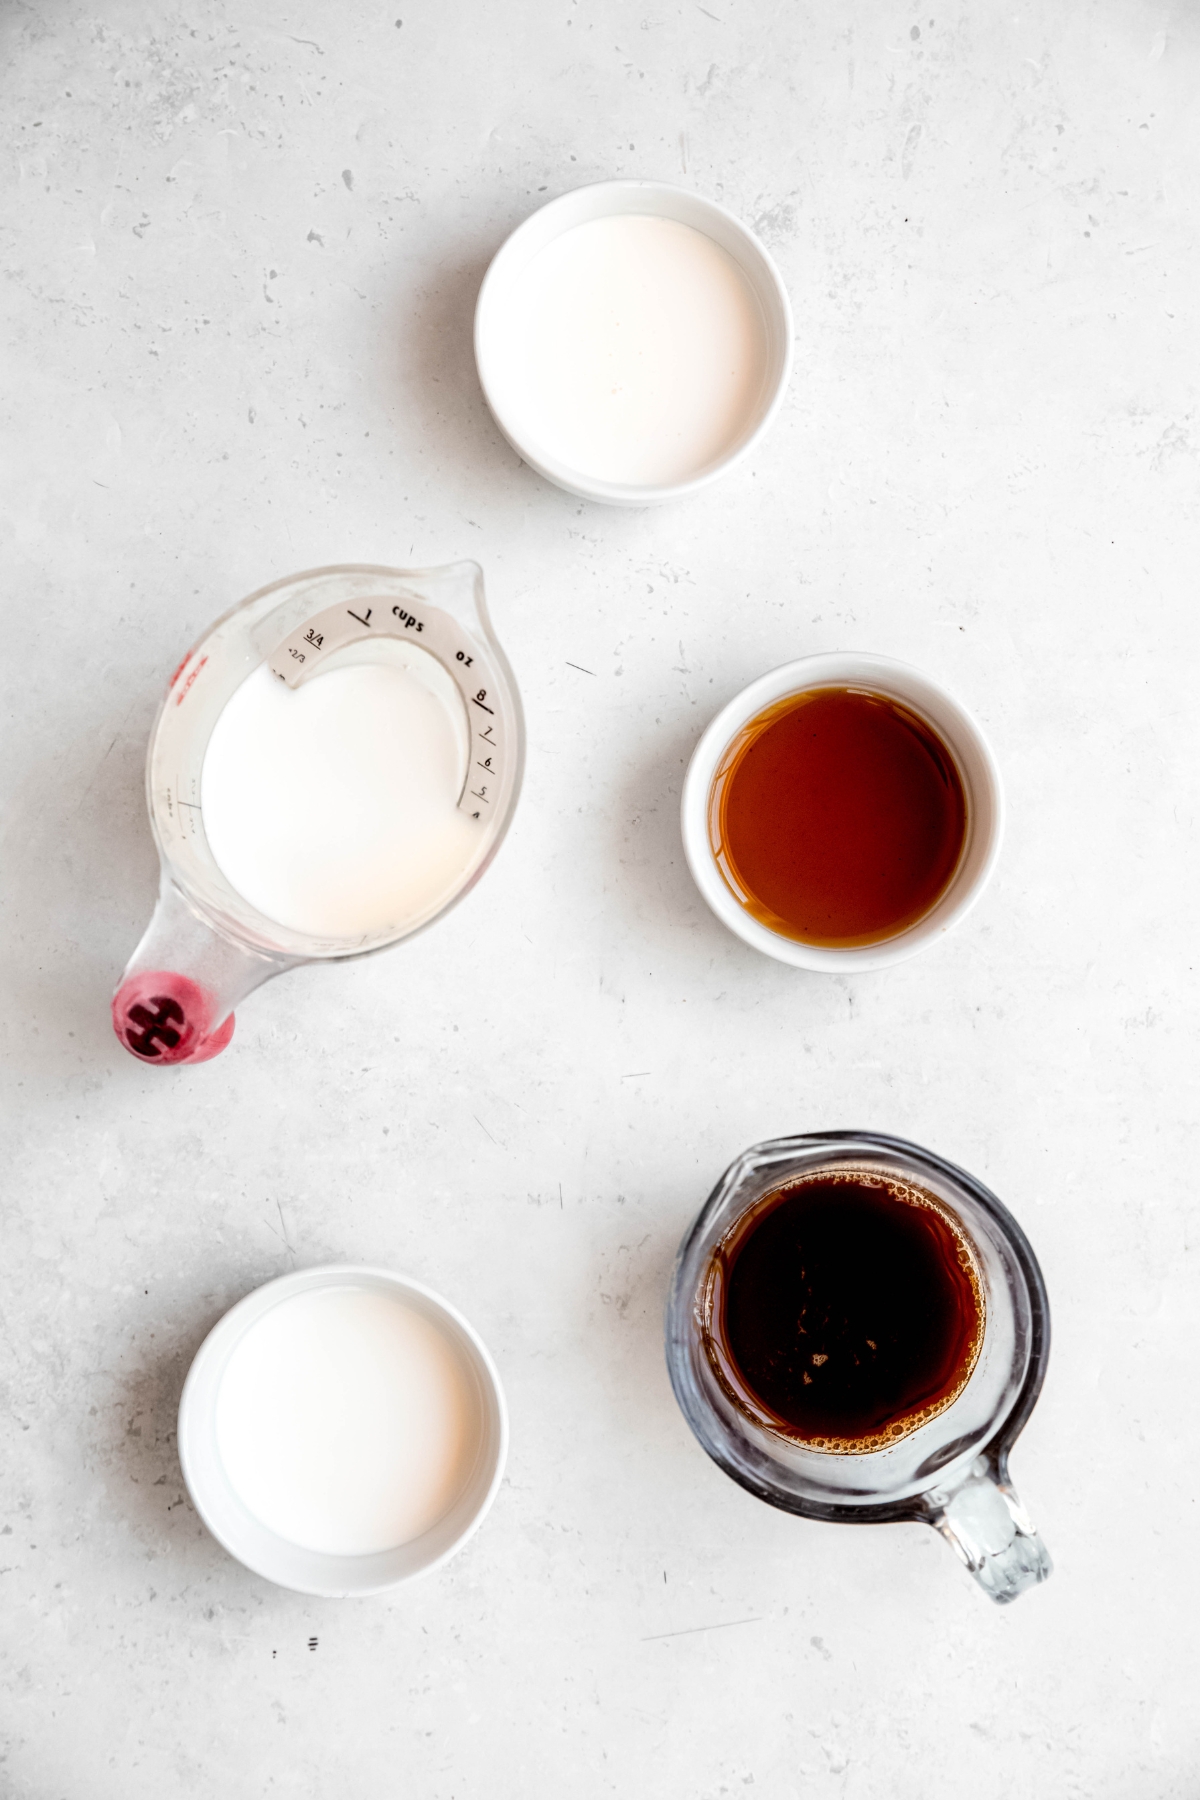
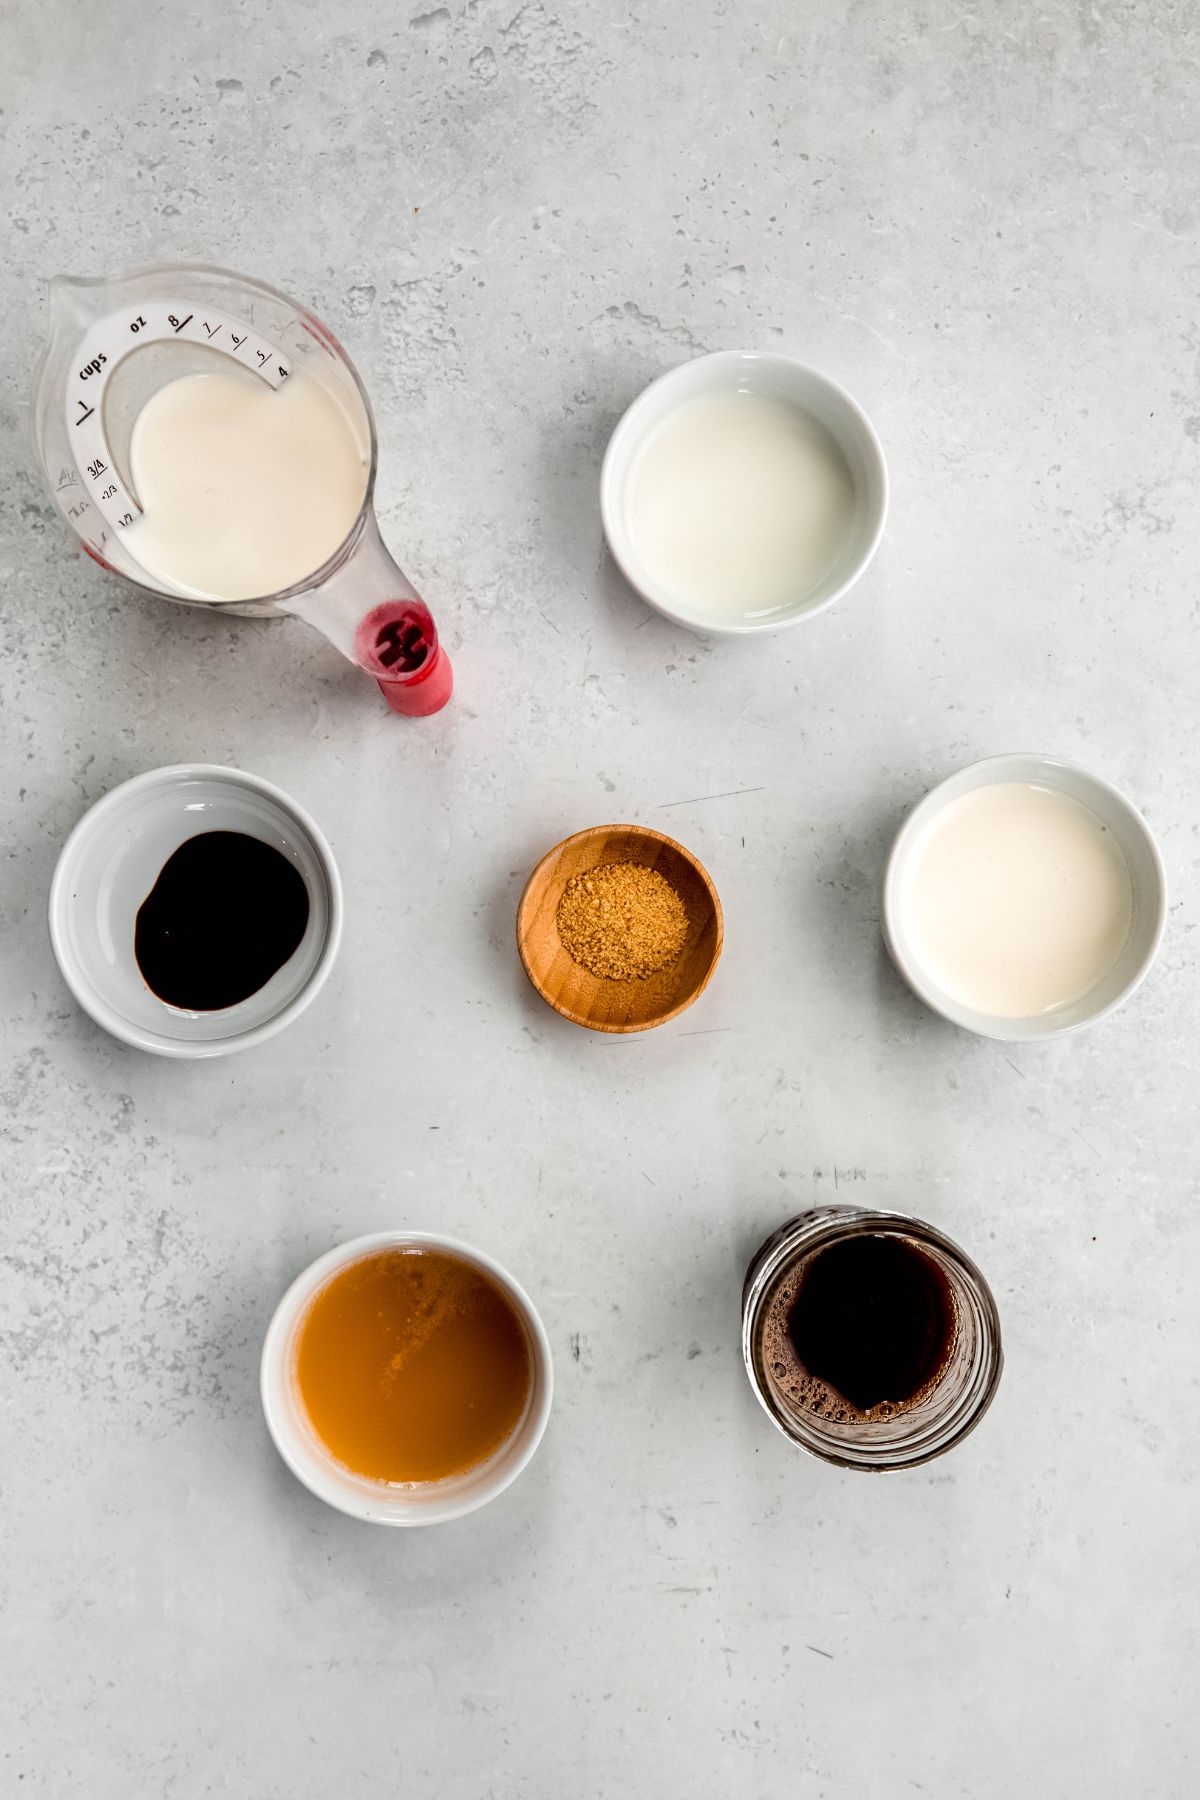
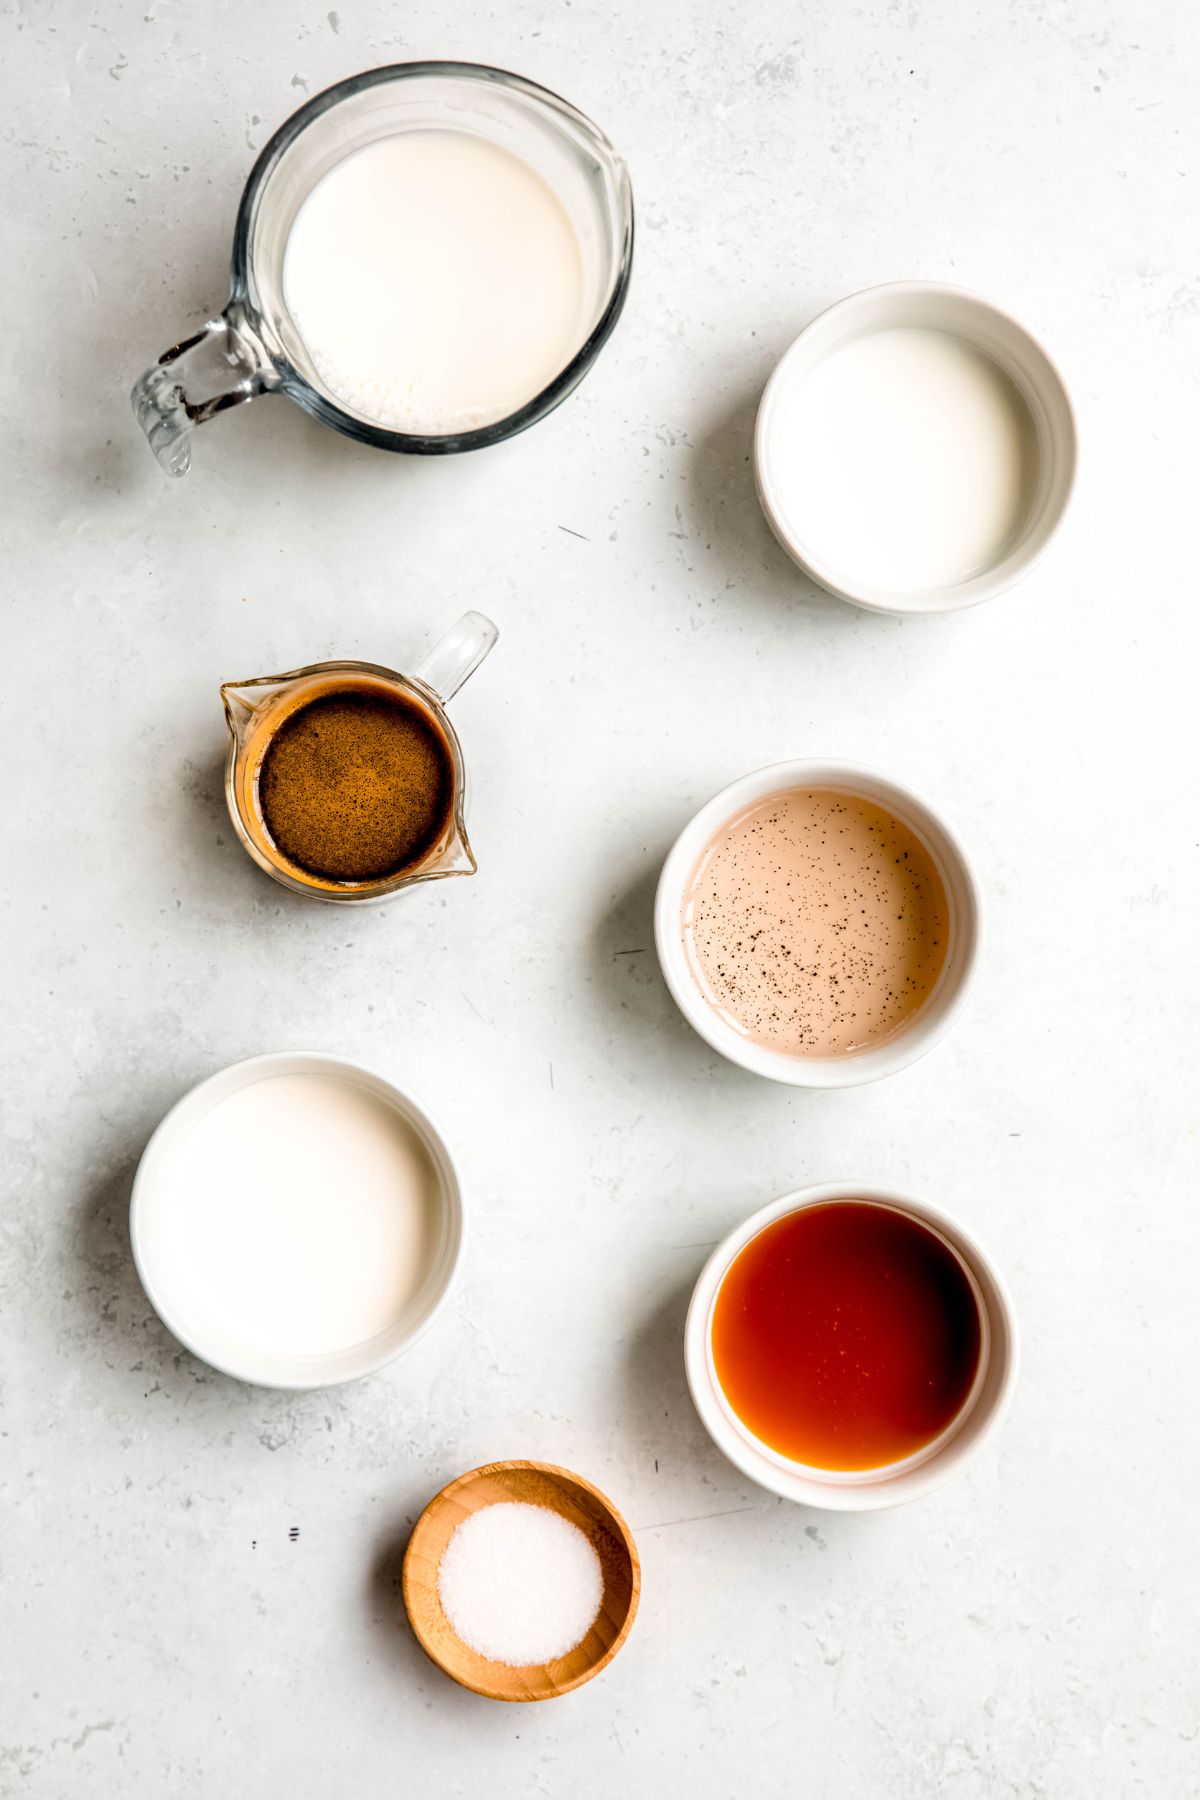
    This Iced S'mores Chai comes together with a handful of simple ingredients — here's what you'll need!

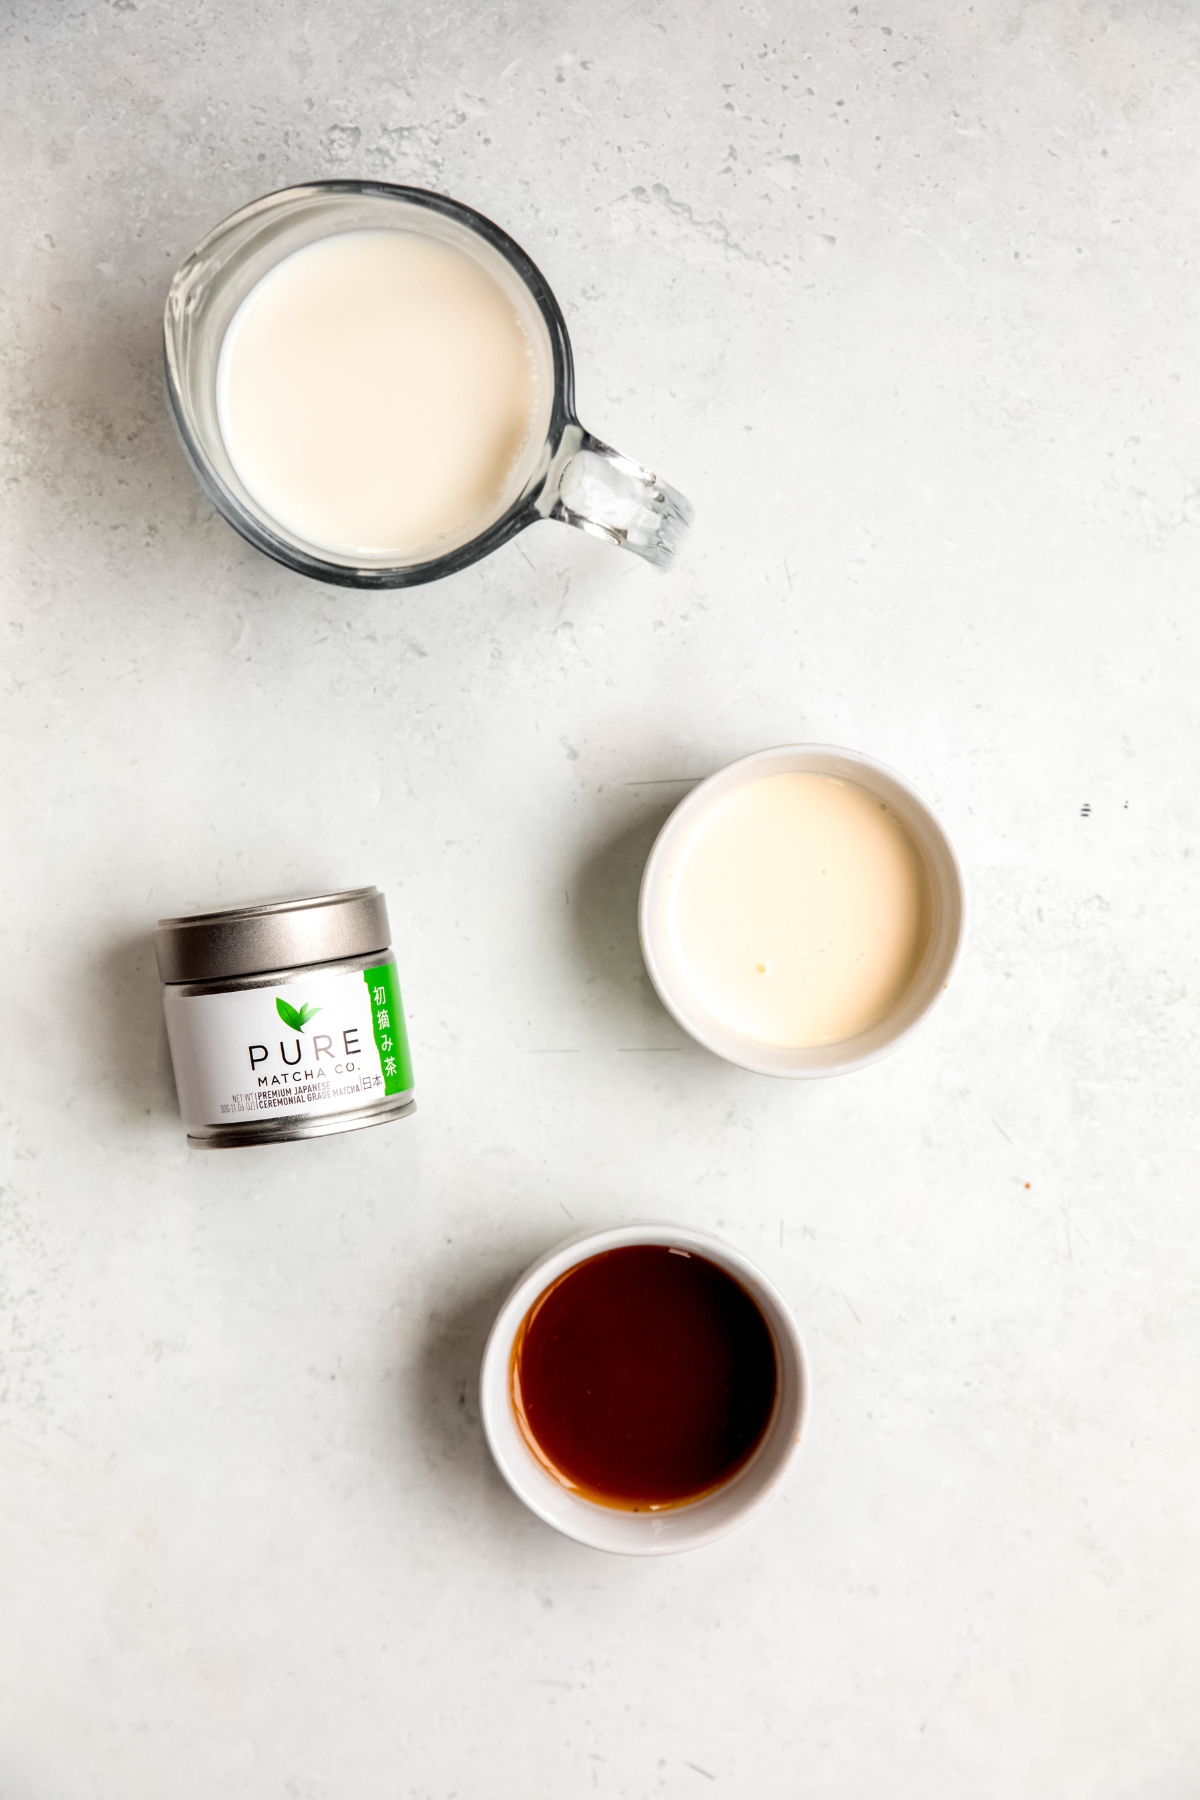
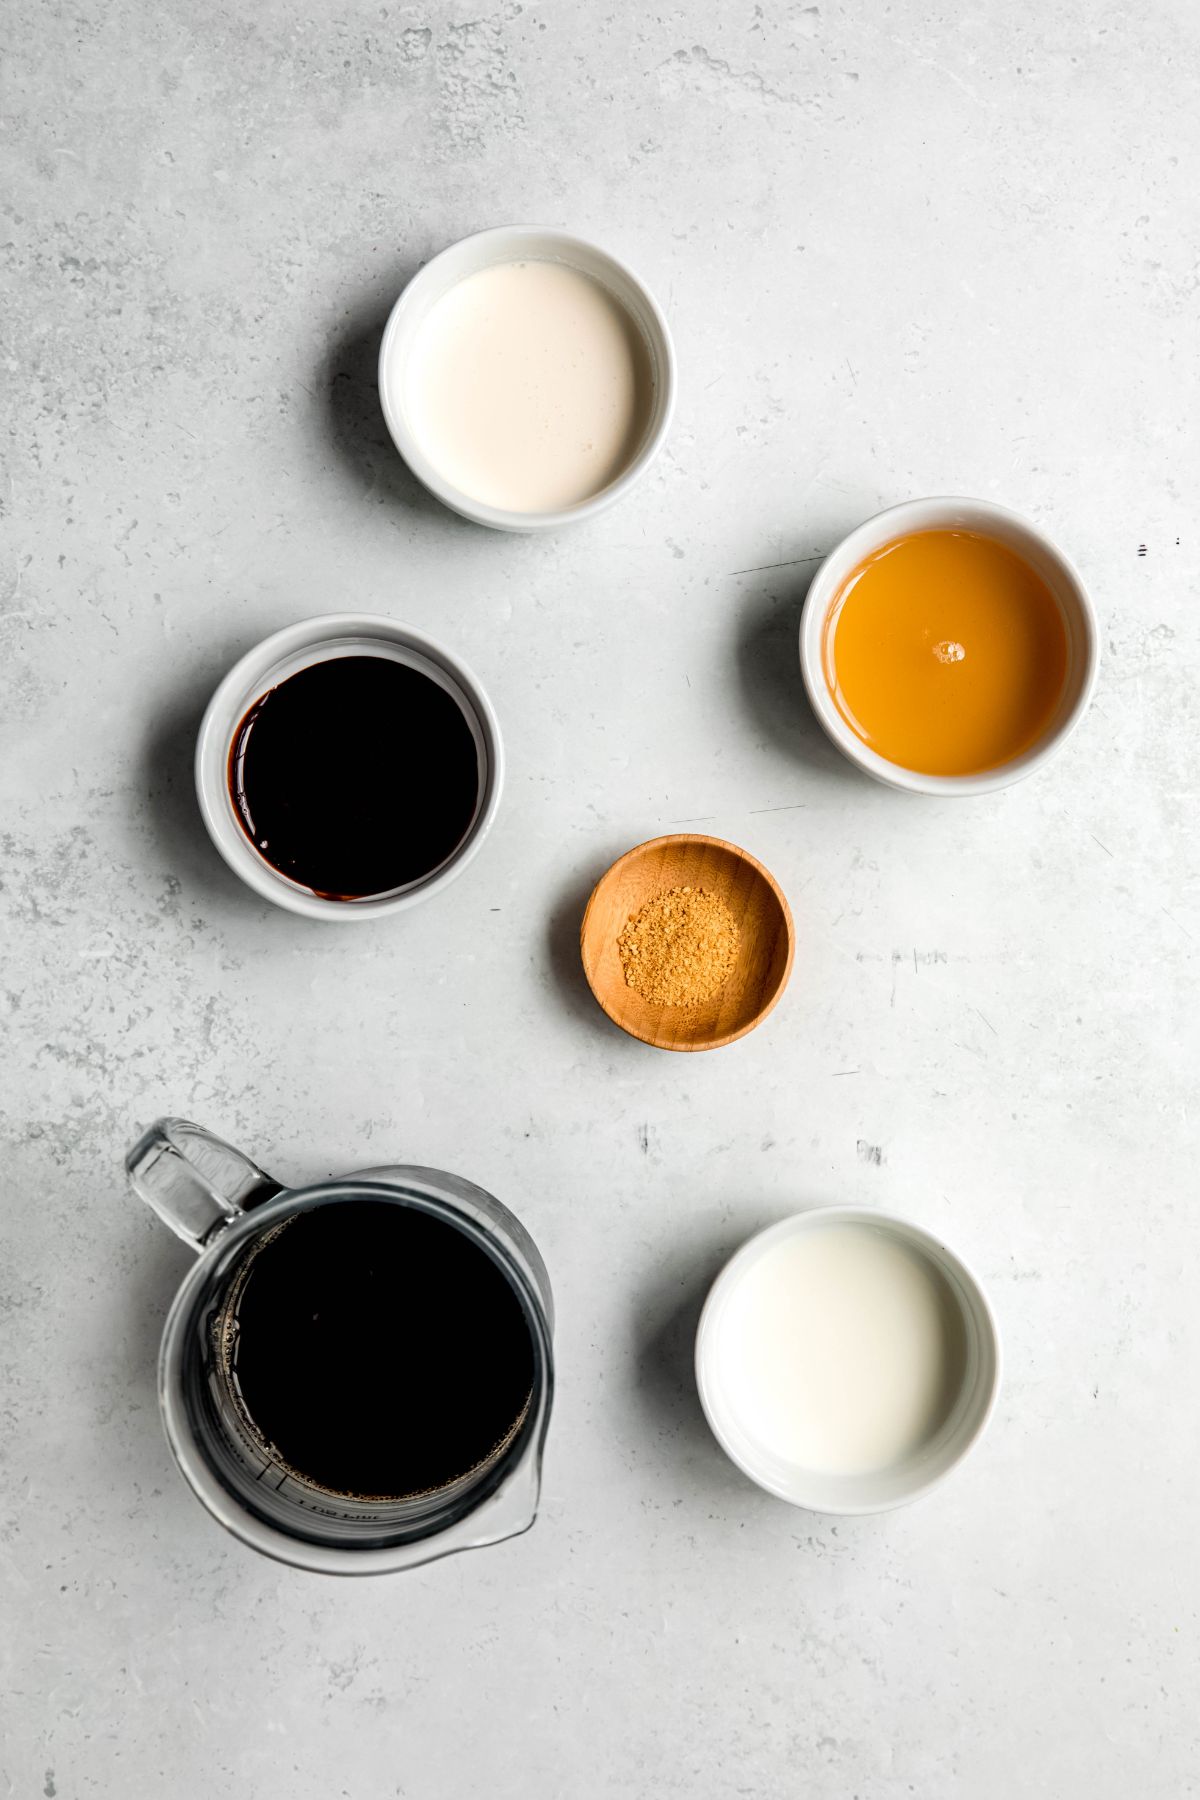
    • Chai concentrate — The spiced, warming base of this drink. My Homemade Chai Tea Concentrate is incredible here and already perfectly sweetened.
    • Milk of choice — Any milk works beautifully. The recipe uses 2%, but oat milk or whole milk both work great too.
    • Heavy cream and whole milk — Together they give the marshmallow cold foam its rich, silky, pourable texture.
    • Toasted marshmallow syrup — Adds that signature sweet, toasty marshmallow flavor to the cold foam. My homemade Toasted Marshmallow Syrup is the move here.
    • Mocha sauce — Adds a rich, chocolatey drizzle on top. Use chocolate syrup as a simple swap if needed.
    • Crushed graham crackers — The finishing touch that gives this drink its classic s'mores crunch.

    Substitutions

    • No homemade chai concentrate? Store-bought chai concentrate works great too! Just check the label — most are pre-sweetened, similar to my homemade version. See the note below on marshmallow syrup if yours happens to be unsweetened.
    • No mocha sauce? Chocolate syrup works perfectly as a simple 1:1 swap.
    • No toasted marshmallow syrup? Use regular vanilla syrup plus a few drops of marshmallow extract for a similar sweet, marshmallow-y flavor.
    • Dairy-Free: Swap the heavy cream and whole milk in the cold foam for full-fat coconut cream and oat milk. It'll still be creamy and delicious!

    How to Make Iced S'mores Chai

    This drink comes together in three simple steps, and it's just as easy as it sounds!

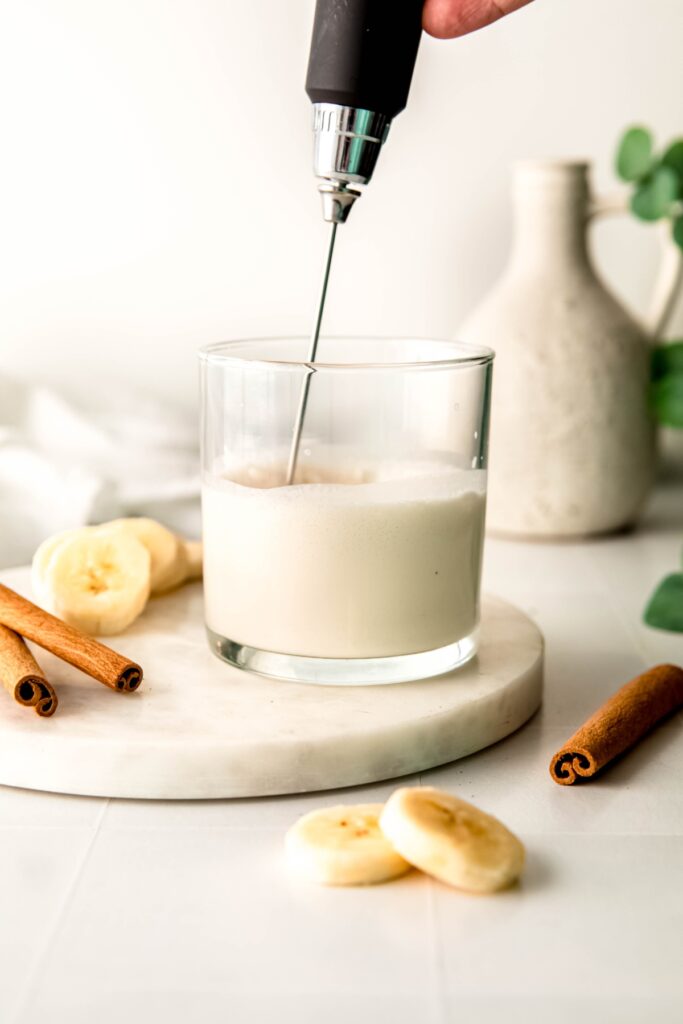
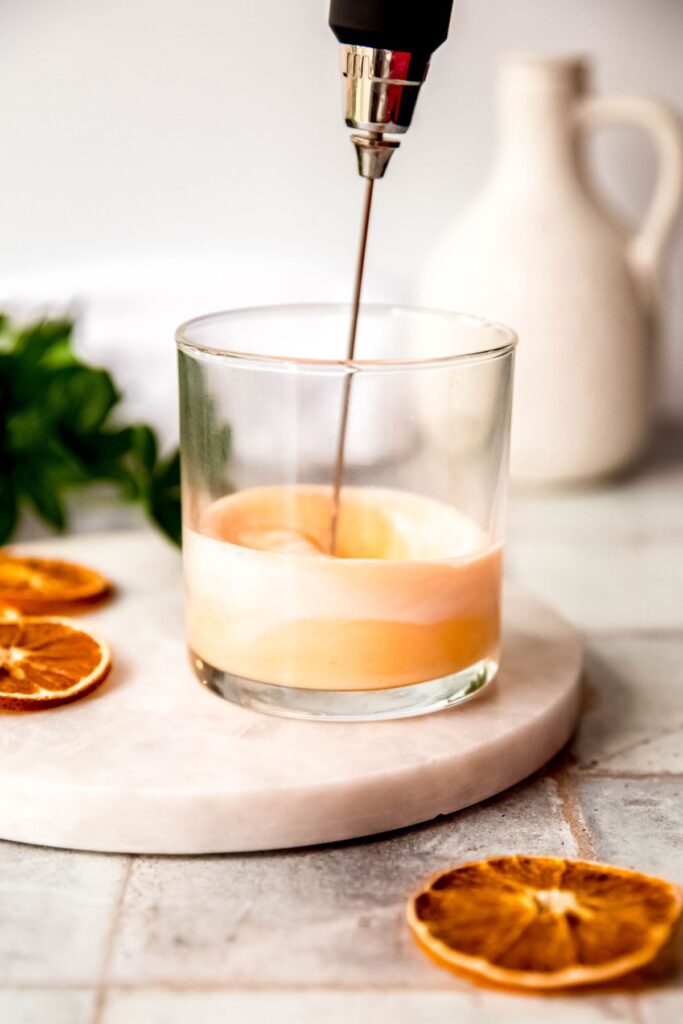
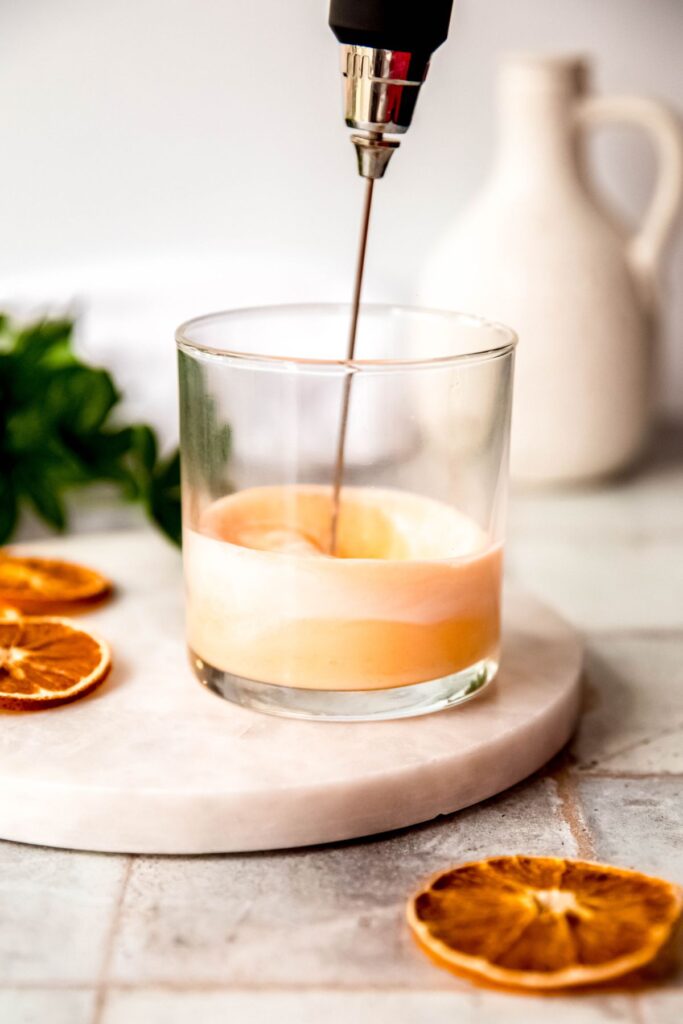
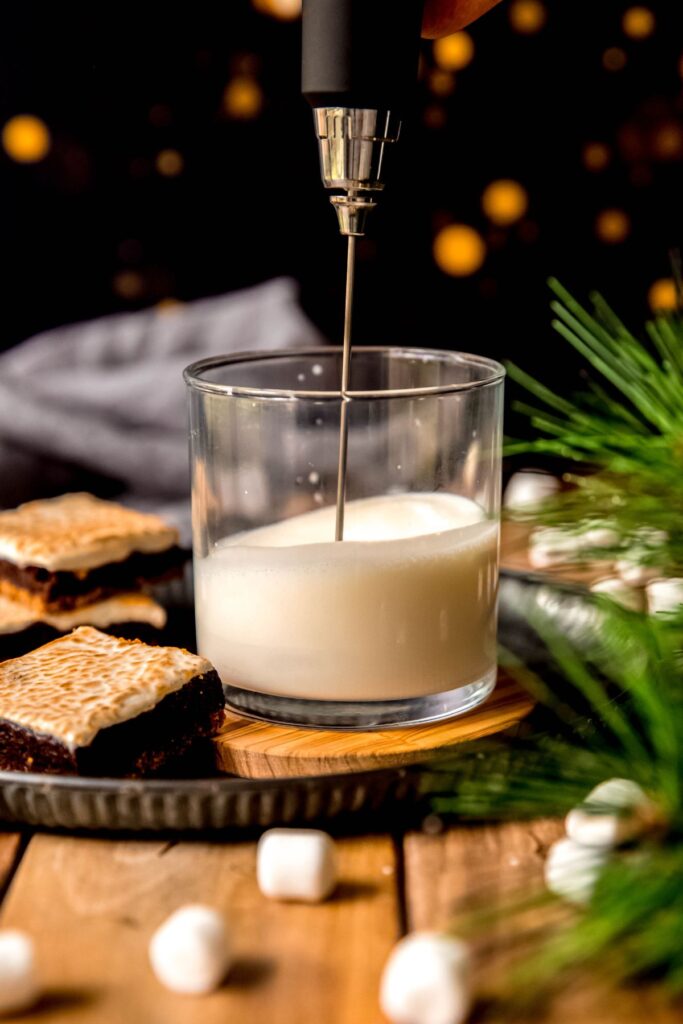
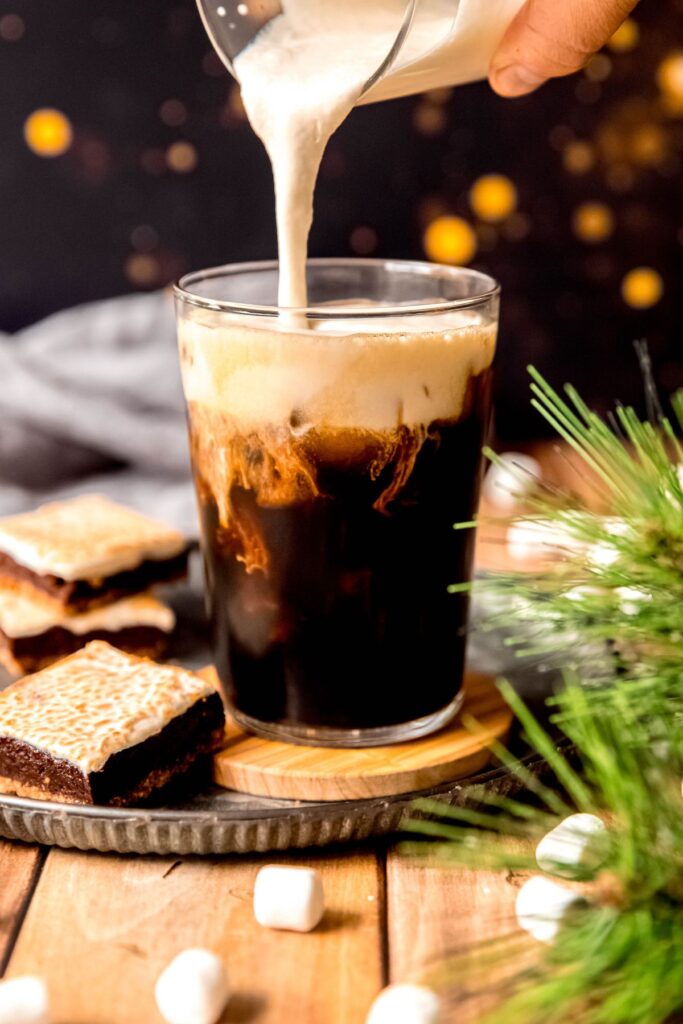
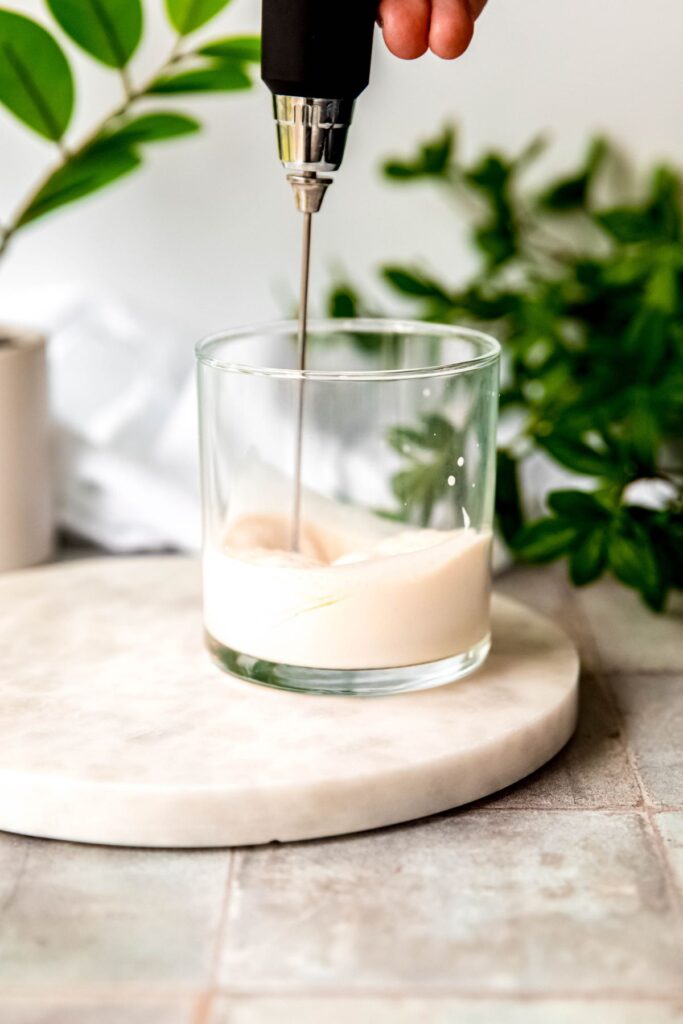
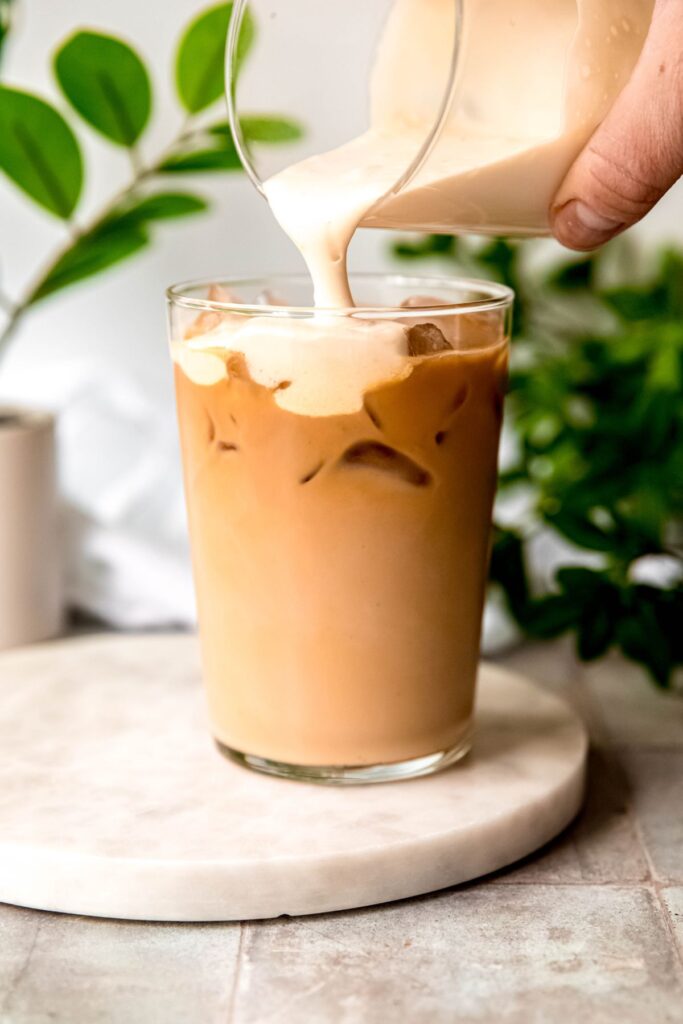
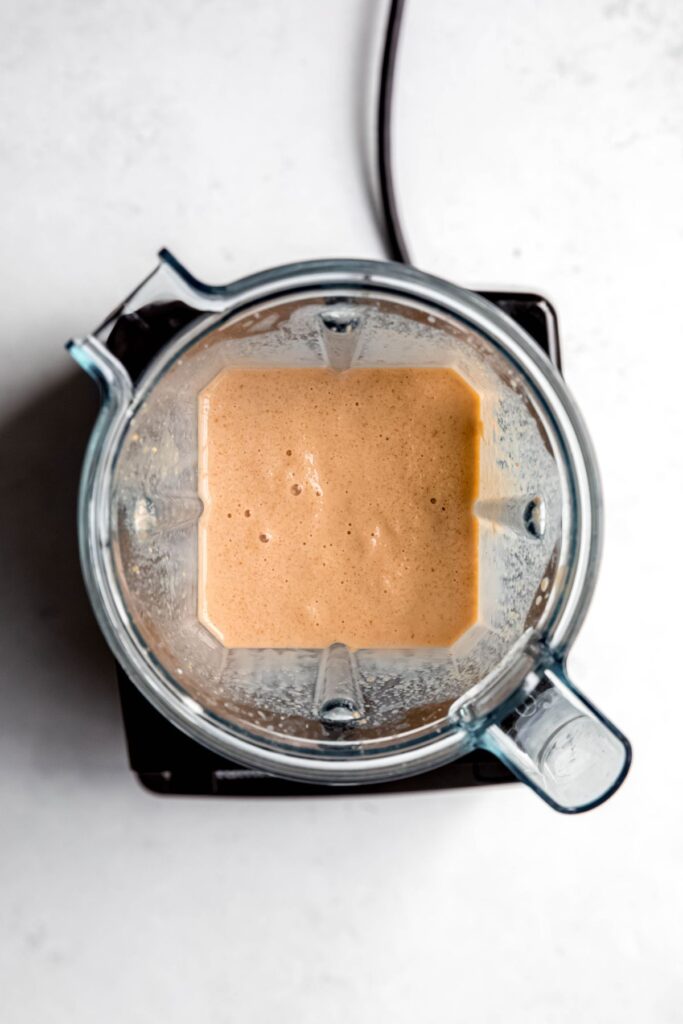
    • Step 1 — Whip up the marshmallow cold foam first. Combine the heavy cream, toasted marshmallow syrup, and whole milk in a small glass or jar, then froth with a milk frother until light and foamy. Set it aside.
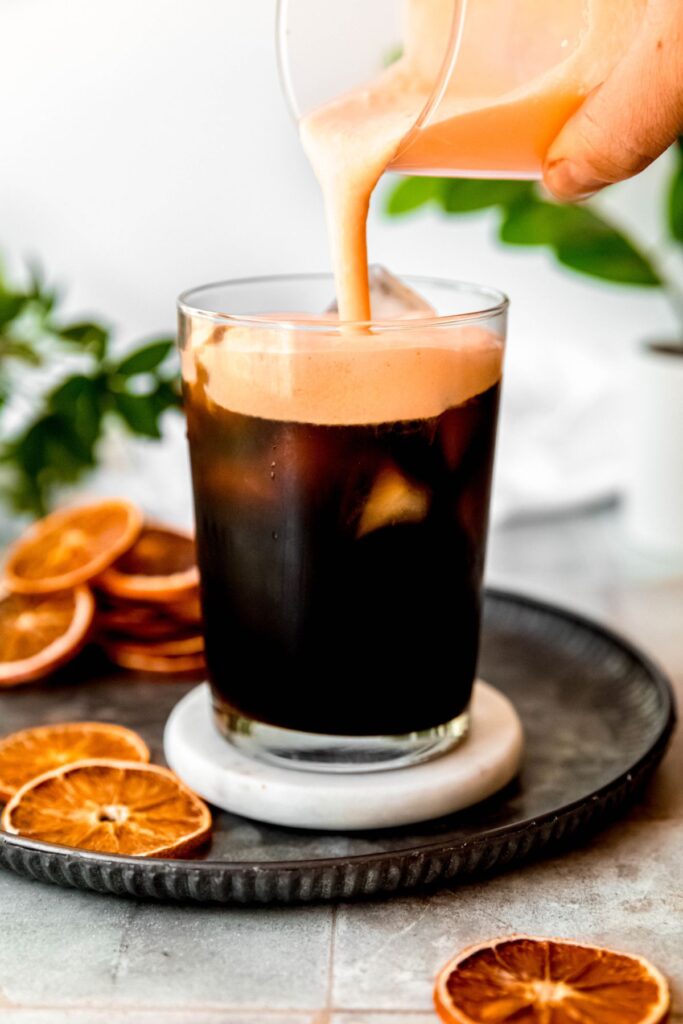
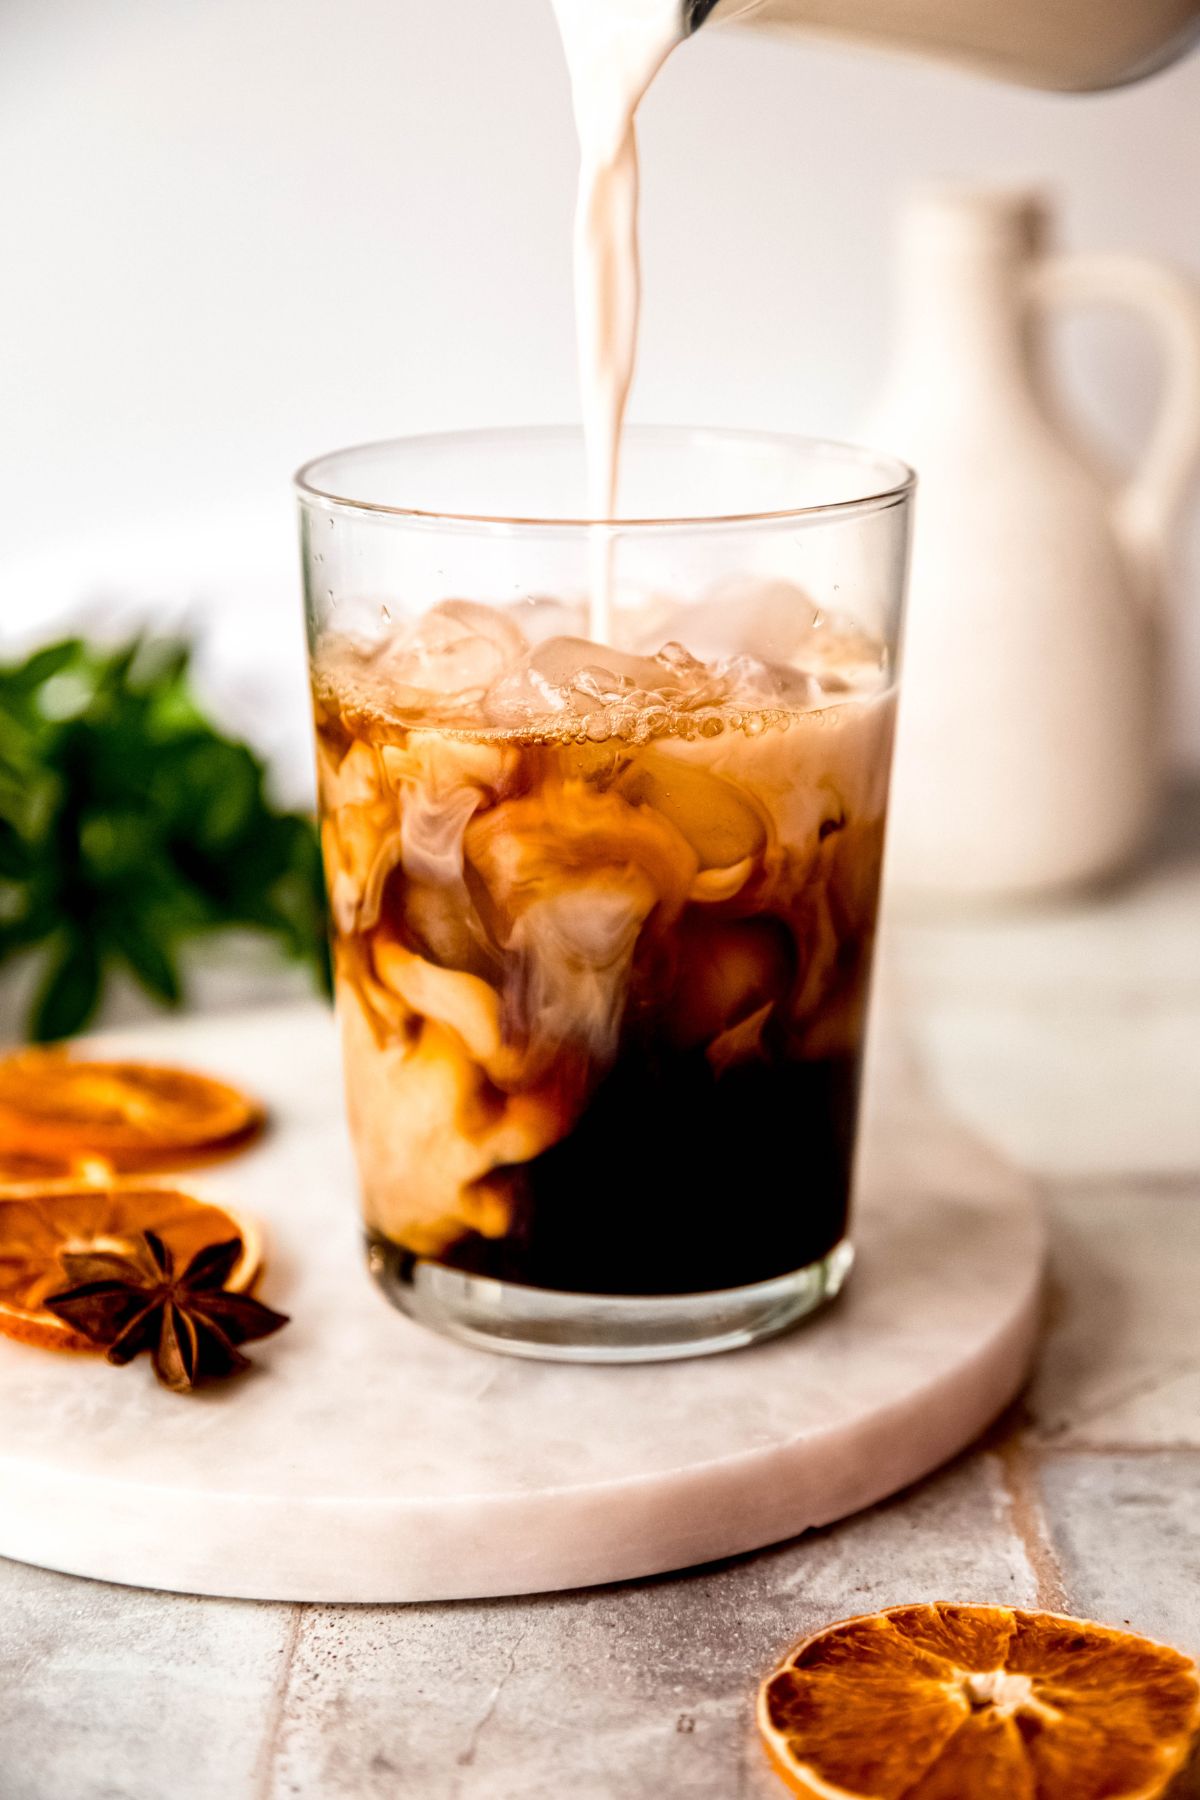
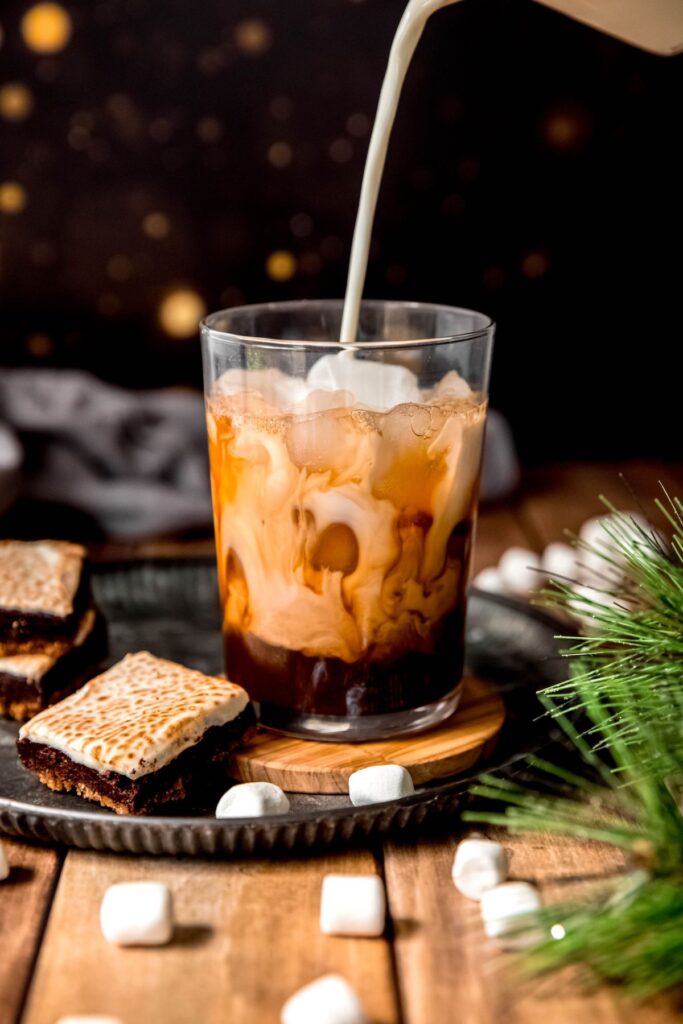
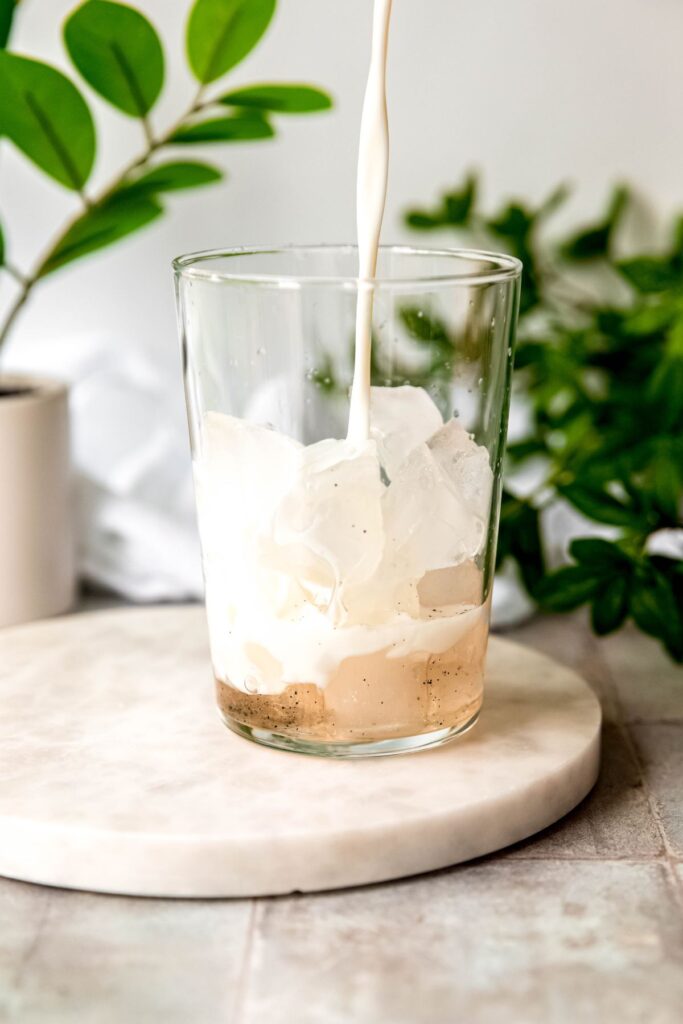
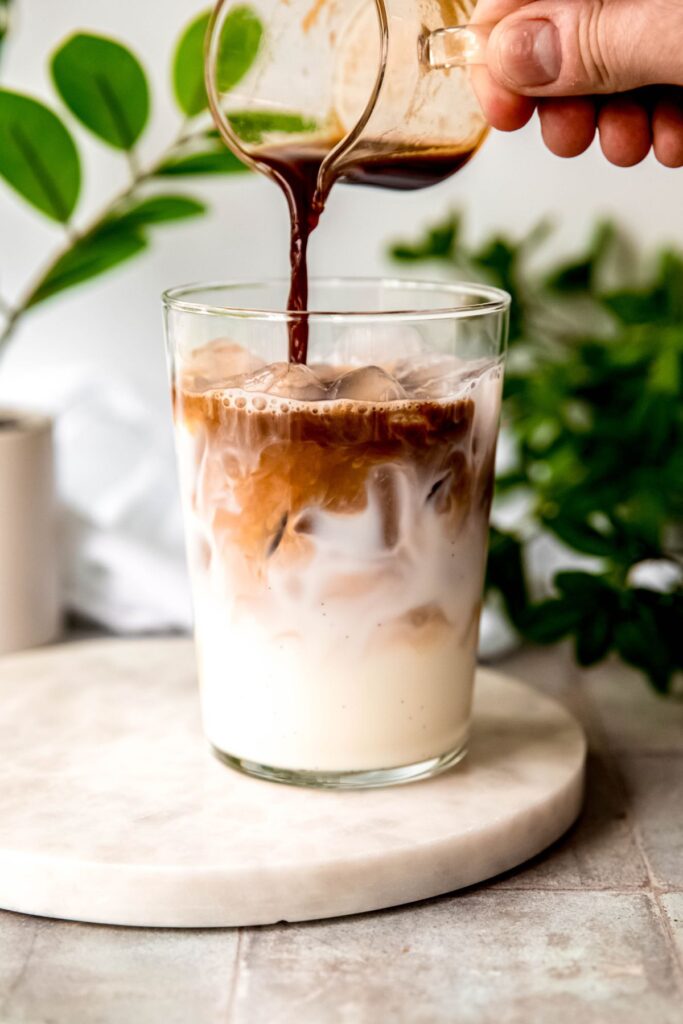
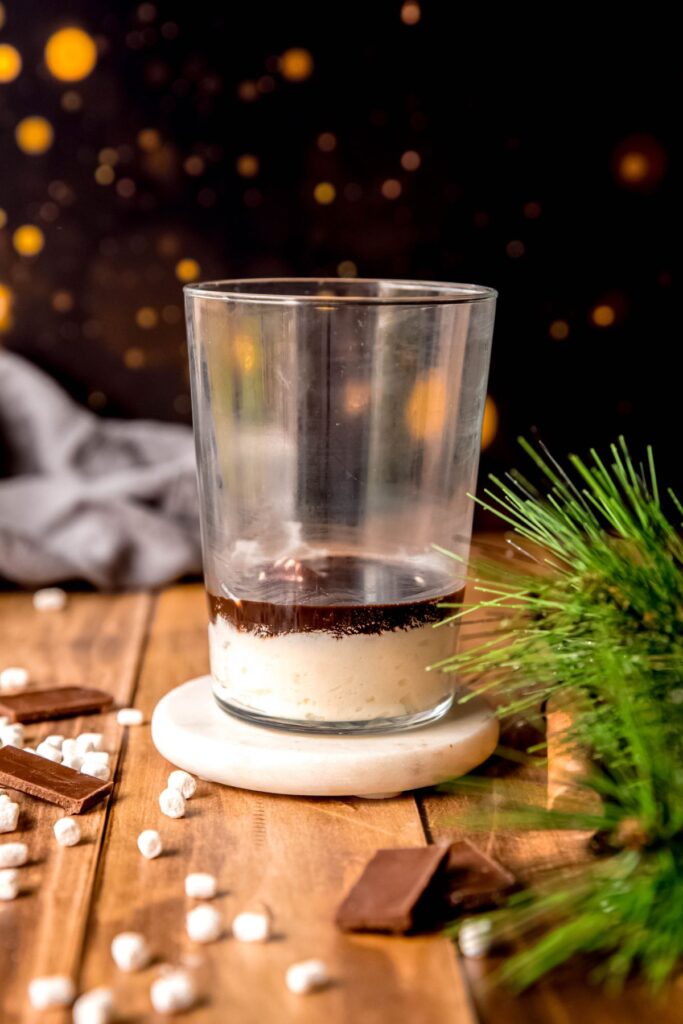
    • Step 2 — Fill a tall glass with ice, then pour in the chai concentrate and milk of choice. If you're using an unsweetened chai concentrate, stir in the marshmallow syrup here too (see the note below for more on this). Give everything a good stir.
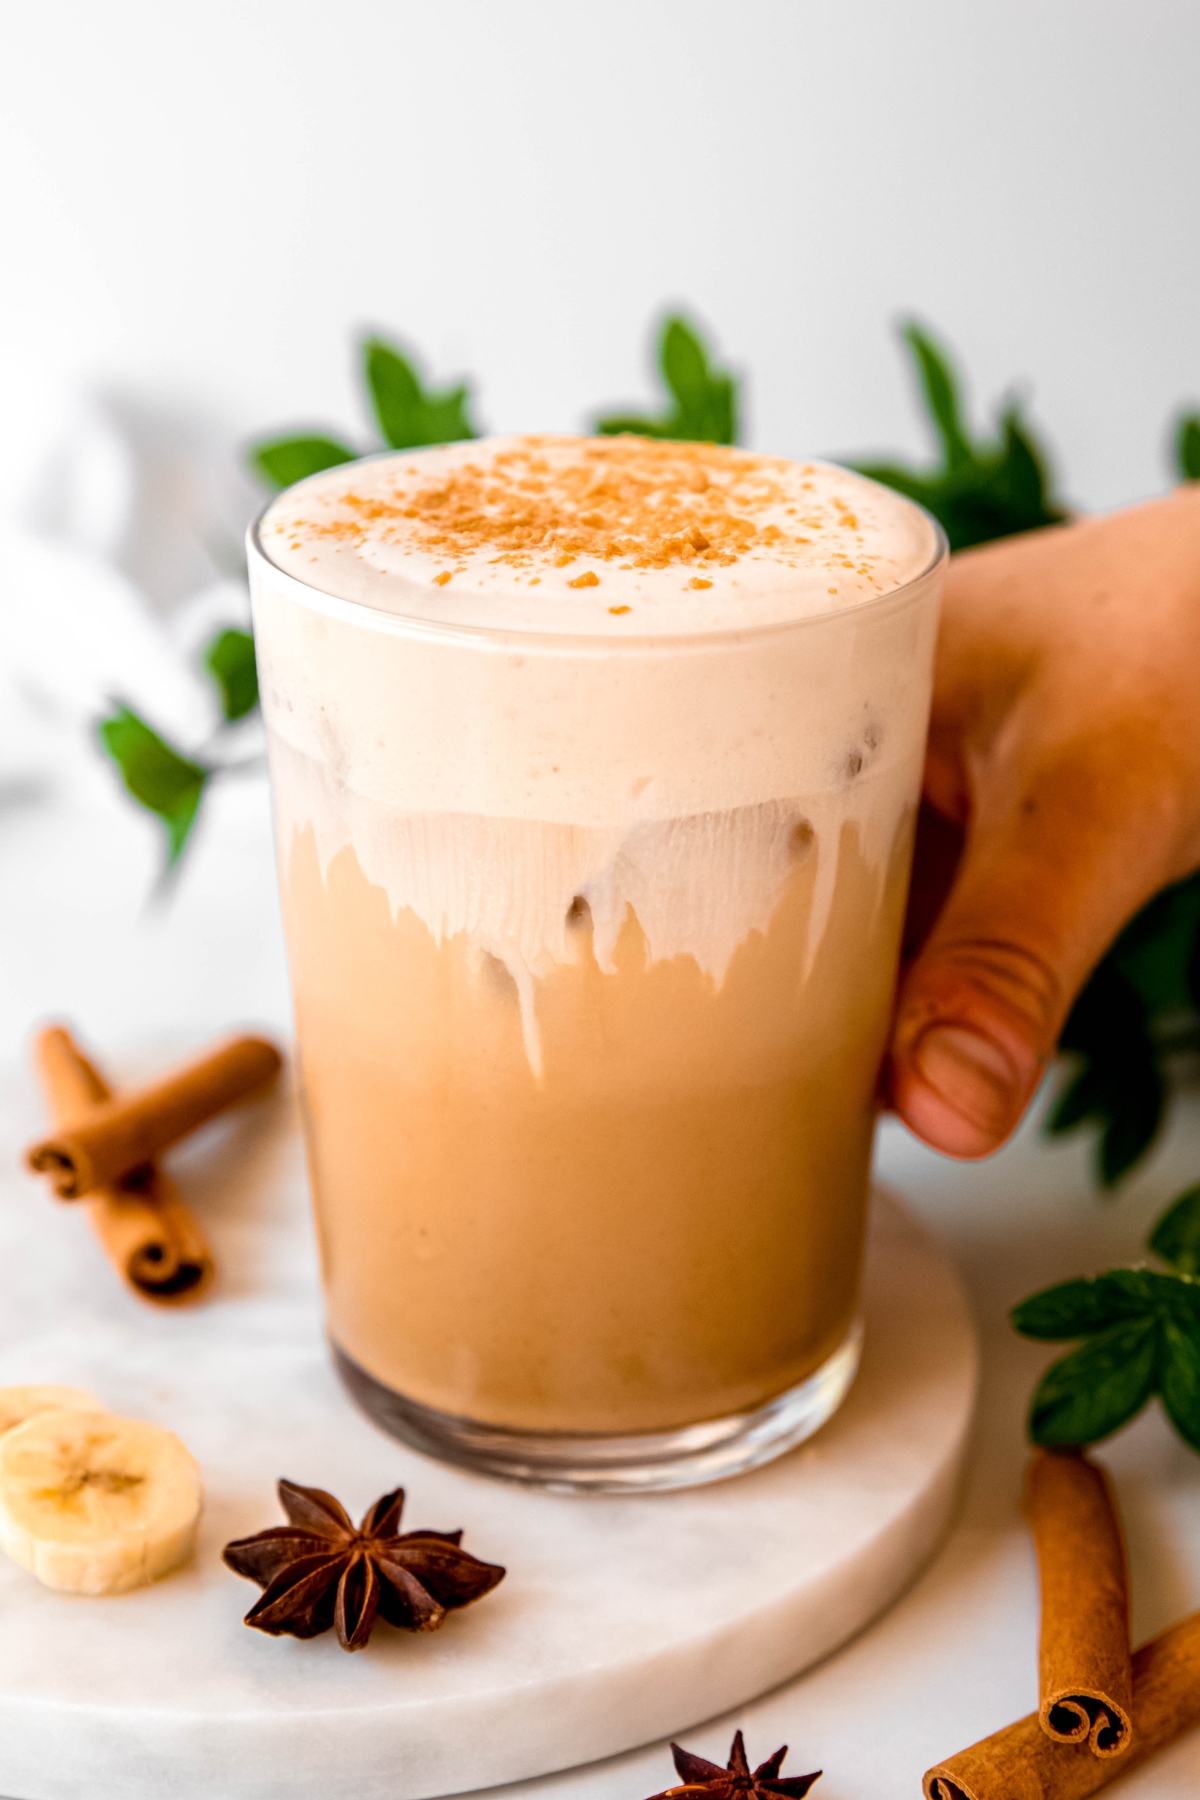
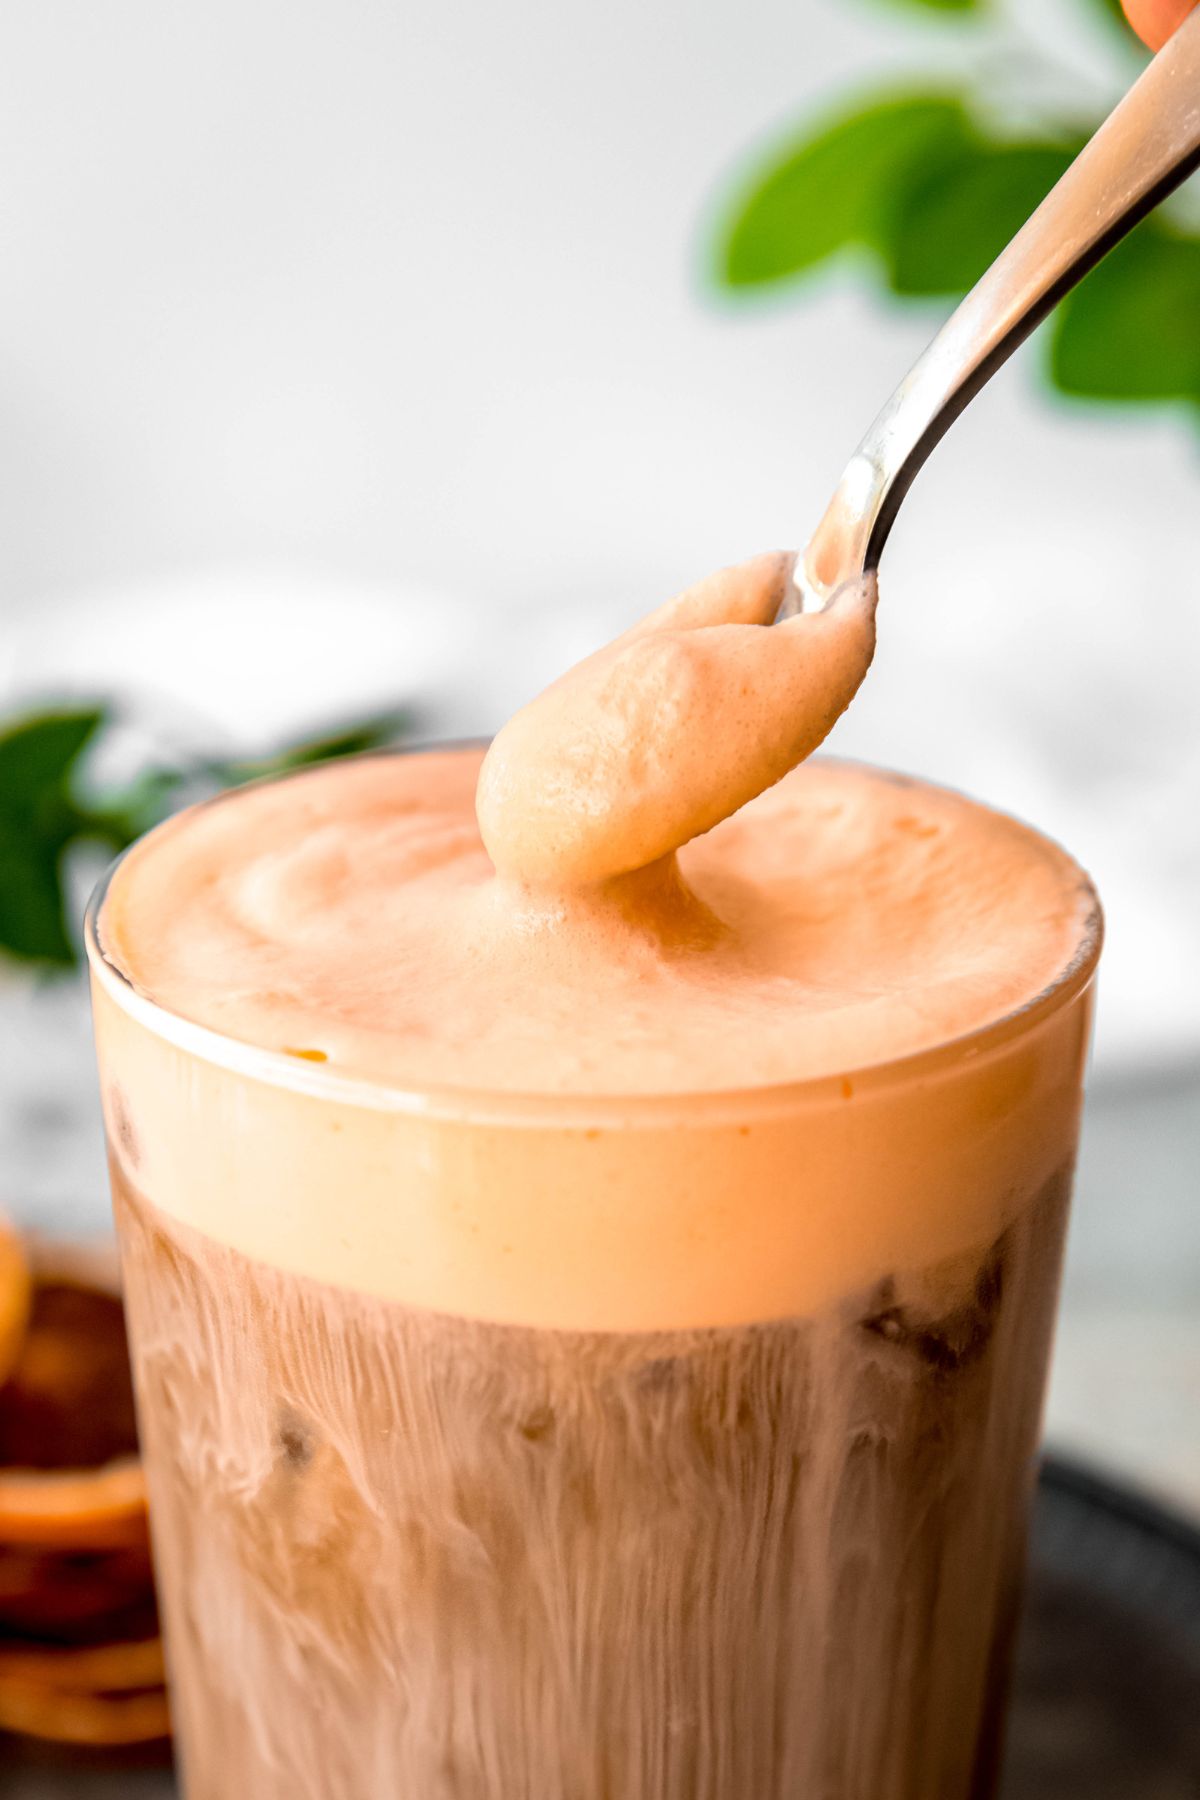
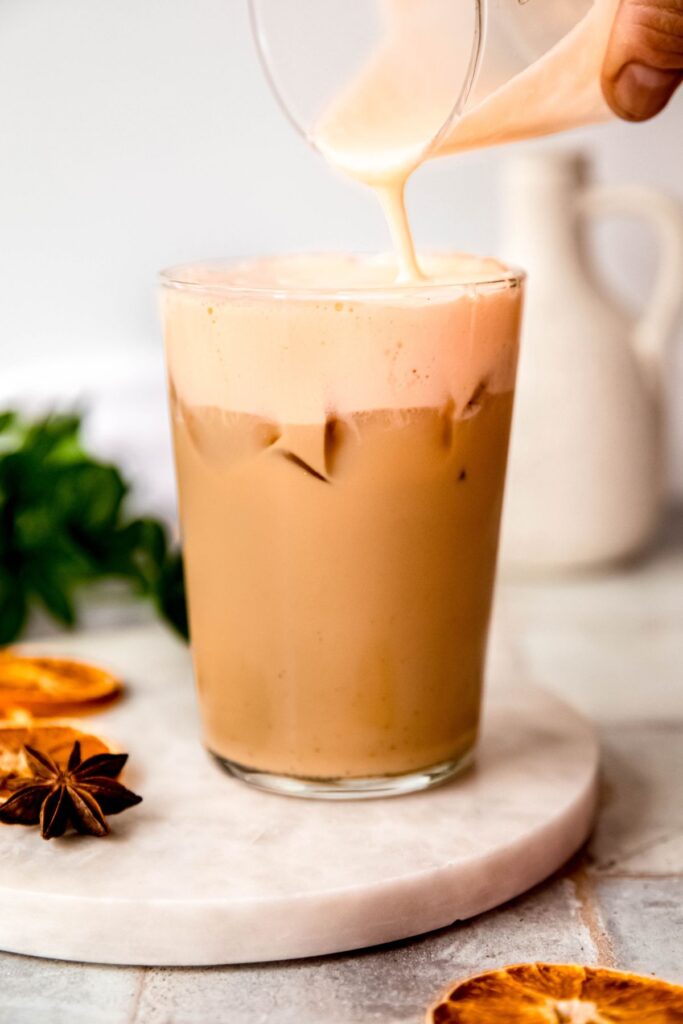
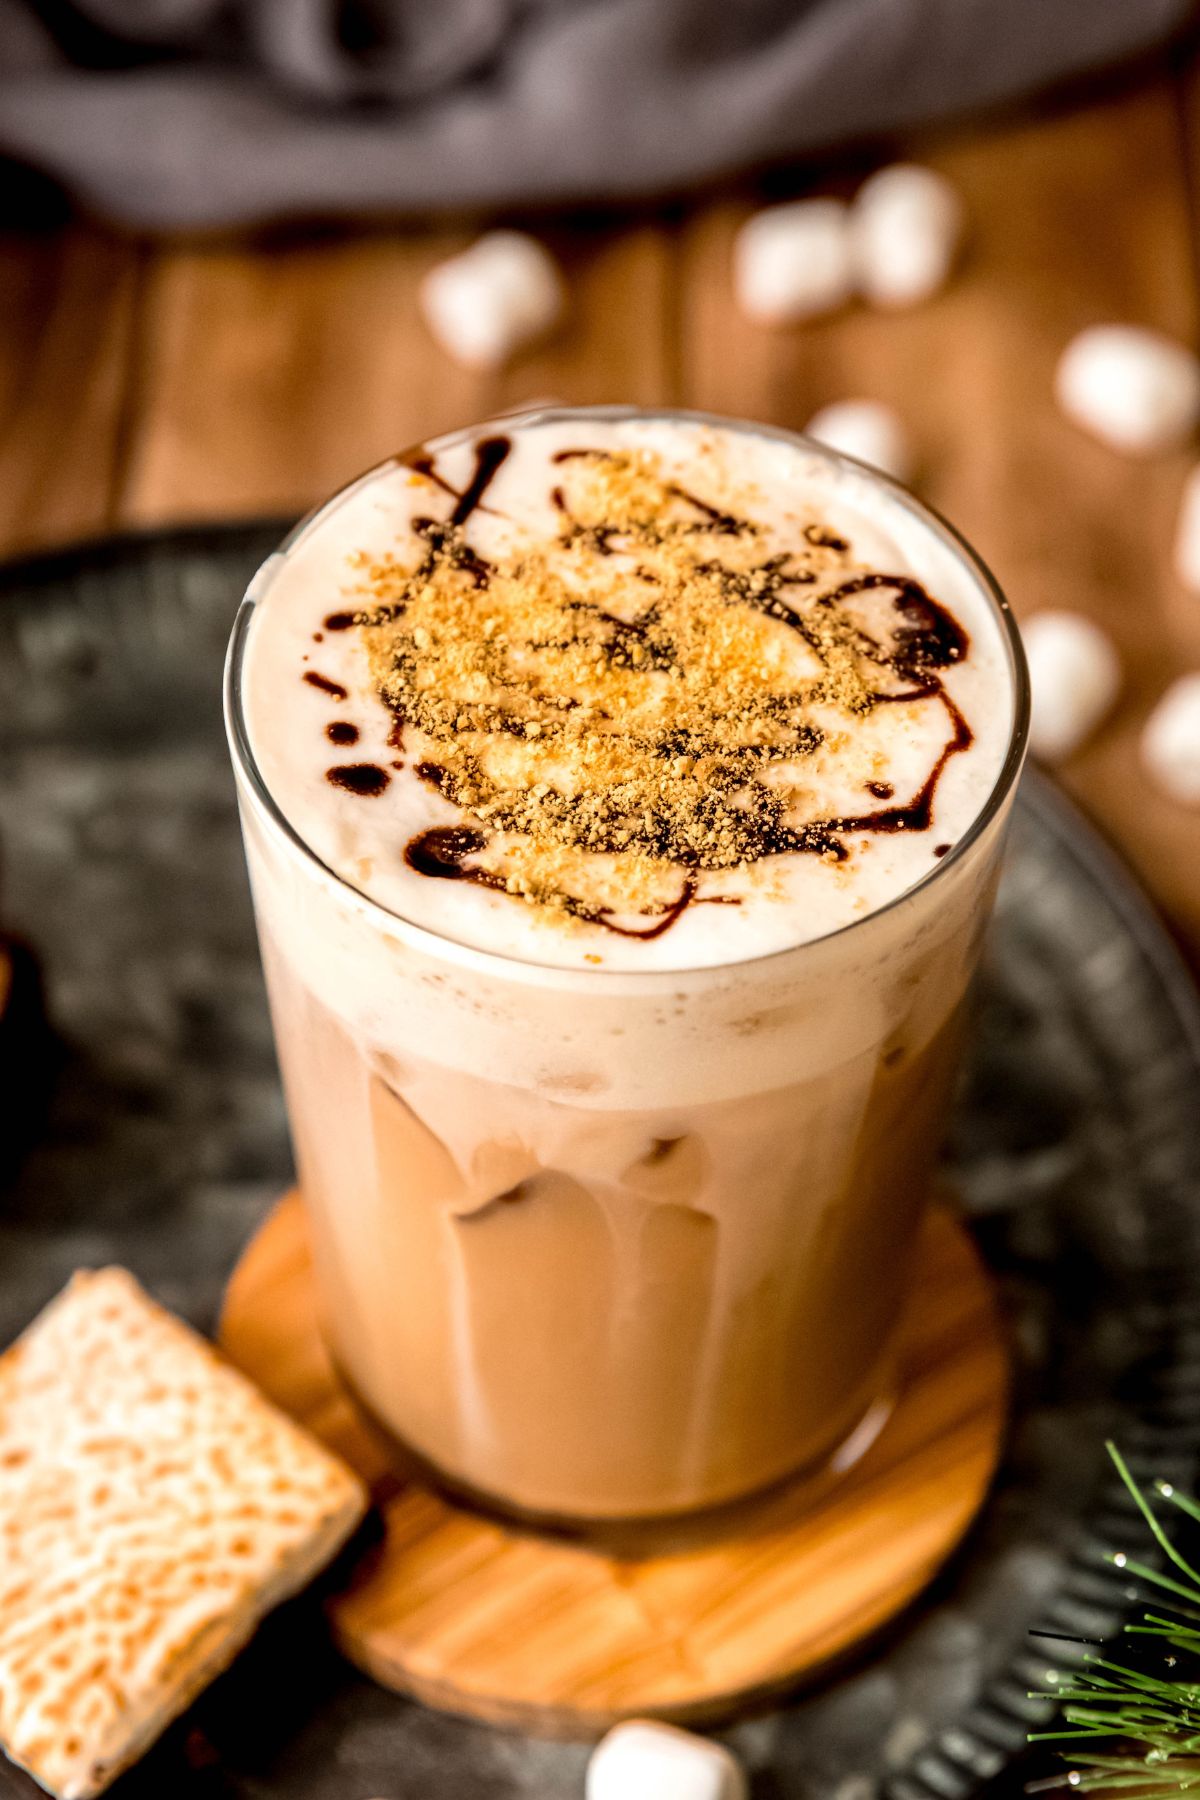
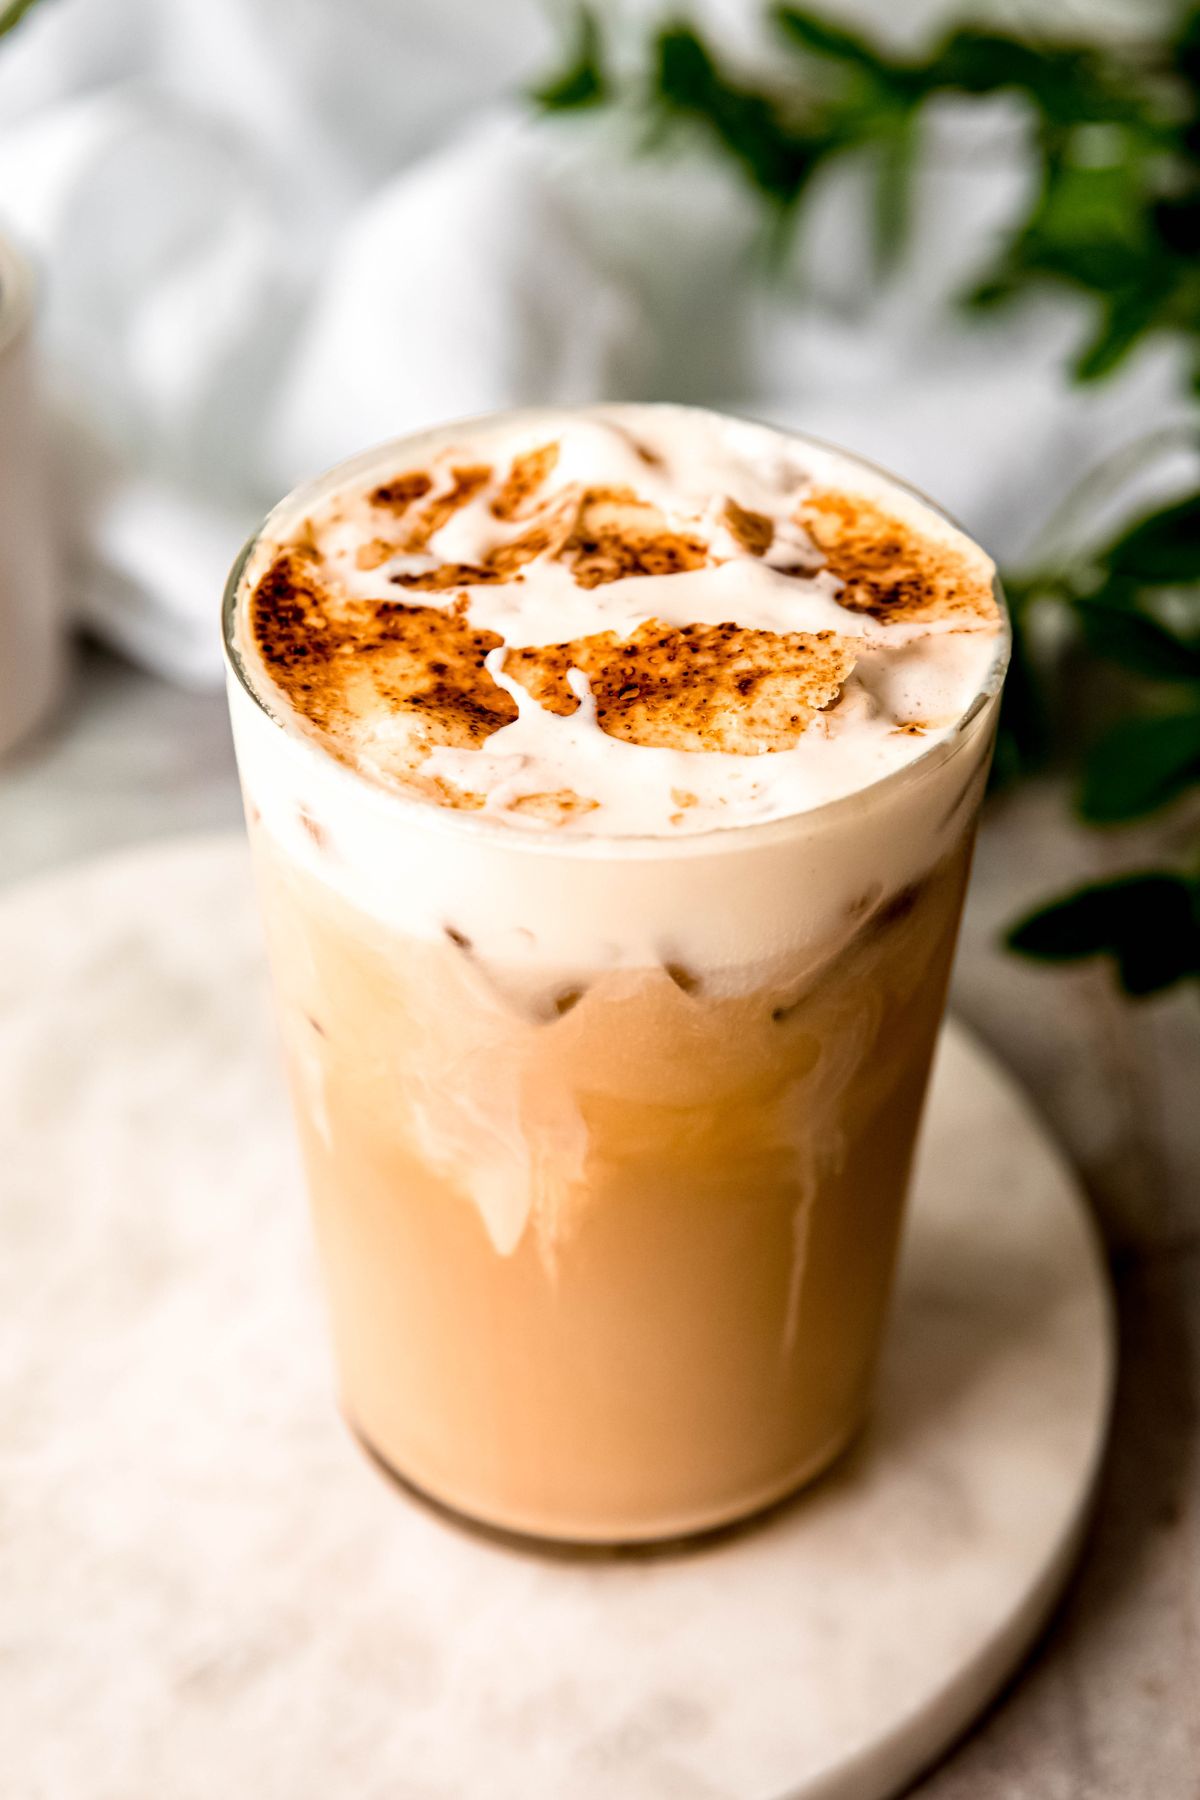
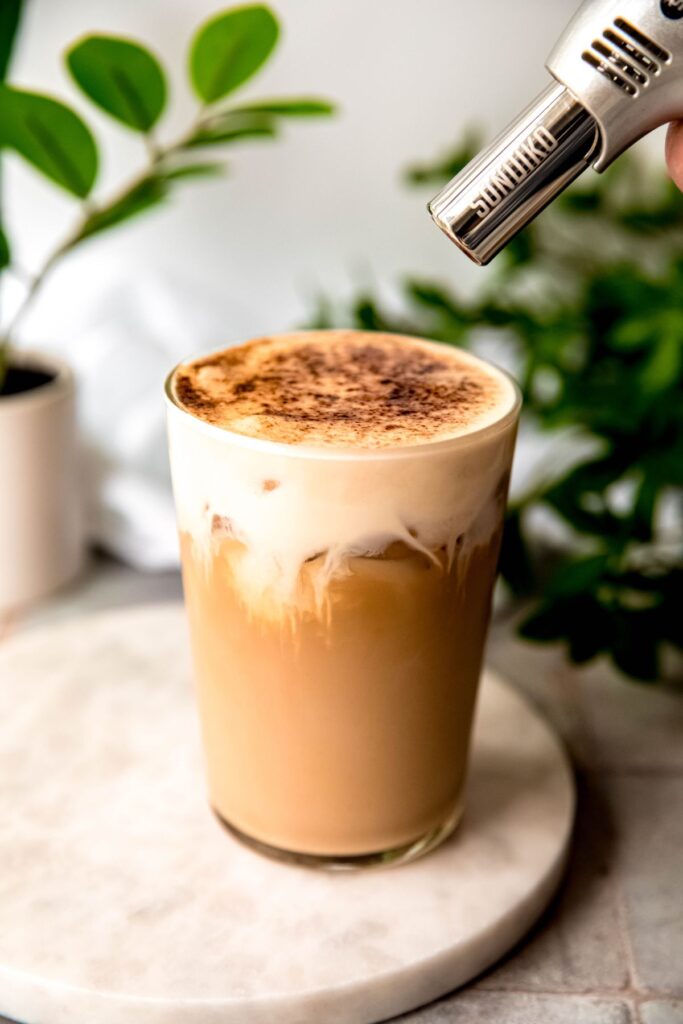
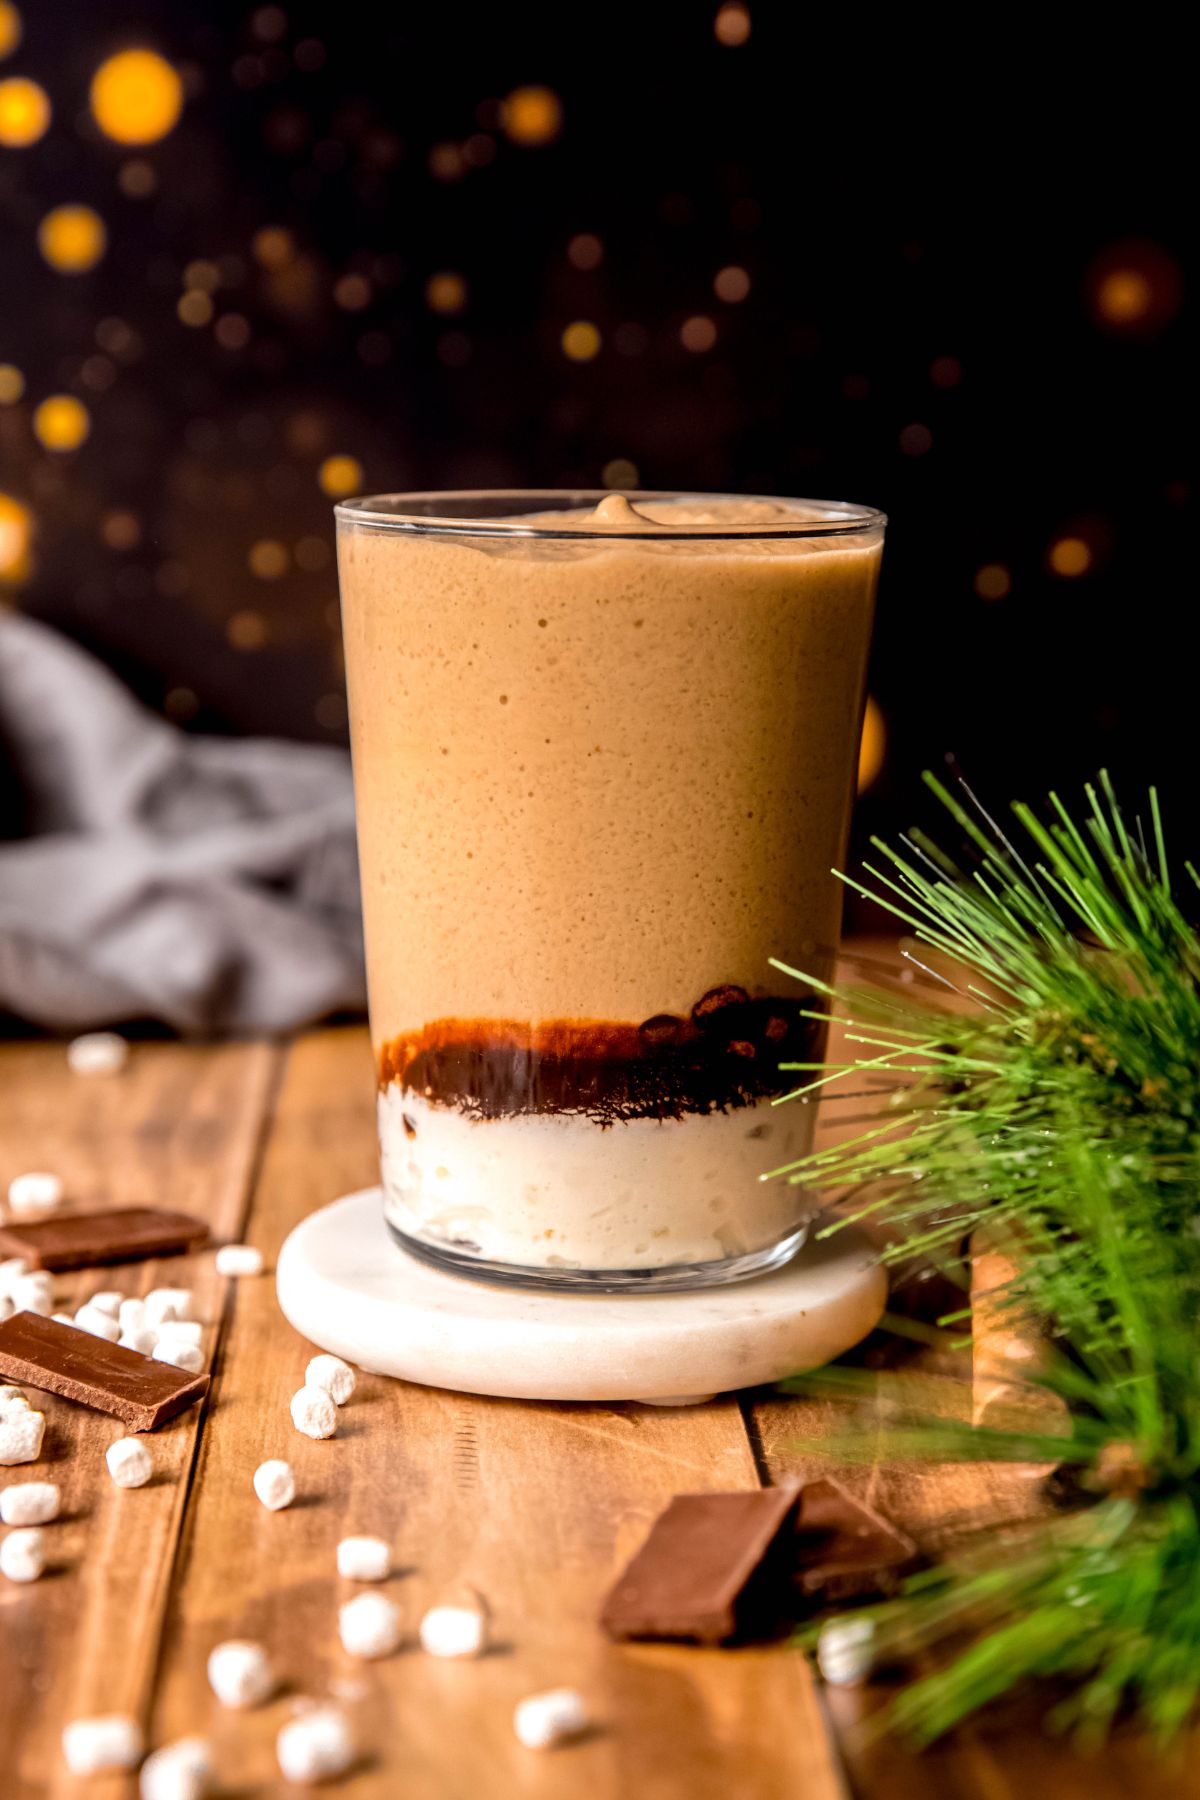
    • Step 3 — Spoon the marshmallow cold foam over the top, drizzle with mocha sauce, and finish with a sprinkle of crushed graham crackers. Enjoy right away!

    Optional Variations

    • Graham cracker rim — Wet the rim of your glass and dip it in crushed graham crackers for that classic, picture-perfect s'mores presentation.
    • Toasted mini marshmallow topping — Use a kitchen torch to lightly toast a few mini marshmallows and add them right on top of the cold foam.
    • Hot S'mores Chai — Skip the ice and warm the chai and milk on the stovetop for a cozy, hot version of this drink — perfect for cooler days.
    • S'mores Chai Frappuccino — Blend the whole drink with ice for a frozen, frappuccino-style treat. If you love that blended texture, you'll also want to try my S'mores Frappuccino!

    A Note on Marshmallow Syrup

    Here's something interesting about how Starbucks builds this drink: their chai base is unsweetened, so they add marshmallow syrup directly into the chai itself to sweeten it. But most chai concentrates — including my homemade version — are already sweetened on their own.

    That means if you're using an already-sweetened chai concentrate, there's no real need to add extra marshmallow syrup to the base. The marshmallow cold foam on top already brings plenty of that flavor!

    However, if you're using an unsweetened chai concentrate, go ahead and stir in 1-2 tablespoons of toasted marshmallow syrup directly into the chai for that authentic Starbucks sweetness.

    Tips for the Best Iced S'mores Chai

    • Use a good quality chai concentrate. Since chai is the star of this drink, a flavorful, well-spiced concentrate makes all the difference. Homemade is best!
    • Don't over-froth the cold foam. You want it foamy and pourable, not stiff. A quick 5-15 seconds with the milk frother is usually perfect.
    • Drizzle the mocha sauce right before serving. This keeps the presentation looking gorgeous and ensures the drizzle doesn't get lost in the foam.
    • Taste your chai before adding extra marshmallow syrup. Since most concentrates are already sweetened, give your chai a taste first to see if you even need the extra syrup in the base.

    FAQs

    What is the Iced S'mores Chai at Starbucks?

    The Iced S'mores Chai is a brand new Starbucks drink launching Summer 2026, featuring chai tea concentrate, a marshmallow cold foam, mocha drizzle, and crushed graham crackers. This homemade copycat nails the flavor perfectly — and you don't have to wait for the official launch to enjoy it!

    When does the Iced S'mores Chai come out at Starbucks?

    The Iced S'mores Chai is set to launch on the Starbucks menu Summer 2026 as part of their new S'mores lineup. Exact availability can vary by location, so check with your local store for details. In the meantime, this homemade version means you don't have to wait!

    What's the difference between the S'mores Chai and the S'mores Cold Brew?

    Great question! Both drinks share that same marshmallow cold foam, mocha drizzle, and graham cracker topping, but the base is completely different. My S'mores Cold Brew uses bold cold brew coffee, while this version uses warm, spiced chai tea concentrate. Same s'mores magic, totally different vibe!

    Can I make this dairy-free?

    Absolutely! Swap the heavy cream and whole milk in the cold foam for full-fat coconut cream and oat milk, and use your favorite plant-based milk in the chai base. It'll still be creamy and delicious!

    Can I use this marshmallow cold foam on other drinks?

    Definitely! This marshmallow cold foam is incredible on an iced pumpkin latte, a cold brew, or even blended into a S'mores Frappuccino for a frozen treat. It's quickly becoming one of my favorite toppings on the site!

    Nutritional Info

    Each serving of this Iced S'mores Chai comes in at 353 calories, with 53g of carbs, 51g of sugar, 14g of fat, and 5g of protein. It's definitely a treat — but it's made with real, simple ingredients and tastes incredible from the very first sip!

    If you're looking to lighten it up, try using an unsweetened chai concentrate and skipping the extra marshmallow syrup in the base — the cold foam alone brings plenty of sweetness.

    Total nutritional content per serving is:

    • Calories: 353 calories
    • Total Fat: 14 grams
    • Protein: 5 grams
    • Sodium: 71 mg
    • Carbohydrates: 53 grams
    • Sugar: 51 grams

    *This nutritional information is an estimate and calculated based on the ingredients used to create the recipe. The nutritional value of your ingredients may differ slightly. Furthermore, this food is not intended to prevent, diagnose, cure, or treat any disease.
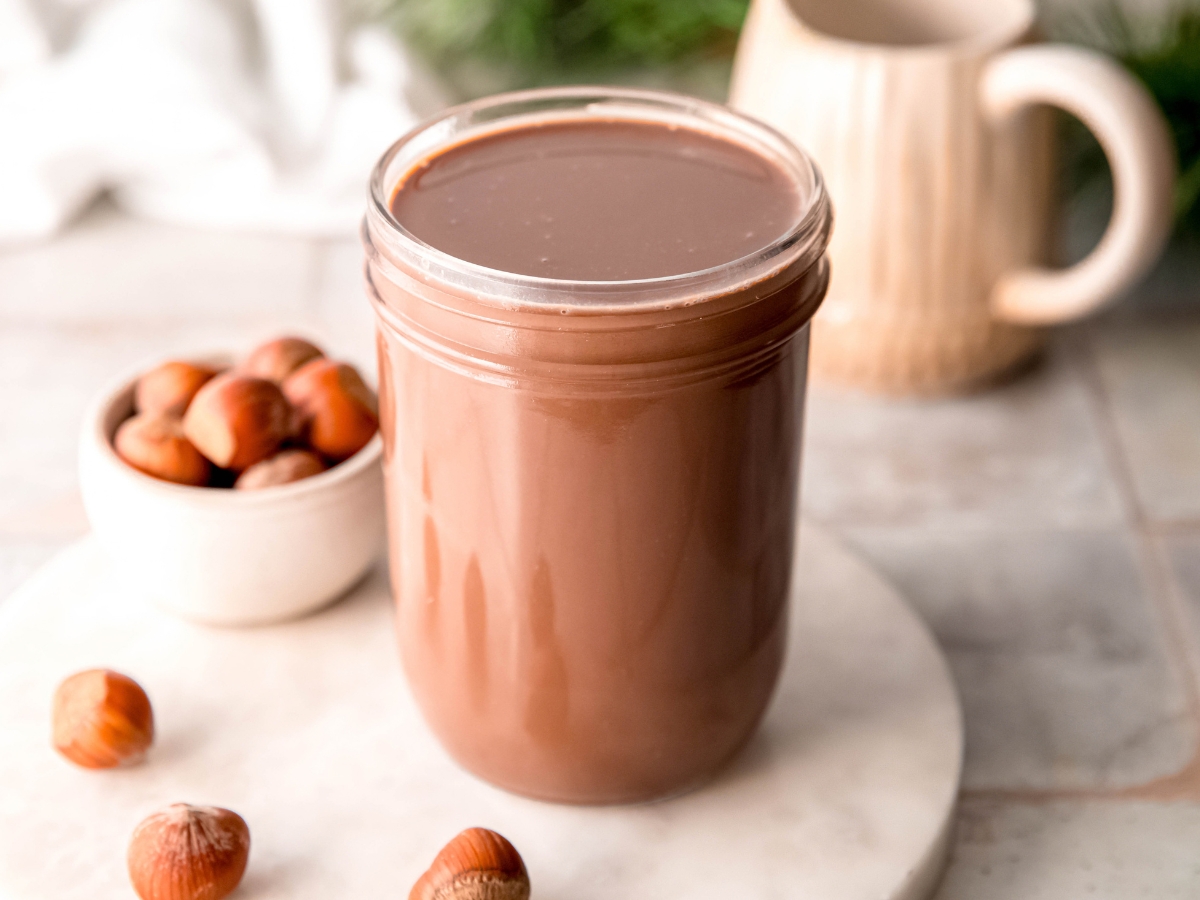
    Other Chai Recipes

    • Iced S'mores Chai (Starbucks Copycat)
    • Iced Mango Cream Chai (Starbucks Copycat)
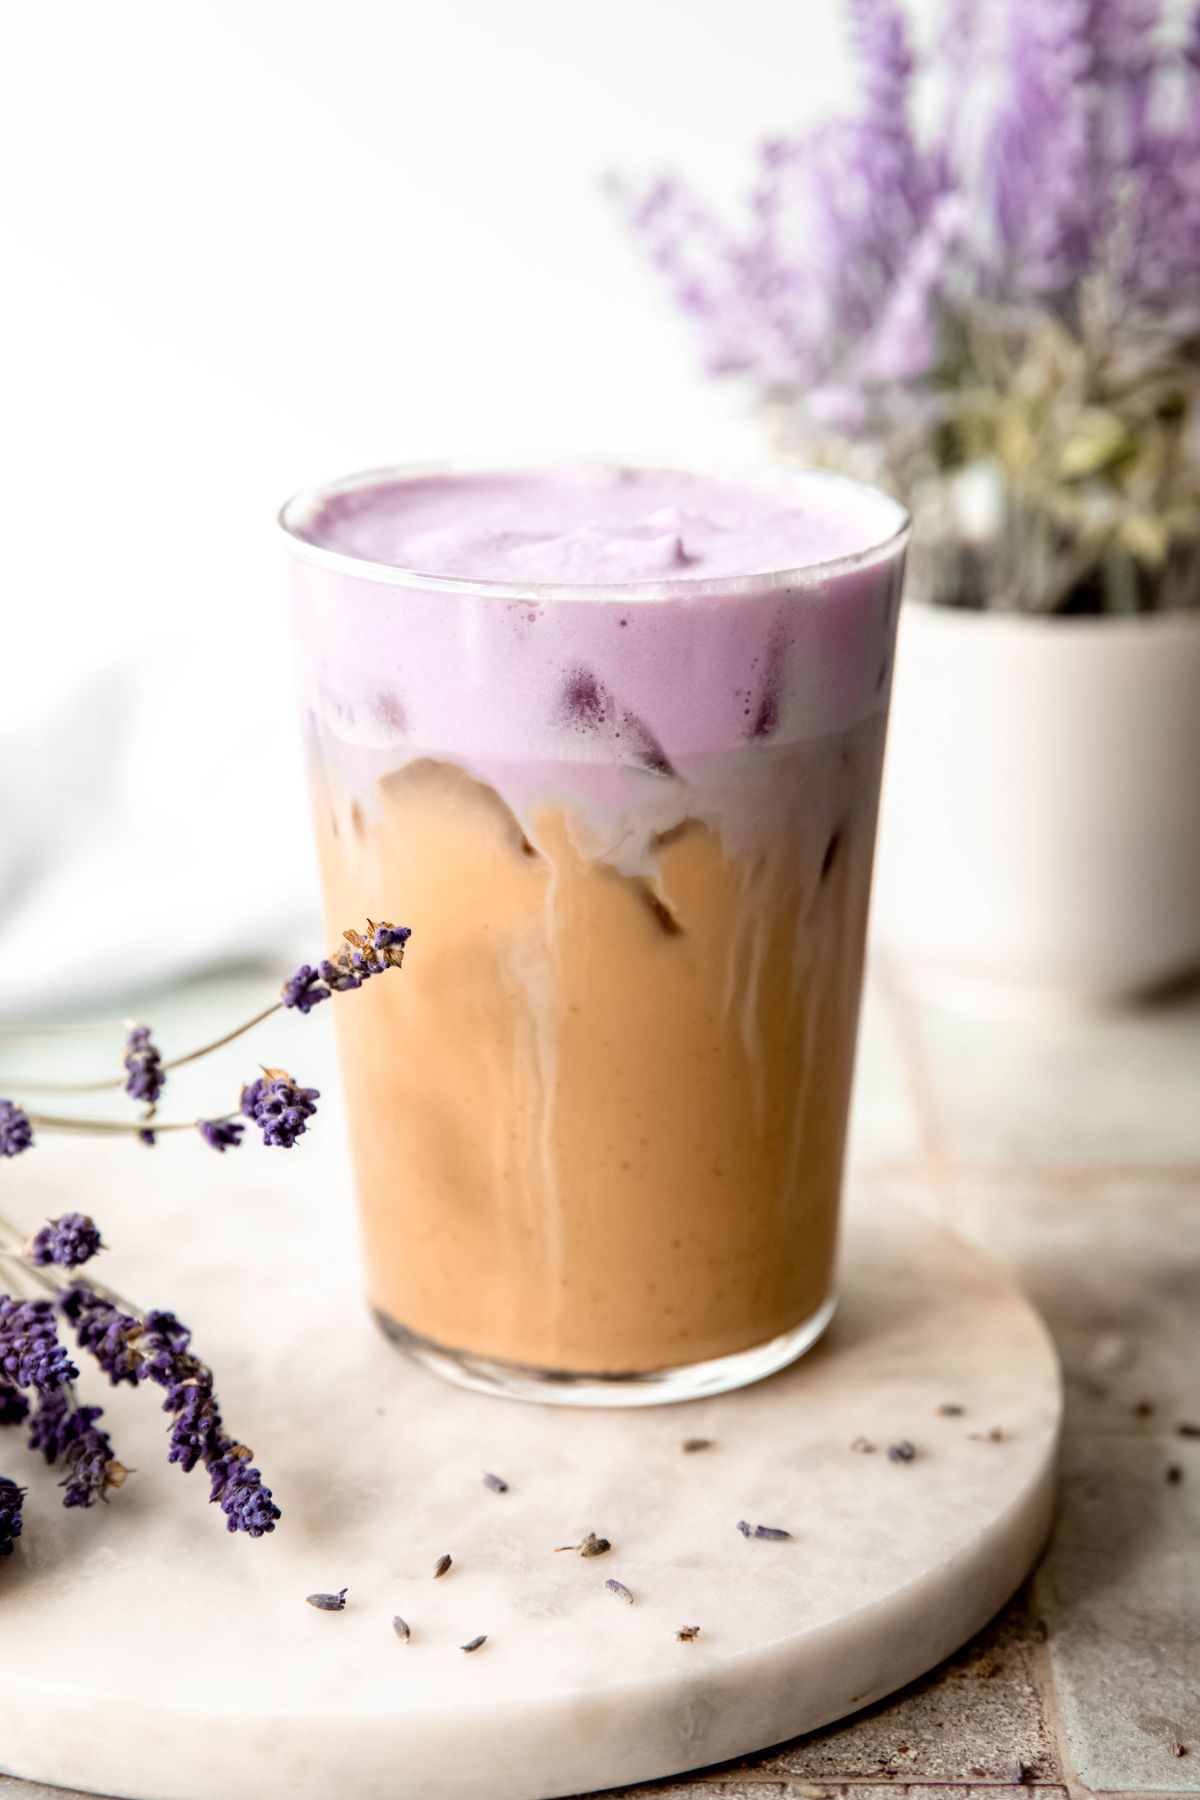
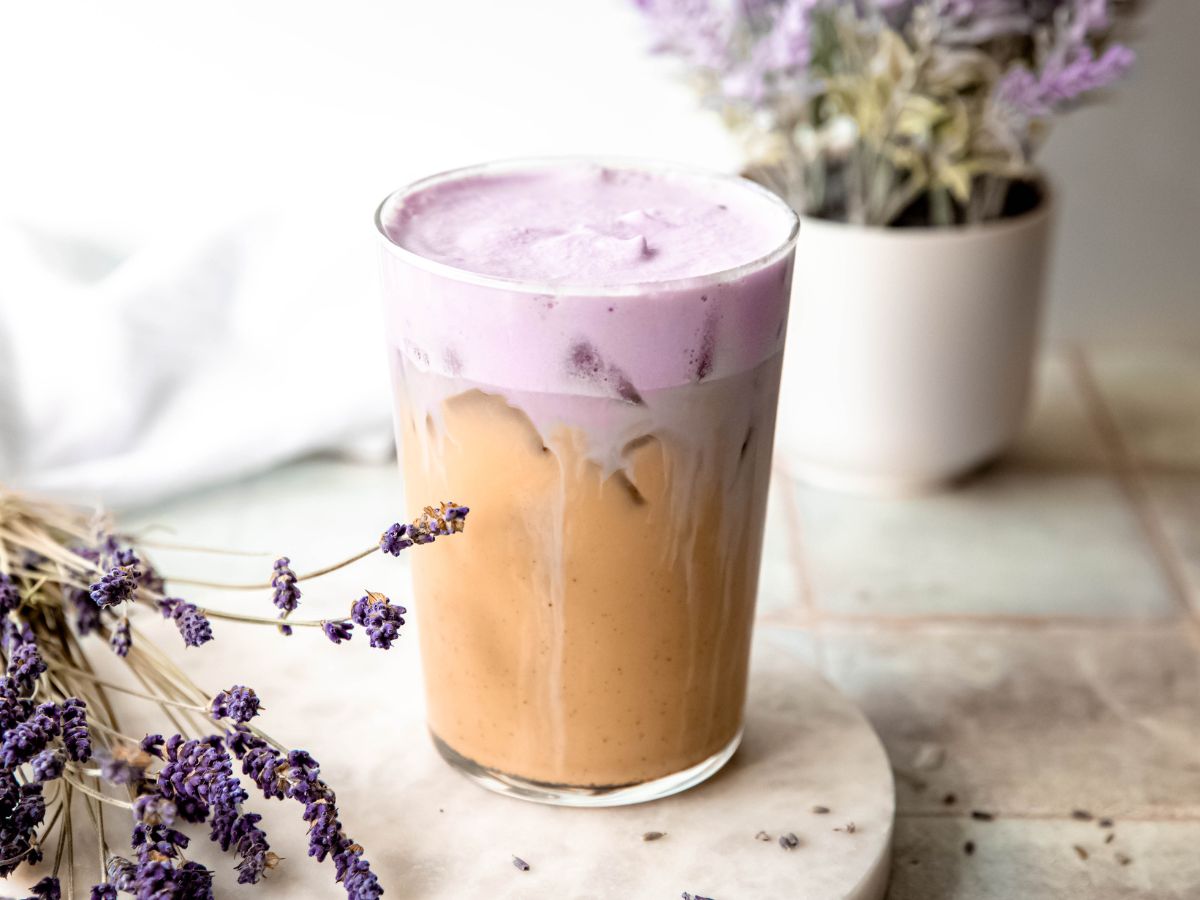
    • Iced Lavender Cream Chai (Starbucks Copycat)
    • Iced Cherry Chai (Starbucks Copycat)
    Print Recipe
    5 from 1 vote

    Iced S'mores Chai (Starbucks Copycat)

    This Iced S'mores Chai tastes just like the new Starbucks drink — spiced chai, marshmallow foam, and a chocolatey finish.
    Prep Time5 minutes mins
    Total Time5 minutes mins
    Course: Drinks
    Cuisine: American
    Keyword: Iced S'mores Chai
    Servings: 1 drink
    Calories: 353kcal
    Author: Megan Byrd

    Equipment

    • 1 milk frother

    Ingredients

    Marshmallow Cold Foam:

    • 2 tablespoon heavy cream
    • 1 ½ tablespoon toasted marshmallow syrup
    • 1 tablespoon whole milk

    Iced S'mores Chai:

    • ½ cup chai tea concentrate
    • ½ cup milk of choice (I used 2%)
    • 1-2 tablespoon toasted marshmallow syrup (optional, see notes)
    • 1 teaspoon mocha sauce (or chocolate syrup)
    • ½ teaspoon crushed graham crackers
    • ice

    Instructions

    • Make the cold foam. Add the heavy cream, marshmallow syrup, and whole milk to a small glass or mason jar and froth with a milk frother until foamy. Set aside.
    • Add ice to a tall glass, then pour in the chai concentrate, milk of choice, and marshmallow syrup (if using). Stir.
    • Top with marshmallow cold foam. Drizzle with mocha sauce and sprinkle with crushed graham crackers. Drink up!

    Notes

    A Note On Marshmallow Syrup: Starbucks uses an unsweetened chai base and adds marshmallow syrup to it. Most chai concentrates (including my homemade version) are already sweetened so there's no real reason to add it unless you really want to. If you're using an unsweetened chai concentrate, add 2 tablespoon marshmallow syrup. 

    Nutrition

    Serving: 1drink | Calories: 353kcal | Carbohydrates: 53g | Protein: 5g | Fat: 14g | Sodium: 71mg | Sugar: 51g
    Iced s'mores chai.

    xoxo Megan

    S'mores Cold Brew (Starbucks Copycat)

    June 26, 2026

    This S'mores Cold Brew is the copycat version of the brand new Starbucks drink — and once you taste it, you're going to want to make it on repeat all summer long. We're talking bold cold brew coffee, a dreamy marshmallow cold foam, a rich chocolate drizzle, and a sprinkle of crushed graham crackers on top.

    It's basically your favorite campfire treat, reimagined as a coffee drink — sweet, toasty, chocolatey, and topped with the fluffiest marshmallow cold foam you've ever seen. This s'mores coffee drink is the kind that makes you actually excited for your afternoon coffee.

    Plus, you don't have to wait in line or pay Starbucks prices to enjoy it. This homemade version comes together in just 5 minutes with a milk frother and a few simple ingredients — most of which you can make right at home using my recipes for both the Toasted Marshmallow Syrup and Mocha Sauce.

    Whether you're getting ready for the new drink to launch or just craving something sweet and coffee-flavored, this S'mores Cold Brew is about to become your new favorite. Let's make it!

    [feast_advanced_jump_to]

    What Does the S'mores Cold Brew Taste Like?

    This drink tastes exactly like a campfire s'more in coffee form — sweet, toasty marshmallow flavor swirled into bold, smooth cold brew coffee. The toasted marshmallow syrup gives it that warm, slightly caramelized sweetness that makes marshmallows so irresistible in the first place.

    The mocha drizzle adds a rich, chocolatey layer that ties everything together, while the crushed graham crackers on top bring that classic s'mores graham cracker flavor. It's sweet, cozy, and just nostalgic enough to make every sip feel like a treat.

    Why You'll Love This Starbucks S'mores Cold Brew

    • Ready in 5 minutes — Faster than any drive-through line, and so much more fun to make yourself.
    • Cheaper than Starbucks — New Starbucks drinks come with a premium price tag. This homemade version gives you the same flavor at a fraction of the cost!
    • That marshmallow cold foam though — It's fluffy, sweet, and absolutely dreamy. Once you make it, you'll want to put it on everything.
    • Totally customizable — Use iced coffee, make it dairy-free, adjust the sweetness — this recipe is completely flexible.
    • A summer drink you can make any time of year — This new Starbucks summer drink doesn't have to wait for an official launch or worry about disappearing from the menu. This version is yours whenever the craving hits!

    Ingredients Needed

    • Heavy cream and whole milk — Together they give the marshmallow cold foam its rich, silky, fluffy texture.
    • Toasted marshmallow syrup — The star of the show! It flavors both the cold foam and the cold brew base, adding that warm, toasty marshmallow sweetness that makes this drink so special. I love using my homemade Toasted Marshmallow Syrup for the best flavor.
    • Cold brew coffee — The bold, smooth coffee base of this drink. The stronger the cold brew, the better it stands up to all that sweetness on top.
    • Mocha sauce — Adds a rich, chocolatey drizzle on top. Our homemade Mocha Sauce is incredible here, or use chocolate syrup as a simple swap.
    • Crushed graham crackers — The finishing touch that gives this drink its classic s'mores crunch. Don't skip it!

    Substitutions

    • No mocha sauce? Chocolate syrup works great as a simple 1:1 swap — it's already noted as an option in the recipe!
    • No toasted marshmallow syrup? Use regular vanilla syrup plus a few drops of marshmallow extract for a similar sweet, marshmallow-y flavor. Or make your own with our Toasted Marshmallow Syrup recipe — it's so easy!
    • Dairy-Free: Swap the heavy cream and whole milk in the cold foam for full-fat coconut cream and oat milk. It'll still be creamy, dreamy, and delicious!

    How to Make S'mores Cold Brew

    This drink comes together in three easy steps — and the hardest part is not eating all the crushed graham crackers before they make it onto your drink!

    • Step 1 — Start with the cold foam. Combine the heavy cream, toasted marshmallow syrup, and whole milk in a small glass or jar, then froth everything together with a milk frother until light and airy. Set it aside while you build the rest of the drink.
    • Step 2 — Fill a tall glass with ice and pour in the cold brew along with the remaining toasted marshmallow syrup. Give it a good stir so the syrup blends evenly into the coffee.
    • Step 3 — Spoon the marshmallow cold foam over the top, finish with a drizzle of mocha sauce, and scatter the crushed graham crackers across the foam. Enjoy immediately!

    Optional Variations

    • Graham cracker rim — Wet the rim of your glass with a little water or syrup, then dip it in crushed graham crackers for that classic, picture-perfect s'mores presentation.
    • Toasted marshmallow topping — Use a kitchen torch to lightly toast a few mini marshmallows and add them on top of the cold foam for an extra campfire touch.
    • Extra chocolatey — Drizzle mocha sauce along the inside of the glass before adding ice for a beautiful mocha-swirled effect in every sip.
    • Iced S'mores Latte — Swap the cold brew for espresso and steamed or cold milk for a creamier, latte-style version of this drink.

    Tips for the Best S'mores Cold Brew

    • Use a good quality cold brew. Since this drink is sweet and rich, a bold cold brew is what keeps it balanced. Weak coffee will get lost under all that marshmallow and chocolate!
    • Don't over-froth the cold foam. You want it foamy and pourable, not stiff. A quick 5-15 seconds with the milk frother is usually all it takes.
    • Drizzle the mocha sauce right before serving. This keeps the presentation looking gorgeous and ensures the drizzle doesn't get lost in the foam.
    • Adjust the marshmallow syrup to taste. Love it extra sweet and toasty? Add a little more syrup. Prefer it more coffee-forward? Scale back slightly. This recipe is totally flexible!

    FAQs

    What is the S'mores Cold Brew at Starbucks?

    The S'mores Cold Brew is a brand new Starbucks drink launching next week featuring cold brew coffee, toasted marshmallow syrup, a marshmallow cold foam, mocha drizzle, and crushed graham crackers. This homemade s'mores cold brew recipe nails the flavor perfectly — and you don't have to wait for the official launch to enjoy it!

    When does the S'mores Cold Brew come out at Starbucks?

    The S'mores Cold Brew is set to launch on the Starbucks app in July 2026. Exact availability can vary by location, so check with your local store for details. In the meantime, this homemade version means you don't have to wait!

    Can I make this without a milk frother?

    A milk frother gives you the best, fluffiest cold foam texture, but you can also use a whisk and whisk vigorously by hand for a minute or two. The foam won't be quite as airy, but it'll still taste delicious.

    Can I make this dairy-free?

    Absolutely! Swap the heavy cream and whole milk in the cold foam for full-fat coconut cream and oat milk. The foam will be slightly less thick, but it'll still be creamy and delicious.

    Can I use this marshmallow cold foam on other drinks?

    Definitely! This marshmallow cold foam is incredible on an iced pumpkin latte or a s'mores frappuccino. It's also a perfect topping for our S'mores Creamer if you want even more of that toasty marshmallow flavor in your coffee routine.

    Nutritional Info

    Each serving of this S'mores Cold Brew comes in at 265 calories, with 40g of carbs, 34g of sugar, 11g of fat, and 1g of protein. It's definitely a treat — but it's made with real, simple ingredients and tastes incredible from the very first sip!

    If you're looking to lighten it up, try reducing the marshmallow syrup and mocha sauce slightly. You'll still get all that gorgeous s'mores flavor with a lighter sweetness.

    Total nutritional content per serving is:

    • Calories: 265 calories
    • Total Fat: 11 grams
    • Protein: 1 gram
    • Sodium: 36 mg
    • Carbohydrates: 40 grams
    • Sugar: 34 grams

    *This nutritional information is an estimate and calculated based on the ingredients used to create the recipe. The nutritional value of your ingredients may differ slightly. Furthermore, this food is not intended to prevent, diagnose, cure, or treat any disease.

    Other At-Home Cold Brew Recipes

    • S'mores Cold Brew (Starbucks Copycat)
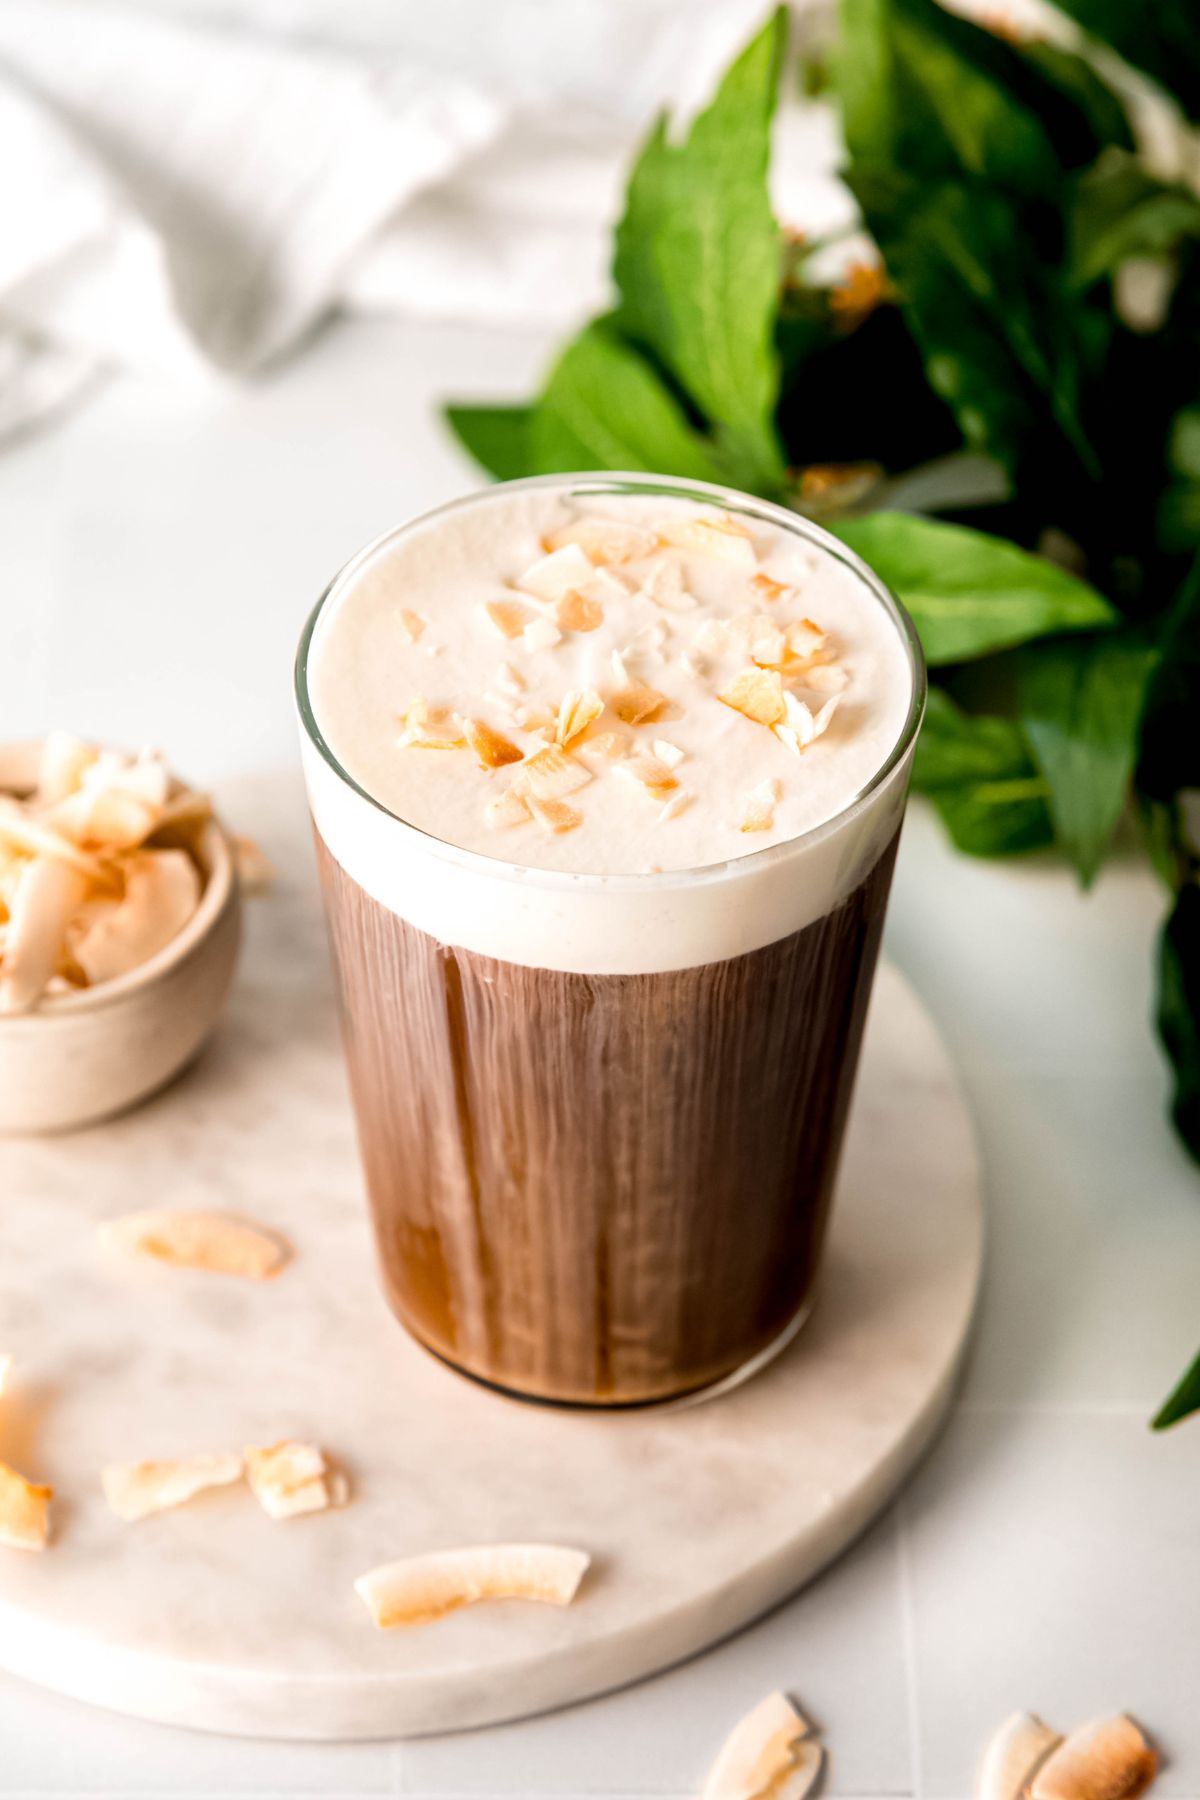
    • Toasted Coconut Cream Cold Brew (Starbucks Copycat)
    • White Chocolate Strawberry Cream Cold Brew (Starbucks Copycat)
    • Cookie Butter Cold Brew (Dunkin' Copycat)
    Print Recipe
    5 from 1 vote

    S'mores Cold Brew (Starbucks Copycat)

    This S'mores Cold Brew tastes just like the new Starbucks drink — bold cold brew, marshmallow foam, and a chocolatey finish.
    Prep Time5 minutes mins
    Total Time5 minutes mins
    Course: Drinks
    Cuisine: American
    Keyword: S'mores Cold Brew
    Servings: 1 drink
    Calories: 265kcal
    Author: Megan Byrd

    Equipment

    • 1 milk frother

    Ingredients

    Marshmallow Cold Foam:

    • 2 tablespoon heavy cream
    • 1 ½ tablespoon toasted marshmallow syrup
    • 1 tablespoon whole milk

    S'mores Cold Brew:

    • 1 ½ cups cold brew coffee
    • 1 ½ tablespoon toasted marshmallow syrup
    • 1 teaspoon mocha sauce (or chocolate syrup)
    • ½ teaspoon crushed graham crackers
    • ice

    Instructions

    • Make the cold foam. Add the heavy cream, marshmallow syrup, and whole milk to a small glass or mason jar and froth with a milk frother until foamy. Set aside.
    • Add ice to a tall glass, then pour in the cold brew and 1 ½ tablespoon marshmallow syrup. Stir.
    • Top with marshmallow cold foam. Drizzle with mocha sauce and sprinkle with crushed graham crackers. Drink up!

    Video

    Nutrition

    Serving: 1drink | Calories: 265kcal | Carbohydrates: 40g | Protein: 1g | Fat: 11g | Sodium: 36mg | Sugar: 34g
    S'mores cold brew.

    xoxo Megan

    5-Minute Lime Simple Syrup

    June 16, 2026

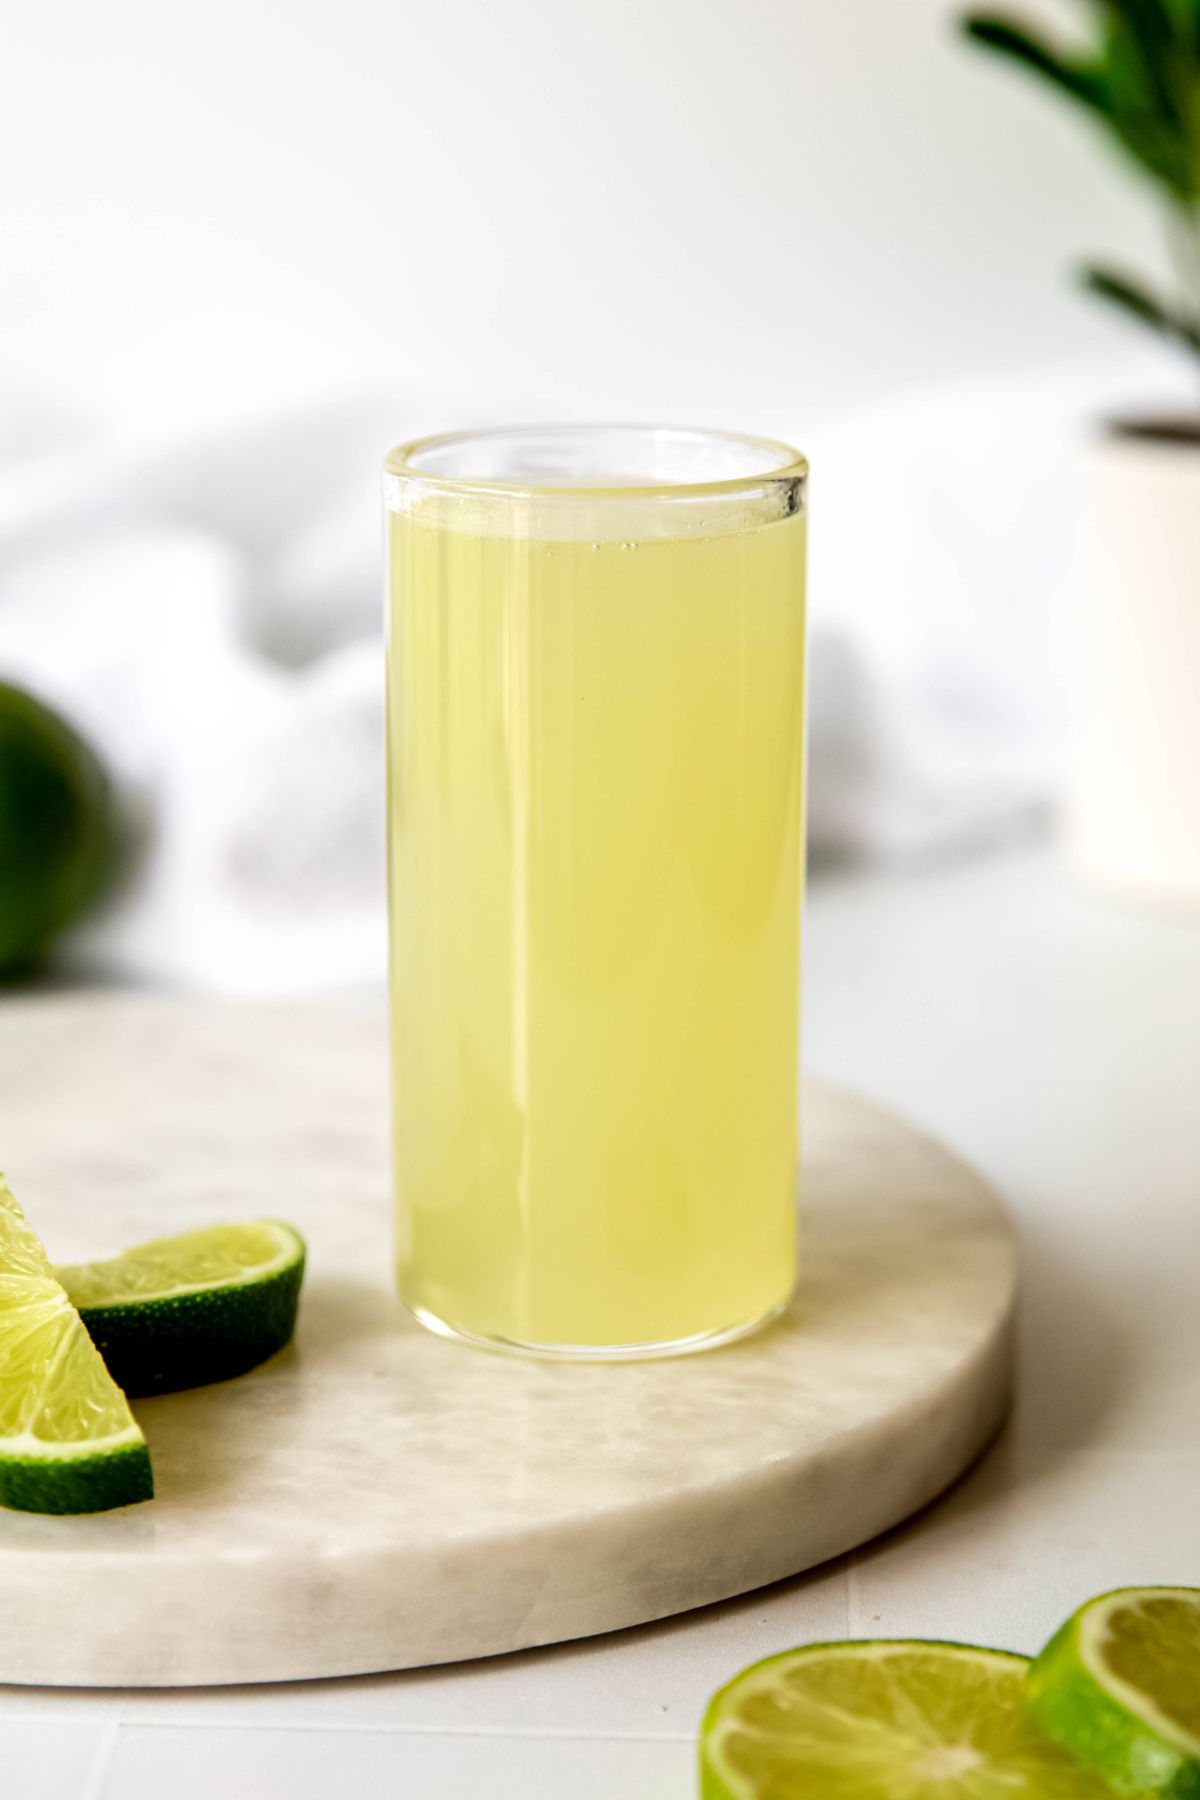
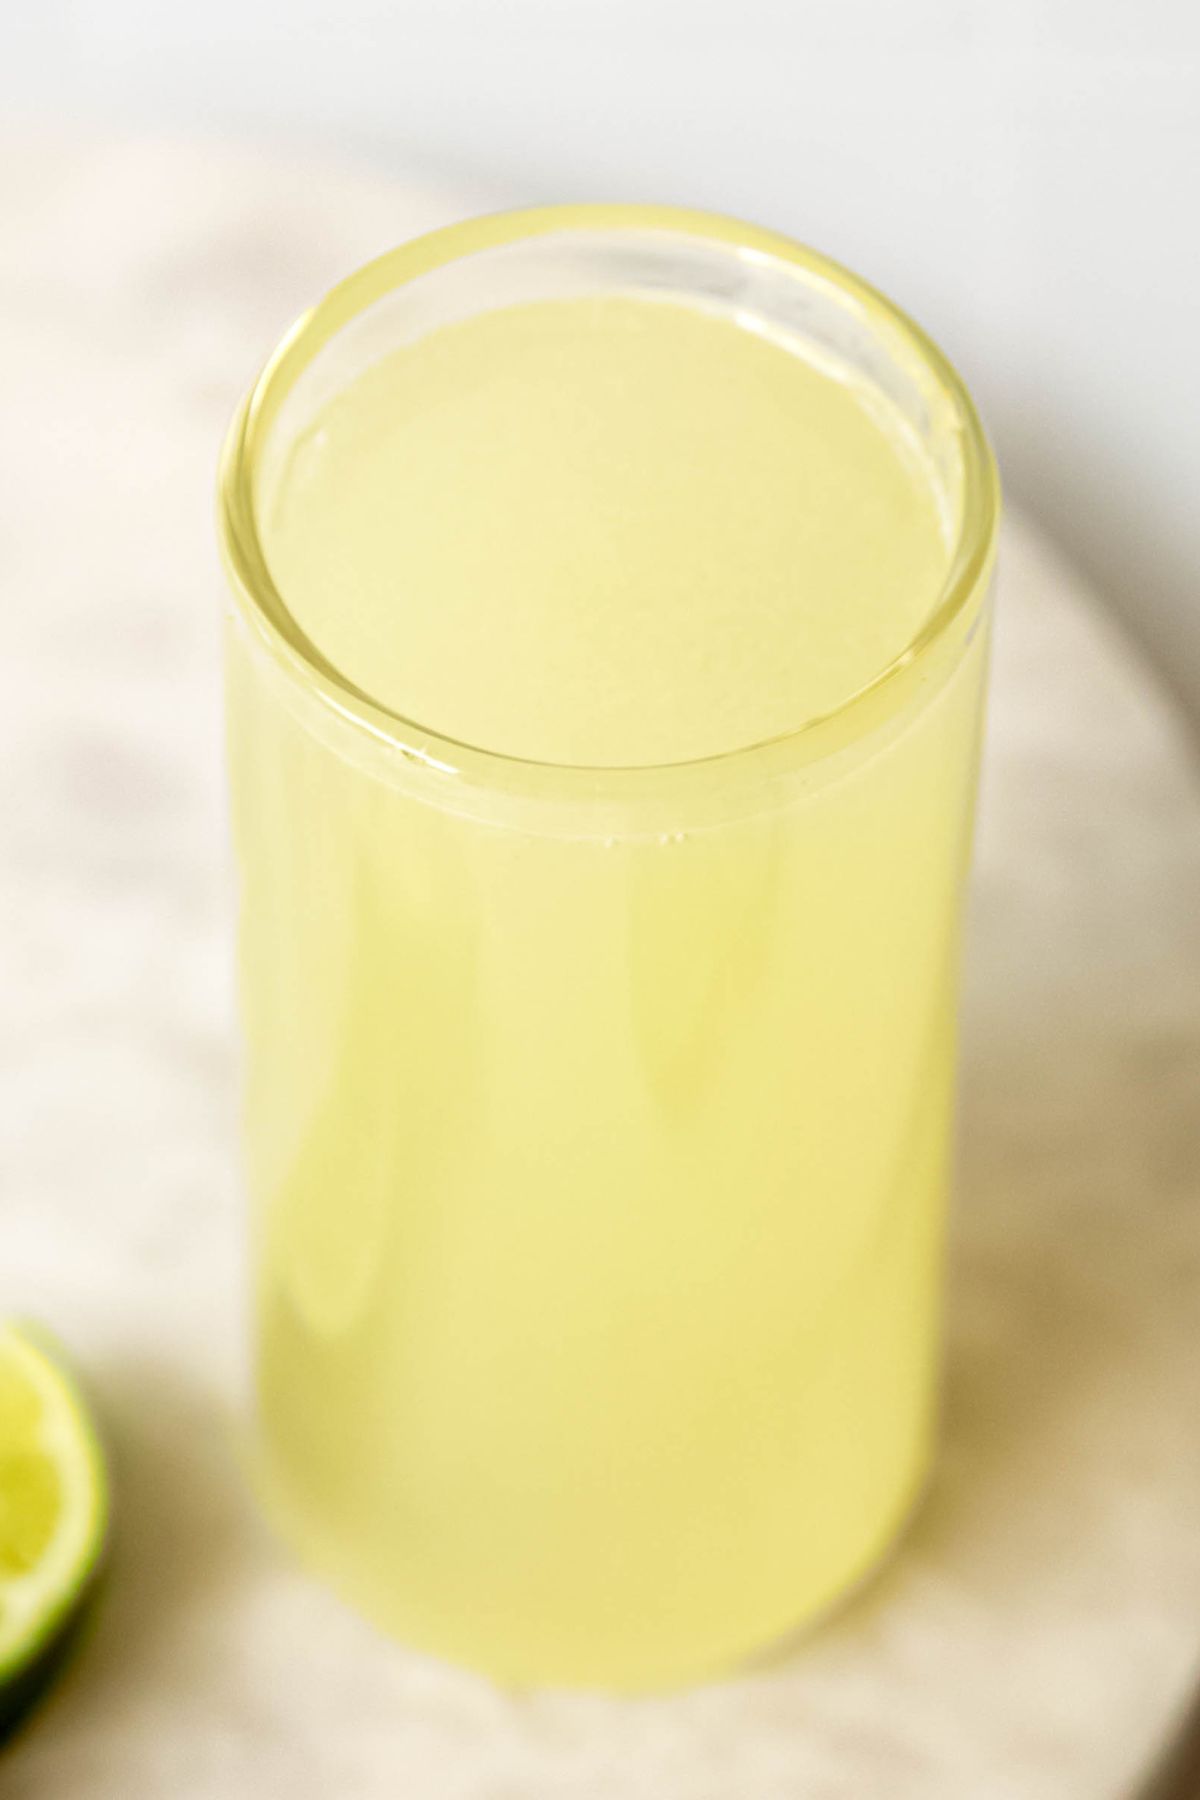
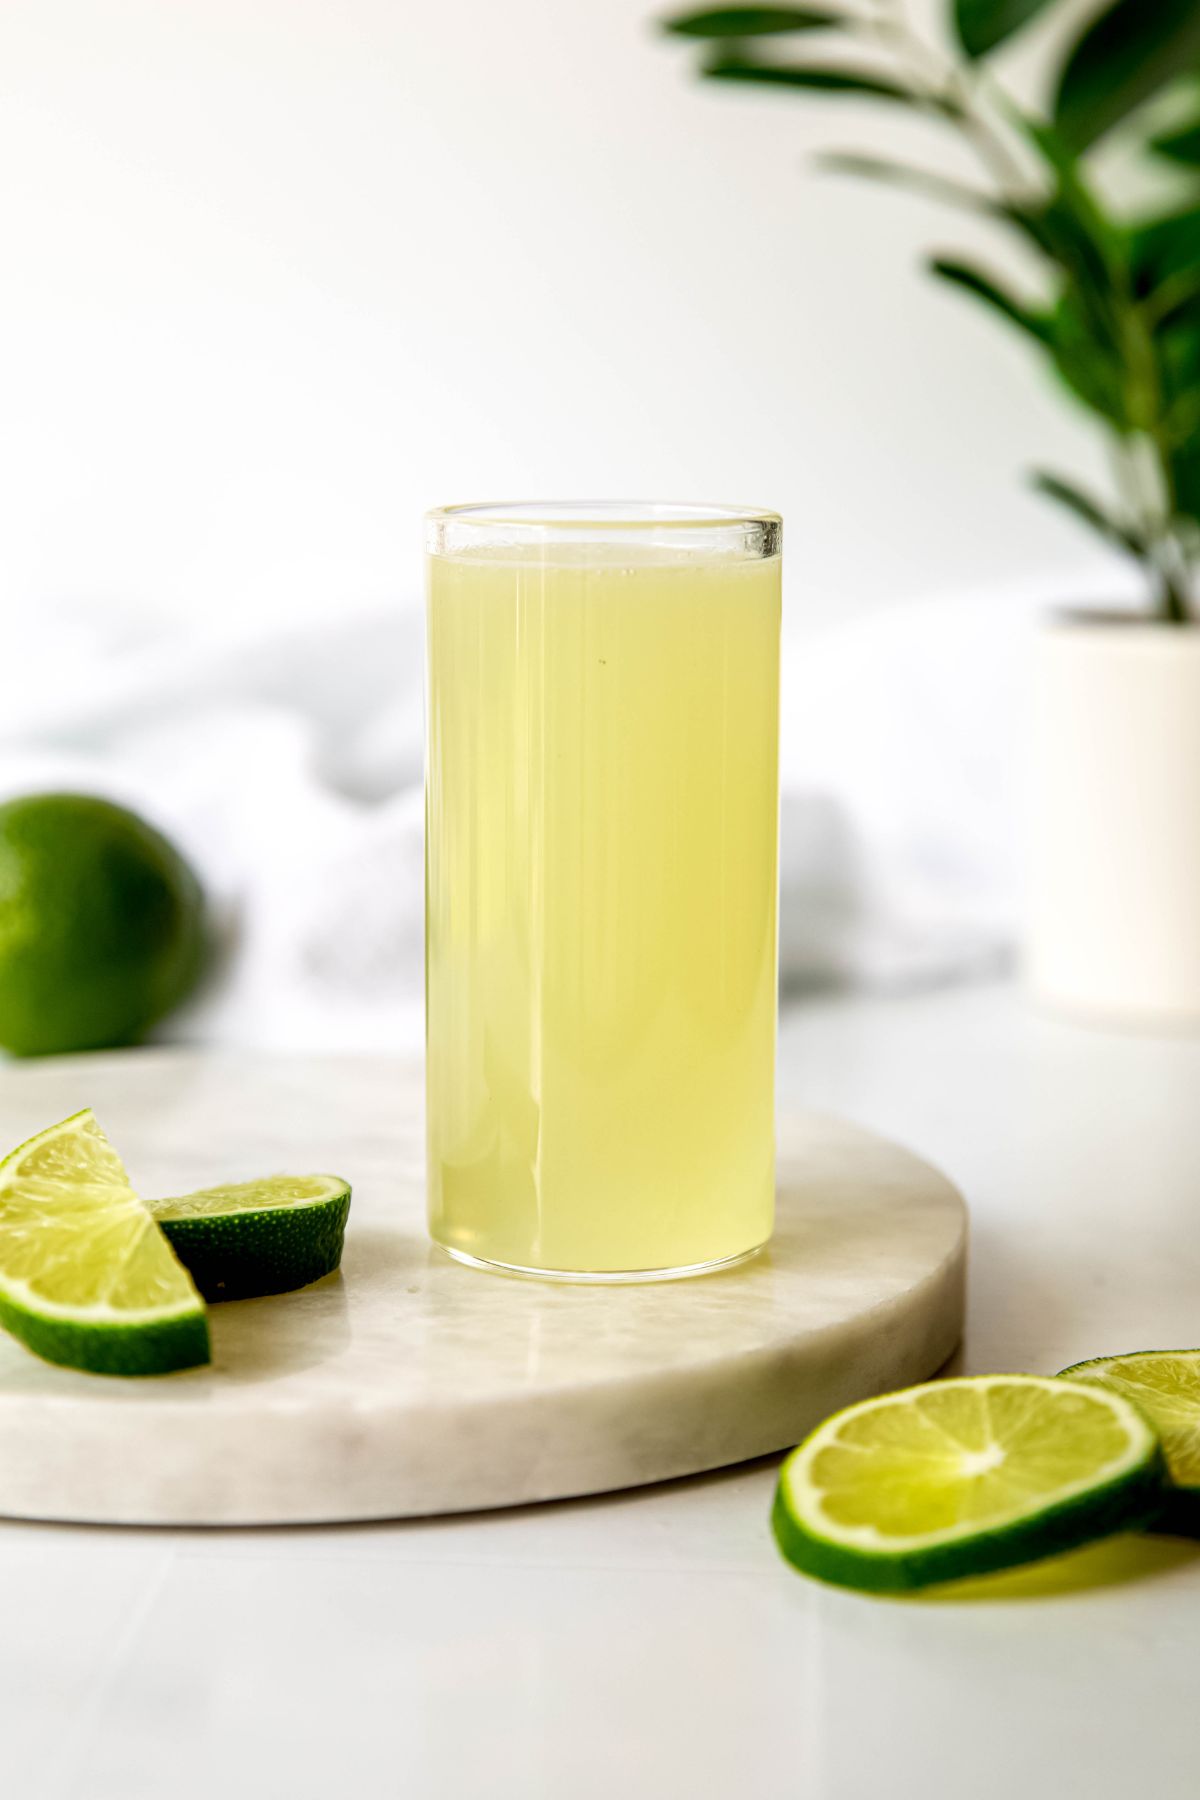
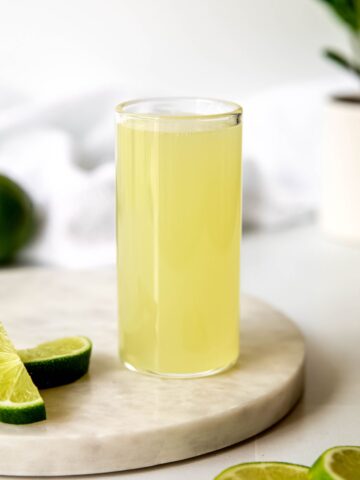
    This Lime Simple Syrup is the bright, tangy, incredibly versatile syrup you're going to want to keep stocked in your fridge all year long. Made with just 3 simple ingredients and ready in 5 minutes, it adds a fresh burst of real lime flavor to everything from cocktails and mocktails to coffee drinks and lemonade.

    If you've ever tried to make a lime-flavored drink and ended up with something flat and artificial-tasting, this syrup is the answer. Real fresh lime juice makes all the difference — and once you taste the difference, you'll never reach for the store-bought stuff again.

    The best part? This recipe makes about 1.5 cups of lime syrup and keeps fresh in the fridge for up to 2 weeks. That means one quick batch and you've got a week's worth of amazing drinks at your fingertips.

    Whether you're whipping up a margarita, making a sparkling limeade, or using it to make a homemade Cool Lime Refresher, this lime simple syrup is about to become one of your most-used kitchen staples. Let's make it!

    [feast_advanced_jump_to]

    What Does Lime Simple Syrup Taste Like?

    This syrup tastes like a perfectly balanced limeade — bright, tangy, and sweet all at once. The fresh lime juice gives it a zingy, citrusy punch that store-bought syrups simply can't replicate.

    It's not too sweet and not too sour — it hits that perfect middle ground that makes every drink it touches taste fresh and vibrant. Think of it as bottled sunshine with a serious lime kick.

    Why You'll Love This Lime Syrup Recipe

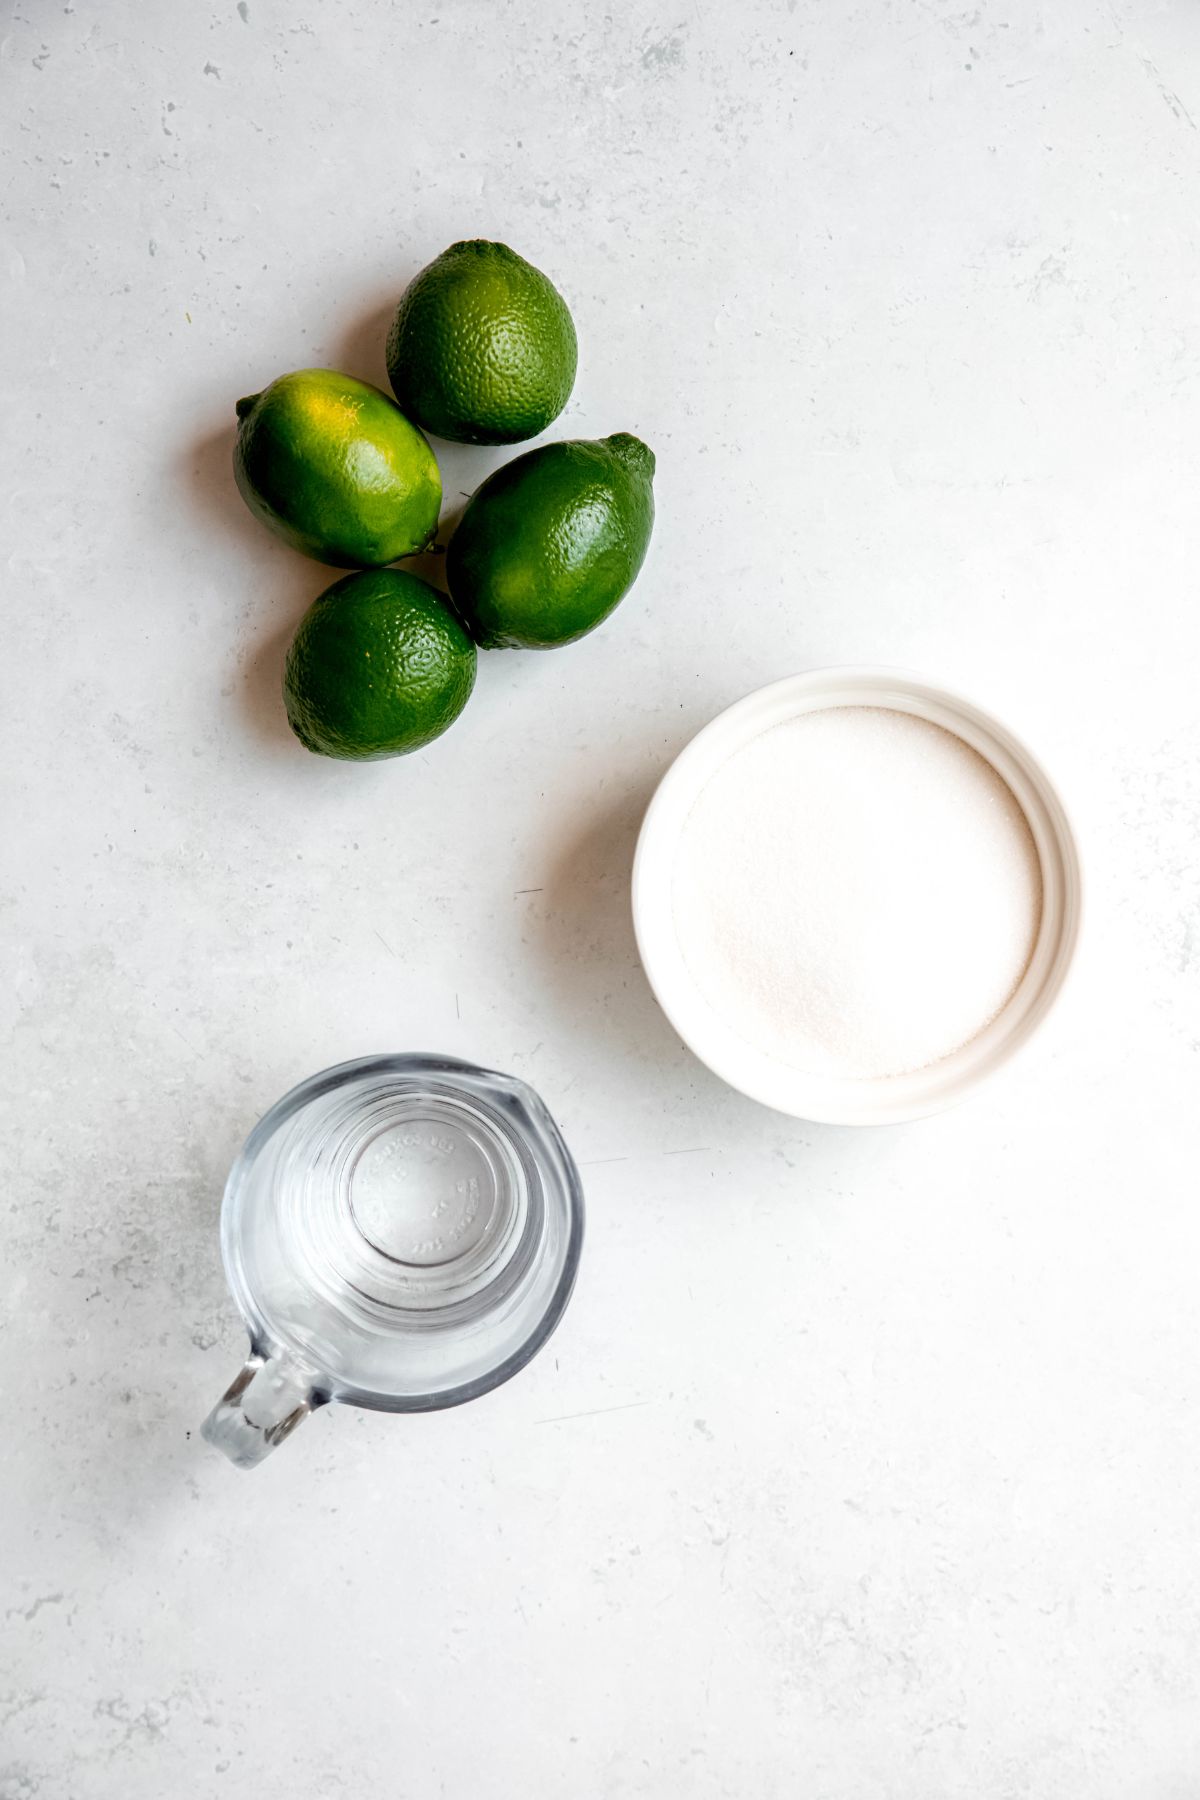
    • Only 3 ingredients — Sugar, fresh lime juice, and water. That's it! Simple ingredients, incredible flavor.
    • Ready in 5 minutes — From saucepan to syrup bottle in under 5 minutes. It doesn't get easier than this!
    • Made with real fresh lime juice — No artificial flavors, no preservatives, no mystery ingredients. Just real lime, real sugar, real water.
    • Lasts 2 weeks in the fridge — Make one batch and enjoy fresh lime flavor in your drinks for two whole weeks!
    • Better than store-bought — Torani and other store-bought lime syrups are fine, but this homemade version is brighter, fresher, and so much more flavorful.
    • Endlessly versatile — Cocktails, mocktails, coffee drinks, lemonade, desserts — this syrup does it all.

    Ingredients Needed

    You only need 3 ingredients to make this lime simple syrup — and there's a good chance you've already got two of them in your kitchen right now!

    • Granulated sugar — The sweet base of the syrup. Regular granulated sugar dissolves beautifully and lets the lime flavor shine through without any competing flavors.
    • Fresh lime juice — The star of the show! You'll need about 4-5 medium limes for ½ cup of juice. Fresh is absolutely essential here — bottled juice just doesn't have the same bright, zingy flavor.
    • Water — Helps the sugar dissolve evenly and balances the tartness of the lime juice for that perfect sweet-tart flavor.

    Ingredient Substitutions

    • Alternate Sugar: Swap the granulated sugar for brown sugar or coconut sugar for a richer, more caramel-y lime syrup. It pairs beautifully with dark spirits like rum and adds a warm depth of flavor that's totally unique!
    • Add lime zest: Want an even more intense lime flavor? Add the zest of 1-2 limes to the saucepan while heating. Remove before bottling for a syrup with serious lime punch.
    • Bottled lime juice: Fresh lime juice is always best, but bottled works in a pinch. Just know the flavor won't be quite as bright or fresh-tasting as the real thing.
    • Lemon lime simple syrup: Split the lime juice with fresh lemon juice — try ¼ cup of each — for a bright, citrusy lemon lime syrup that's amazing in cocktails and mocktails!

    How to Make Lime Simple Syrup

    This is genuinely one of the easiest recipes on the site — two steps and you're done!

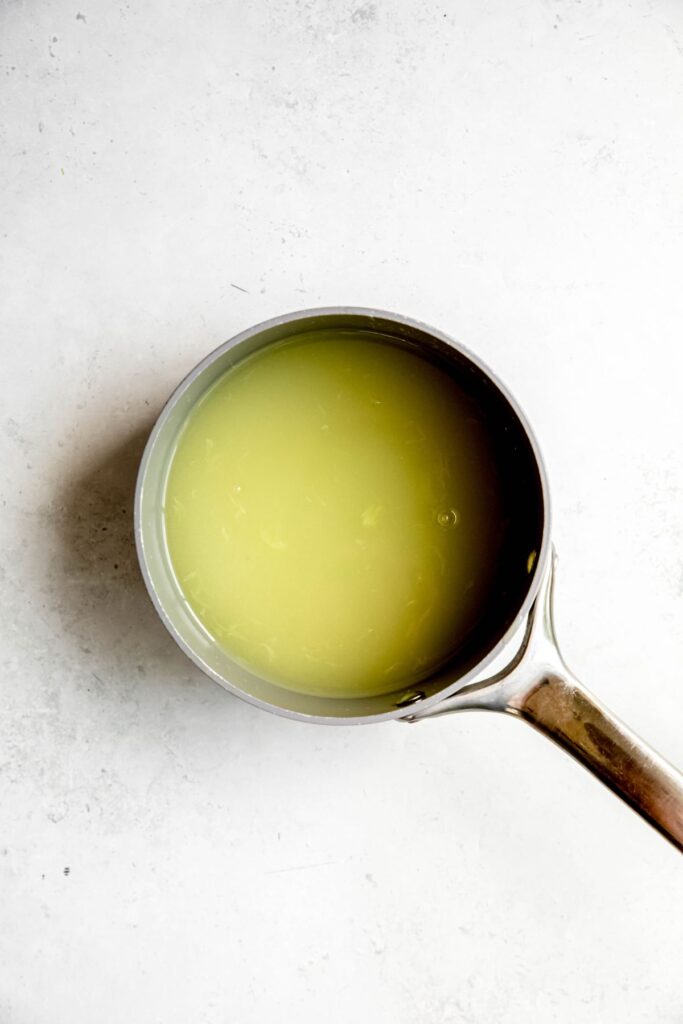
    • Step 1 — Add the granulated sugar, fresh lime juice, and water to a medium saucepan. Heat over medium-low heat, stirring frequently, until the sugar is completely dissolved. Don't let it boil — medium-low heat keeps the lime flavor fresh and bright!
    • Step 2 — Remove from heat and allow to cool for 15 minutes at room temperature. Transfer to a mason jar or syrup bottle and store in the fridge for up to 2 weeks.

    Ways to Use Lime Simple Syrup

    Once you have a bottle of this in your fridge, you'll find yourself reaching for it constantly. Here are some of our favorite ways to use it!

    • Cocktails — This syrup is a game changer in margaritas, mojitos, daiquiris, and any other lime-forward cocktail. Use it anywhere you'd use simple syrup or lime juice in a cocktail recipe!
    • Mocktails and limeades — Stir it into sparkling water for an instant limeade, or use it as the base for a beautiful virgin margarita. Refreshing and delicious!
    • Coffee drinks — A splash of lime simple syrup in cold brew or iced coffee adds a bright, citrusy twist that's surprisingly addictive. It's tart, refreshing, and unlike any coffee drink you've had before.
    • Lemonade upgrade — Add a splash to your favorite lemonade recipe for a gorgeous lemon-lime twist. So simple, so good.
    • Desserts and drizzles — Drizzle it over fruit salad, yogurt, pound cake, or ice cream for a bright citrusy finish that makes everything taste more summery.

    Tips for the Best Lime Simple Syrup

    • Always use fresh lime juice. This is the most important tip! Bottled lime juice lacks the brightness and complexity of fresh-squeezed. Take the extra 5 minutes to juice your limes — it makes all the difference.
    • Don't let it boil. Medium-low heat is the move here. Boiling can cook off some of the volatile compounds that give lime its bright, fresh flavor. Low and slow keeps everything tasting vibrant!
    • Let it cool completely before using. Warm syrup will melt your ice and dilute your drink. Give it the full 15 minutes at room temperature — or refrigerate it for an hour if you're in a hurry.
    • Use a syrup bottle for easy pouring. A squeeze bottle or pour-spout bottle makes adding syrup to drinks so much easier and less messy than a mason jar. Highly recommend!

    FAQs

    What is lime simple syrup used for?

    Lime simple syrup is used to sweeten and flavor drinks — everything from cocktails like margaritas and mojitos to mocktails, limeades, and coffee drinks. It dissolves instantly in cold liquids, making it so much easier to use than granulated sugar. It's also great drizzled over desserts, fruit, and yogurt!

    How long does lime simple syrup last?

    You can, but we strongly recommend fresh lime juice for the best flavor. Bottled lime juice tends to taste duller and more artificial than fresh-squeezed, which can affect the overall brightness of your syrup. If you're in a pinch, bottled will work — but fresh is always worth the extra few minutes!

    What is the difference between lime syrup and lime simple syrup?

    Lime simple syrup is made from scratch with fresh lime juice, sugar, and water — it's a homemade, all-natural sweetener. Lime syrup, on the other hand, often refers to commercially produced flavored syrups like Torani, which may contain artificial flavors, preservatives, and other additives. Homemade is always better!

    Can I make a lemon lime simple syrup?

    Absolutely! Simply split the lime juice with fresh lemon juice — use ¼ cup of each — for a bright, citrusy lemon lime syrup. It's amazing in cocktails, mocktails, and lemonade, and gives you the best of both citrus worlds!

    Can I freeze lime simple syrup?

    Yes! Lime simple syrup freezes beautifully. Pour it into an ice cube tray, freeze until solid, then transfer the cubes to a freezer bag. They'll keep for up to 3 months — and the best part is you can pop a cube or two directly into your drink for instant lime flavor and a little extra chill!

    Can I use lime simple syrup in margaritas?

    Absolutely — and honestly, it's a game changer! Swap it in anywhere a margarita recipe calls for simple syrup or lime juice. It dissolves instantly into the cocktail shaker, gives you that perfect sweet-tart balance, and makes every margarita taste fresh and bright. Once you try it, you'll never go back to bottled lime juice!

    Nutritional Info

    Each 2 tablespoon serving of this lime simple syrup comes in at 67 calories, with 18g of carbs and 17g of sugar. It's a sweetener — not a health food — but it's made with real, recognizable ingredients and a little goes a long way in any drink!

    If you're looking to cut back on sugar, try making a lighter version by reducing the sugar to ¾ cup. You'll get a thinner syrup with a slightly more tart lime flavor, but it'll still be delicious in your favorite drinks.

    Total nutritional content per serving is:

    • Calories: 67 calories
    • Total Fat: 0 grams
    • Protein: 0 grams
    • Sodium: 0 mg
    • Carbohydrates: 18 mg
    • Sugar: 17 mg

    *This nutritional information is an estimate and calculated based on the ingredients used to create the recipe. The nutritional value of your ingredients may differ slightly. Furthermore, this food is not intended to prevent, diagnose, cure, or treat any disease.

    Other Simple Syrup Recipes

    • 5-Minute Lime Simple Syrup
    • Fresh Mango Syrup (Starbucks Copycat)
    • Toasted Vanilla Bean Syrup (Starbucks Copycat)
    • Banana Bread Syrup (for Coffee!)
    Print Recipe
    5 from 1 vote

    Lime Simple Syrup

    A bright, fresh lime simple syrup made with real lime juice, sugar, and water. Ready in 5 minutes and keeps in the fridge for 2 weeks!
    Prep Time2 minutes mins
    Cook Time3 minutes mins
    Total Time5 minutes mins
    Course: Drinks
    Cuisine: American
    Keyword: Lime Simple Syrup
    Servings: 12 servings
    Calories: 67kcal
    Author: Megan Byrd

    Equipment

    • 1 lemon juicer
    • 1 medium saucepan
    • 1 syrup bottle or mason jar

    Ingredients

    • 1 cup granulated sugar
    • ½ cup fresh lime juice (4-5 medium limes)
    • ½ cup water

    Instructions

    • Add all ingredients to a medium saucepan and heat over medium-low heat, stirring until the sugar is dissolved.
    • Remove from heat and allow to cool for 15 minutes at room temperature. Transfer to a mason jar or syrup bottle and store in the fridge for 2 weeks.

    Notes

    This makes about 1.5 cups of lime syrup! 

    Nutrition

    Serving: 2tablespoon | Calories: 67kcal | Carbohydrates: 18g | Sugar: 17g
    Lime simple syrup.

    xoxo Megan

    Blue Coconut Refresher (Starbucks Copycat)

    June 9, 2026

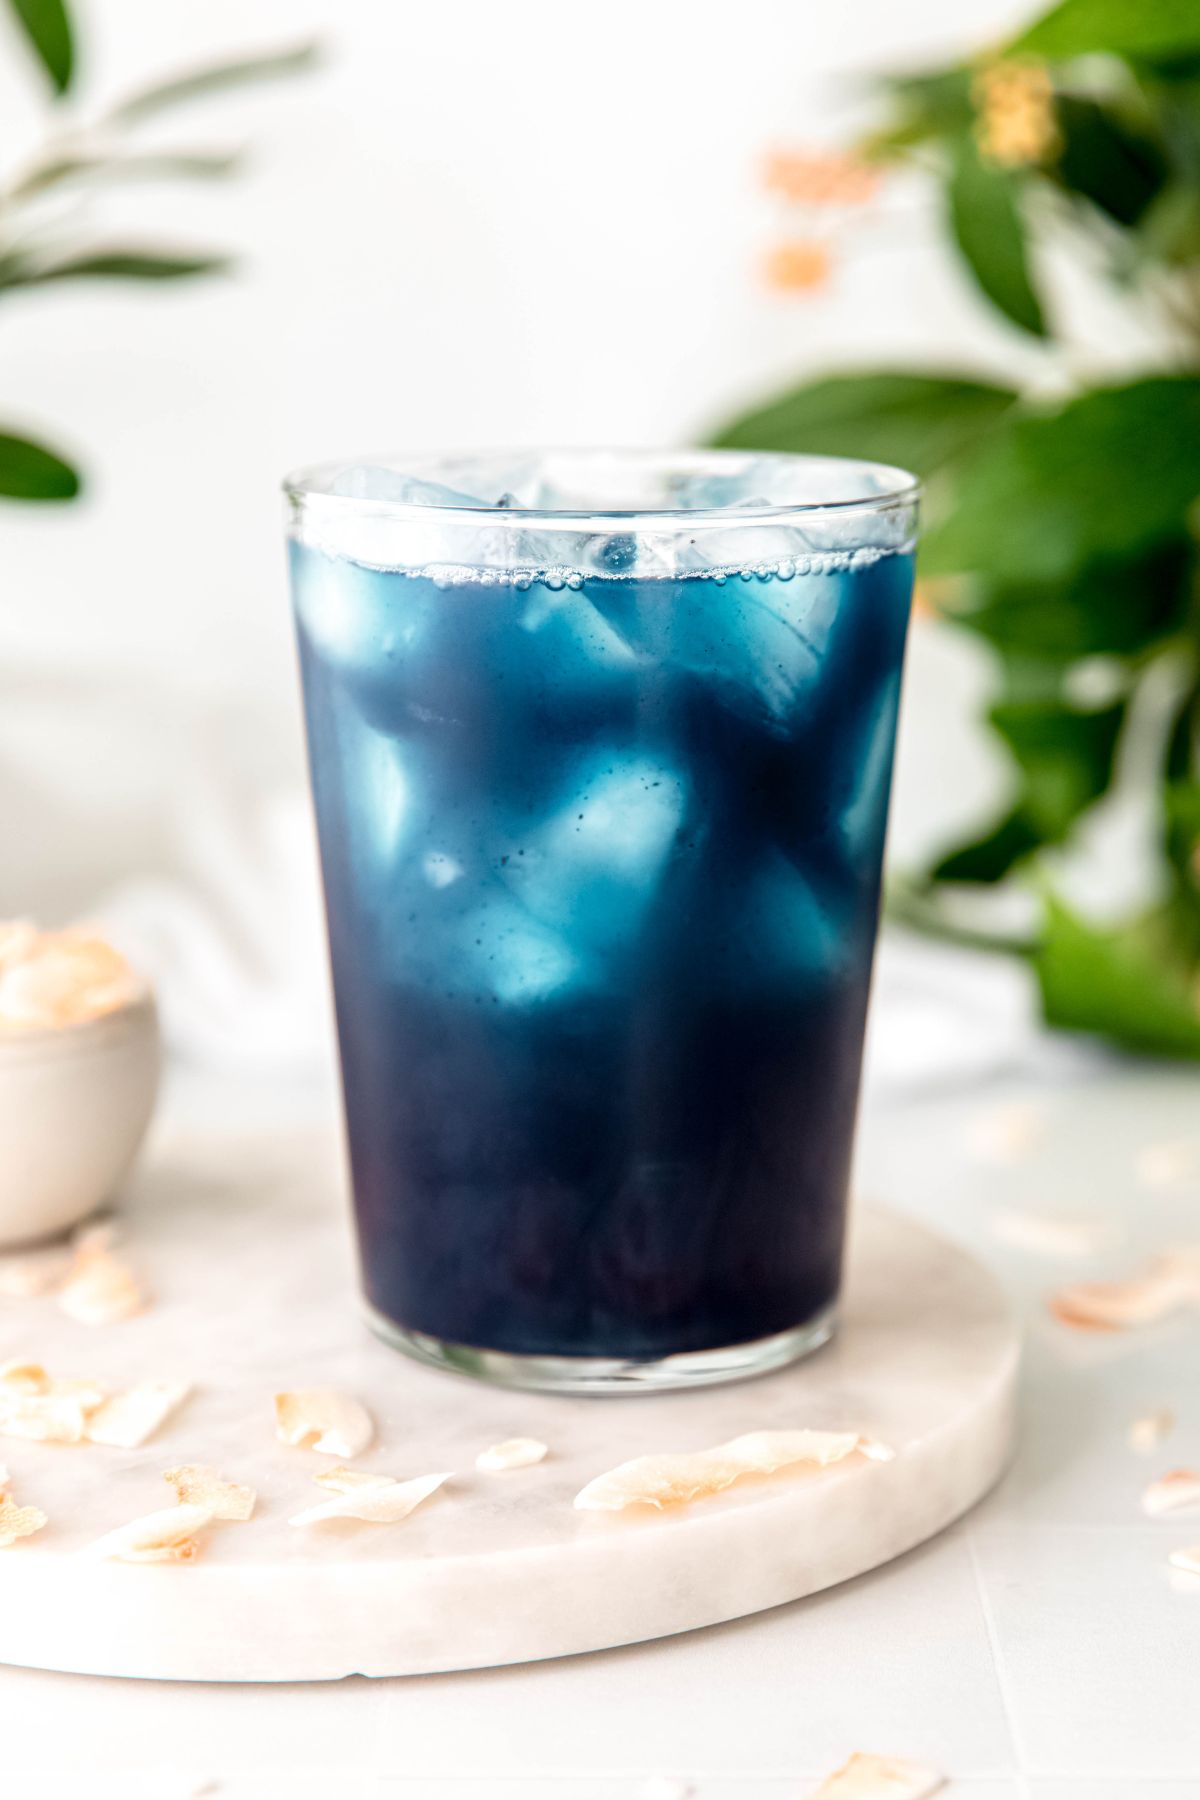
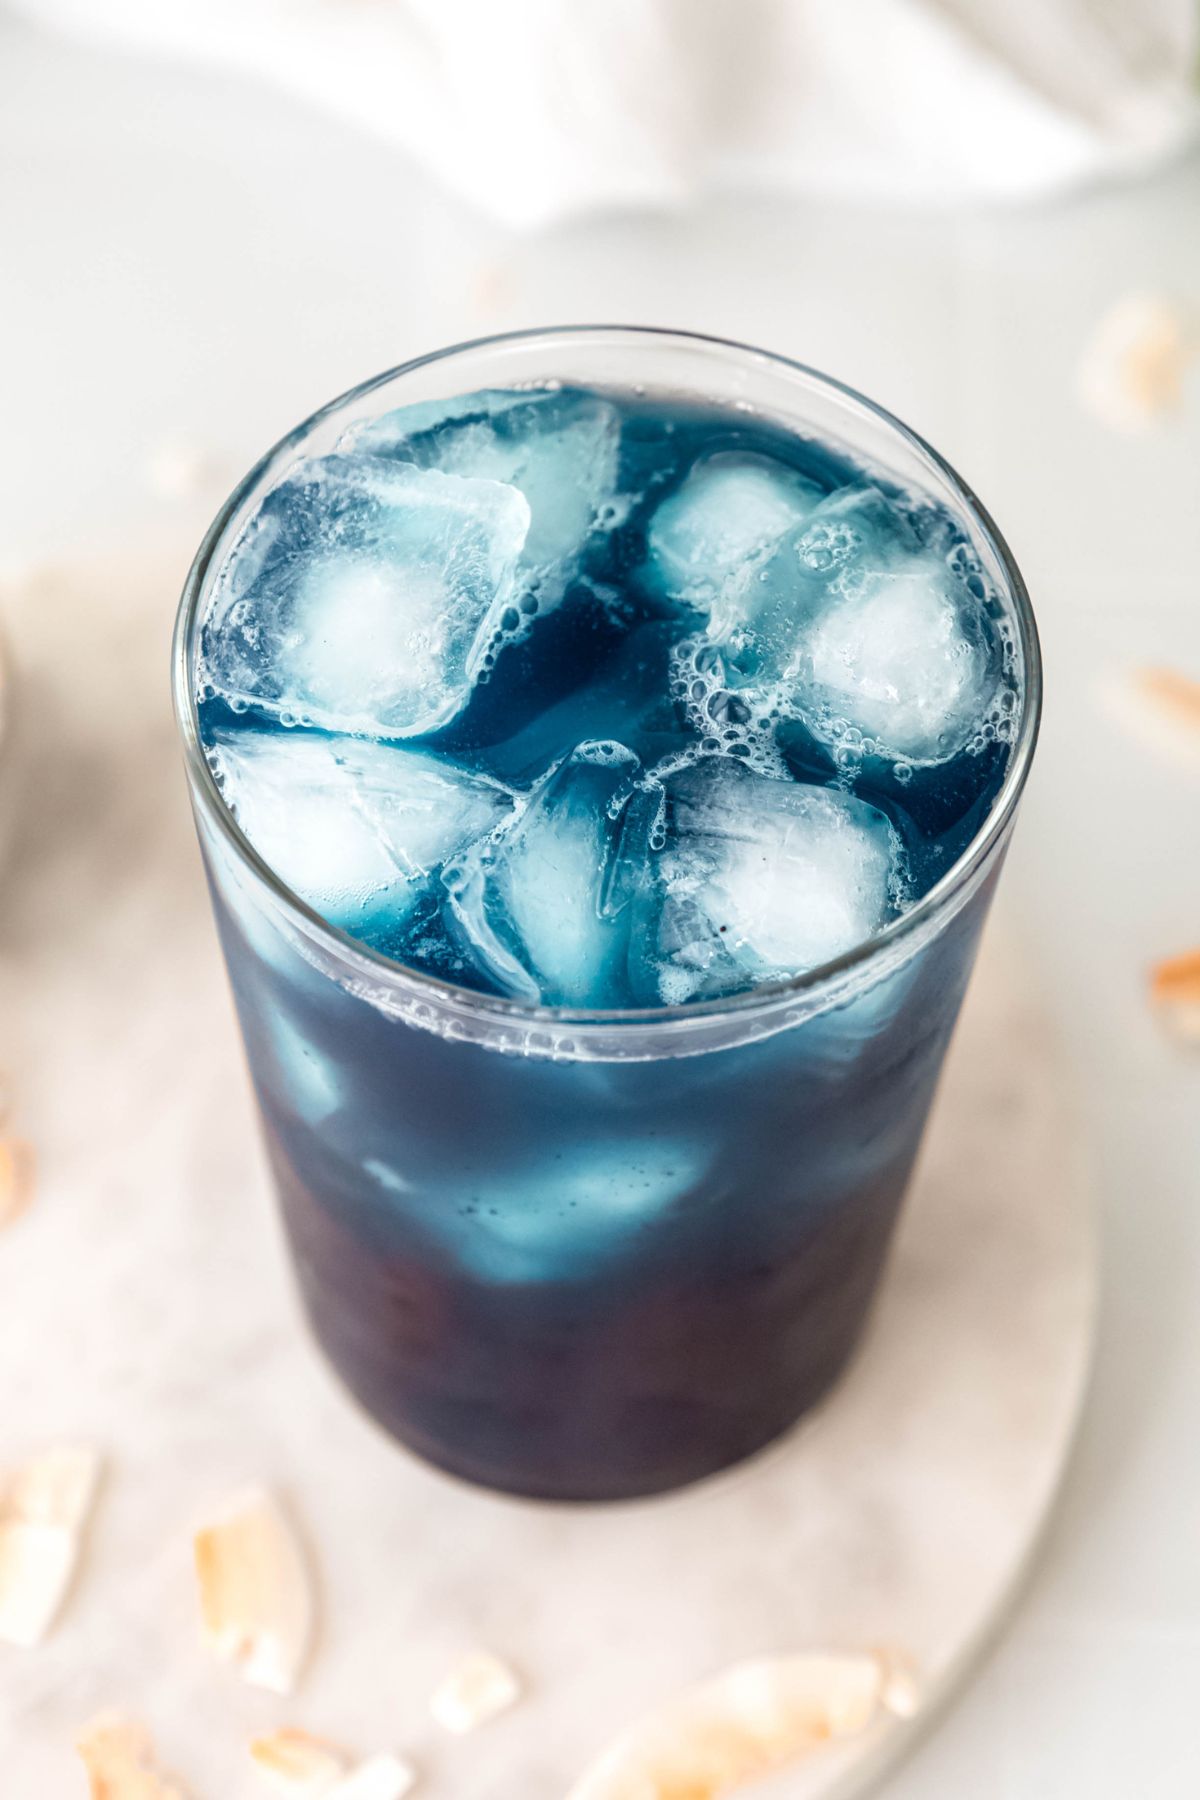
    This Blue Coconut Refresher is the stunning new Starbucks summer 2026 drink you're going to want to make at home all season long — and once you try it, you'll never want to pay Starbucks prices again. We're talking sweet, fruity, tropical refresher vibes with that jaw-dropping electric blue color that's been breaking the internet.

    If you're already obsessed with the Starbucks Strawberry Acai Refresher, this drink is basically its cooler, more tropical summer cousin. It's the same beloved fruity base, but with coconut syrup and blue spirulina shaken right in for a color and flavor upgrade that makes it feel like an entirely new drink.

    The best part about this recipe? The homemade Strawberry Acai Refresher base makes enough for 5 drinks and stores in the fridge for up to a week. That means one 15-minute batch on Sunday and you're sipping stunning blue coconut refreshers all week long.

    Whether you're hosting a summer cookout, looking for a gorgeous mocktail, or just need a seriously refreshing pick-me-up, this is the drink of the summer. Let's make it!

    [feast_advanced_jump_to]

    What Does the Blue Coconut Refresher Taste Like?

    This drink tastes like the Strawberry Acai Refresher had a tropical vacation — sweet, fruity, and bright with a subtle coconut sweetness woven through every sip. The strawberry and acai base is tangy and refreshing, and the coconut syrup adds just enough tropical flavor to make it feel like something completely new.

    The blue spirulina adds absolutely zero flavor — it's purely there to give this drink that stunning, electric blue hue that makes it almost too pretty to drink. It's light, refreshing, and not too sweet — basically everything you want in a summer drink.

    Why You'll Love This Copycat Blue Coconut Refresher

    • Cheaper than Starbucks — New Starbucks summer drinks come with a premium price tag. This homemade version gives you the same stunning drink at a fraction of the cost!
    • One batch makes 5 drinks — The homemade Strawberry Acai base makes 2½ cups — enough for 5 full refreshers. Meal prep your summer drinks and thank yourself all week!
    • That electric blue color — It's absolutely show-stopping. Whether you're making it for yourself or serving it to guests, this drink is guaranteed to turn heads.
    • No artificial dyes — That gorgeous blue comes entirely from natural blue spirulina powder. Beautiful AND clean!
    • Caffeine-free — Unlike most Starbucks drinks, this refresher is completely caffeine-free. It's perfect for kids, non-coffee drinkers, or anyone who wants a gorgeous summer drink without the buzz.

    What is Blue Spirulina?

    Blue spirulina is a natural pigment derived from blue-green algae, and it's the magic ingredient behind that jaw-dropping electric blue color in this refresher. It's the same ingredient we use in our Blue Coconut Matcha cold foam — and just like there, it adds zero flavor here.

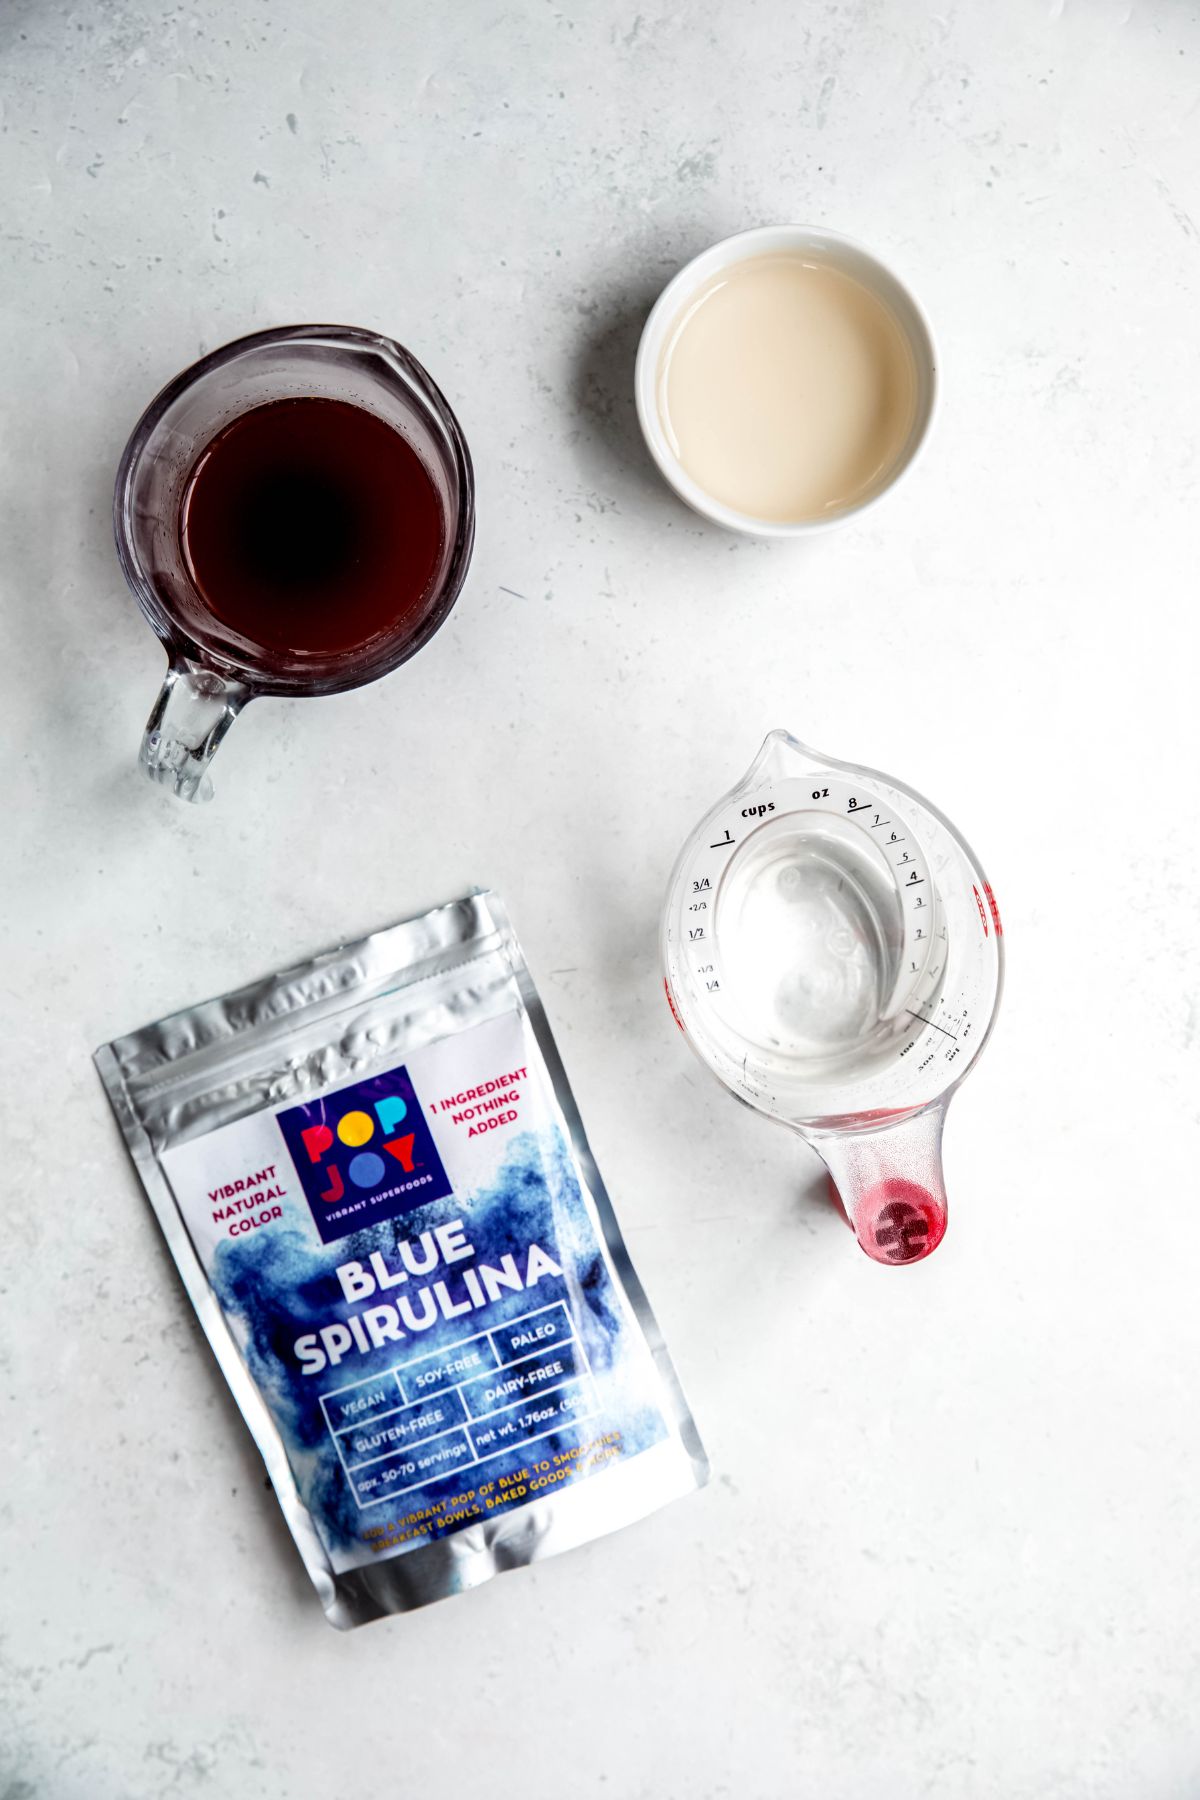
    It's completely safe, widely used as a natural food coloring, and packed with antioxidants and anti-inflammatory properties. You can find it at most health food stores, here on Amazon, or at Whole Foods — and just ⅛ teaspoon is all you need for that stunning blue hue!

    Ingredients Needed

    This Blue Coconut Refresher comes together in two parts — the homemade Strawberry Acai Refresher base and the refresher itself. Don't let the ingredient list intimidate you — the base is simple to make and gives you enough for 5 gorgeous drinks!

    • Water and white grape juice — The liquid base of the refresher. White grape juice adds a subtle sweetness and helps create that authentic Starbucks flavor.
    • Fresh strawberries — The star of the base! Fresh, hulled strawberries give this refresher its bright, fruity flavor and beautiful color.
    • Granulated sugar — Just enough sweetness to balance the tartness of the strawberries and lemon juice.
    • Acai powder and passionfruit powder — The secret ingredients that give this base its authentic Starbucks Strawberry Acai flavor.
    • Lemon juice and citric acid — Together they add that bright, tangy, slightly fizzy-feeling brightness that makes Starbucks refreshers so addictive.
    • Coconut syrup — The tropical twist that transforms the classic Strawberry Acai into the Blue Coconut Refresher. Sweet, tropical, and absolutely dreamy.
    • Blue spirulina powder — Just ⅛ teaspoon gives this drink its stunning electric blue color!

    Substitutions

    • No fresh strawberries? Frozen strawberries work great instead!
    • No acai or passionfruit powder? These are worth tracking down for the most authentic Starbucks flavor — you can find both on Amazon. You can make it without them and still have a delicious drink, but you won't have that signature Starbucks taste.
    • No coconut syrup? Use 1 ½ tablespoons of simple syrup plus ⅛ teaspoon of coconut extract for the same sweet coconut flavor.
    • No citric acid? Add a little extra lemon juice instead. The flavor won't be quite as bright, but it'll still be delicious!
    • Want to mix it up? Swap the water for lemonade to make a Blue Coconut Lemonade, or swap it for coconut milk to make a creamy, dreamy Ocean Drink. So many fun variations!
    • Using the store-bought base? Simple pour 1 cup of the mixture into your cocktail shaker, then add 1 tablespoon coconut syrup and ⅛ teaspoon of blue spirulina and shake!

    How to Make the Blue Coconut Refresher

    This recipe has two parts — first you'll make the Strawberry Acai Refresher base, then you'll shake up your refresher. The base takes about 15 minutes and makes enough for 5 gorgeous drinks, so the hard work pays off all week long!

    • Step 1 — Add the water, white grape juice, fresh strawberries, and granulated sugar to a medium saucepan and stir to combine. Heat over medium heat until it reaches a simmer, then simmer for 10 minutes.
    • Step 2 — After 10 minutes, strain out the strawberries, squeezing them firmly to get as much liquid as possible. Discard the strawberries and pour the liquid back into the saucepan.
    • Step 3 — Heat the strawberry liquid over low heat and whisk in the lemon juice, acai powder, passionfruit powder, and citric acid. Whisk until everything is dissolved — note that the acai powder will leave small specks; this is totally normal and expected!
    • Step 4 — Remove from heat, transfer to a large jar, and allow to cool completely before using. Don't rush this step — a warm base will melt your ice and water down your drink!
    • Step 5 — Add ½ cup of the cooled Strawberry Acai base, ½ cup water, 1 ½ tablespoons coconut syrup, and ⅛ teaspoon blue spirulina to a cocktail shaker or mason jar with a lid. Shake vigorously until well combined and the blue spirulina is evenly distributed. Pour over ice and drink up!

    How to Use the Strawberry Acai Refresher Base

    Since this base makes enough for 5 drinks, why not get creative with it? Here are some of our favorite ways to use it beyond the Blue Coconut Refresher!

    • Classic Strawberry Acai Refresher — Skip the coconut syrup and blue spirulina and just shake the base with water and ice for the Starbucks classic.
    • Strawberry Acai Lemonade — Skip the coconut syrup and blue spirulina and shake the base with lemonade instead of water for a bright, tart, incredibly refreshing summer drink.
    • Pink Drink — Skip the coconut syrup and blue spirulina and shake the base with coconut milk instead of water for a creamy, dreamy Pink Drink moment.
    • Blue Coconut Lemonade - Shake the base with lemonade instead of water!
    • Ocean Drink - Shake the base with coconut milk for a creamy blue drink!
    • Summer Popsicles — Pour the base into popsicle molds and freeze for a fun, fruity summer treat the whole family will love!

    Tips for the Best Blue Coconut Refresher

    • Let the base cool completely. This is the most important tip! A warm base will melt your ice instantly and leave you with a watery, diluted drink. Let it cool fully — even refrigerate it overnight if you can!
    • Shake vigorously. The shaking is what distributes the blue spirulina evenly throughout the drink. Give it a really good shake for that consistently beautiful blue color in every sip.
    • Use lots of ice. Refreshers are best served ice cold. Fill your glass to the top!
    • Batch prep your base. Since the base lasts up to a week in the fridge, make it on Sunday and enjoy gorgeous blue coconut refreshers all week with almost no effort.
    • Adjust the coconut syrup to taste. Love a stronger coconut flavor? Add an extra half tablespoon. Prefer it more subtle? Scale back slightly. This recipe is totally flexible!

    FAQs

    What is the Blue Coconut Refresher at Starbucks?

    The Blue Coconut Refresher is a new Starbucks summer 2026 drink that takes the classic Strawberry Acai Refresher and adds coconut syrup and blue spirulina for a tropical twist and that stunning electric blue color. This homemade copycat nails the flavor perfectly — and costs a fraction of the price!

    Can I make this without blue spirulina?

    Absolutely! Simply leave out the blue spirulina and you'll still have a delicious coconut strawberry acai refresher — it just won't have that electric blue color. If you can't find blue spirulina locally, it's easy to order on Amazon and a little goes a very long way!

    What's the difference between the Blue Coconut Refresher and the Strawberry Acai Refresher?

    The Blue Coconut Refresher uses the exact same Strawberry Acai base, but with coconut syrup and blue spirulina shaken in. The coconut syrup adds a tropical sweetness and the blue spirulina gives it that jaw-dropping blue color. Same great base, totally different vibe!

    How long does the refresher base last?

    The homemade Strawberry Acai Refresher base keeps fresh in the fridge for up to 1 week when stored in an airtight jar. It makes 2½ cups — enough for 5 full refreshers — so you'll have gorgeous drinks all week long! You can also freeze the base for up to 1 month — just thaw in the fridge overnight before using.

    Nutritional Info

    Each serving of this Blue Coconut Refresher comes in at just 128 calories, with 32g of carbs, 31g of sugar, and 0g of fat. It's one of the lightest Starbucks copycat recipes on the site — refreshing, fruity, and relatively guilt-free!

    If you're looking to cut back on sugar, try reducing the coconut syrup by half and adding a splash more water. You'll keep all that gorgeous fruity coconut flavor with a lighter sweetness.

    Total nutritional content per serving is:

    • Calories: 128 calories
    • Total Fat: 0 grams
    • Protein: 0 grams
    • Sodium: 9 mg
    • Carbohydrates: 32 grams
    • Sugar: 31 grams

    *This nutritional information is an estimate and calculated based on the ingredients used to create the recipe. The nutritional value of your ingredients may differ slightly. Furthermore, this food is not intended to prevent, diagnose, cure, or treat any disease.

    Other Copycat Starbucks Refresher Recipes

    • Blue Coconut Refresher (Starbucks Copycat)
    • Tropical Butterfly Refresher (Starbucks Copycat)
    • Summer Skies Drink (Starbucks Copycat)
    • Summer Berry Lemonade Refresher (Starbucks Copycat)
    Print Recipe
    5 from 1 vote

    Blue Coconut Refresher (Starbucks Copycat)

    A gorgeous copycat Starbucks blue coconut refresher made with a homemade strawberry acai base, coconut syrup, and blue spirulina. Ready in 15 minutes!
    Prep Time5 minutes mins
    Cook Time10 minutes mins
    Total Time15 minutes mins
    Course: Drinks
    Cuisine: American
    Keyword: Blue Coconut Refresher
    Servings: 1 drink
    Calories: 128kcal
    Author: Megan Byrd

    Equipment

    • 1 medium saucepan
    • 1 cocktail shaker or mason jar with a lid

    Ingredients

    Strawberry Acai Refresher Base:

    • 1 ½ cups water
    • 1 cup white grape juice
    • 1 cup sliced/hulled, fresh strawberries
    • ¼ cup granulated sugar
    • 1 teaspoon lemon juice
    • ½ teaspoon acai powder
    • ½ teaspoon passionfruit powder
    • ½ teaspoon citric acid

    Blue Coconut Refresher:

    • ½ cup Strawberry Acai Refresher Base
    • ½ cup water
    • 1 ½ tablespoon coconut syrup
    • ⅛ teaspoon blue spirulina powder
    • ice

    Instructions

    • Add the water, grape juice, 1 cup strawberries, and sugar to a medium saucepan and stir. Heat to a simmer, then simmer for 10 minutes.
    • After 10 minutes, strain out the strawberries, squeezing them to get as much liquid from them as possible. Discard the strawberries and pour the liquid back into the saucepan.
    • Heat the strawberry liquid over low heat and whisk in the lemon juice, acai powder, passionfruit powder, and citric acid. Whisk until everything is dissolved (acai powder will leave specks, it doesn't fully dissolve).
    • Remove from heat, transfer to a large jar, and allow to cool completely before using.
    • Make the refresher: Add ½ cup of the Strawberry Acai base, ½ cup water, 1 ½ tablespoon coconut syrup, and ⅛ teaspoon blue spirulina to a cocktail shaker and shake until well combined. Pour over ice and drink up!

    Video

    Notes

    This makes 2 ½ cups of base, enough for 5 drinks. Store any leftover refresher base in the fridge for up to 1 week. 

    Nutrition

    Serving: 1drink | Calories: 128kcal | Carbohydrates: 32g | Sodium: 9mg | Sugar: 31g
    Blue coconut refresher.

    xoxo Megan

    Iced Blue Coconut Matcha (Starbucks Copycat)

    June 4, 2026

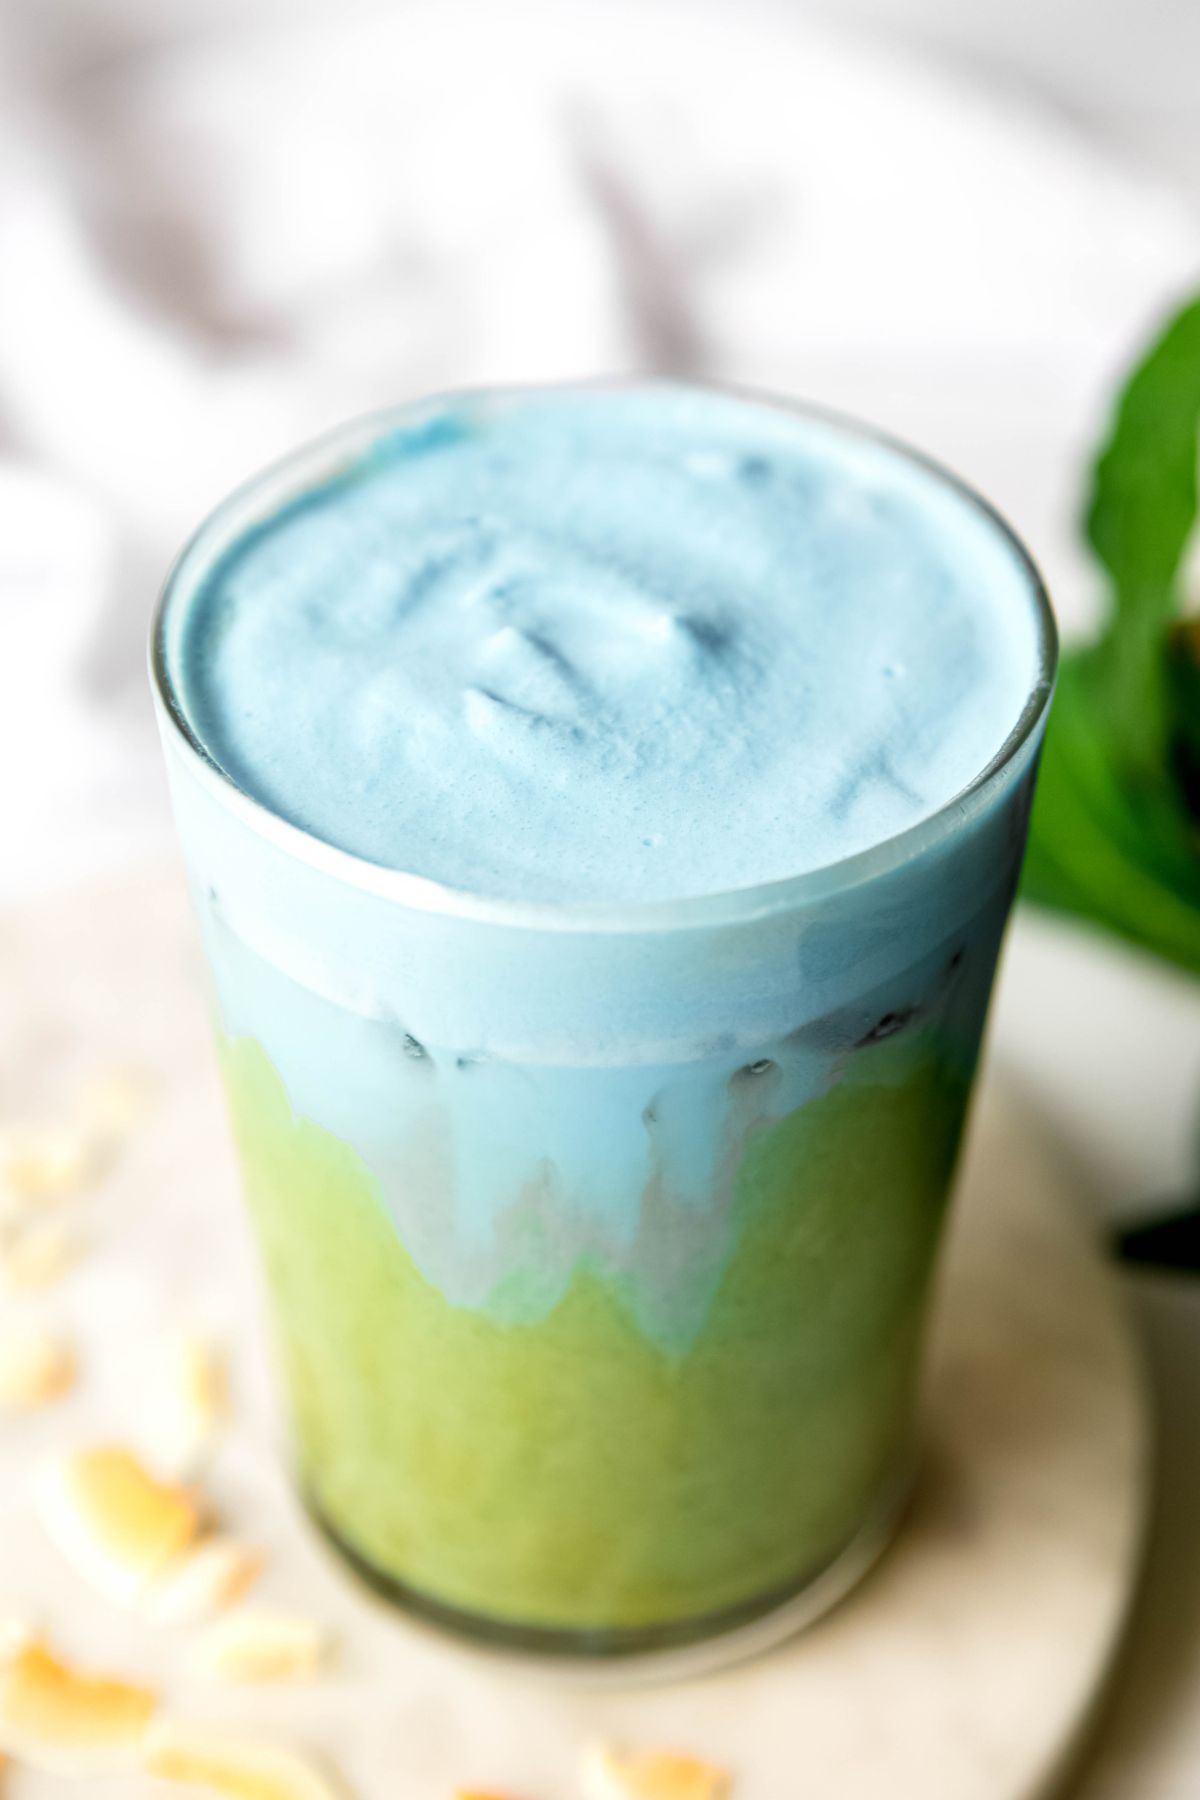
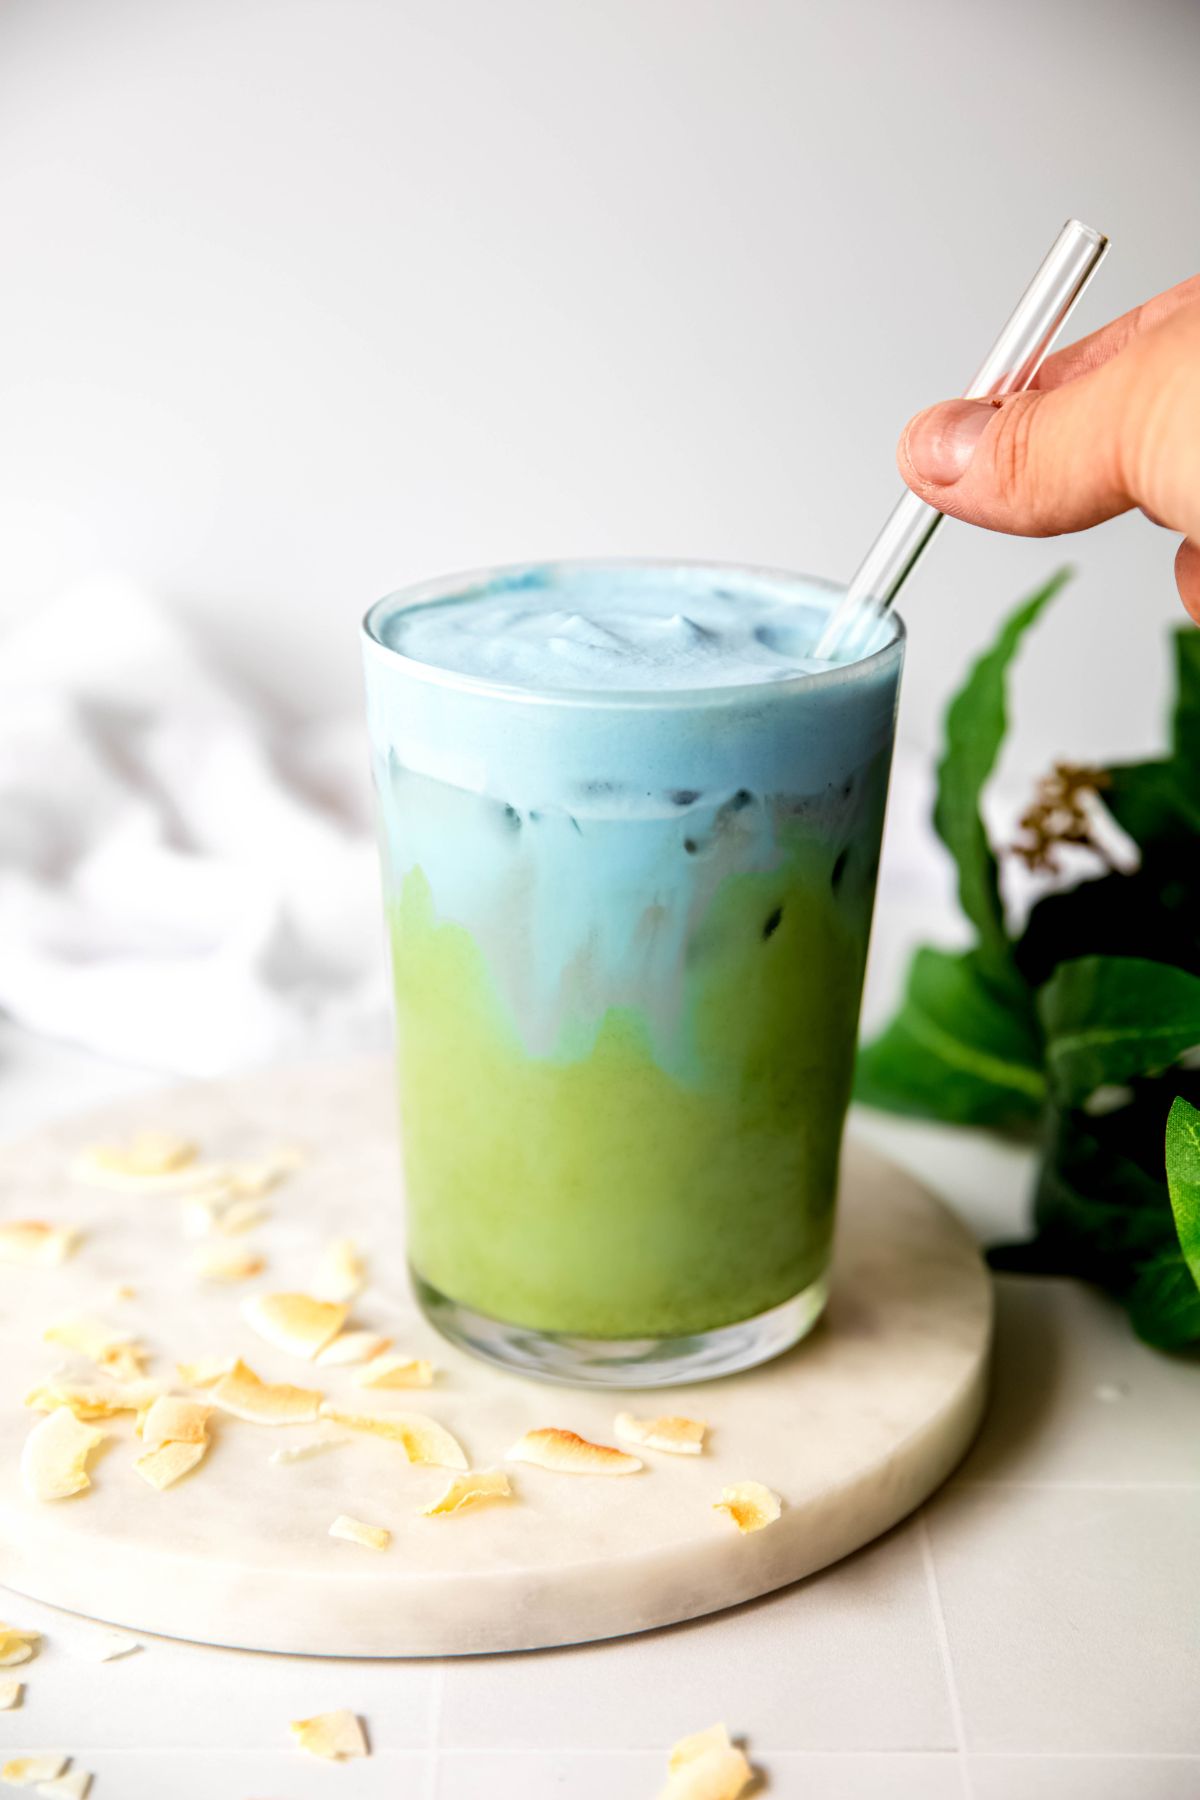
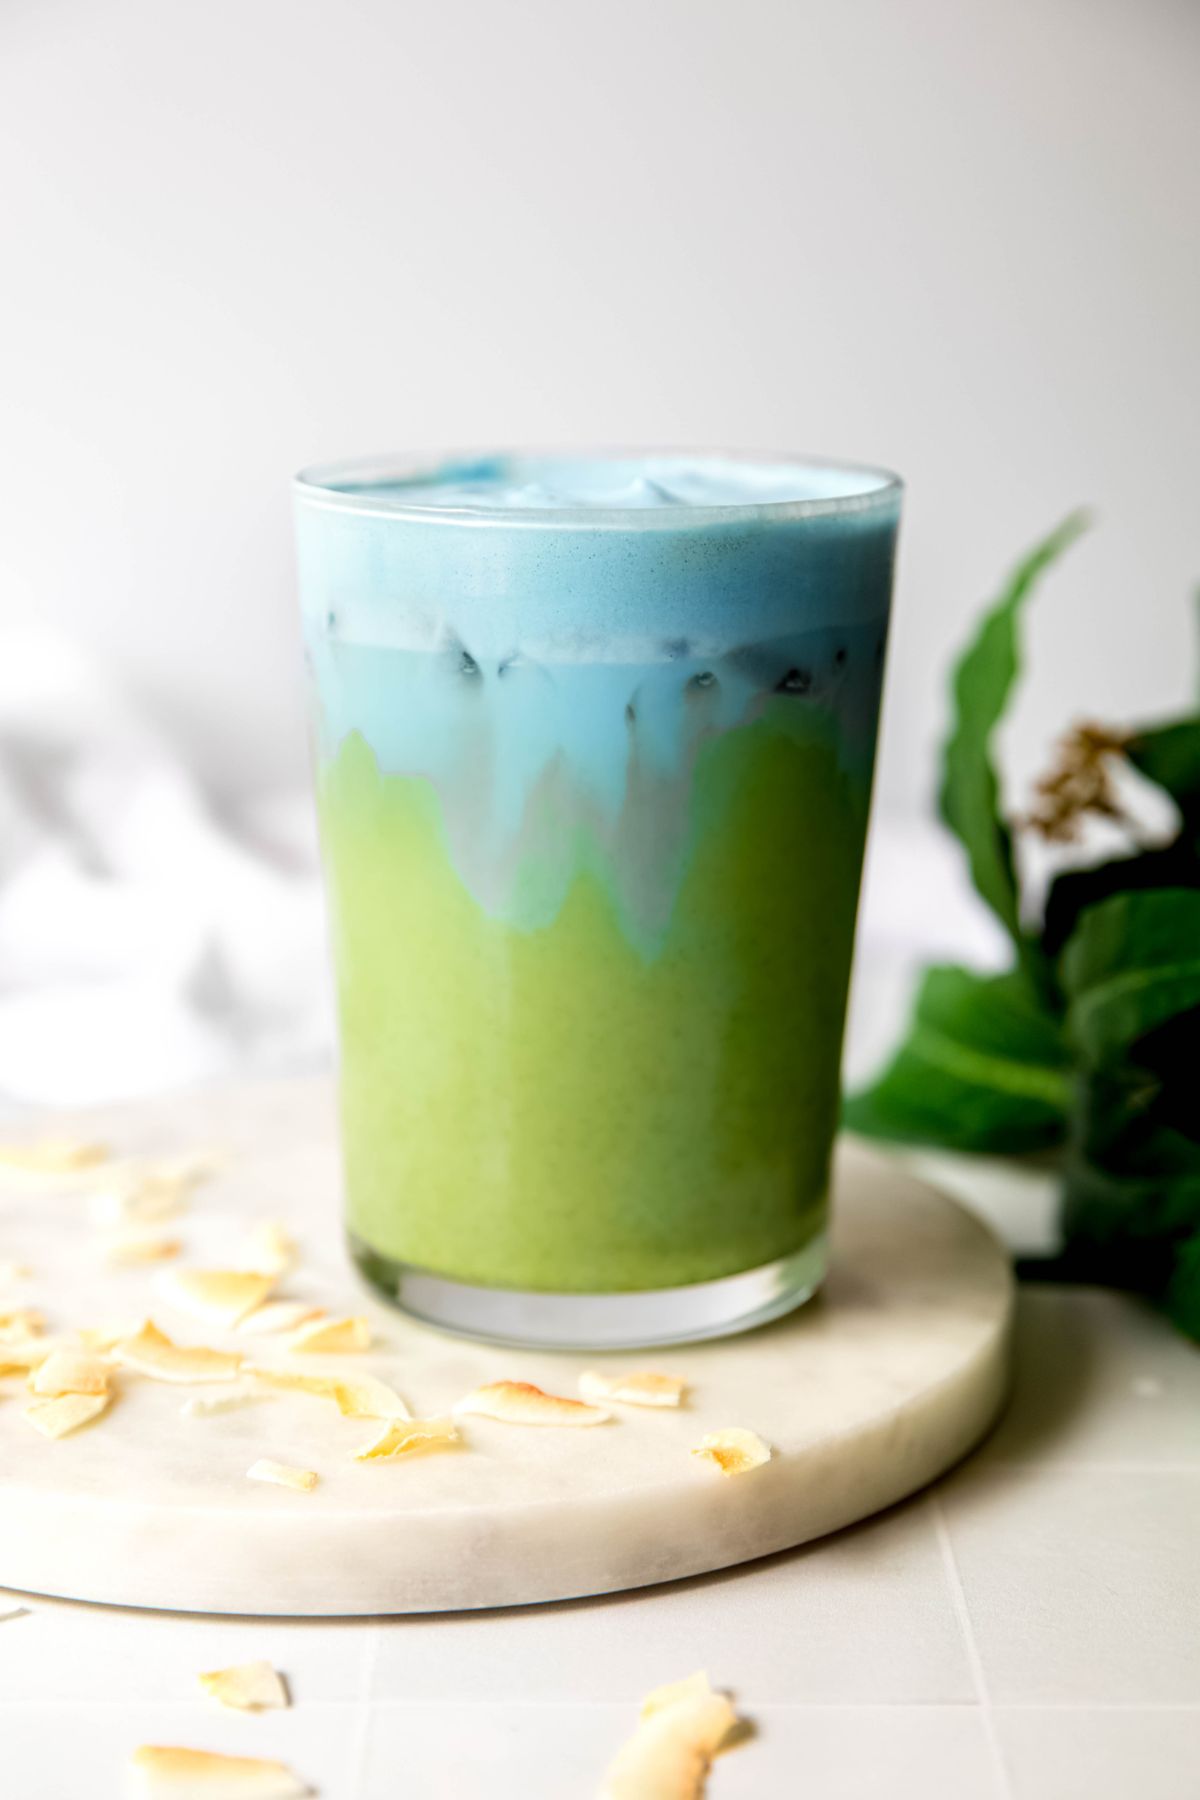
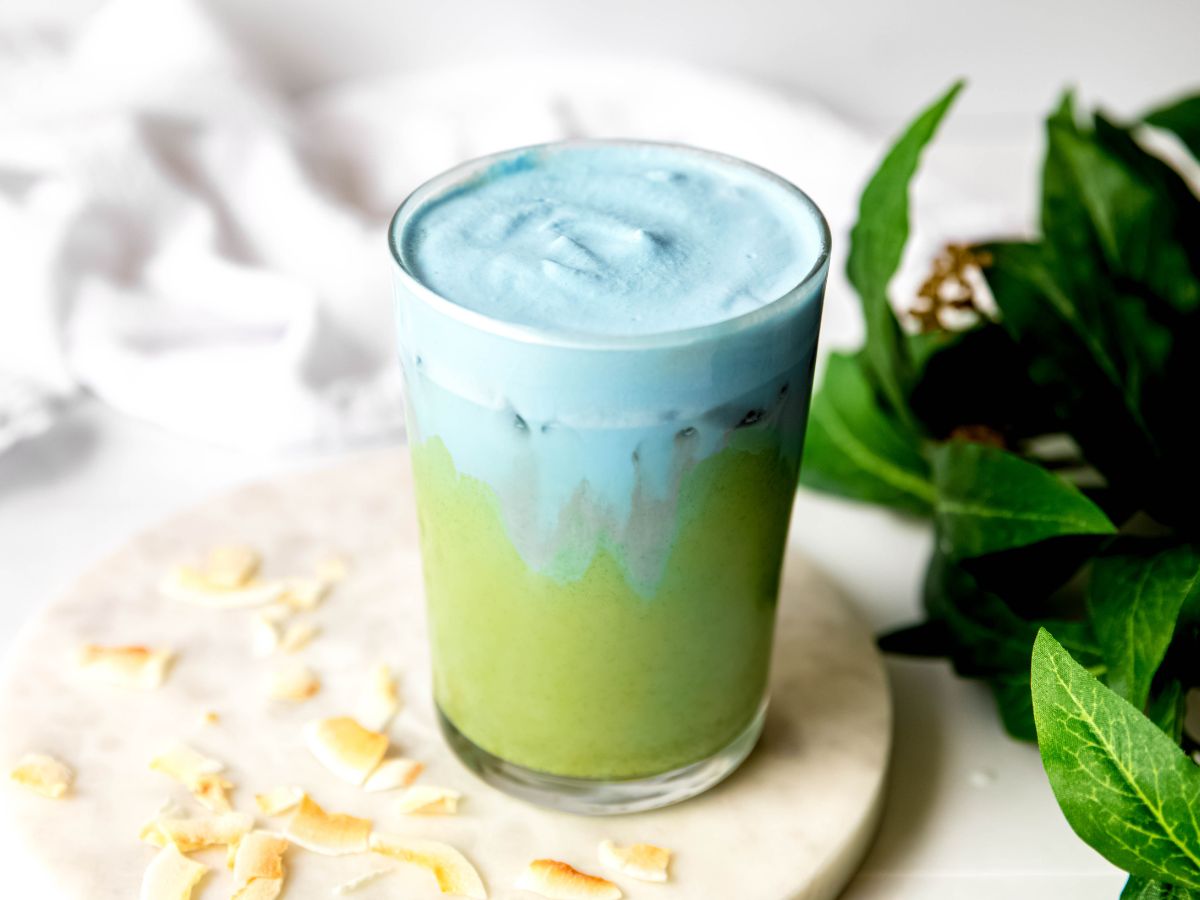
    This Iced Blue Coconut Matcha is the stunning Starbucks copycat recipe you're going to want to make on repeat all summer long. We're talking a creamy, earthy matcha base topped with the most gorgeous blue coconut cold foam you've ever seen — and it's ready in just 5 minutes.

    If you've seen this drink floating around on TikTok and Instagram lately, you already know it's one of the most visually striking things Starbucks has ever put on the menu. That dreamy blue foam sitting on top of a bright green mango matcha? It's almost too pretty to drink. Almost.

    The secret behind the blue color is blue spirulina powder — a natural, tasteless pigment that gives the cold foam its jaw-dropping hue without changing the flavor at all. It's completely safe, packed with nutrients, and honestly just really fun to work with.

    This homemade copycat Starbucks blue coconut matcha costs a fraction of the Starbucks price and tastes just as incredible. Five minutes, one milk frother, and you've got the new Starbucks summer drink right in your own kitchen. Let's make it!

    [feast_advanced_jump_to]

    What does the Blue Coconut Matcha taste like?

    This drink is earthy, tropical, creamy, and refreshing all at once — it's genuinely unlike anything else in the Starbucks lineup. The matcha base is smooth, with the mango syrup adding a sweet, tropical twist that balances the earthiness perfectly.

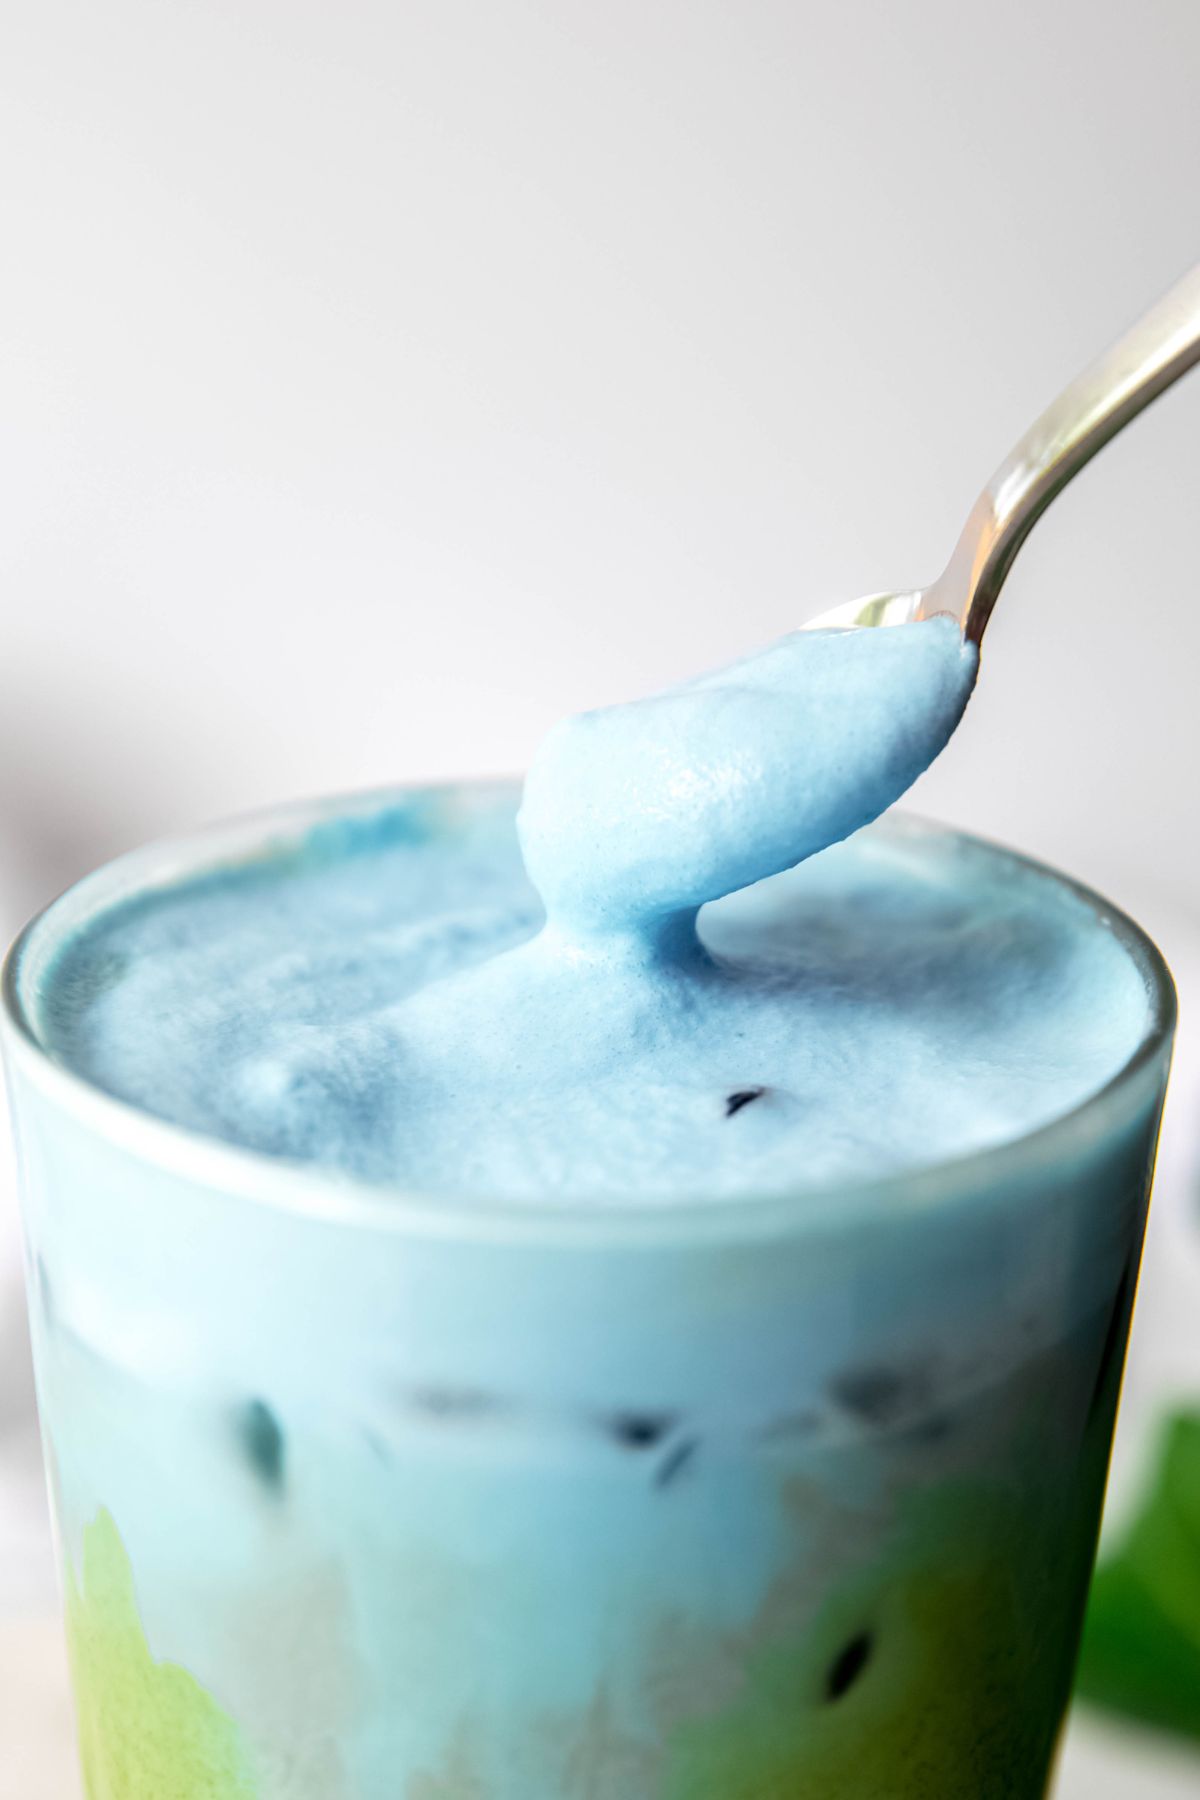
    The blue coconut cold foam on top is silky, lightly sweet, and coconutty — it slowly melts into the matcha as you drink, making every sip a little different. And the blue spirulina? Virtually tasteless. It's purely there to make this drink look absolutely stunning.

    Why You'll Love This Copycat Blue Coconut Matcha

    • Cheaper than Starbucks — The new Starbucks summer drink everyone is obsessing over doesn't come cheap. This homemade version gives you all the flavor and all the drama at a fraction of the price!
    • Ready in 5 minutes — Faster than any drive-through line, and so much more satisfying to make yourself.
    • That blue coconut cold foam though — It's silky, coconutty, and the most beautiful shade of blue. Once you make it, you'll want to put it on everything!
    • Totally customizable — Swap the mango syrup, make it dairy-free, adjust the sweetness — this recipe is totally flexible!
    • Blue spirulina is actually good for you — Beyond the gorgeous color, blue spirulina is packed with antioxidants and anti-inflammatory properties. Beauty AND function!
    • A natural caffeine boost — Matcha gives you a smooth, sustained energy lift without the jittery crash you get from coffee. The best kind of morning pick-me-up!

    What is Blue Spirulina?

    If you've never cooked or baked with blue spirulina before, you're in for a treat — and not just because of the color. Blue spirulina is a natural pigment derived from blue-green algae, and it's the ingredient responsible for that stunning, electric blue hue in the cold foam.

    Here's the best part: it tastes like virtually nothing. Unlike green spirulina, which has a strong, earthy flavor, blue spirulina is almost completely neutral. It's purely a color agent, which means you get all the visual drama without any funky taste.

    It's also completely safe and commonly used as a natural food coloring in everything from smoothie bowls to lattes. You can find it at most health food stores, on Amazon, or at Whole Foods — and a little goes a very long way!

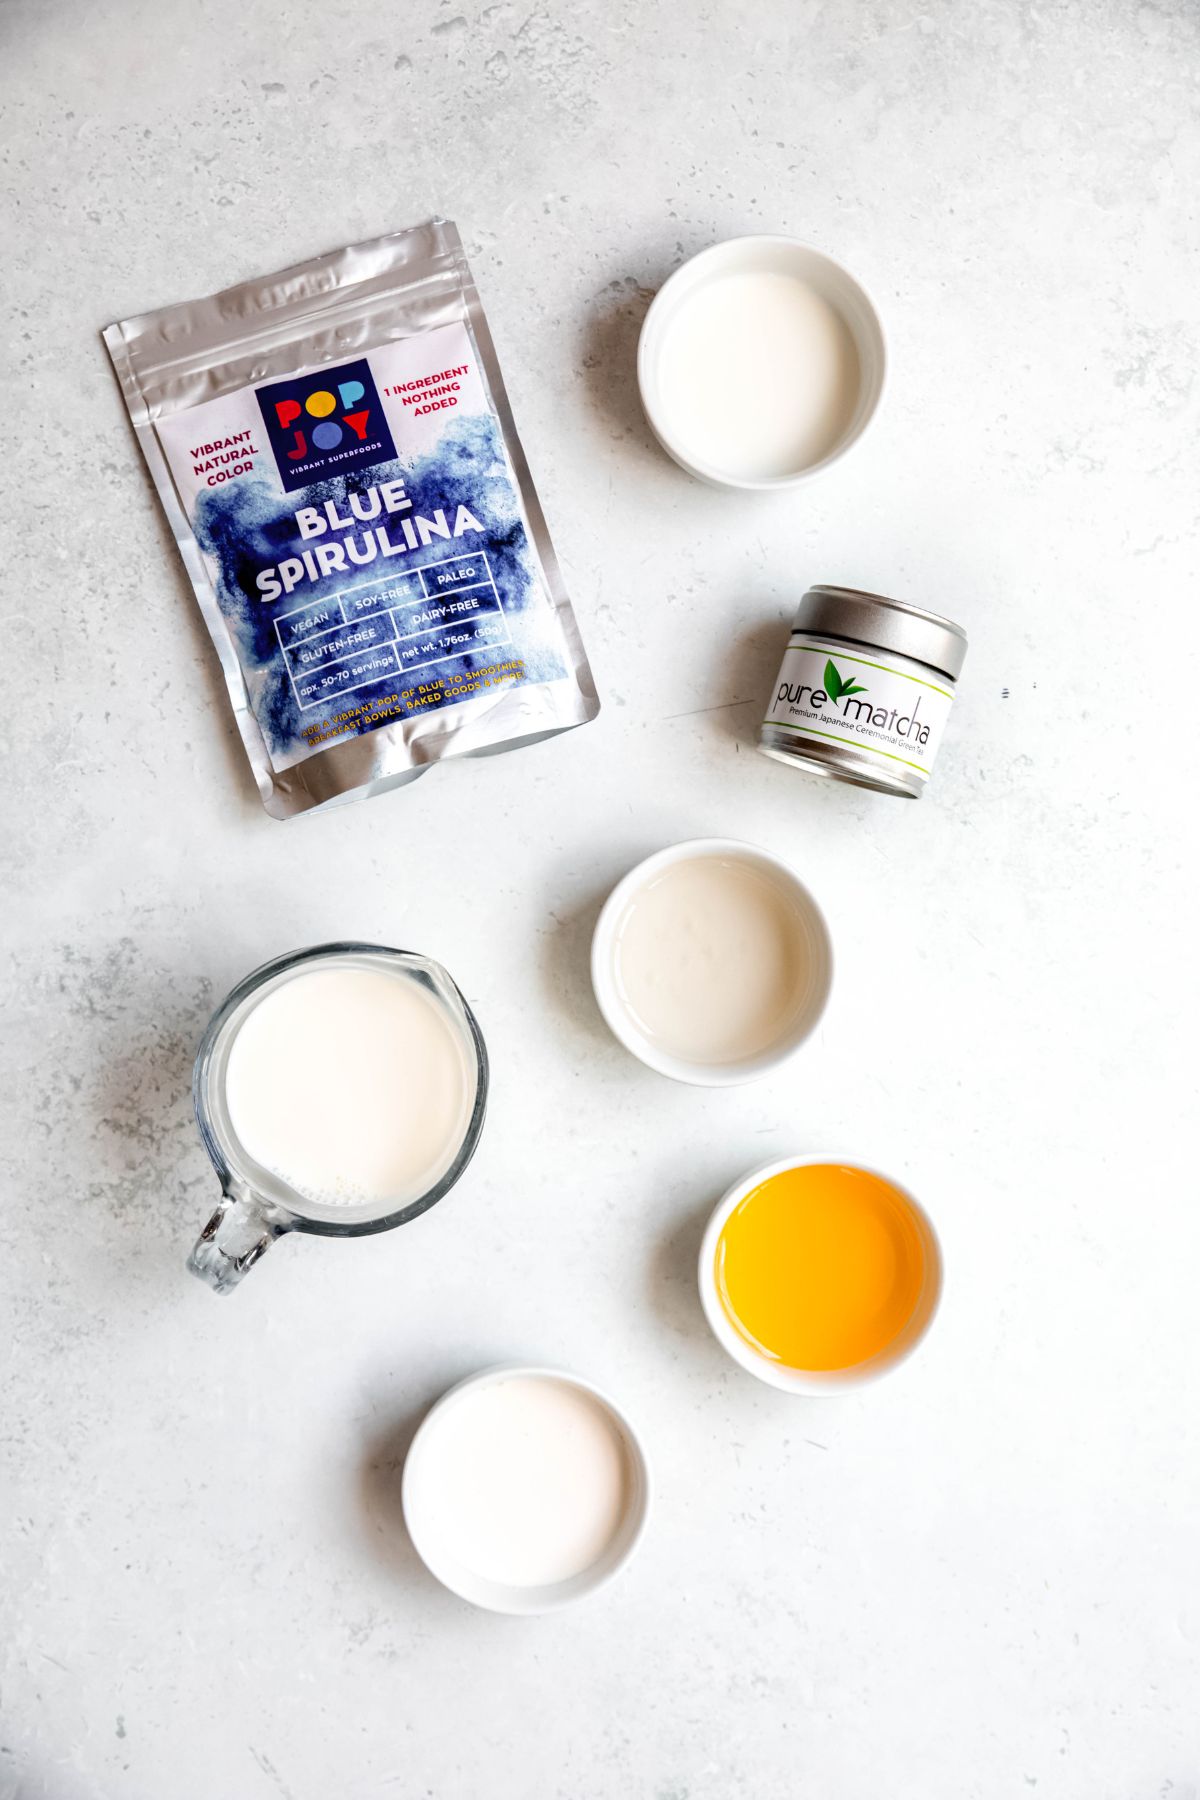
    Ingredients

    This blue coconut matcha comes together with two components — the iced matcha base and the blue coconut cold foam. Here's what you'll need!

    • Heavy cream and whole milk — Together they give the cold foam its rich, silky, pourable texture.
    • Coconut syrup — Adds that sweet, tropical coconut flavor that makes this cold foam so irresistible.
    • Blue spirulina powder — Just ⅛ teaspoon is all you need for that gorgeous, vibrant blue color!
    • Pure matcha powder — The earthy, vibrant green base of this drink. Always sift it before whisking to avoid clumps!
    • Milk of choice — Any milk works beautifully here. The recipe uses 2%, but oat milk or coconut milk take the tropical vibes up a notch!
    • Mango syrup — The tropical twist that makes this drink taste like a vacation.

    Ingredient Substitutions

    • Dairy-Free: Swap the heavy cream and whole milk in the cold foam for full-fat coconut cream and oat milk. It'll still be creamy, dreamy, and delicious!
    • No mango syrup? Vanilla syrup works great as a more subtle alternative, or try passion fruit syrup for a different kind of tropical twist.
    • Matcha powder: Always use pure ceremonial grade matcha for the best flavor and the most vibrant green color. Culinary grade works too, but the flavor won't be quite as smooth.
    • Coconut syrup: No problem! Use 1½ tablespoons of vanilla syrup and ⅛ teaspoon of coconut extract instead for that same sweet coconut flavor.

    How to Make Iced Blue Coconut Matcha

    This drink comes together in four easy steps — and the hardest part is not drinking the blue coconut cold foam straight from the jar!

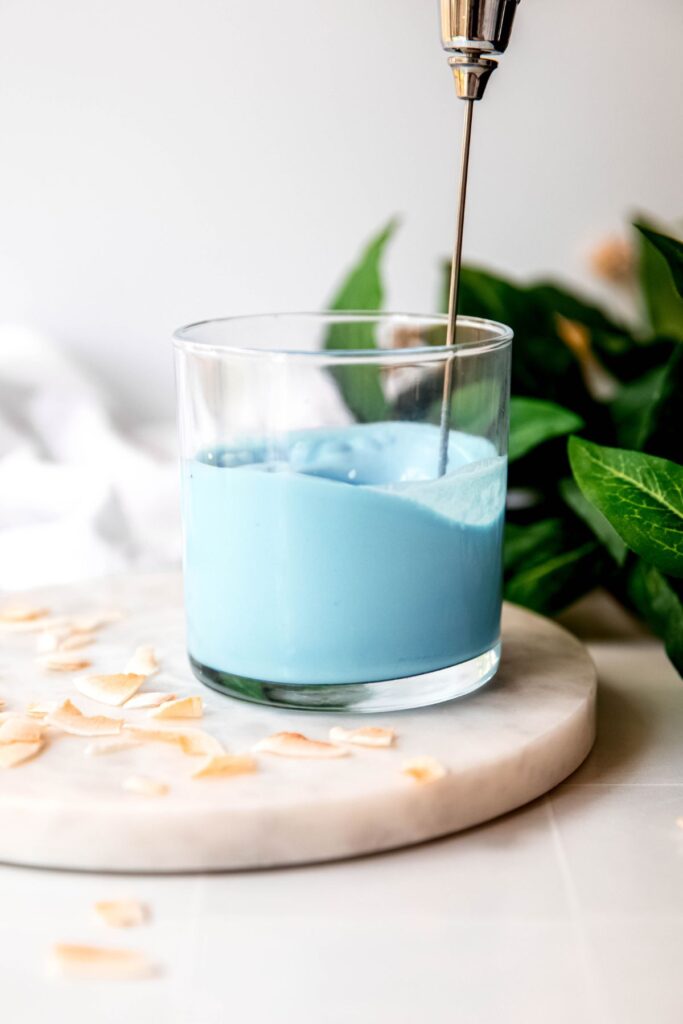
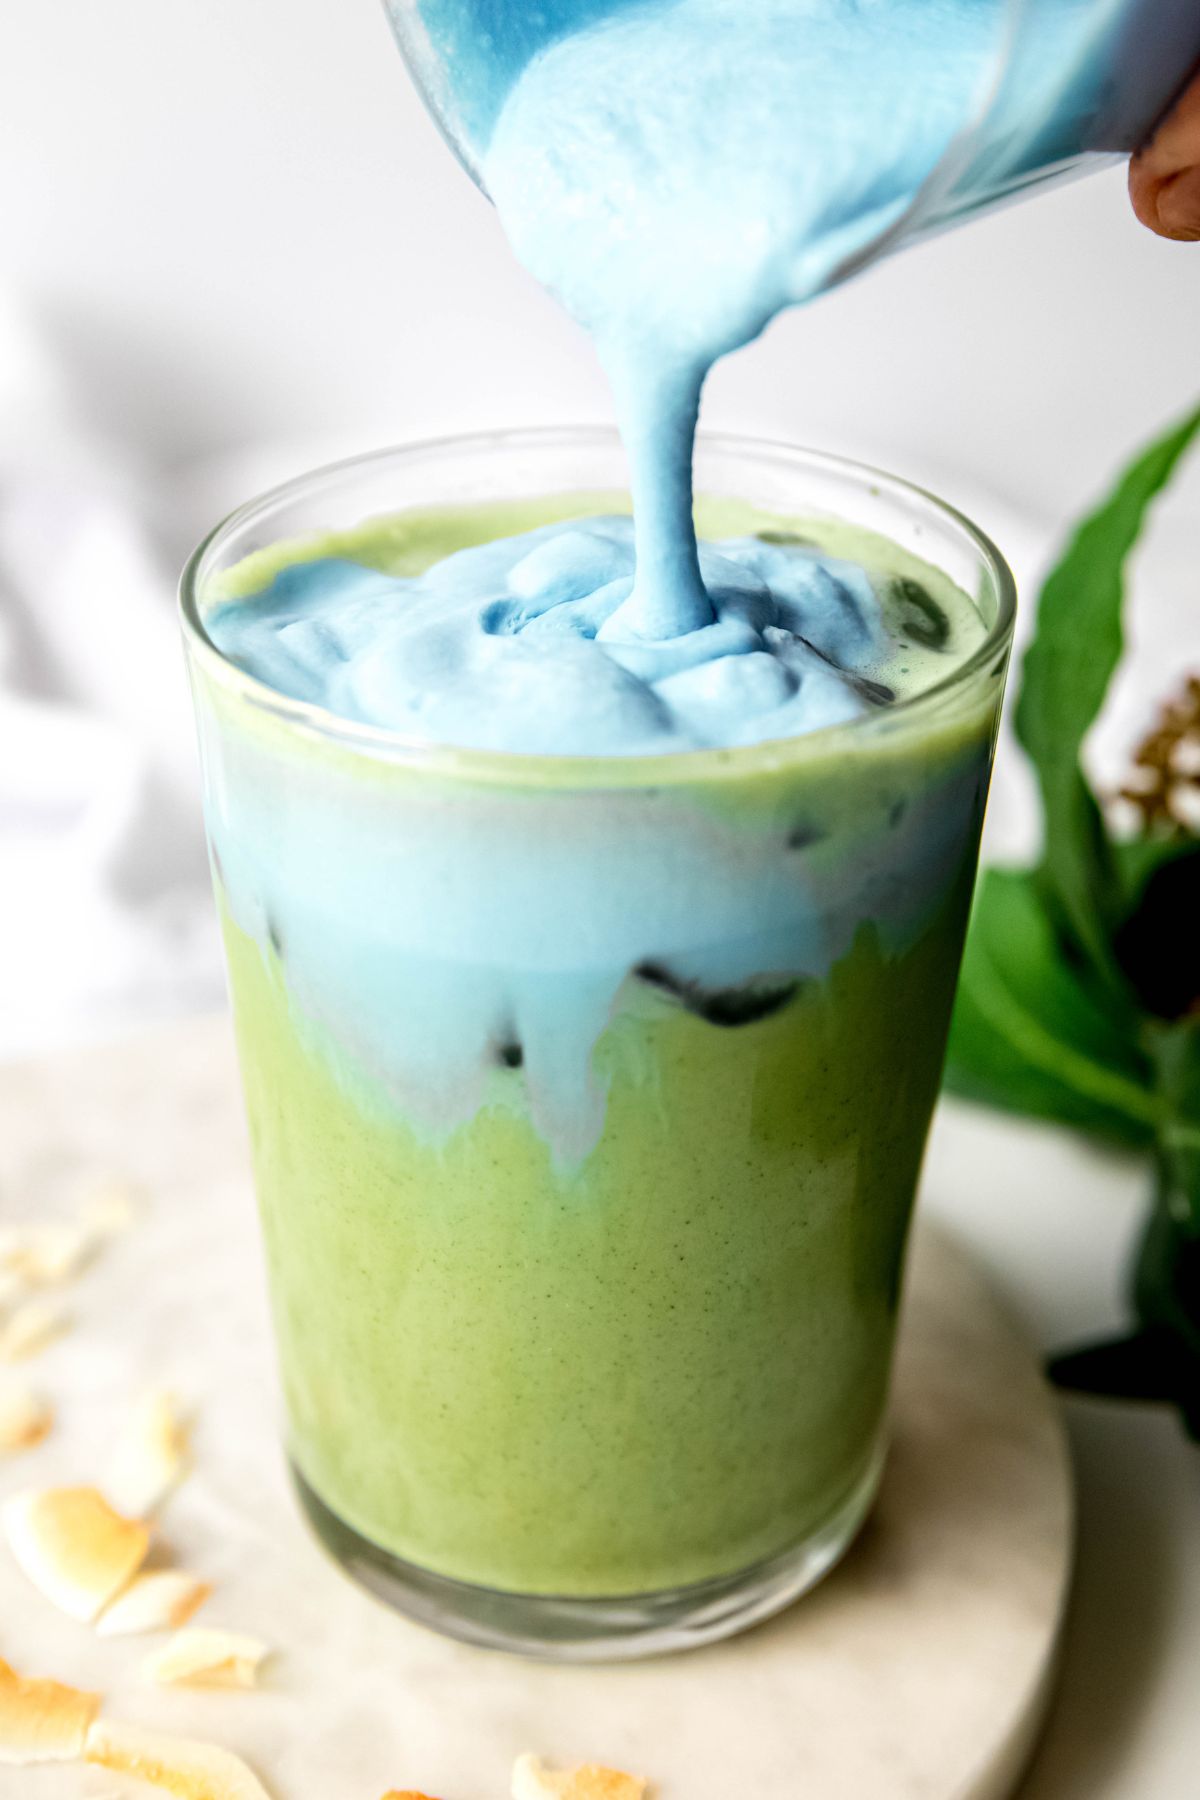
    • Step 1 — Make the cold foam. Add the heavy cream, coconut syrup, whole milk, and blue spirulina powder to a small glass or jar. Froth with a milk frother for 20-30 seconds until foamy and well combined. Set aside.
    • Step 2 — Make the matcha. Add the water to a small microwave-safe jar or glass and heat until boiling — about 30-45 seconds in the microwave. Sift the matcha powder into the hot water to remove any large clumps, then whisk together until smooth and slightly foamy. Set aside.
    • Step 3 — Build the drink. Add ice to a tall glass, then pour in the milk and mango syrup. Stir to combine, then pour the matcha over the top and stir again.
    • Step 4 — Spoon the blue coconut cold foam over the matcha and drink up!

    Tips for the Best Blue Coconut Matcha

    • Always sift your matcha. This is non-negotiable! Matcha clumps easily, and sifting before whisking gives you a perfectly smooth, lump-free concentrate every single time.
    • Use a matcha whisk. A milk frother works in a pinch, but a traditional matcha whisk gives you the smoothest, most evenly dissolved matcha.
    • Don't skip the mango syrup. The earthiness of the matcha needs that sweet, fruity contrast. The mango syrup is what makes this drink taste tropical and balanced!
    • Froth the cold foam for exactly 20-30 seconds. Under-froth and it'll be too thin. Over-froth and it gets too stiff to pour. The sweet spot is right in that window.
    • Use ceremonial grade matcha. The higher quality the matcha, the smoother and more vibrant green your drink will be. It's worth the upgrade!
    • Serve immediately. The blue foam is most vibrant and beautiful right after frothing. Don't let it sit too long before drinking!

    FAQs

    What is the blue coconut matcha at Starbucks?

    The Starbucks Iced Blue Coconut Matcha is a new summer drink featuring an iced mango matcha latte base topped with a blue coconut cold foam made with blue spirulina. It's one of the most visually stunning drinks Starbucks has released in years — and this homemade version nails it perfectly!

    Can I make this without the blue spirulina?

    Yes! Simply leave out the blue spirulina and you'll still have a delicious coconut cold foam — it just won't have that stunning blue color. Without the spirulina, the cold foam is essentially the same coconut cold foam used in our Toasted Coconut Cold Brew — so if you love that drink, you're going to love this one too!

    Can I make this dairy-free?

    Absolutely! Swap the heavy cream and whole milk in the cold foam for full-fat coconut cream and oat milk. The foam will be slightly less thick, but it'll still be creamy and delicious — and the coconut flavor will actually be even more pronounced!

    What's the difference between this and the Mango Cream Matcha?

    Great question! Both drinks feature a matcha base and a creamy cold foam on top, but the flavors are quite different. The Mango Cream Matcha has a classic vanilla sweet cream cold foam with mango syrup in the base, while this blue coconut matcha features a coconut-flavored blue spirulina foam for a tropical, coconutty twist. Both are absolutely incredible — why not try both?

    Nutritional Info

    Each serving of this iced blue coconut matcha comes in at 451 calories, with 55g of carbs, 51g of sugar, 21g of fat, and 12g of protein. It's definitely an indulgent treat — but it's made with real matcha, real cream, and blue spirulina, so you're getting some serious nutritional benefits alongside the deliciousness!

    If you're looking to lighten it up, try reducing the coconut and mango syrups by half and using a lower-fat milk. You'll keep all that gorgeous tropical matcha flavor with a lighter nutritional profile.

    Total nutritional content per drink is:

    • Calories: 451 calories
    • Total Fat: 21 grams
    • Protein: 12 grams
    • Sodium: 114 mg
    • Carbohydrates: 55 grams
    • Sugar: 51 grams

    *This nutritional information is an estimate and calculated based on the ingredients used to create the recipe. The nutritional value of your ingredients may differ slightly. Furthermore, this food is not intended to prevent, diagnose, cure, or treat any disease.

    Other Homemade Matcha Recipes

    • Iced Blue Coconut Matcha (Starbucks Copycat)
    • Iced Mango Cream Matcha (Starbucks Copycat)
    • Iced Banana Bread Matcha (Starbucks Copycat)
    • Iced Double Berry Matcha (Starbucks Copycat)
    Print Recipe
    5 from 1 vote

    Iced Blue Coconut Matcha (Starbucks Copycat)

    A gorgeous copycat Starbucks blue coconut matcha with a creamy blue spirulina coconut cold foam. Ready in 5 minutes and better than the original!
    Prep Time5 minutes mins
    Total Time5 minutes mins
    Course: Drinks
    Cuisine: American
    Keyword: Blue Coconut Matcha
    Servings: 1 drink
    Calories: 451kcal
    Author: Megan Byrd

    Equipment

    • 1 milk frother
    • 1 small fine mesh strainer
    • 1 matcha whisk

    Ingredients

    Blue Coconut Cold Foam:

    • 3 tablespoon heavy cream
    • 1 ½ tablespoon coconut syrup
    • 1 tablespoon whole milk
    • ⅛ teaspoon blue spirulina powder

    Iced Blue Coconut Matcha:

    • 3 tablespoon hot water
    • 1 ½ teaspoon pure matcha powder sifted
    • 1 cup milk of choice (I used 2%)
    • 2 tablespoon mango syrup (or vanilla syrup)
    • ice

    Instructions

    • Make the cold foam. Add the heavy cream, 1 ½ tablespoon coconut syrup, whole milk, and blue spirulina to a small glass or jar and froth with a milk frother for 20-30 seconds until foamy and well combined. Set aside.
    • Add the water to a small microwave-safe jar or glass, and heat until boiling (30-45 seconds in the microwave). Sift the matcha into the hot water, removing any large clumps. Whisk the matcha and water together until smooth and slightly foamy. Set aside.
    • Add ice to a tall glass, then top with the milk and 2 tablespoon mango syrup. Stir to combine. Add the matcha and stir again.
    • Top the matcha with your blue coconut cold foam. Drink up!

    Video

    Nutrition

    Serving: 1drink | Calories: 451kcal | Carbohydrates: 55g | Protein: 12g | Fat: 21g | Sodium: 114mg | Sugar: 51g
    Blue coconut matcha.

    xoxo Megan

    Homemade Banana Bread Creamer

    June 2, 2026

    This Homemade Banana Bread Creamer is the coziest, most delicious way to upgrade your morning coffee — and it only takes 2 minutes to make. We're talking warm, sweet, banana bread flavor swirled right into your cup, and it tastes even better than anything you'll find at the grocery store.

    Here's the thing — banana bread creamer doesn't exist in stores. Not at Chobani, not in the coffee aisle, nowhere. And honestly? We've been petitioning Chobani to make it for years. Until that day comes, this homemade version is the only way to get your fix — and it's SO good you might not even want the store-bought version anymore.

    And honestly, this is officially the easiest homemade creamer recipe on the planet. No stovetop, no blender, no cooking required. Just three ingredients, a mason jar, and a spoon.

    Whether you're pouring it into your morning hot coffee, using it to make a banana bread latte, or splashing it into a banana iced coffee, this creamer is about to become your new obsession. We've got all the inspo you need right here — let's get into it!

    [feast_advanced_jump_to]

    What Does Banana Bread Creamer Taste Like?

    This creamer tastes exactly like a warm, freshly baked loaf of banana bread melted into your morning coffee — sweet, cozy, and loaded with that rich, caramel-y banana flavor you know and love. It's like breakfast and dessert in one sip.

    It's rich and creamy without being heavy, and it makes your coffee taste like the most comforting thing you've ever had. Think a cozy Sunday morning in a mug — warm, sweet, and absolutely irresistible.

    Why You'll Love This Banana Coffee Creamer

    • Only 3 ingredients — Half & half, heavy cream, and banana bread syrup. That's it! This is as simple as homemade creamer gets.
    • Ready in 2 minutes — No cooking, no blending, no fuss. Just stir and store. Seriously, it's that easy!
    • Makes a full week's worth — One batch makes about 3 cups and keeps fresh in the fridge for up to 7 days. Hello, amazing mornings!
    • Better than store-bought — There's no banana flavored coffee creamer in the coffee aisle that comes close to this. Real cream and real banana bread syrup make this so much richer and more flavorful than anything you'll find on a shelf!
    • Dairy-free and lactose-free options — This recipe is super easy to adapt for any dietary need. More on that below!
    • Totally customizable — This DIY banana bread creamer works as a rich creamer or a lighter banana milk creamer depending on how much heavy cream you use. Totally up to you!

    Ingredients

    You only need 3 ingredients to make this banana bread coffee creamer — and if you've already got the syrup on hand, this recipe comes together in literally 2 minutes!

    • Half & half and heavy cream — The rich, creamy base of this creamer. Together, they give it that perfect balance of lightness and indulgence without being too heavy.
    • Banana bread syrup — The star of the show and the only source of flavor in this recipe! A good quality syrup is everything here. We love using our Homemade Banana Bread Syrup — it's packed with real banana flavor and makes this creamer taste absolutely incredible.

    Ingredient Substitutions

    • Dairy-Free & Vegan: Substitute 1.5 cups full-fat coconut milk and ½ cup oat milk and eliminate the half & half and heavy cream. The creamer will still be rich, creamy, and totally delicious!
    • Lactose-Free: Enjoy this banana bread creamer recipe without any tummy troubles! Just swap in lactose-free heavy cream and lactose-free half & half for their traditional counterparts.
    • Banana bread syrup: If you don't have store-bought banana bread syrup on hand, make your own! Our Homemade Banana Bread Syrup recipe is easy, delicious, and takes this creamer completely over the top.
    • Banana milk: If you have banana milk on hand, use that instead of the half n half, add less syrup and the same amount of heavy cream!

    How to Make Banana Bread Creamer

    We weren't kidding when we said this is the easiest homemade creamer recipe ever. Two steps, two minutes, done!

    • Step 1 — Add the half & half, heavy cream, and banana bread syrup to a large mason jar. Stir until everything is fully combined and the syrup is evenly mixed throughout.
    • Step 2 — Pop the lid on the mason jar and store in the fridge for up to 7 days. Give it a shake before each use and enjoy!

    How to Use Banana Bread Coffee Creamer

    The obvious move is a generous pour into your morning coffee — but there are so many fun ways to use this creamer. Here are some of our favorites!

    • Hot coffee — A splash of this banana bread creamer transforms any plain cup into the coziest morning treat. So good!
    • Banana iced coffee — Pour it over a glass of iced coffee for a sweet, creamy, banana-forward cold drink. Total summer vibes.
    • Cold brew — The rich, sweet flavor of this creamer pairs beautifully with the bold, smooth taste of cold brew. Absolute perfection.
    • Cold foam — Froth it up for a sweet, creamy banana bread cold foam to spoon over your cold brew. Game. Changer.

    Tips for the Best Homemade Banana Bread Creamer

    • Use a good quality banana bread syrup. Since it's the only flavoring in this recipe, the syrup does all the heavy lifting. The better the syrup, the better the creamer — it's that simple! We highly recommend our Homemade Banana Bread Syrup for the best results.
    • Shake before every pour. Some natural separation can happen in the fridge — totally normal! A quick shake before pouring brings everything back together beautifully.
    • Let it chill before using. Give the creamer at least 30 minutes in the fridge before your first pour. It tastes best when it's nice and cold!
    • Adjust the syrup to taste. Love it extra sweet and banana-forward? Add a little more syrup. Prefer a subtler flavor? Scale back slightly. This recipe is totally flexible!

    FAQs

    How long does banana bread creamer last?

    This creamer keeps fresh in the fridge for up to 7 days when stored in an airtight mason jar or bottle. Give it a shake before each use since natural separation can occur!

    What is banana bread syrup and where do I find it?

    Banana bread syrup is a flavored simple syrup made to taste just like banana bread — warm, sweet, and full of banana flavor. You can find it at some specialty grocery stores and Amazon, but the easiest (and most delicious) option is to make your own! Check out our Homemade Banana Bread Syrup recipe — it's super simple and takes this creamer to a whole new level.

    Can I use this to make a banana bread latte?

    Yes, and you absolutely should! This creamer is the perfect base for a Banana Bread Iced Latte. Just add a generous pour to your espresso and milk over ice for a dreamy, dessert-inspired coffee drink!

    Nutritional Info

    Each ¼ cup serving of this homemade banana bread creamer comes in at 132 calories, with 17g of carbs, 16g of sugar, 7g of fat, and 1g of protein. It's one of the lighter homemade creamer options out there — and every single calorie comes from a real, recognizable ingredient!

    If you're looking to cut back even further, try reducing the amount of banana bread syrup slightly. You'll still get all that gorgeous banana bread flavor with a bit less sugar.

    Total nutritional content per ¼ cup is:

    • Calories: 132 calories
    • Total Fat: 7 grams
    • Protein: 1 gram
    • Sodium: 56 mg
    • Carbohydrates: 17 grams
    • Sugar: 16 grams

    *This nutritional information is an estimate and calculated based on the ingredients used to create the recipe. The nutritional value of your ingredients may differ slightly. Furthermore, this food is not intended to prevent, diagnose, cure, or treat any disease.

    Other Homemade Creamer Recipes
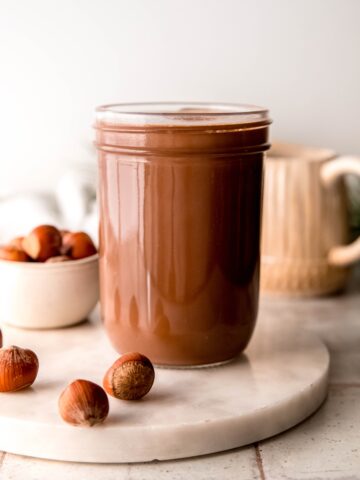
    • Homemade Banana Bread Creamer
    • Homemade Cookie Dough Coffee Creamer
    • Homemade Cookies & Cream Creamer
    • Homemade Caramel Macchiato Creamer
    Print Recipe
    5 from 1 vote

    Homemade Banana Bread Creamer

    This banana bread coffee creamer is rich, creamy, and ready in just 2 minutes! Made with real banana bread syrup and stored in the fridge for up to 7 days.
    Prep Time2 minutes mins
    Total Time2 minutes mins
    Course: Drinks
    Cuisine: American
    Keyword: Banana Bread Creamer
    Servings: 12 servings
    Calories: 132kcal
    Author: Megan Byrd

    Equipment

    • 1 mason jar

    Ingredients

    • 1 ½ cup half & half
    • 1 cup banana bread syrup
    • ½ cup heavy cream

    Instructions

    • Add all ingredients to a large mason jar and stir until combined.
    • Store in the fridge for up to 7 days.

    Video

    Notes

    • Dairy-Free & Vegan: Substitute 1.5 cups full-fat coconut milk and ½ cup oat milk and eliminate the half-and-half and heavy cream.
    • Lactose-Free: Enjoy this coffee creamer recipe without any tummy troubles! Just swap in lactose-free heavy cream and lactose-free half-and-half for their traditional counterparts.

    Nutrition

    Serving: 0.25cup | Calories: 132kcal | Carbohydrates: 17g | Protein: 1g | Fat: 7g | Sodium: 56mg | Sugar: 16g
    Banana bread coffee creamer.

    xoxo Megan
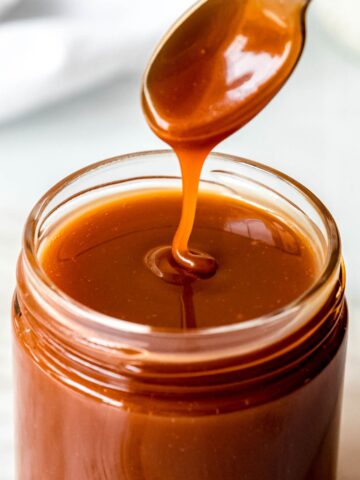
    Iced Strawberry Cheesecake Latte

    June 1, 2026

    This Strawberry Cheesecake Latte is the dessert-inspired iced latte you didn't know you needed — and once you try it, your regular morning coffee is never going to cut it again. We're talking espresso, strawberry syrup, and the creamiest strawberry cream cheese cold foam you've ever tasted, all in one glass.

    The secret weapon? A dreamy strawberry cold foam latte situation — whipped cream cheese frothed with strawberry syrup that sits right on top of your iced latte like a cloud of pure joy.

    And if you've seen the viral Trader Joe's Strawberry Whipped Cream Cheese floating around on TikTok, good news — this recipe is the perfect excuse to finally grab a tub. It makes the cold foam even more incredible and takes this latte completely over the top.

    The best part? This whole drink comes together in just 3 minutes. No barista skills required — just a milk frother and a serious love of strawberry cheesecake.

    [feast_advanced_jump_to]

    What Does a Strawberry Cheesecake Latte Taste Like?

    This latte tastes exactly like a strawberry cheesecake in drink form — sweet, fruity, and just a little tangy from that cream cheese cold foam. The strawberry syrup gives every sip a bright, jammy flavor that feels like summer in a glass.

    The espresso cuts through the sweetness just enough to remind you that yes, this is still a coffee drink. And if you add the optional graham cracker topping? That little crunch ties the whole thing together and makes every sip taste like an actual slice of strawberry cheesecake.

    Why You'll Love This Strawberry Cheesecake Latte

    • Ready in 3 minutes — Faster than any coffee shop line and so much more fun to make. This is your new weekday treat!
    • Cheaper than Starbucks — There's no official Starbucks strawberry cheesecake latte on the menu, and even secret menu drinks add up fast. This homemade version costs a fraction of the price.
    • That cream cheese cold foam though — It's silky, sweet, tangy, and pourable. Once you put cream cheese cold foam on a latte, there's no going back.
    • Totally customizable — Whether you want a simple strawberry latte or the full cheesecake experience, this recipe works with whatever you have on hand!
    • The graham cracker topping is everything — It's optional, but honestly? Don't skip it. That little sprinkle of crushed freeze-dried strawberries and graham cracker crumbs makes this feel like a full-on dessert experience.

    Ingredients

    This strawberry cheesecake iced latte comes together with three simple components — the latte base, the cream cheese cold foam, and an optional but highly recommended topping. Here's what you'll need!

    • Whipped cream cheese — The base of the cold foam and the key to that signature cheesecake flavor. Make sure you're using whipped cream cheese, not block — it froths up so much better!
    • Strawberry syrup — Adds sweetness and that bright strawberry flavor to the foam and latte. Use your favorite store-bought syrup or make it homemade!
    • Heavy cream and whole milk — Together they give the foam its rich, creamy, pourable texture.
    • Milk of choice — Any milk works here! The recipe uses 2%, but oat milk, whole milk, or almond milk all work beautifully.
    • Espresso — Two shots of espresso give this latte its coffee backbone. Strong and bold is the move!
    • Strawberry Graham Cracker Topping — Crush the strawberries and mix with the graham cracker crumbs for a sweet, fruity, crunchy topping that makes this latte taste like an actual slice of cheesecake!

    Substitutions

    • Trader Joe's Strawberry Whipped Cream Cheese: If you can get your hands on this viral ingredient, use it! Swap it in 1:1 for the regular whipped cream cheese and skip the strawberry syrup in the cold foam — the flavor is already built right in. More on this below!
    • No espresso machine? Use 2 oz of very strong brewed coffee or a double shot from a Nespresso or Keurig instead. You can also dissolve 2 teaspoons of Nescafé Gold Blonde instant espresso into ½ cup of warm water for a quick and easy alternative!
    • Dairy-Free: Swap the heavy cream and whole milk in the cold foam for full-fat coconut cream, and use oat milk or almond milk as your latte base.

    How to Make an Iced Strawberry Cheesecake Latte

    This recipe is SO easy — it comes together in three simple steps and the hardest part is not drinking the cold foam straight from the jar!

    • Step 1 — Make the topping (if using). Crush 2 freeze-dried strawberries and stir in 1 teaspoon of graham cracker crumbs. Set aside while you make the rest of the drink.
    • Step 2 — Make the cold foam. Add the whipped cream cheese, strawberry syrup, heavy cream, and whole milk to a small glass or jar. Froth using a milk frother until the mixture is completely smooth and creamy. Set aside.
    • Step 3 — Build the latte. Add ice to a tall glass, then pour in the strawberry syrup. Add the milk and stir to combine. Slowly pour the espresso over the sweetened milk, then spoon the cream cheese cold foam on top. Finish with the strawberry graham cracker topping if using, and drink up!

    The Trader Joe's Strawberry Whipped Cream Cheese Hack

    If you've been anywhere near coffee TikTok lately, you've probably seen the Trader Joe's Strawberry Whipped Cream Cheese popping up everywhere — and for good reason. It's sweet, fruity, and already perfectly flavored for this exact kind of latte.

    To use it in this recipe, simply swap it in 1:1 for the regular whipped cream cheese and leave out the strawberry syrup in the cold foam. The flavor is already baked right in, which means one fewer ingredient and even more strawberry cheesecake taste in every sip.

    The only catch? It's a Trader Joe's product, which means availability can vary by location and season. If you spot it, grab two — you're going to want to keep making this latte all week long! And if you love fun, flavored lattes like this one, don't miss my Carrot Cake Latte — it's just as dreamy!

    Tips for the Best Strawberry Cheesecake Latte

    • Always use whipped cream cheese. Block cream cheese is too dense and won't froth properly. Whipped cream cheese is lighter and blends into a silky smooth foam every single time.
    • Don't skip the frother. A milk frother is the key to getting that dreamy, pourable cold foam texture. A regular whisk just won't cut it!
    • Layer your ingredients in order. Ice first, then syrup, then milk, then espresso, then foam on top. This order gives you the prettiest drink and the best flavor in every sip.
    • Adjust the strawberry syrup to taste. Love it extra sweet and fruity? Add another pump of syrup. Prefer it more coffee-forward? Scale back to 1 tablespoon. This recipe is totally flexible!
    • Don't skip the graham cracker topping. It's labeled optional in the recipe but it genuinely takes this from a great iced latte to a full-on strawberry cheesecake experience. Highly recommend!

    FAQs

    What is the strawberry cheesecake drink at Starbucks?

    There isn't an official strawberry cheesecake drink on the Starbucks menu, but there is a popular secret menu version! To order it, ask for an iced latte with 2 shots of espresso, 2-3 pumps of strawberry syrup, and vanilla sweet cream cold foam on top. Request a sprinkle of graham cracker crumbs if your location has them. It's not quite the same as this homemade version — nothing beats that cream cheese cold foam — but it's a solid approximation when you're on the go!

    Does Dunkin' have a strawberry cheesecake latte?

    Dunkin' has offered strawberry-flavored drinks and seasonal specials in the past, but a dedicated strawberry cheesecake latte isn't a permanent menu item. Your best bet is to make this homemade version — it takes just 3 minutes and tastes way better anyway!

    How do I make the cream cheese cold foam thicker?

    Make sure you're using whipped cream cheese and frothing long enough for the mixture to fully emulsify. If you want it even thicker, add an extra tablespoon of heavy cream and froth a little longer. You can also pop it in the fridge for a few minutes after frothing — it thickens up as it chills!

    Nutritional Info

    Each serving of this strawberry cheesecake latte comes in at 376 calories, with 50g of carbs, 47g of sugar, 17g of fat, and 9g of protein. It's absolutely a dessert in a glass — but it's made with real, simple ingredients and it's a whole lot cheaper than a coffee shop run!

    If you're looking to lighten it up, try reducing the strawberry syrup by half and using a lower-fat milk. You'll still get all that gorgeous strawberry cheesecake flavor with a lighter nutritional profile.

    Total nutritional content per drink is:

    • Calories: 376 calories
    • Total Fat: 17 grams
    • Protein: 9 grams
    • Sodium: 263 mg
    • Carbohydrates: 50 grams
    • Sugar: 47 grams

    *This nutritional information is an estimate and calculated based on the ingredients used to create the recipe. The nutritional value of your ingredients may differ slightly. Furthermore, this food is not intended to prevent, diagnose, cure, or treat any disease.

    Other Iced Coffee Recipes

    • Iced Strawberry Cheesecake Latte
    • Iced Crème Brûlée Latte
    • Iced Ube Coconut Cream Shaken Espresso (Starbucks Copycat)
    • Iced Ube Coconut Macchiato (Starbucks Copycat)
    Print Recipe
    5 from 1 vote

    Iced Strawberry Cheesecake Latte

    A dreamy iced strawberry latte topped with cream cheese cold foam and a graham cracker crumble. Ready in 3 minutes!
    Prep Time3 minutes mins
    Total Time3 minutes mins
    Course: Drinks
    Cuisine: American
    Keyword: Strawberry Cheesecake Latte
    Servings: 1 drink
    Calories: 376kcal
    Author: Megan Byrd

    Equipment

    • 1 milk frother

    Ingredients

    Strawberry Cream Cheese Cold Foam:

    • 3 tablespoon whipped cream cheese (or Trader Joe's Strawberry Whipped Cream Cheese)
    • 2 tablespoon strawberry syrup
    • 2 tablespoon whole milk
    • 1 tablespoon heavy cream

    Strawberry Cheesecake Latte:

    • 2 tablespoon strawberry syrup
    • ¾ cup milk of choice (I used 2%)
    • 2 oz espresso
    • ice

    Strawberry Graham Cracker Topping (Optional)

    • 1 crushed freeze-dried strawberry
    • ½ teaspoon graham cracker crumbs

    Instructions

    • Make the topping (if using). Crush 1 freeze-dried strawberry, then stir in ½ teaspoon of graham cracker crumbs. Set aside.
    • Make the cold foam. Add all cold foam ingredients to a small glass or jar and froth using a milk frother until smooth and creamy. Set aside.
    • Make the strawberry cheesecake latte. Add ice to a tall glass, then pour in the strawberry syrup. Top with milk and stir. Pour the espresso over the sweetened milk, then top with strawberry cheesecake cold foam and strawberry graham cracker topping (if using). Drink up!

    Video

    Nutrition

    Serving: 1drink | Calories: 376kcal | Carbohydrates: 50g | Protein: 9g | Fat: 17g | Sodium: 263mg | Sugar: 47g
    Iced strawberry cheesecake latte.

    xoxo Megan
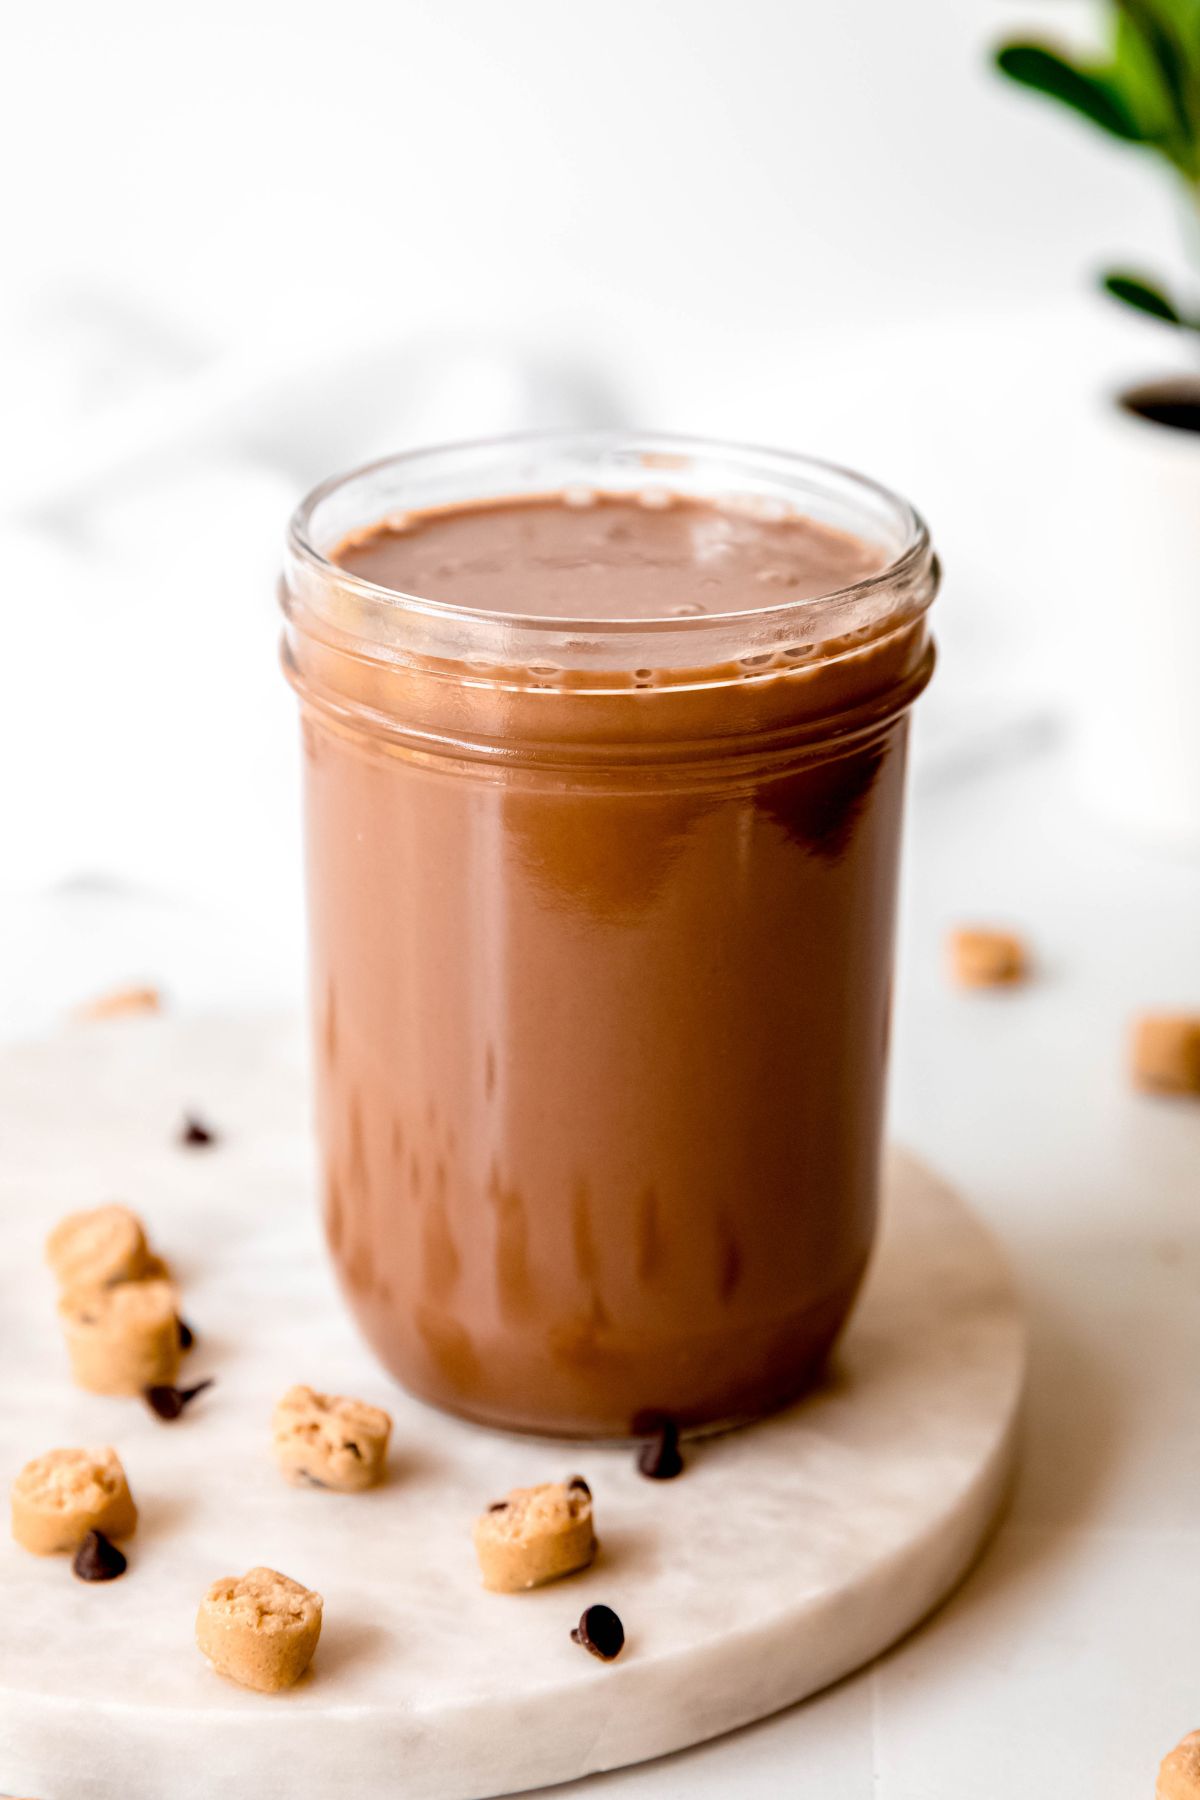
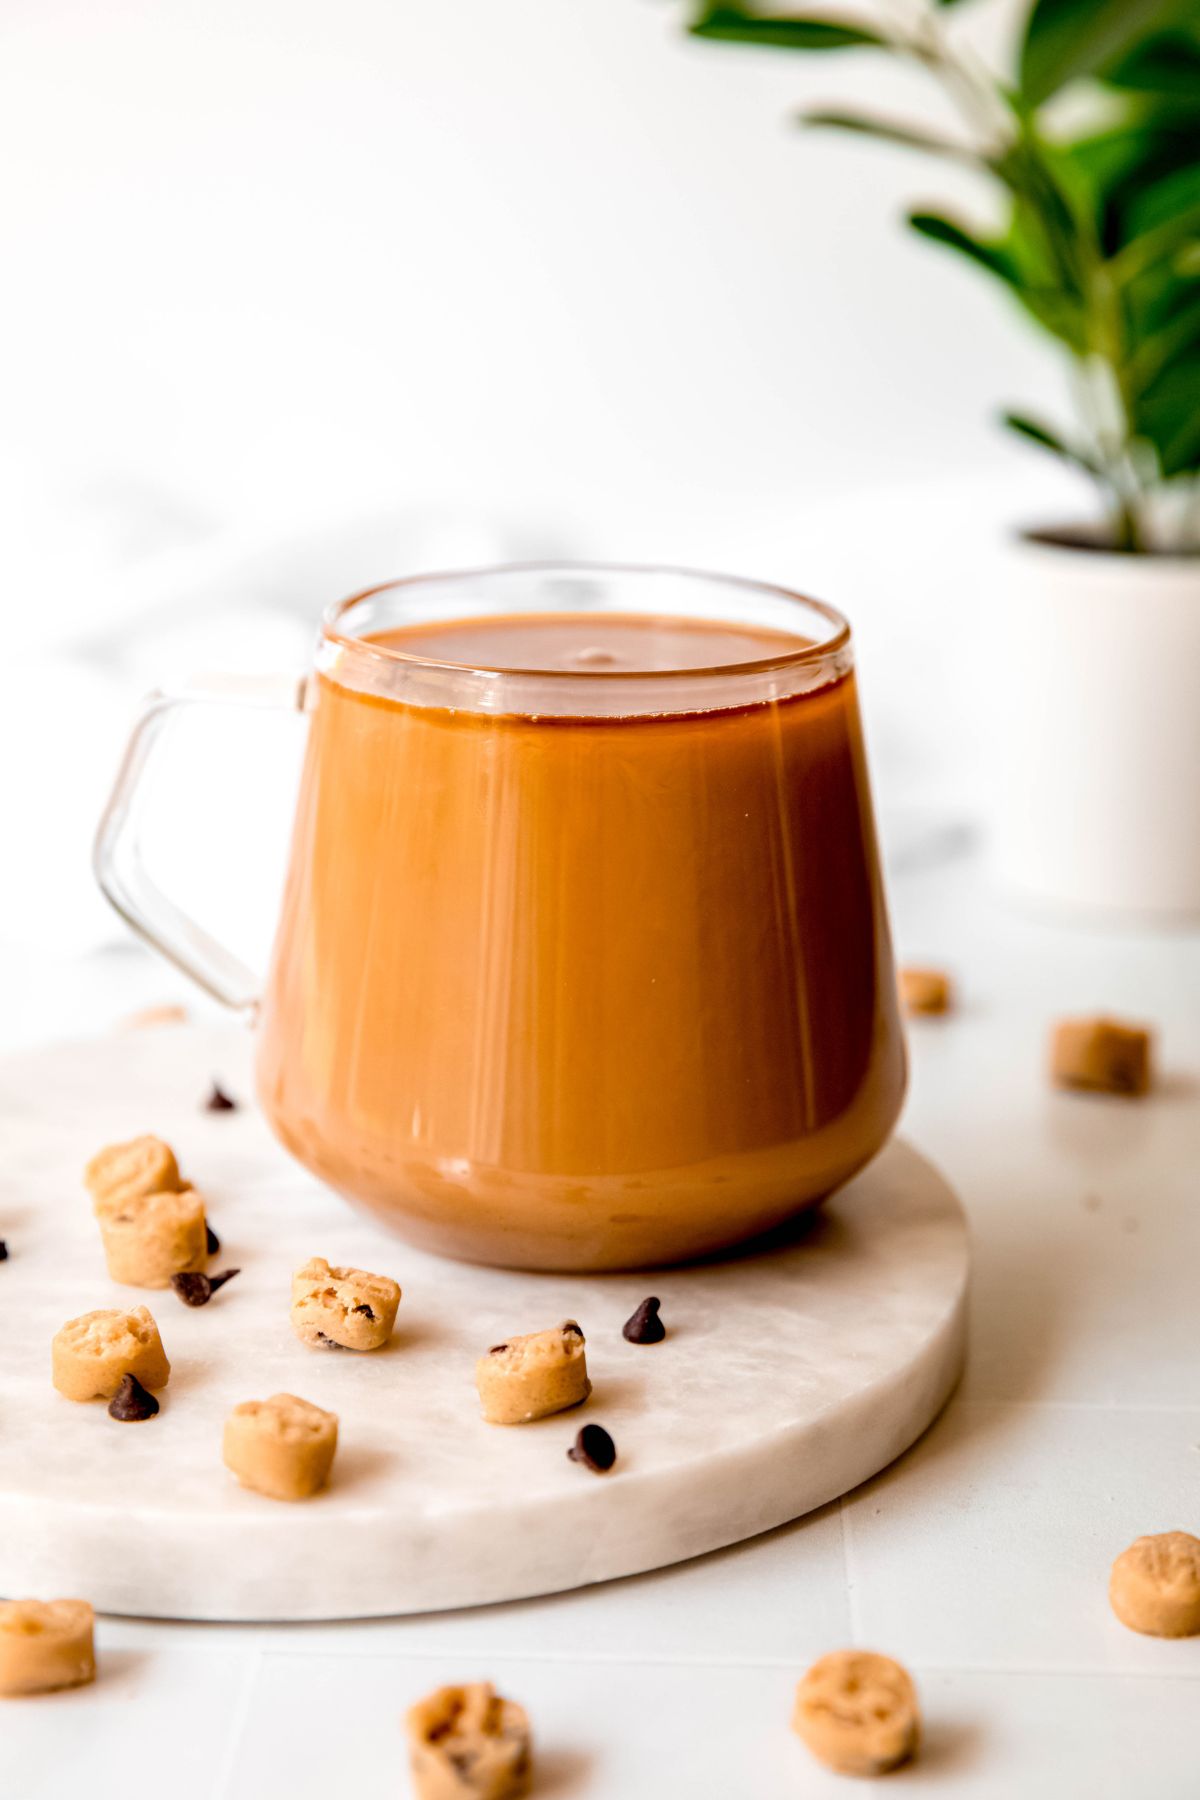
    Homemade Cookie Dough Coffee Creamer

    May 28, 2026

    This Homemade Cookie Dough Coffee Creamer is the ultimate copycat Chobani cookie dough creamer — the easiest homemade flavored coffee creamer you'll ever make, made with real cream, brown sugar, and a hint of cocoa. Spoiler: it tastes SO much better than anything you'll find in the coffee aisle.

    If you've ever wished you could eat cookie dough for breakfast and have it be totally acceptable, this creamer is your answer. That sweet, buttery, doughy flavor? Straight in your morning cup. You're welcome.

    It makes about 2.5 cups and keeps in the fridge for up to 2 weeks — which means one quick batch on Sunday and your coffee is sorted all week long!

    Whether you're chasing that Chobani flavor at home or just want an easy homemade creamer recipe that tastes like dessert, this recipe is about to be your new go-to. Trust us — once you try it, the store-bought stuff just won't cut it anymore.

    [feast_advanced_jump_to]

    What Does Cookie Dough Creamer Taste Like?

    This creamer tastes exactly like raw cookie dough melted into your morning coffee — sweet, rich, and loaded with that warm brown sugar flavor you know and love. A hint of cocoa and vanilla weaves through every sip, giving it that classic unbaked dough taste.

    It's indulgent without being over-the-top, and it makes your coffee taste like a total treat. Think cookie dough ice cream, but make it coffee.

    Why You'll Love This Cookie Dough Coffee Creamer

    • Better than store-bought — We're talking real cream, real brown sugar, and real vanilla. The flavor is richer and more authentic than anything you'll find on a shelf!
    • Only 6 ingredients — Half & half, heavy cream, two sugars, cocoa powder, and vanilla extract. Simple, real, and delicious.
    • Lasts up to 2 weeks — One batch makes about 2.5 cups and stays fresh in the fridge for two whole weeks. That's a lot of amazing mornings!
    • More affordable than store-bought — Skip the $5-6 bottle and make a bigger batch at home for less. Your wallet will thank you!
    • Totally customizable — This DIY cookie dough creamer can easily be made dairy-free or adjusted to your sweetness preference. More on that below!

    Ingredients

    You only need 6 simple ingredients for this Chobani cookie dough creamer recipe — and there's a good chance most of them are already in your kitchen right now!

    • Half & half and heavy cream — The creamy, pourable base of this creamer. Together they give us that perfect balance of richness without being too heavy.
    • Granulated sugar and brown sugar — The dynamic duo! Granulated sugar adds straightforward sweetness while brown sugar brings that warm, caramel-y, cookie dough flavor we're after.
    • Unsweetened cocoa powder — Just enough to mimic that hint of chocolate you get in classic chocolate chip cookie dough. It's subtle but essential!
    • Vanilla extract — Rounds everything out with that warm, sweet vanilla flavor that makes cookie dough taste like cookie dough.

    Substitutions

    • Dairy-Free: Swap the half & half for full-fat oat milk and the heavy cream for canned coconut cream for a rich, non-dairy version.
    • Brown Sugar Swap: Out of brown sugar? Mix ½ cup granulated sugar with 1 tablespoon of molasses for a quick DIY substitute!
    • Cocoa Powder: This recipe uses unsweetened cocoa powder — not Dutch process, not hot cocoa mix. Regular unsweetened is the move here!

    How to Make Cookie Dough Creamer

    Step 1 — Add the half & half, heavy cream, granulated sugar, brown sugar, and cocoa powder to a medium saucepan. Heat over medium-low heat, whisking frequently. Don't rush it — low and slow is the move here!

    Step 2 — Continue whisking until everything is fully dissolved and well combined. Once the mixture is smooth and there are no lumps of cocoa powder or sugar remaining, remove the saucepan from the heat and stir in the vanilla extract.

    Step 3 — Allow the creamer to cool at room temperature for 15 minutes, then transfer to a mason jar, pop a lid on, and store in the fridge for up to 2 weeks.

    How to Use Cookie Dough Coffee Creamer

    The obvious move is to splash it straight into your morning coffee — but there are so many fun ways to enjoy this creamer beyond your basic cup!

    • Hot coffee — A generous pour transforms any plain cup into a cookie dough latte situation. Dreamy!
    • Iced coffee — This creamer swirls beautifully into a glass of iced coffee and makes every sip taste like dessert.
    • Cold brew — The sweet, rich flavor pairs perfectly with the bold, smooth taste of cold brew. Absolute game changer.
    • Cold foam — Froth it up and spoon it over your cold brew for a cookie dough cold foam moment you won't forget.
    • Blended drinks — Toss it in the blender with ice and cold brew for a homemade cookie dough frappuccino. Yes, really!

    Tips for the Best DIY Cookie Dough Creamer

    • Whisk constantly while heating. The cocoa powder and sugars can settle or scorch if left alone. Keep that whisk moving the whole time!
    • Medium-low heat is key. Don't crank up the heat to speed things up — low and slow ensures everything dissolves evenly without scalding the cream.
    • Always stir in the vanilla off the heat. Adding vanilla to a hot pan can cook off the flavor. Pull the saucepan off the burner first, then stir it in!
    • Let it cool before refrigerating. Give the creamer a full 15 minutes at room temperature before transferring to the fridge. This keeps the texture smooth and prevents condensation.
    • Shake before every pour. Some natural separation can happen in the fridge — totally normal! A quick shake before you pour brings everything right back together.
    • Use a mason jar or bottle with a pour spout. This is the one I use and it'll make your morning routine so much easier and way less messy!

    FAQs

    How long does homemade cookie dough creamer last?

    This creamer stays fresh in the fridge for up to 2 weeks when stored in an airtight mason jar or bottle. Give it a shake before each use since natural separation can occur!

    Can I freeze homemade cookie dough creamer?

    We don't recommend it! Cream-based creamers tend to separate and get grainy when frozen and thawed. Since this batch lasts 2 weeks in the fridge, it's easy to just make it fresh as needed!

    Does this actually taste like cookie dough?

    It really does! The combination of brown sugar, vanilla, and a hint of cocoa powder nails that classic unbaked cookie dough flavor. It's sweet, warm, and just a little chocolatey — exactly what you'd expect from a cookie dough flavored creamer.

    Can I make this dairy-free?

    Absolutely! Swap the half & half for full-fat oat milk and the heavy cream for canned coconut cream. The creamer will still be rich, smooth, and totally delicious.

    What's the cocoa powder for?

    A small amount of unsweetened cocoa powder mimics the hint of chocolate chip flavor you get in classic cookie dough. It's subtle, but it's what takes this from a plain vanilla creamer to a full-on cookie dough experience!

    Nutritional Info

    Each ¼ cup serving of this homemade cookie dough coffee creamer comes in at around 171 calories, with 23g of carbs, 23g of sugar, 9g of fat, and 2g of protein. It's absolutely a treat — but every single calorie comes from a real, recognizable ingredient!

    If you're looking to cut back on sugar, try reducing the granulated sugar by a few tablespoons. You'll still get all that amazing cookie dough flavor from the brown sugar and vanilla.

    Total nutritional content per ¼ cup serving is:

    • Calories: 171 calories
    • Total Fat: 9 grams
    • Protein: 2 grams
    • Sodium: 28 mg
    • Carbohydrates: 23 grams
    • Sugar: 23 grams

    *This nutritional information is an estimate and calculated based on the ingredients used to create the recipe. The nutritional value of your ingredients may differ slightly. Furthermore, this food is not intended to prevent, diagnose, cure, or treat any disease.

    Other DIY Coffee Creamer Recipes

    • Homemade Vanilla Coconut Creamer
    • Homemade Pistachio Creamer
    • 15+ Homemade Creamer Recipes
    • Homemade Sugar Cookie Creamer
    Print Recipe
    5 from 1 vote

    Homemade Cookie Dough Coffee Creamer

    This copycat Chobani cookie dough creamer is made from scratch with real cream and brown sugar. Ready in 10 minutes and keeps in the fridge for 2 weeks!
    Prep Time5 minutes mins
    Cook Time5 minutes mins
    Total Time10 minutes mins
    Course: Drinks
    Cuisine: American
    Keyword: Cookie Dough Creamer
    Servings: 10 servings
    Calories: 171kcal
    Author: Megan Byrd

    Equipment

    • 1 medium saucepan
    • 1 mason jar

    Ingredients

    • 1 ½ cups half & half
    • ½ cup heavy cream
    • ½ cup granulated sugar
    • ½ cup brown sugar
    • 4 teaspoon unsweetened cocoa powder
    • 1 teaspoon vanilla extract

    Instructions

    • Add the half & half, heavy cream, sugars, and cocoa powder to a medium saucepan and heat over medium-low heat, whisking frequently.
    • Continue to whisk until everything is dissolved and well combined, then remove from the heat and stir in the vanilla extract.
    • Allow to cool at room temperature for 15 minutes, then transfer to a mason jar and store in the fridge for up to 2 weeks.

    Video

    Notes

    This makes about 2.5 cups of cookie dough creamer! 

    Nutrition

    Serving: 0.25cup | Calories: 171kcal | Carbohydrates: 23g | Protein: 2g | Fat: 9g | Sodium: 28mg | Sugar: 23g
    Cookie dough coffee creamer.

    xoxo Megan
    Homemade Cookies & Cream Creamer

    May 20, 2026

    This Homemade Cookies & Cream Creamer is the ultimate copycat Chobani creamer — a coffee creamer recipe from scratch made with real ingredients like whole milk, Hershey's Cookies and Creme bars, and actual Oreos.

    If your morning coffee could taste like a cookies and cream candy bar, would you make it happen? Obviously yes — and guess what? It only takes 10 minutes!

    Whether you're a busy mom who needs her coffee to feel like a treat, or just someone who thinks dessert-for-breakfast is a completely valid life choice (same), this creamer is about to become your new obsession. It makes about 4 cups — enough to keep your coffee dreamy all week long — and the only hard part is not drinking it straight from the jar.

    [feast_advanced_jump_to]

    What does it taste like?

    This creamer tastes exactly like an Oreo melted into your morning coffee — and yes, it's just as dreamy as it sounds. You get that sweet, creamy base with little pops of chocolate cookie flavor woven all the way through.

    It's rich and indulgent without being overwhelming, and it makes every sip feel like dessert. Think cookies and cream ice cream, but make it coffee. It's the most indulgent chocolate cookie coffee creamer you'll ever taste.

    Why You'll Love Cookies & Cream Coffee Creamer

    • Better than store-bought — We're talking real milk, real Oreos, and real Hershey's chocolate. The flavor is richer, creamier, and more indulgent than anything you'll find in the coffee aisle!
    • Only 4 ingredients — Hershey's Cookies and Creme bar, whole milk, sugar, and Oreos. That's literally it.
    • Makes a full week's worth — One batch yields about 4 cups of Oreo creamer, so your coffee is sorted for days.
    • Make it any time of year — The Chobani cookies and cream creamer is a seasonal release, which means it's not always on shelves when you're craving it. This homemade version means cookies and cream coffee is on the menu 365 days a year!
    • Totally customizable — This DIY flavored coffee creamer can easily be made dairy-free or gluten-free!

    Ingredients

    You only need four simple ingredients for this recipe — and if you're anything like me, there's a good chance you've already got Oreos in the pantry. (No judgment if they're half eaten. Mine always are.)

    • 7 oz Hershey's Cookies and Creme Bar — This is the star of the show! It's about 4½ of the standard 1.55 oz bars. The white chocolate base with chocolate cookie pieces gives this creamer its signature cookies and cream flavor.
    • 3 cups whole milk — Whole milk gives us a rich, creamy base without making it overly heavy. It also blends beautifully with the chocolate.
    • ½ cup granulated sugar — Just enough sweetness to make this creamer feel indulgent without being over-the-top.
    • 4 Oreo cookies — Because one source of cookies and cream flavor just isn't enough! The Oreos deepen that classic chocolate cookie taste and blend right into the creamer.

    Substitutions

    • Dairy-Free: Swap the whole milk for full-fat oat milk or coconut milk for a creamy, non-dairy version.
    • Gluten-Free: Use 5 oz of white chocolate and 5 gluten-free Oreos in place of the Hershey's bar and regular Oreos.
    • Can't find Hershey's Cookies and Creme? Use 5 oz of white chocolate and an extra Oreo cookie instead!

    How to Make Cookies and Cream Creamer

    Here's exactly how to make Oreo creamer at home! If you can stir a pot and press a blender button, you've totally got this!

    Step 1: Break up the Hershey's Cookies and Creme bars into individual pieces and add them to a medium saucepan. Pour in the whole milk, granulated sugar, and drop in the 4 Oreo cookies. It looks a little chaotic at this point — that's perfectly normal, promise!

    Step 2: Heat the mixture over medium heat, whisking frequently. Keep stirring until the chocolate is fully dissolved and the Oreo cookies have completely disintegrated into the mixture. You'll notice the little dark chocolate cookie pieces from the Hershey's bar floating to the top — that's totally expected and exactly what should happen!

    Step 3: Remove the saucepan from the heat and carefully pour the mixture into a high-speed blender.

    Step 4: Blend until completely smooth. Let the creamer cool at room temperature for about 15 minutes, then pour it into a mason jar, pop a lid on it, and store it in the fridge for up to 7 days.

    Serving Suggestions

    The obvious answer is: pour it in your coffee and never look back. But there are so many fun ways to use this creamer beyond your standard morning cup!

    • Hot coffee or cold brew — A generous splash transforms any plain cup into a cookies and cream latte situation.
    • Iced coffee — This creamer is incredible poured over a glass of iced coffee. It swirls in beautifully and makes every sip feel like a treat.
    • Blended drinks — Toss it in the blender with some ice and cold brew for a homemade frappuccino moment.
    • Cold foam — Froth it up for a creamy, chocolatey cold foam topping for your cold brew. Game. Changer.

    Recipe Success Tips

    • Whisk constantly while heating. The chocolate can scorch if left alone on the heat, so keep that whisk moving! Medium heat and frequent stirring is the move.
    • Let it cool before refrigerating. Give the creamer a full 15 minutes at room temperature before transferring to the fridge. This prevents condensation and keeps the texture smooth and dreamy.
    • Shake it before every pour. Since we're not using any artificial emulsifiers (yay!), some natural separation can happen in the fridge. A quick shake before you pour brings everything right back together.
    • Use a mason jar or bottle with a pour spout. Trust me — it makes the morning routine so much easier and way less messy!
    • Don't skip the blender step! It's what transforms this from a chunky chocolate milk situation into a silky-smooth, pourable creamer. Trust the process!

    FAQs

    How long does homemade cookies and cream creamer last?

    This creamer will keep in the fridge for up to 7 days when stored in an airtight mason jar or bottle. Give it a shake before each use since natural separation can occur!

    Can I freeze homemade coffee creamer?

    We don't recommend it! Dairy-based creamers tend to separate and get grainy when frozen and thawed. It's best to make a fresh batch as needed — and with only 10 minutes of effort, that's totally doable!

    Do I have to use a blender?

    Yes! The blender is what gives this creamer its silky-smooth texture. Skipping it will leave you with a chunky, uneven consistency that won't pour well into your coffee. If you'd rather skip the blender, you can use an immersion blender directly in a large pot or container — just make sure there's plenty of room to avoid splashing!

    Can I use this creamer in iced coffee?

    100% yes — and honestly, it's incredible over ice. It swirls in beautifully and makes every sip feel like a treat!

    Nutritional Info

    Each ¼ cup serving of this homemade Oreo creamer comes in at around 175 calories, with 26g of carbs, 21g of sugar, 7g of fat, and 3g of protein. It's definitely a treat — not a health food — but that's kind of the whole point, right?

    The good news is that every single one of those calories comes from a real, recognizable ingredient, which is more than we can say for most store-bought creamers! If you're looking to lighten things up, try the sugar-free swap mentioned above. You'll keep all that dreamy cookies and cream flavor with a lot fewer carbs.

    Total nutritional content per serving is:

    • Calories: 175 calories
    • Total Fat: 7 grams
    • Protein: 3 grams
    • Sodium: 83 grams
    • Carbohydrates: 26 grams
    • Sugar: 21 grams

    *This nutritional information is an estimate and calculated based on the ingredients used to create the recipe. The nutritional value of your ingredients may differ slightly. Furthermore, this food is not intended to prevent, diagnose, cure, or treat any disease.

    Other Coffee Creamer Recipes

    • Cookie Butter Creamer
    • White Chocolate Raspberry Creamer
    • Homemade Caramel Apple Creamer
    • Homemade Birthday Cake Creamer
    Print Recipe
    5 from 2 votes

    Homemade Cookies and Cream Creamer

    Make cookies and cream coffee creamer at home with just 4 ingredients! This copycat Chobani creamer is creamier, more chocolatey, and available year-round!
    Prep Time5 minutes mins
    Cook Time5 minutes mins
    Total Time10 minutes mins
    Course: Drinks
    Cuisine: American
    Keyword: Cookies and Cream Creamer
    Servings: 12 servings
    Calories: 175kcal
    Author: Megan Byrd

    Equipment

    • 1 medium saucepan
    • 1 high-speed blender

    Ingredients

    • 7 oz Hershey's Cookies and Creme Bar (about 4 ½ of the 1.55 oz bars)
    • 3 cups whole milk
    • ½ cup granulated sugar
    • 4 Oreo cookies

    Instructions

    • Break up the cookies and creme chocolate bars into their individual pieces and place a medium saucepan. Add the milk, sugar, and Oreo cookies.
    • Heat over medium heat, whisking frequently until the chocolate is dissolved and the Oreo cookies are disintegrated. The little chocolate cookie pieces from the chocolate bar will float to the top.
    • Remove from heat and carefully pour into a blender and blend the creamer until smooth. Allow to cool for 15 minutes at room temperature, then pour into a mason jar and store in the fridge for 7 days.

    Video

    Notes

    This makes about 4 cups of Oreo creamer! 
    • Dairy-Free: Swap the whole milk for full-fat oat milk or coconut milk for a creamy, non-dairy version.
    • Gluten-Free: Use 5 oz of white chocolate and 5 gluten-free Oreos in place of the Hershey's bar and regular Oreos.
    • Can't find Hershey's Cookies and Creme? Use 5 oz of white chocolate and an extra Oreo cookie instead!

    Nutrition

    Serving: 0.25cup | Calories: 175kcal | Carbohydrates: 26g | Protein: 3g | Fat: 7g | Sodium: 83mg | Sugar: 21g
    Cookies and cream coffee creamer.

    xoxo Megan
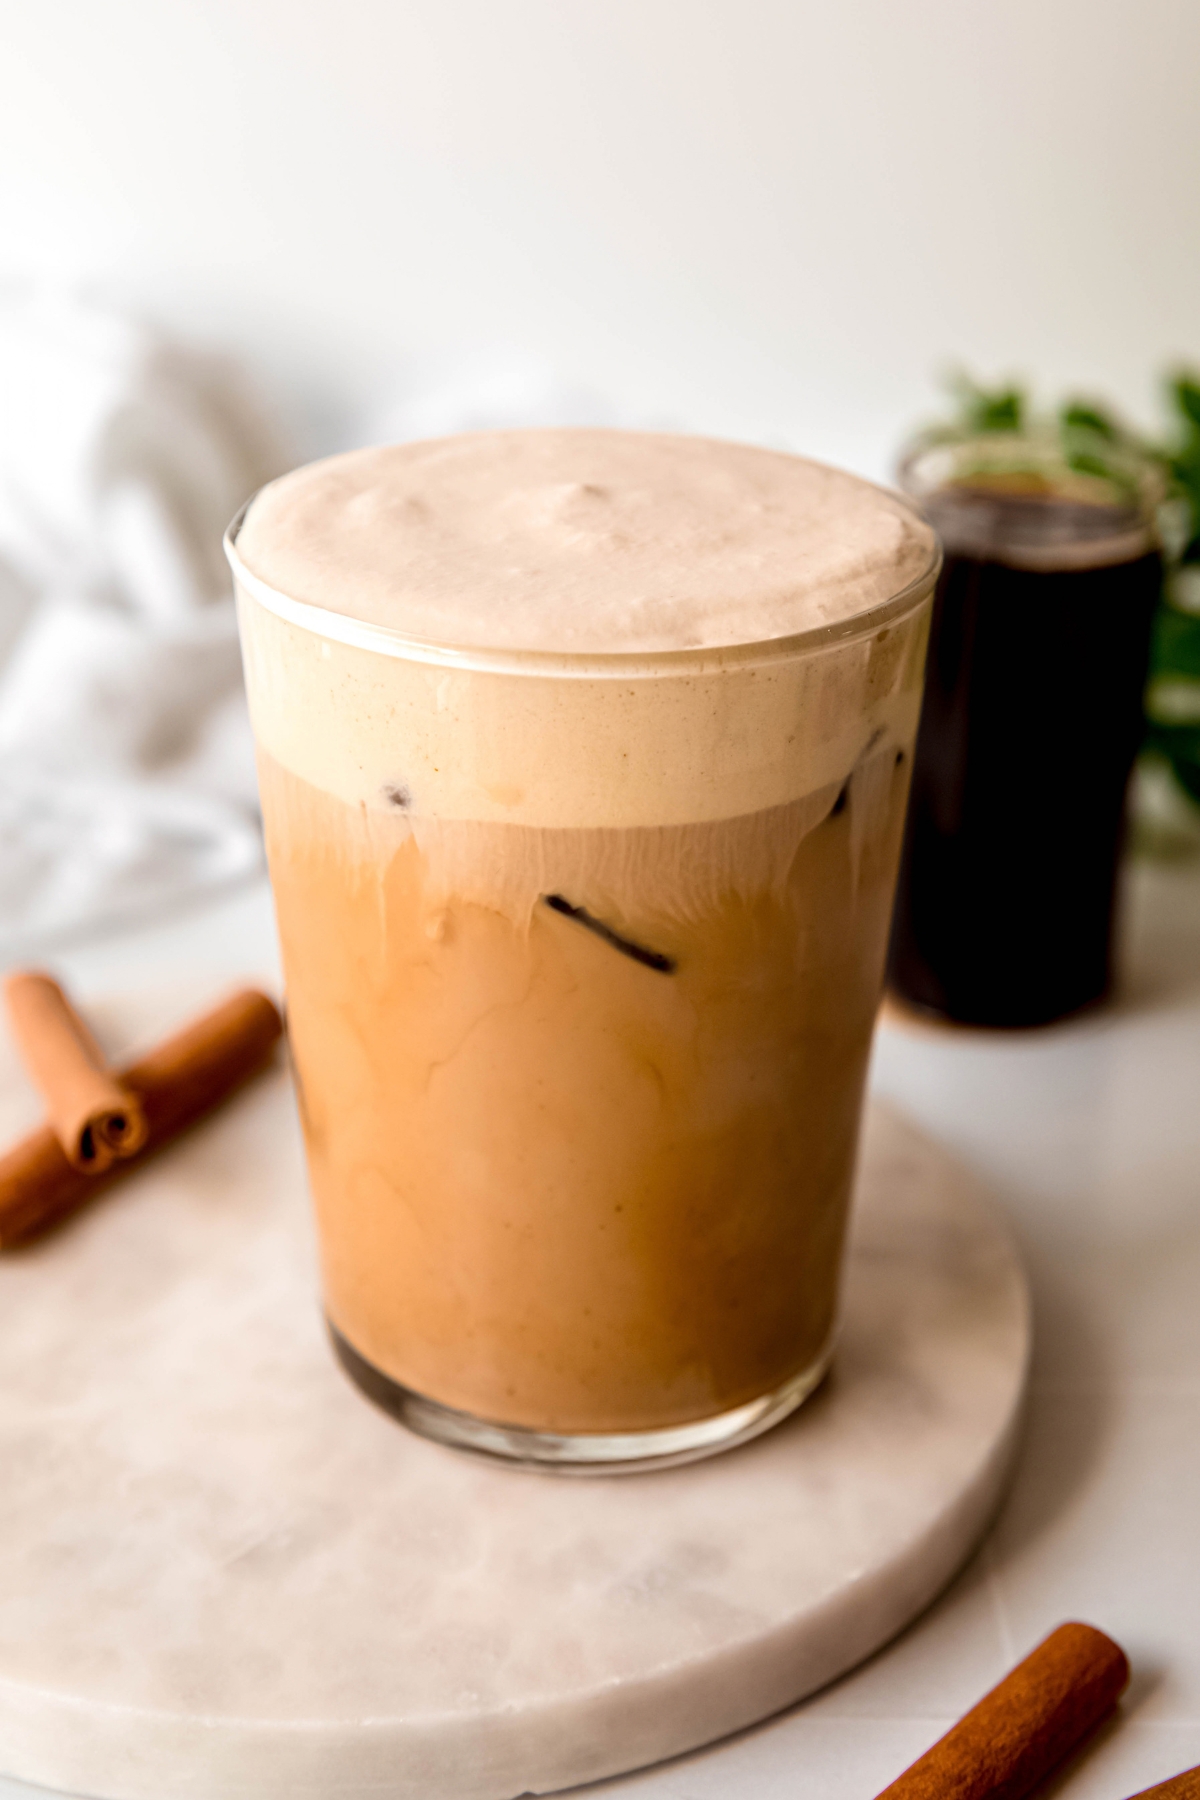
    Tropical Butterfly Refresher (Starbucks Copycat)

    May 2, 2026

    Drink your way to paradise with my Copycat Starbucks Tropical Butterfly Refresher recipe. This easy DIY comes together with just 6 simple ingredients and about 10 minutes of prep. Best of all, each recipe makes enough for 5 drinks, so you’ll be sipping in style all week long!

    homemade tropical butterfly refresher in a clear pint glass on a white table with a whole pineapple and a jar of mango popping boba blurred in the background and a halved mango and green houseplant in the fore.

    When you’re looking to hydrate without any caffeine (but something more interesting than water), homemade Starbucks refreshers are a lovely place to start. Treats like this tropical butterfly refresher are great at cooling you down with sweet, fruity goodness, offering a nice change of pace from iced coffee drinks.

    Here, guava, passionfruit, and mango play together, making each sip taste like a beach vacation. Similar to the stunning summer berry lemonade refresher, this layered tropical drink includes popping boba pearls, offering exciting juicy explosions as you slurp. 

    But what makes this tropical refresher really special is the butterfly pea powder layer. It starts as a vibrant blue hue, but when it comes into contact with the acidic juicy layer underneath, the color shifts to a marvelous magenta color. My kids can’t get enough of the “magic trick,” so I’ve been making them nonstop!

    [feast_advanced_jump_to]

    What does it taste like?

    This tropical butterfly refresher is a vibrant explosion of fruity, tropical flavors that's refreshing and energizing. The white grape juice creates a subtly sweet foundation that lets the star ingredients shine, while the guava syrup brings lush, fragrant tropical notes that instantly transport you to a sunny paradise. 

    Passionfruit powder adds a bright, tangy punch with a distinctive exotic tartness, while the citric acid amplifies the puckery zing. The butterfly pea powder contributes a subtle earthiness that grounds all those fruity flavors, while the mango popping boba delivers surprise bursts of juicy, tangy-sweet mango flavor with every sip. It tastes like summer in a glass! 

    45 degree overhead shot of a DIY starbucks tropical butterfly refresher showing the ombre color shift from magenta to orange.

    Why You’ll Love This Starbucks Refresher Recipe

    • One & Done - Make a batch of the tropical butterfly refresher base on your day off, then reap the rewards all week long! 
    • Budget-Friendly - Rather than spending $7 on a single sipper, you can spend less than that much to make 5 drinks. I’m no math major, but that feels like a big win!
    • Terrifically Tropical - The lush, juicy flavors of guava, passionfruit, and mango are a match made in tropical heaven. Each sip will transport you to a sun-kissed shore in your mind.

    Ingredients Needed

    • Water - Start with filtered water for the cleanest flavor.
    • White Grape Juice - For a naturally sweet base with a neutral flavor profile.
    • Guava Syrup - Homemade is easy to make, all-natural and will likely save you money, but you’re welcome to use store-bought.
    • Passionfruit Powder - Powdered freeze-dried passionfruit adds a bright, tropical flavor to the refresher base.
    • Citric Acid - Just a bit of citric acid adds puckery tang. A little goes a long way!
    • Butterfly Pea Powder - This bright blue powder has a slightly earthy flavor. It turns magenta when it comes in contact with acid, giving the tropical butterfly refresher its vibrant ombre color scheme.
    • Mango Popping Boba - For tangy-sweet, juicy pops of fruity flavor.
    ingredients needed to make a homemade copycat starbucks tropical butterfly refresher recipe measured out on a white table.

    Substitutions

    • White Grape Juice - Clear apple juice has a slightly more pronounced flavor, but will work in a pinch.
    • Guava Syrup - Mango syrup is the closest alternative in terms of tropical flavor.
    • Citric Acid - You can swap in a tablespoon of fresh lemon juice if you prefer.
    • Butterfly Pea Powder - Red cabbage powder has a similar flavor and also changes color when it comes in contact with acidic ingredients. You can also use blue spirulina, but it’ll stay blue.
    • Mango Popping Boba - Pineapple popping boba is also delicious!
    homemade tropical butterfly starbucks refresher in a clear pint glass on a white marble round on a grey slate table with a green houseplant and a halved mango in the foreground and a pineapple and a jar of mango popping boba in the background.

    How To Make Starbucks Tropical Butterfly Refresher At Home

    Step 1: Make the Tropical Butterfly Refresher Base. Add the water, white grape juice, guava syrup, passionfruit syrup, and citric acid to a medium saucepan and heat over low heat. Whisk continuously until everything is dissolved. 

    Step 2: Decant the base into a mason jar and set aside to cool.

    Step 3: Make the Butterfly Layer. In a small jar, stir together 3 tablespoon hot water and ⅛ teaspoon butterfly pea powder until dissolved, then set aside to cool.

    Step 4: Layer. Once everything is cooled to room temperature, add the popping boba to a tall glass. Add ice, then pour in ½ cup Tropical Butterfly Refresher Base and ½ cup water. 

    Step 5: Serve. Stir, then top with your prepared butterfly pea powder infusion. Drink up with a boba straw!

    tropical butterfly refresher base in a small saucepan.
    action shot of a the tropical butterfly refresher base being poured into a mason jar to cool.
    butterfly pea flower layer mixed together in a small glass jar.
    action shot of the refresher base being poured over a glass of mango popping boba and a ice.
    action shot of the butterfly pea flower layer being poured in, turning from blue to magenta.

    Optional Variations & Dietary Adjustments

    • Reduced Sugar - Swap in sugar-free guava syrup to significantly reduce the added sugar. You can also use diet grape juice to reduce the sugar further, making it more of a diabetic-friendly drink. If you can find them, feel free to swap in sugar-free popping boba, too!
    • Caffeinated - If you were to buy a tropical butterfly refresher from Starbucks, you’d get a little bit of a caffeinated buzz thanks to the addition of green coffee bean extract. Feel free to do the same at home. A few drops of either green coffee bean extract or green tea extract should do the trick!

    Serving Suggestions

    Presentation is half the fun with this visually stunning tropical butterfly refresher. Serve in clear glasses to show off that gorgeous magenta-to-blue ombre effect, and consider garnishing with fresh fruit slices like lime wheels, pineapple wedges, or edible flowers for an Instagram-worthy finish. I like to freeze my glasses ahead of time so it stays frosty to the last drop.

    This tropical refresher makes an excellent brunch beverage, a midday pick-me-up that's far more interesting than plain water, or a festive mocktail for parties and celebrations. For an adult twist, add a splash of white rum, vodka, or coconut rum to transform it into a stunning tropical cocktail that's sure to impress at summer gatherings. 

    It's also a fantastic post-workout refresher—the natural fruit sugars provide quick energy while the hydrating base replenishes fluids. Kids absolutely love the color-changing magic and fun popping boba, making it a hit for birthday parties or special family treats.

    Feel free to adjust the intensity by diluting with sparkling water for a lighter, fizzy version, or concentrate the flavors by reducing the water content for a bolder punch. You can also add a splash of coconut milk for a creamy take. Batch it ahead for gatherings by mixing everything except the ice and boba, then assembling individual servings as needed. 

    hand grabbing the silver boba straw from a homemade tropical butterfly refresher glass.

    Recipe Success Tips

    • Start with cold ingredients whenever possible—chilled water and refrigerated juice help the drink stay refreshingly cold without diluting too quickly as the ice melts. If you're making homemade guava syrup, let it cool completely before adding it to your drink to prevent the ice from melting instantly and watering down the flavors.
    • When mixing your refresher base and the butterfly layer, whisk or shake vigorously to ensure the powders fully dissolve; passionfruit and butterfly pea powders can clump if not properly incorporated, so take an extra minute to blend everything smoothly. 
    • Go easy on the citric acid—it's incredibly potent, and a little truly goes a long way. Start with a small pinch, taste, and add more only if needed, as too much will make your drink unpleasantly sour. 

    FAQs

    What’s the new refresher at Starbucks?

    Starbucks announced the release of the Tropical Butterfly Refresher that’s debuting May 12 of 2026. But, now that you have the inside skinny, you can make it for yourself before the release date!

    What is the tropical drink at Starbucks?

    Starbucks offers several tropical-inspired refreshers on their menu. The most notable is the Paradise Drink, which features pineapple and passionfruit flavors with coconut milk, creating a creamy tropical beverage. There's also the Pineapple Passionfruit Refresher, made with their refresher base, pineapple and passionfruit flavors, and pieces of real passionfruit. The Mango Dragonfruit Refresher is another popular tropical option featuring mango and dragonfruit flavors with pieces of real dragonfruit. Finally, the Tropical Butterfly Refresher features guava, passionfruit and mango flavors.

    What is the Tropical Butterfly Refresher at Starbucks?

    The tropical butterfly refresher at Starbucks is a vibrant, colorful drink that features a blend of tropical fruit flavors including guava and passionfruit, plus mango popping boba that add bursts of juicy flavor and a fun textural element with each sip. What makes it particularly distinctive is the use of butterfly pea powder, which creates a stunning visual effect—the drink displays a beautiful ombre color scheme that shifts from bright blue to magenta when it comes into contact with acidic ingredients like citric acid or citrus juice. The flavor profile is bright, tropical, and refreshing with a balance of sweet and tart notes.

    45 degree angle shot of a clear glass filled with a homemade starbucks tropical butterfly refresher showing the ombre hues going from magenta to orange to yellow popping boba.

    DIY Tropical Butterfly Refresher Nutrition

    This tropical butterfly refresher is a light, low-calorie beverage that clocks in at just 129 calories per serving, making it a guilt-free treat for those watching their calorie intake. It's completely fat-free and contains no protein, positioning it as a pure refreshment. With only 3 grams of sodium, it's a low-sodium option that won't contribute significantly to your daily salt intake.

    It contains 31 grams of carbohydrates, with 30 grams coming from natural sugars found in the white grape juice, as well as added sugars in the guava syrup and popping boba. While the sugar content is notable, it's important to remember that roughly half comes from fruit-derived sugars rather than refined sweeteners. 

    This refresher works well as an occasional treat or a flavorful alternative to sugary sodas and energy drinks. If you're looking to reduce the sugar content, consider diluting with sparkling water, using less syrup, or opting for a sugar-free sweetener alternative in your homemade guava syrup. As with any sweetened beverage, you should enjoy it in moderation. Cheers!

    Total nutritional content per serving is:

    • Calories: 129 calories
    • Total Fat: 0 grams
    • Protein: 0 grams
    • Sodium: 3 grams
    • Carbohydrates: 31 grams
    • Sugar: 30 grams

    *This nutritional information is an estimate and calculated based on the ingredients used to create the recipe. The nutritional value of your ingredients may differ slightly. Furthermore, this food is not intended to prevent, diagnose, cure, or treat any disease.

    horizontally framed hero image of a homemade tropical butterfly refresher from starbucks on a white table with a whole and halved mango, a whole pineapple, a jar of mango boba with some pearls spilling over onto the table, a green houseplant with yellow buds, and a silver boba straw.

    Other Starbucks Refresher Recipes

    • Strawberry Acai Lemonade (Starbucks Copycat)
    • Easy Homemade Lemonade (3 Ingredients!)
    • Midnight Drink (Starbucks Copycat)
    • Blackberry Sage Lemonade Refresher (Starbucks Copycat)
    Print Recipe
    5 from 1 vote

    Tropical Butterfly Refresher (Starbucks Copycat)

    My DIY Starbucks Tropical Butterfly Refresher is a delicious copycat that'll save you a lot of money!
    Prep Time10 minutes mins
    Total Time10 minutes mins
    Course: Drinks
    Cuisine: American
    Keyword: Tropical Butterfly Refresher
    Servings: 1 drink
    Calories: 129kcal
    Author: Megan Byrd

    Equipment

    • 1 medium saucepan
    • 1 boba straw

    Ingredients

    Tropical Butterfly Refresher Base:

    • 1 cup water
    • ¾ cup white grape juice
    • ¾ cup guava syrup
    • 1 tablespoon passionfruit powder
    • ¼ teaspoon citric acid

    Butterfly Pea Powder Infusion:

    • 3 tablespoon hot water
    • ⅛ teaspoon butterfly pea powder

    Tropical Butterfly Refresher:

    • ½ cup Tropical Butterfly Refresher Base
    • ½ cup water
    • ¼ cup mango popping boba (or pineapple popping boba)
    • Ice

    Instructions

    • Make the Tropical Butterfly Refresher Base. Add the water, white grape juice, guava syrup, passionfruit syrup, and citric acid to a medium saucepan and heat over low heat. Whisk continuously until everything is dissolved. Set aside to cool.
    • In a small jar, stir together 3 tablespoon hot water and ⅛ teaspoon butterfly pea powder until dissolved, then set aside to cool.
    • Once everything is cooled to room temperature, add the popping boba to a tall glass. Add ice, then pour in ½ cup Tropical Butterfly Refresher Base and ½ cup water. Stir, then top with your prepared butterfly pea powder infusion. Drink up with a boba straw!

    Video

    Notes

    Note: This makes 2.5 cups of base, enough for 5 drinks. Store any leftover refresher base in the fridge for up to 1 week. 

    Nutrition

    Serving: 1drink | Calories: 129kcal | Carbohydrates: 31g | Sodium: 3mg | Sugar: 30g
    Tropical butterfly refresher.

    xoxo Megan
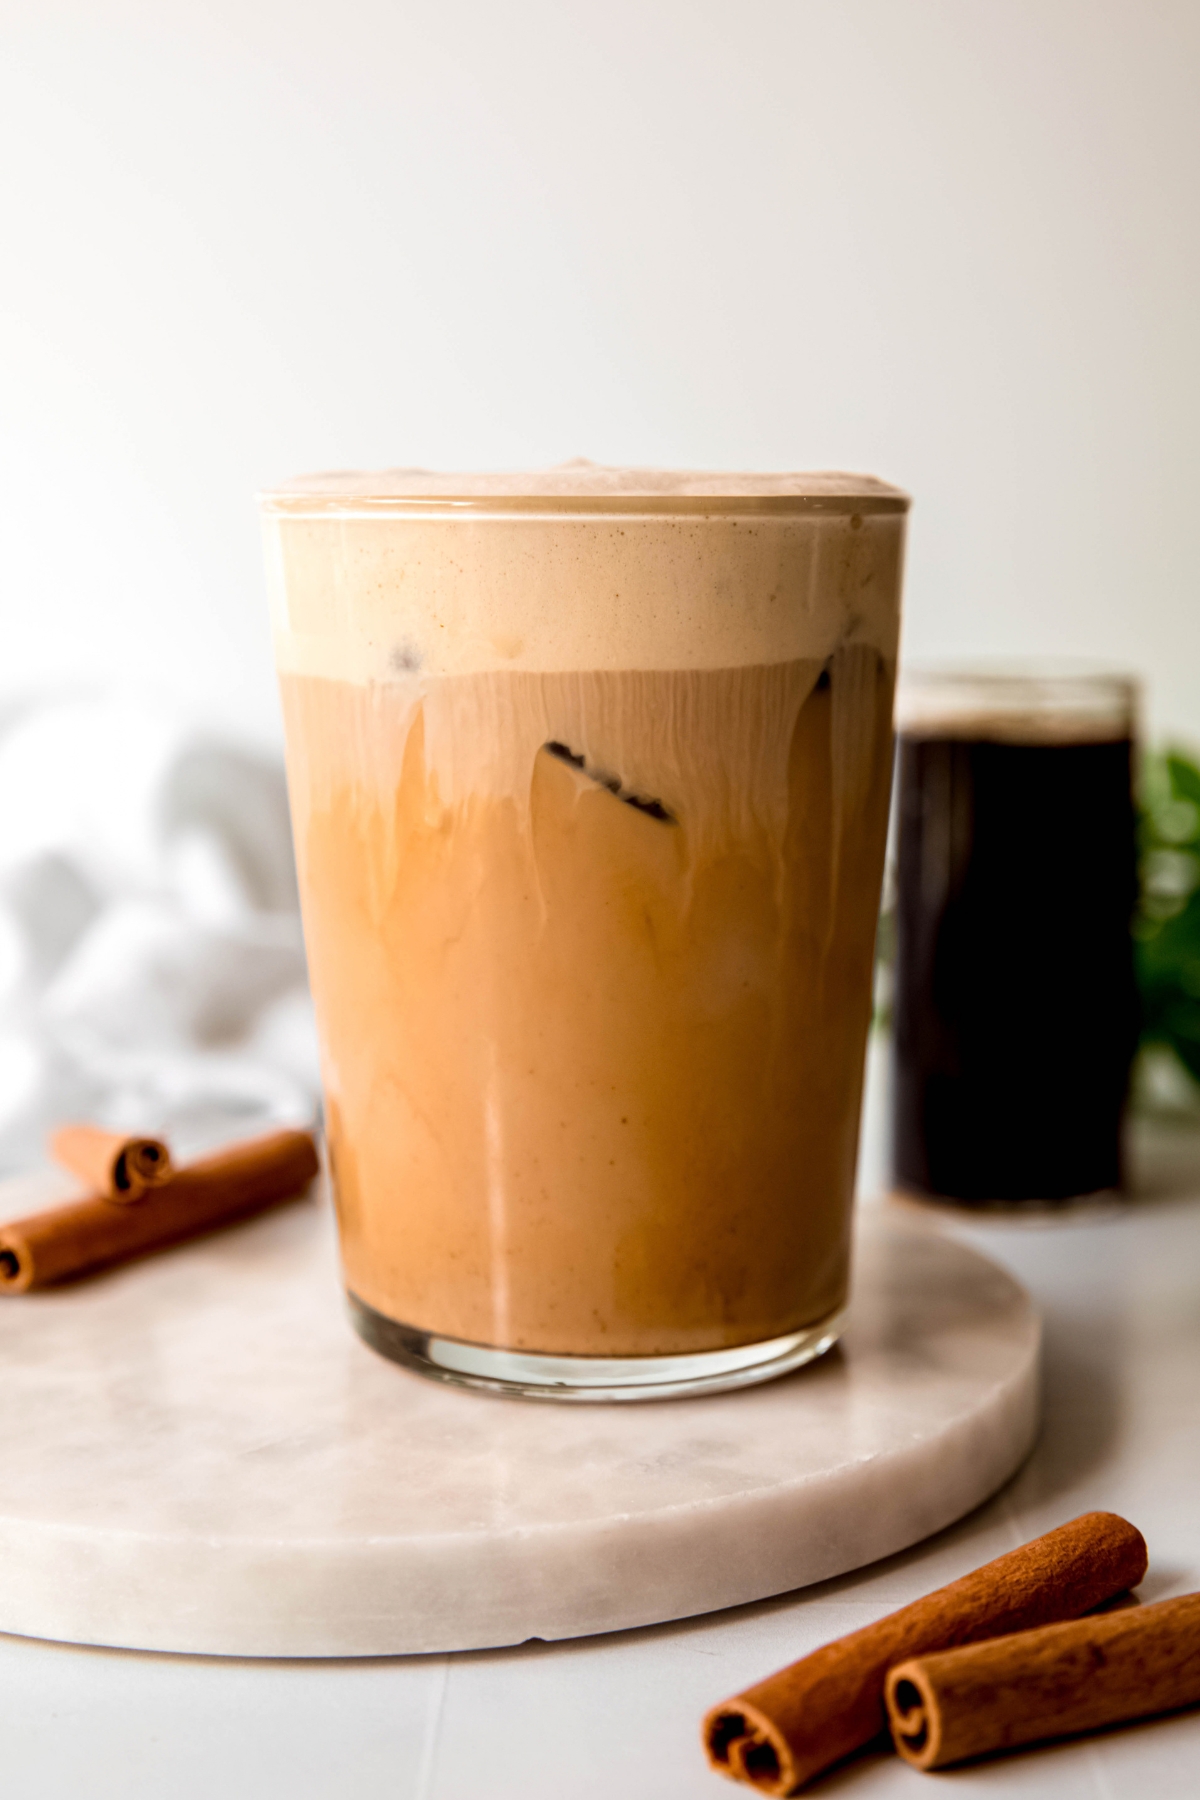
    Iced Crème Brûlée Latte

    April 27, 2026

    If you love the classic French custard with a crisp burnt sugar top, I have a feeling you’re going to love this Iced Crème Brûlée Latte recipe. Featuring a creamy toasted vanilla latte base topped with a caramel cream cold foam crown, sprinkled with sugar granules and torched, this decadent sipper truly tastes like dessert.

    I have always had a sweet tooth and a caffeine addiction, so iced coffee drinks that are built to taste like my favorite desserts are basically my love language. From this iced creme brulee latte and my carrot cake latte with cream cheese cold foam to cookie dough iced coffee and chocolate hazelnut cookie cold brew, there’s a whole lot of yum to choose from.

    Here, we harness the power of both toasted vanilla syrup and caramel syrup, mixing the first with espresso and milk for our base and mixing the second into a fluffy cloud of cold foam. The resulting creme brulee coffee is more than the sum of its parts!
    Imagine an iced vanilla latte or caramel iced coffee—sweet and creamy with just enough bold espresso to make it interesting.

    Adding the dreamy cold foam on top offers a delectably rich mouthfeel that is reminiscent of custard, while the burnt sugar adds the perfect amount of crisp. And the combination of toasted vanilla and salty caramel? Every sip screams “creme brulee!”

    [feast_advanced_jump_to]

    What does it taste like?

    The first flavor you’ll taste is the bold essence of espresso that melds seamlessly with creamy milk. The toasted vanilla bean syrup adds a layer of warm sweetness that evokes the comforting flavors of a freshly torched crème brûlée. 

    As the caramel cold foam cascades over the top, it adds a luxurious creaminess, while the delicate sprinkle of torched sugar granules provides a satisfying crunch, mirroring the crisp caramelized top of the classic dessert. Delightful! 

    Why You’ll Love This Special Iced Latte Recipe

    • Quick & Easy - It takes just 5 minutes to make this café-style stunner—less time than it’d take to order in stores! 
    • All-Natural - With just 7 basic ingredients and no artificial colors, preservatives, or emulsifiers, my homemade creme brulee latte is better for you than typical café drinks. 
    • Budget-Friendly - I seriously still can’t get over how expensive coffee drinks have gotten. $7 for ONE DRINK?!? You’ve gotta be kidding me! Luckily, DIYing your barista favorites at home will save you a boatload. I was able to make this bad boy for just $1.50 in 2026 prices!

    Ingredients Needed

    • Heavy Cream & Whole Milk - This dynamic dairy duo ensures our caramel cold foam froths up into a dreamy cloud. Make sure they’re nice and cold! 
    • Caramel Syrup - For flavoring the cold foam with a caramelly flavor reminiscent of the burnt sugar topping on a creme brulee. 
    • Toasted Vanilla Syrup - For flavoring the iced latte base with the rich, aromatic warmth of toasted vanilla beans.
    • 2% Milk - My preferred milk for daily drinking. If you have the option, I highly recommend swapping in an ultra-filtered variety like Fairlife for an extra creamy mouthfeel and protein boost.
    • Espresso - Because you can’t have a latte without coffee!
    • Granulated Sugar - A little sprinkle of sugar on top helps replicate the creme brulee vibe, particularly if you hit it with a torch.

    Substitutions

    • Heavy Cream & Whole Milk - Feel free to swap in slightly lighter whipping cream. For a dairy-free alternative, use vegan whipping cream or well-shaken full-fat canned coconut milk and full-fat oat milk or soy milk.
    • Caramel Syrup - Caramel sauce will also do the trick! 
    • Toasted Vanilla Syrup - Plain vanilla syrup offers a similar boost of vanilla warmth, but without the same toasty depth. In a pinch, it’ll do!
    • 2% Milk - You’re welcome to use any percentage of dairy milk or any plant-based milk (preferably a “barista blend”) you prefer.
    • Espresso - You can use twice as much cold brew coffee for a smoother, less acidic latte. 
    • Granulated Sugar - Feel free to omit it, or swap in other sweet toppers like turbinado sugar or toffee bits. (You don’t have to torch those.)

    How To Make An Iced Crème Brûlée Latte With Caramel Cold Foam

    Step 1: Make the Cold Foam. In a small jar or glass, froth together the heavy cream, caramel syrup, and whole milk with a milk frother. (Make sure they’re all cold from the fridge for the best results.) Set aside.

    Step 2: Sweeten Milk. Add ice to a glass, then pour in the vanilla syrup. Add the milk, then stir.

    Step 3: Brew your espresso, then pour over the vanilla milk and stir again.

    Step 4: Top with caramel cold foam.

    Step 5: Sprinkle granulated sugar over the top of the cold foam, then carefully use a culinary torch to caramelize the sugar. Drink up!

    Optional Variations & Dietary Adjustments

    • Dairy-Free - Swap in vegan whipping cream or full fat canned coconut milk for the cream, full-fat oat or soy milk for the whole milk, and your favorite plant-based (preferably barista blend) milk for the latte base.
    • Sugar-Free - Use (or make) sugar-free syrups and omit the burnt sugar topping to make a diabetic-friendly version.
    • Decaf/Caffeine-Free - Use your favorite decaf roast espresso to cut back the buzz. If you can’t handle any caffeine, swap in your favorite alternative (e.g. roasted chicory “coffee” or Dandy Blend).

    Serving Suggestions

    When serving your iced crème brûlée latte, consider presenting it in a clear glass to showcase its beautiful layers. I like to freeze my serving glass for about 30 minutes ahead of time to keep everything nice and frosty to the last sip. Considering how sweet the drink is, I also like to pair it with fiber- and protein-rich foods to keep my blood sugar from spiking.

    For breakfast, try it with a coconut chia protein pudding, whole wheat protein powder pancakes, or high protein strawberry overnight oats. If you’re having a mid-day coffee break, oatmeal protein cookies or protein cookie dough are delightful. And if you’re craving something savory to counter all the sweet, you can’t go wrong with avocado toast! 

    Recipe Success Tips

    • Choose Quality Ingredients: Opt for high-quality espresso beans for a rich flavor. Freshly toasted vanilla bean syrup will improve the overall taste, so consider making your own if you have the time.
    • Chill Your Ingredients: For the best experience, ensure your milk and any other components are well-chilled beforehand. This helps maintain the drink’s refreshing nature, and also ensures the cold foam whips up in a jiffy.
    • Adjust Sweetness: Taste your latte before serving and adjust the sweetness if necessary. Depending on your preference, you can add more syrup or sugar to achieve the perfect balance.

    FAQs

    What is in a crème brûlée latte?

    It depends on the recipe! My iced creme brulee latte is made with heavy cream, whole milk and caramel syrup for the cold foam, 2% milk, toasted vanilla bean syrup and espresso for the latte base, and then is topped with granulated sugar and torched to replicate the creme brulee burnt caramel experience.

    Did Starbucks ever have a crème brûlée latte?

    Starbucks caramel brulee latte is as close as they’ve come to a creme brulee latte. That one is a seasonal drink that is normally available as part of their winter offerings, is often served hot, and focuses more on caramel flavors than on the vanilla bean you’d find in a creme brulee.

    Is crème brûlée latte a coffee?

    Yes! Since it’s made with espresso and served cold, I’d consider this iced creme brulee latte to be an iced coffee drink. 

    Homemade Iced Crème Brûlée Latte Nutrition

    This iced crème brûlée latte is undeniably indulgent—more of a treat than an everyday coffee—but that’s part of its charm! Each serving comes in at 356 calories, delivering a rich, dessert-like experience in drinkable form. With 15 grams of fat, this latte gets its signature creamy, velvety texture, while the 8 grams of protein add a small but meaningful boost. 

    The 48 grams of carbs—45 of which come from sugar—are what give this drink its its caramelized, almost custard-like flavor profile. If you’re concerned about it, feel free to swap in sugar-free syrups or reduce the amount of syrup you use. I also recommend pairing it with protein or fiber-forward snacks to keep your blood sugar level.

    Despite its decadent taste, the sodium content remains relatively low at 109 mg per serving, making it a reasonable option when you’re craving something sweet. Overall, this iced crème brûlée latte is best enjoyed on occasion—perfect for when you want to treat yourself with something a little more luxurious than your regular morning brew. Savor every drop!

    Total nutritional content per serving is:

    • Calories: 356 calories
    • Total Fat: 15 grams
    • Protein: 8 grams
    • Sodium: 109 mg
    • Carbohydrates: 48 grams
    • Sugar: 45 grams

    *This nutritional information is an estimate and calculated based on the ingredients used to create the recipe. The nutritional value of your ingredients may differ slightly. Furthermore, this food is not intended to prevent, diagnose, cure, or treat any disease.

    Other Iced Latte Recipes

    • Protein Iced Coffee (3 Flavors!)
    • Iced Dubai Chocolate Mocha (Starbucks Copycat)
    • Iced Butterbeer Latte
    • Iced Cookie Butter Latte (with Cookie Butter Cold Foam)
    Print Recipe
    5 from 1 vote

    Iced Crème Brûlée Latte

    This deliciously simple Iced Creme Brulee Latte features a toasted vanilla bean latte base, caramel cold foam, & a torched sugar topper!
    Prep Time5 minutes mins
    Total Time5 minutes mins
    Course: Drinks
    Cuisine: American
    Keyword: Crème Brûlée Latte
    Servings: 1 drink
    Calories: 356kcal
    Author: Megan Byrd
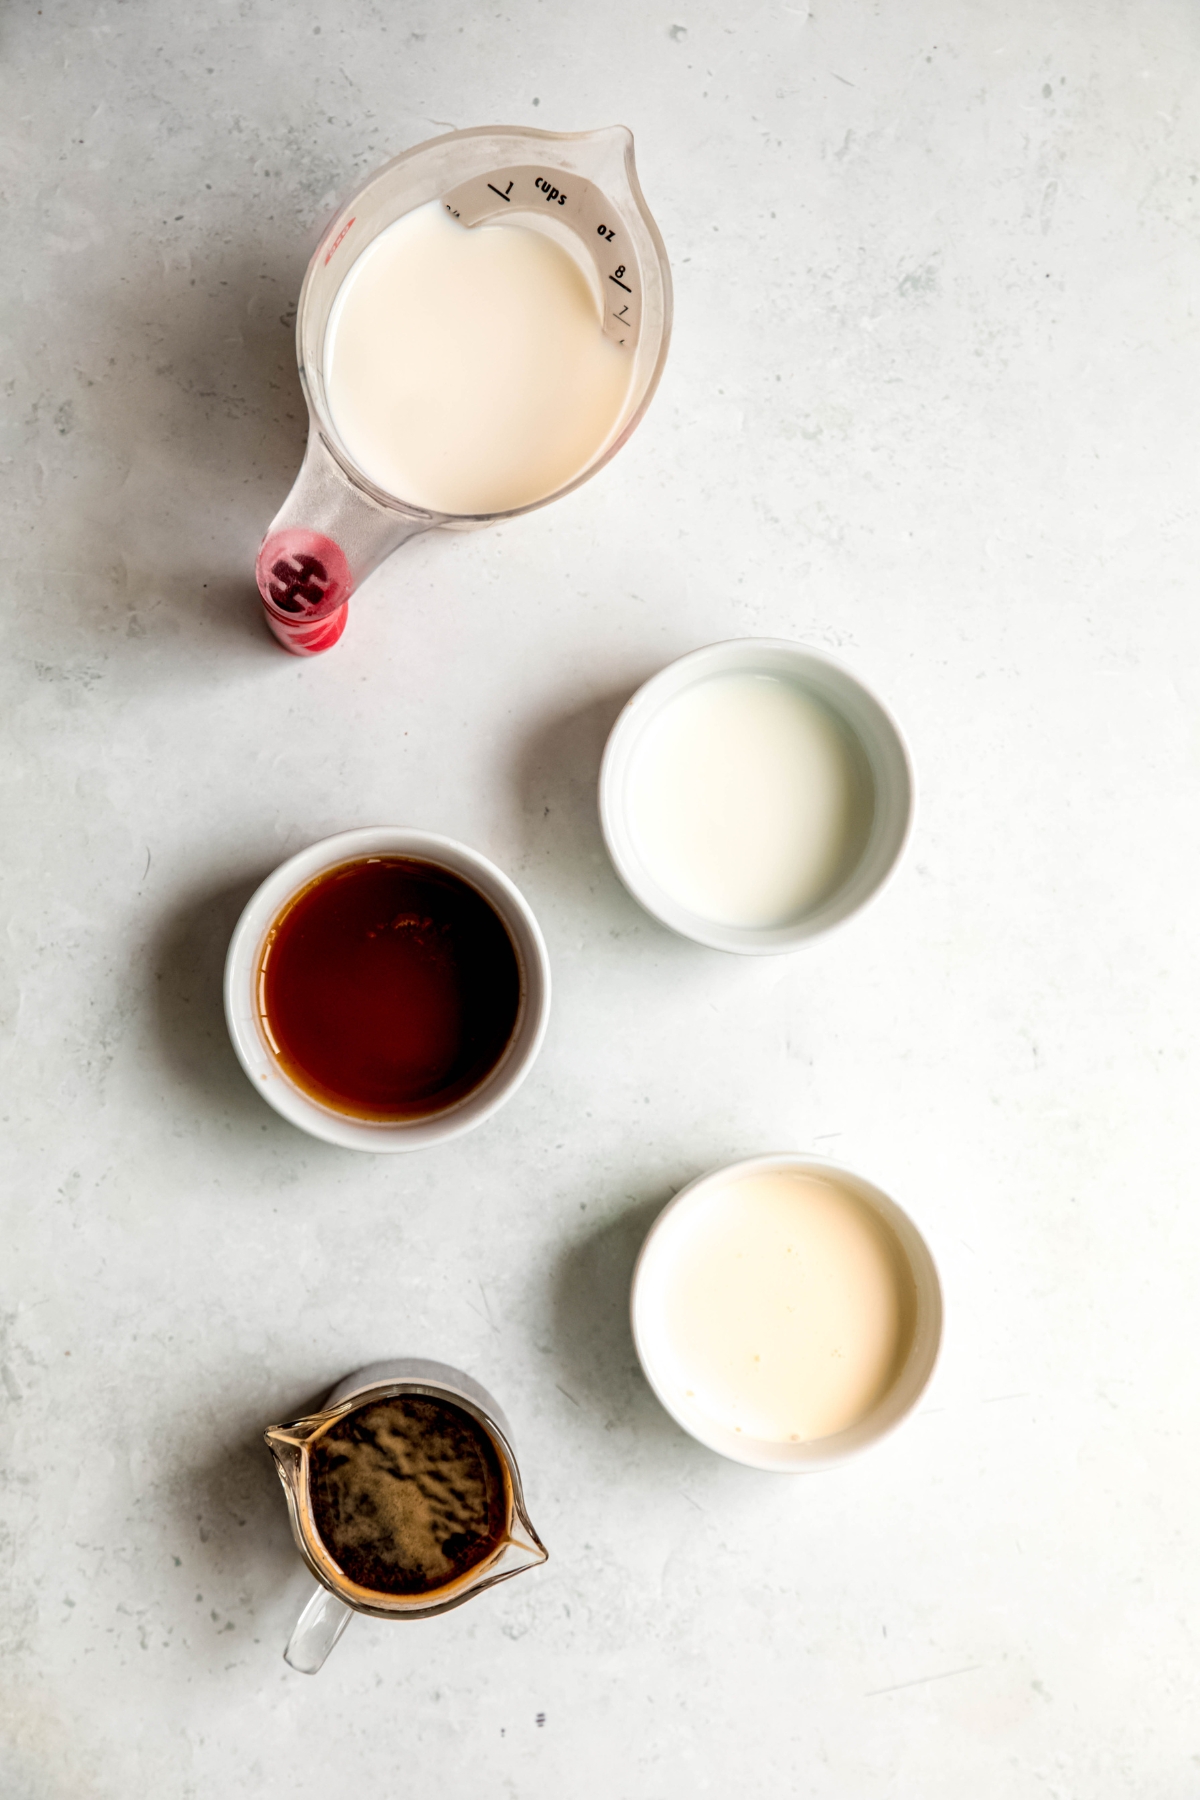
    Equipment

    • 1 milk frother
    • 1 culinary torch

    Ingredients

    Caramel Cold Foam:

    • 2 tablespoon heavy cream
    • 1 tablespoon caramel syrup (or sauce)
    • 1 tablespoon whole milk

    Iced Crème Brûlée Latte:

    • 2 tablespoon toasted vanilla syrup
    • ¾ cup milk of choice (I used 2%)
    • 2 oz espresso
    • ice
    • 1 tsp granulated sugar for topping

    Instructions

    • Make the cold foam. In a small jar or glass, froth together the heavy cream, caramel syrup, and whole milk with a milk frother. Set aside.
    • Add ice to a glass, then pour in the vanilla syrup. Add the milk, then stir.
    • Brew your espresso, then pour over the vanilla milk and stir again.
    • Top with caramel cold foam.
    • Sprinkle granulated sugar over the top of the cold foam, then carefully use a culinary torch to caramelize the sugar. Drink up!

    Video

    Nutrition

    Serving: 1drink | Calories: 356kcal | Carbohydrates: 48g | Protein: 8g | Fat: 15g | Sodium: 109mg | Sugar: 45g
    Iced creme brulee latte.

    xoxo Megan
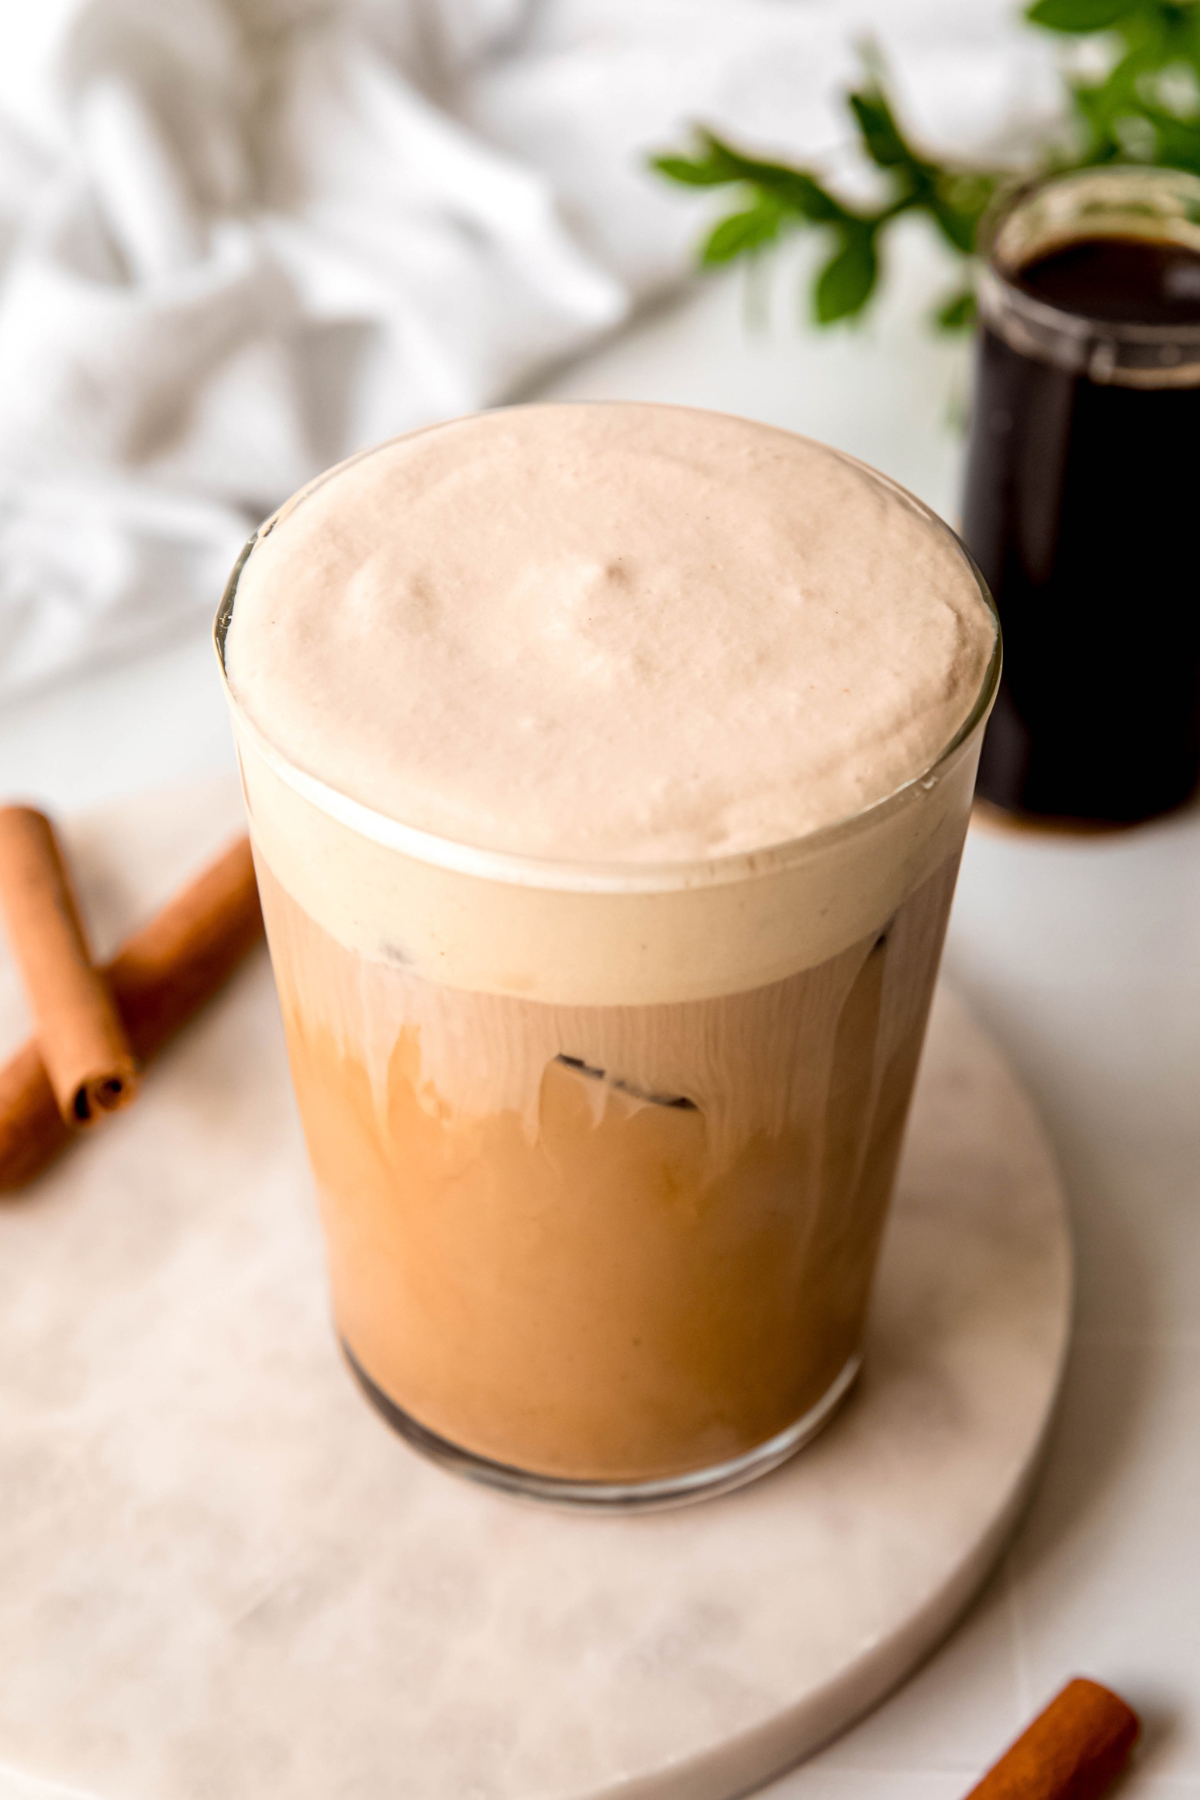
    S'mores Frappuccino (Starbucks Copycat)

    April 25, 2026

    Turn a nostalgic childhood treat into your new favorite way to caffeinate with my copycat Starbucks S’mores Frappuccino recipe! Featuring a toasted marshmallow-graham cracker frappe layered on top of fudgy mocha sauce and fluffy marshmallow whipped cream, every frosty slurp is like taking a bite out of a freshly toasted s’more.

    homemade Starbucks s'mores frappuccino in a clear pint glass on a wooden table with a marshmallow roasting stick, small chocolate bars, and mini marshmallows in front of a black night sky with flecks of fire rising in the background.

    Now that the weather is starting to get warmer, I’m in full-fledged DIY frappuccino mode, and this s’mores frappe couldn’t have come at a better time! After all, one of the first things we would do on summer break as kids was toast marshmallows for s’mores. This yummy sipper distills all that sweet, toasty, chocolatey flavor of freedom into a cool, creamy, caffeinated treat for parents.

    Similar to the caramel ribbon crunch frappuccino, this s’mores frappuccino is made by layering the frosty frappe layer on top of a cloud of whipped cream and sweet sauce, though here we swap out caramel for chocolate. That means your first sip is of marshmallow whipped cream and mocha sauce, followed by the graham cracker toasted marshmallow frozen coffee. 

    Friends, that layering is where it’s at. Sure, I like to top it off with an extra flourish of whip, because why not?!? But the reverse order is what gives this frappe its gooey, melty marshmallow quality that makes it so good you’ll definitely want s’more. 😎

    [feast_advanced_jump_to]

    What does it taste like?

    The first taste of this s’mores frappe greets you with a deliciously chocolatey mocha sauce, perfectly balanced by the sweet, smoky essence of toasted marshmallow whipped cream, creating a decadent base that sparks memories of cozy campfire nights. As you delve further, the frappe layer bursts forth, blending smooth coffee with crunchy bits of graham crackers. 

    The dual marriage of toasted marshmallow and chocolate flavors with creamy-crunchy textures is truly enchanting, reminiscent of a classic s'mores experience. Crowned with a generous dollop of airy whipped cream and a sprinkle of crushed grahams, each sip transports you to a blissful moment, capturing the essence of summer nights from simpler days.

    45 degree overhead shot of a homemade s'mores frappuccino showing the whipped cream and crushed graham crackers on top, a layer of graham cracker frappe in the middle, the mocha sauce and whipped cream at the bottom of the glass.

    Why You’ll Love This Starbucks Frappuccino Recipe

    • Fabulously Frosty - If you crave the flavor of s’mores but recoil at the idea of lighting a fire in the summer heat, this icy treat is just the thing for you! Think of it as the s’mores version of a frozen hot chocolate.
    • Budget-Friendly - There’s no need to spend $7 on a single frappe when you act as your own barista. Since they cost just $1-2 to make at home, DIYing them will save you a boatload of money!
    • Nostalgic - You get the flavor of s’mores in a milkshake-like package, but with just enough caffeinated coffee to keep it from tasting too sweet. It’s like your childhood, all grown up!

    Ingredients Needed

    • Ice - Make sure to start with filtered water for the cleanest, purest taste.
    • Cold Brew Coffee - The cool, caffeinated heart of our frappuccino!
    • Whole Milk - If you were to order a s’mores frappe at Starbucks, this would be the default milk option. It yields a rich, creamy mouthfeel.
    • Toasted Marshmallow Syrup - For the authentic taste of toasted marshmallows in every sip. My homemade version is cheap and easy to make, but you can use store-bought if you like.
    • Graham Cracker - Because every s’more needs a toasty, sweet shell. Feel free to use either honey or cinnamon graham crackers.
    • Xanthan Gum - This natural corn-derived thickener helps to hold the ice and milk in suspension so your s’mores frappe stays creamy till the last drop.
    • Marshmallow Whipped Cream - Made by whipping cream and marshmallow fluff together, this fluffy layer really sells the s’mores magic! You can also make a shortcut whipped cream dispenser version using the toasted marshmallow syrup.
    • Mocha Sauce - For rich, melty chocolate flavor. Again, my homemade recipe is a snap to make and will likely save you money, but you’re welcome to use store-bought sauce if needed.
    • Whipped Cream - For a final flourish of deliciousness, top your frappuccino with a cloud of whipped cream and crumbled graham crackers.
    ingredients needed to make a homemade Starbucks s'mores frappuccino recipe measured out on a white table.

    Substitutions

    • Cold Brew Coffee - Strongly brewed regular coffee or espresso that has been chilled is a simple swap.
    • Whole Milk - Feel free to use any percentage of dairy milk or your preferred plant-based
      “barista blend” milk. Note that richer options like ultra-filtered 2% milk or full-fat oat milk will yield the creamiest base.
    • Toasted Marshmallow Syrup - While marshmallow is classic, toasted vanilla syrup offers a similar cozy vibe.
    • Graham Cracker - If needed, use a gluten-free graham cracker.
    • Marshmallow Whipped Cream - Regular whipped cream or cool whip are good substitutes.
    • Mocha Sauce - Store-bought chocolate sauce works, too!
    hand in a grey sweater up to the knuckles grabbing a homemade s'mores frappe from the wooden table with mini marshmallows and mini chocolate bars.

    How To Make A Starbucks S’mores Frappuccino At Home

    Step 1: Blitz. In a high-speed blender, blend the ice, cold brew, milk, toasted marshmallow syrup, graham cracker, and xanthan gum until smooth and creamy. Set aside.

    Step 2: Layer. Press the whipped cream into the bottom of a tall glass with a spoon. Pour in the mocha sauce to cover the whipped cream.

    Step 3: Garnish & Serve. Pour in the s'mores frappe, then top with more whipped cream and/or graham cracker crumbs if desired. Drink up!

    graham cracker frappe ingredients added to a blender.
    frappe layer after blitzing until smooth.
    whipped cream in the bottom of a pint glass topped with a layer of mocha sauce.
    s'mores frappuccino after pouring in the frozen frappe layer on top of the whipped cream and mocha sauce layers.

    Optional Variations & Dietary Adjustments

    • Gluten-Free - Swap in your favorite gluten-free graham crackers.
    • Dairy-Free - Use your favorite plant-based (preferably barista blend) milk for the frappuccino base, then swap in vegan whipped cream or vegan frozen whipped topping for the marshmallow whipped cream. Double check that your graham crackers are also dairy-free.
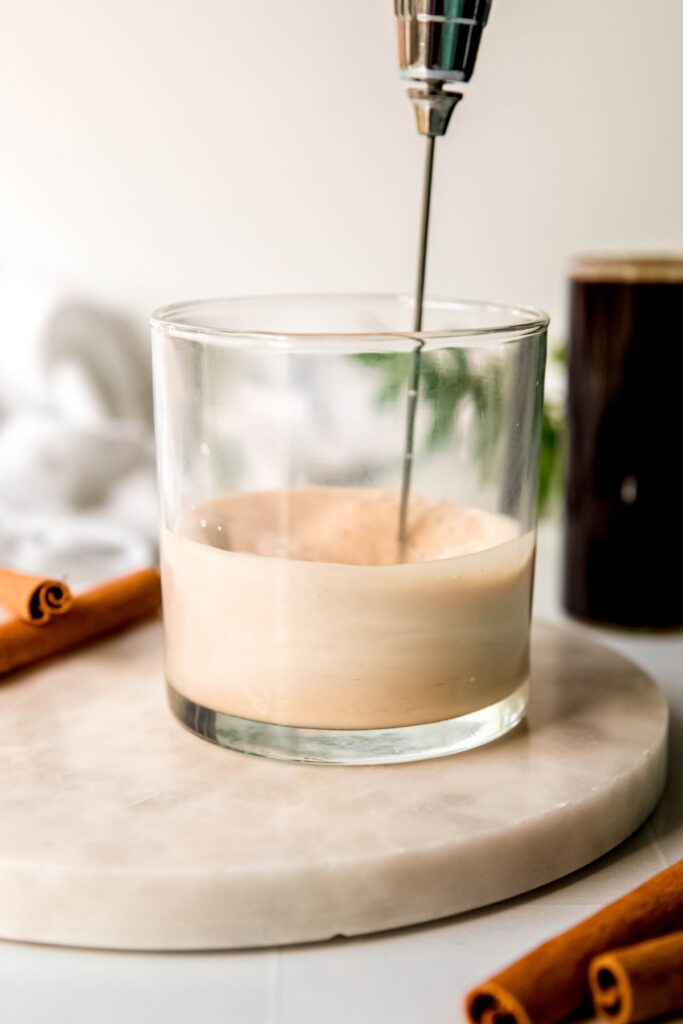
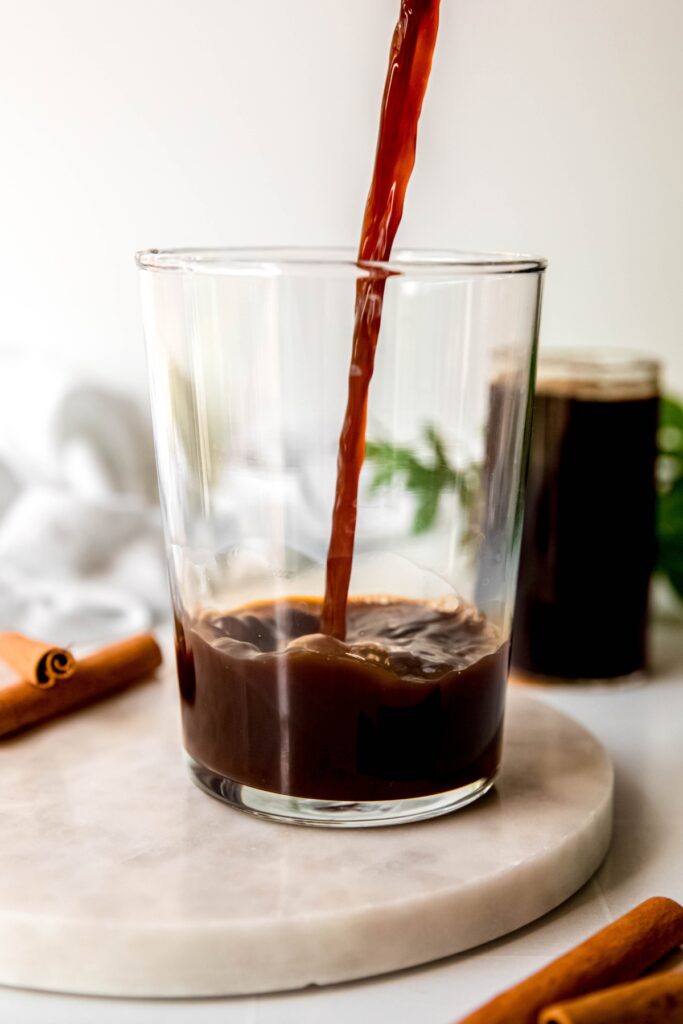
    • Sugar-Free - Use sugar-free syrup, sugar-free chocolate sauce, and sugar-free graham crackers for a diabetic-friendly frappe.
    • Decaf/Caffeine-Free - Swap in your favorite decaf cold brew to take the buzz down a notch. If you can’t do caffeine at all, use an alternative like cold brewed roasted chicory instead.
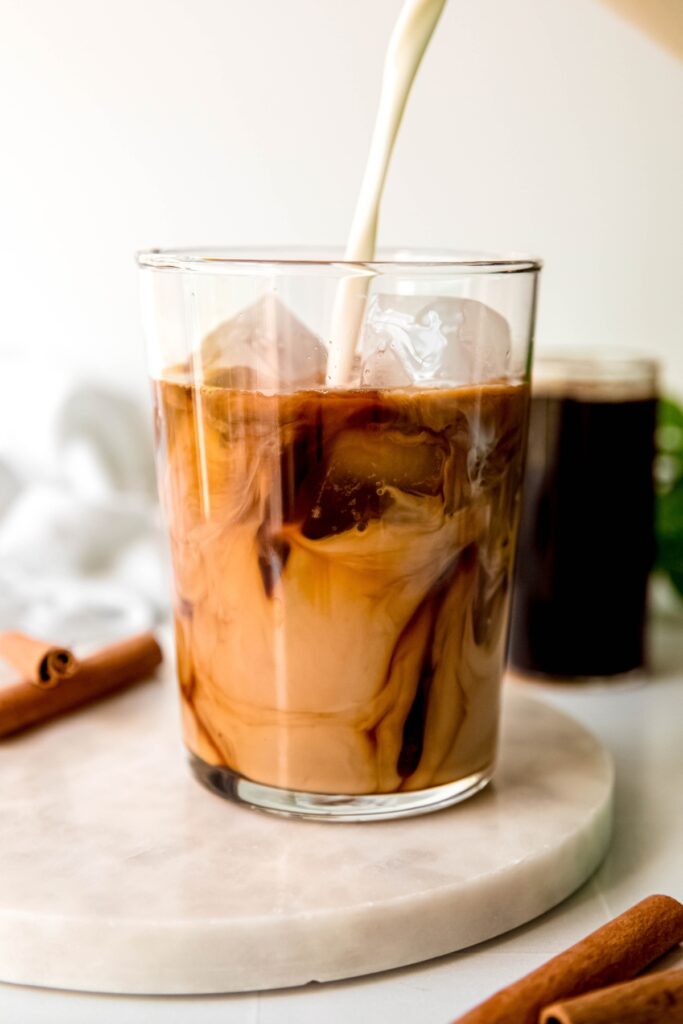
    Serving Suggestions

    When serving your copycat s'mores frappuccino, use clear glass mugs or mason jars to showcase the beautiful layers. For an extra touch, rim the glasses with more mocha sauce and dip them in crushed graham crackers before pouring in the frappuccino. This adds a delightful sweetness right from the first sip.
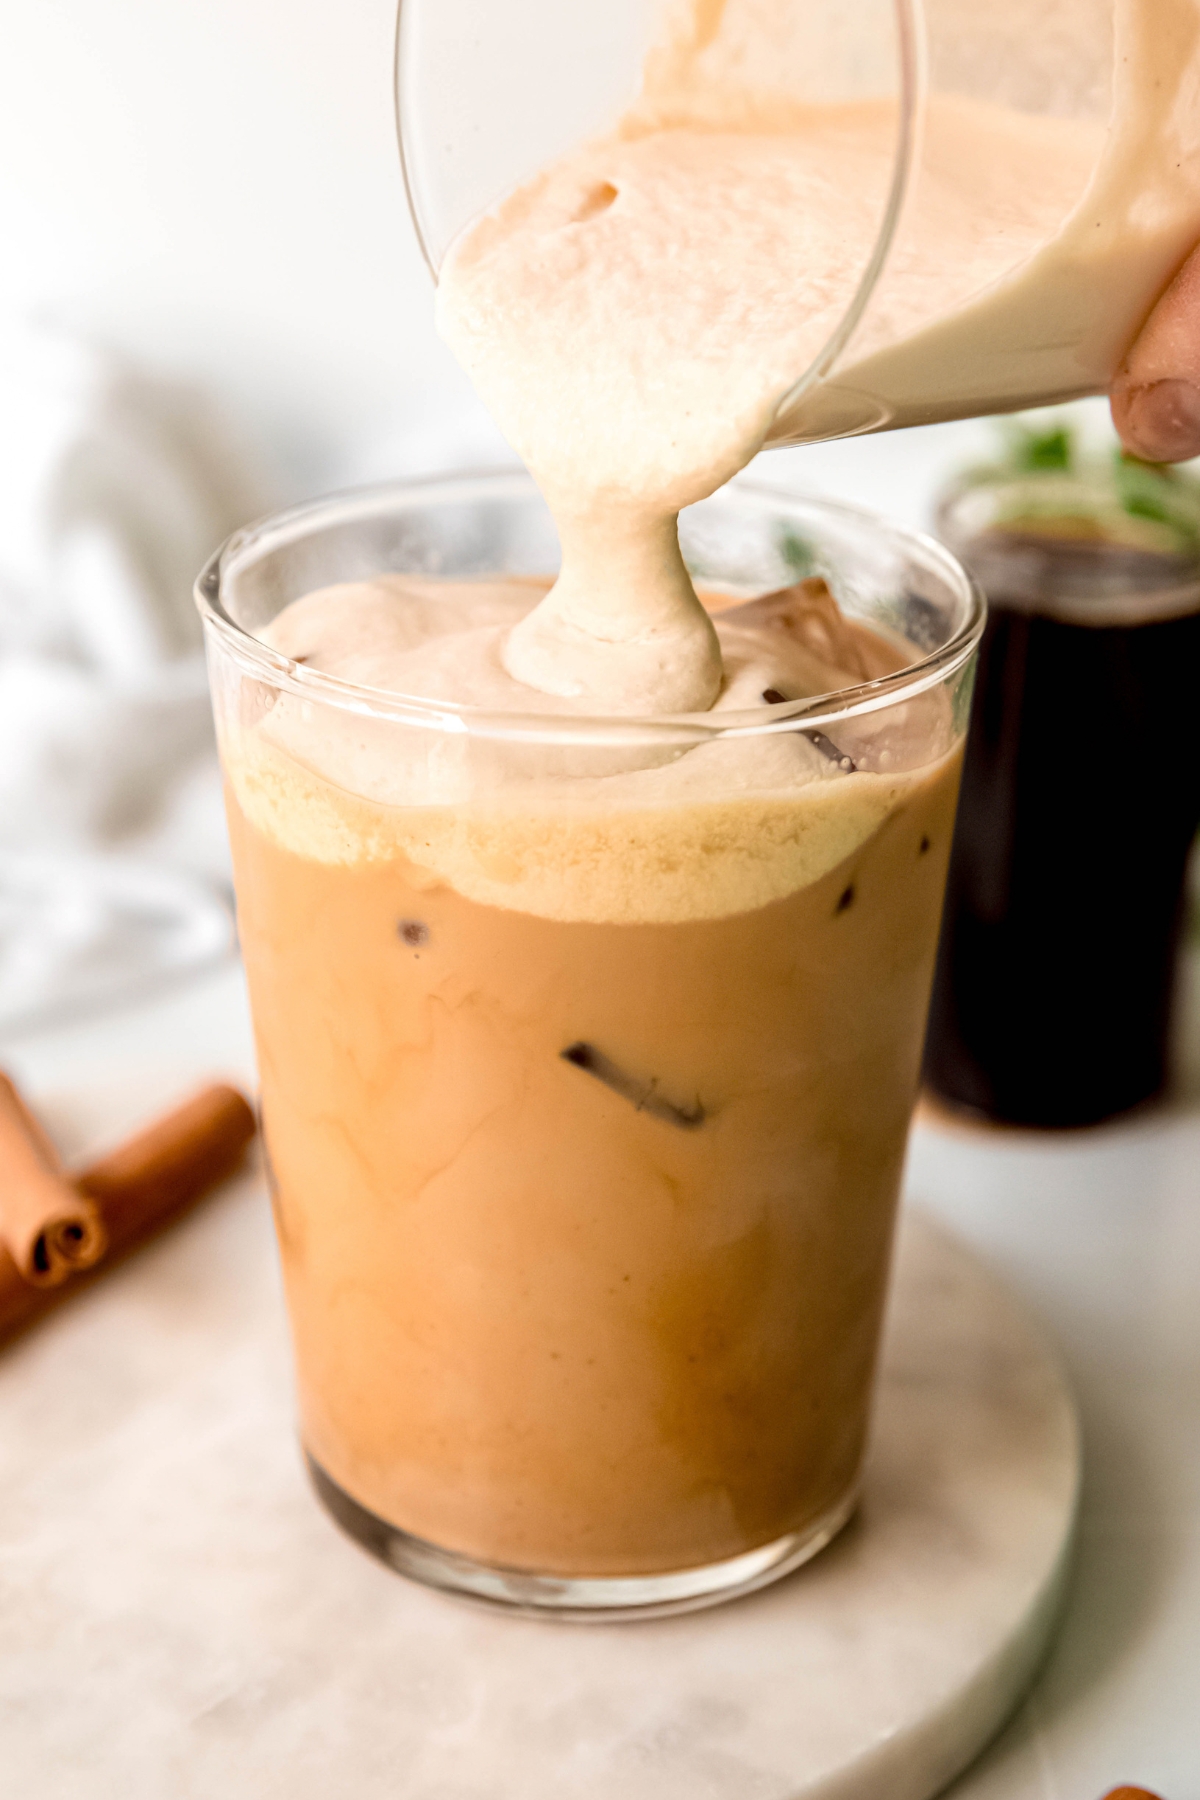
    If you’re ready to double down on the deliciousness, pair your frappuccino with no-bake s'mores cereal snacks or whole wheat fluffernutter cookies. If that’s a bit too rich for your blood (sugar), chocolate oatmeal protein cookies and fresh berries bring some fiber to keep you steady.

    45 degree overhead shot of a homemade starbucks s'mores frappe topped with whipped cream and graham cracker bits.

    Recipe Success Tips

    • Use Fresh Ingredients: Opt for high-quality coffee and fresh whipped cream for the best flavor. If you can, make your own whipped cream for a richer taste.
    • Prep Your Graham Crackers: Break the graham crackers into smaller pieces before blending them into the s’mores frappe. This will ensure a smoother texture and better distribution throughout the drink.
    • Layer Carefully: When assembling the drink, take your time to create distinct layers. Pour slowly and gently to maintain the visual appeal of the toasted marshmallow cream and mocha sauce.
    • Keep it Frosty: Freeze your serving drink for about 30 minutes before serving to ensure every sip stays frosty till the very last.

    FAQs

    Does Starbucks have a s’mores frappe?

    They sure do! But, now that you know how to make it at home, why bother with Starbucks prices??

    Is the s’mores frappuccino discontinued?

    It was discontinued in 2019, but Starbucks brought it back for the 2026 menu.

    Is Starbucks bringing back the s’mores frappe?

    They are! But, who wants to spend $7 on a single s’mores frappuccino—without tip? Not this gal. DIY FTW!

    hero shot of a DIY Starbucks s'mores frappuccino on a wooden table with graham cracker crumbs, mini marshmallows, chocolate pieces, a green pine sprig, and a marshmallow roasting fork in front of a black sky with a campfire.

    Homemade Starbucks S’mores Frappuccino Nutrition

    This s’mores frappuccino is the definition of a fun, fancy-free, dessert-meets-drink. It’s sweet, creamy, and packed with nostalgic campfire flavor! Each serving comes in at 397 calories, making it perfect for satisfying a serious sweet tooth. The 8 grams of fat help create a smooth, creamy texture, while the 6 grams of protein add a small bit of staying power.

    With 76 grams of carbohydrates and 58 grams of sugar, this drink leans heavily into dessert territory, delivering that classic combination of chocolate, marshmallow, and graham cracker sweetness. If you’re concerned about sugar intake, consider swapping in sugar-free syrup. And at 184 mg of sodium, it stays relatively moderate on the salt front.

    Overall, this s’mores frappuccino is best enjoyed as an occasional treat rather than an everyday coffee. It’s a fun, flavorful way to recreate a classic fireside favorite in drink form—perfect for when you’re craving something cool, creamy, and a little over-the-top.

    Total nutritional content per serving is:

    • Calories: 397 calories
    • Total Fat: 8 grams
    • Protein: 6 grams
    • Sodium: 184 mg
    • Carbohydrates: 76 grams
    • Sugar: 58 grams

    *This nutritional information is an estimate and calculated based on the ingredients used to create the recipe. The nutritional value of your ingredients may differ slightly. Furthermore, this food is not intended to prevent, diagnose, cure, or treat any disease.

    horizontally framed hero image of a homemade s'mores frappe in a clear pint glass on a rustic wooden table with marshmallows, chocolate bars, and a sprig of pine tree in front of a dark night sky with a fire.

    Other Starbucks Frappuccino Recipes

    • S'mores Frappuccino (Starbucks Copycat)
    • Caramel Ribbon Crunch Frappuccino (Starbucks Copycat)
    • Lavender Crème Frappuccino (Starbucks Copycat)
    • Eggnog Frappuccino
    Print Recipe
    5 from 1 vote

    S'mores Frappuccino (Starbucks Copycat)

    This DIY Starbucks S'mores Frappuccino recipe is even yummier than the one they sell in stores—and it won't set you back $7 for a single drink!
    Prep Time5 minutes mins
    Total Time5 minutes mins
    Course: Drinks
    Cuisine: American
    Keyword: S'mores Frappuccino
    Servings: 1 drink
    Calories: 397kcal
    Author: Megan Byrd

    Equipment

    • 1 high-speed blender

    Ingredients

    • 1 cup ice
    • ½ cup cold brew coffee
    • ½ cup whole milk
    • 3 tablespoon toasted marshmallow syrup
    • 1 graham cracker
    • ¼ teaspoon xanthan gum
    • ¼ cup marshmallow whipped cream (or regular whipped cream)
    • 2 tablespoon mocha sauce (or chocolate sauce)
    • whipped cream and/or graham cracker crumbs optional for topping

    Instructions

    • In a high-speed blender, blend the ice, cold brew, milk, toasted marshmallow syrup, graham cracker, and xanthan gum until smooth and creamy. Set aside.
    • Press the whipped cream into the bottom of a tall glass with a spoon. Pour in the mocha sauce (or chocolate sauce).
    • Pour in the s'mores frappe, then top with more whipped cream and/or graham cracker crumbs if desired. Drink up!

    Nutrition

    Serving: 1drink | Calories: 397kcal | Carbohydrates: 76g | Protein: 6g | Fat: 8g | Sodium: 184mg | Sugar: 58g
    S'mores frappuccino.

    xoxo Megan
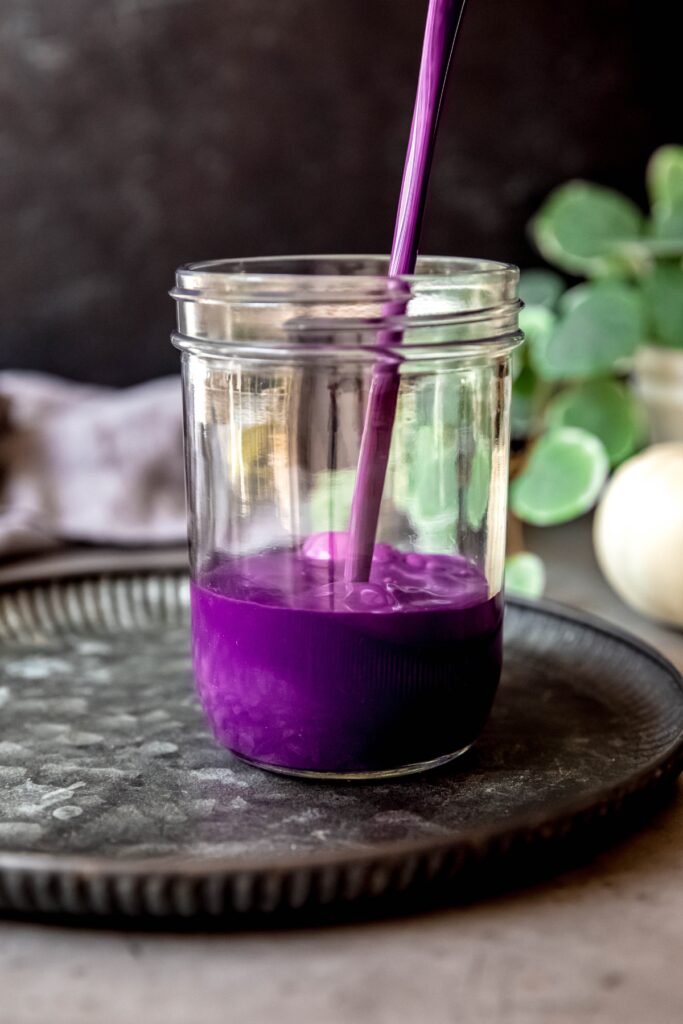
    Homemade Caramel Macchiato Creamer

    April 11, 2026

    Turn a basic pot of java into a dreamy café-style treat with a drizzle of my Copycat Starbucks Caramel Macchiato Creamer recipe! Simply made with just 4 ingredients in 5 minutes, this easy DIY is both cheaper and better for you than store-bought.

    mason jar of homemade caramel macchiato coffee creamer on a white table with a jar of caramel sauce in the foreground and a dribble of caramel sauce running down the side of the mason jar filled with the creamer.

    I like to get a jump start on busy weeks by making a batch of homemade coffee creamer and a batch of homemade cold brew so all I have to do when my energy is flagging is pour and stir. This deliciously simple 4-ingredient caramel macchiato creamer is one that my hubby and I can’t seem to get enough of lately. It’s the speediest iced caramel macchiato hack around!

    Rather than having to layer together the espresso, flavored syrup, sweetened milk, caramel sauce, and dispenser whipped cream you’d find in a fancy Starbucks copycat drink, this one-and-done creamer recipe ensures you get that creamy-salty-sweet flavor with little more than a flick of the wrist. 

    Just mix cream, half & half, and sugar in a saucepan, heat until the sugar dissolves, then stir in caramel extract and voila! You’ve got a week’s worth (or more) of the creamy-sweet flavor needed to make caramel iced coffee or hot caramel lattes at the ready. 

    [feast_advanced_jump_to]

    What does it taste like?

    This homemade caramel macchiato creamer is the perfect way to spruce up your morning coffee routine. The rich, velvety texture of the heavy cream and half-and-half creates an indulgent base with a dreamy mouthfeel, sugar brings the perfect hit of sweetness, and the caramel extract infuses each sip with a deep, toasted flavor reminiscent of thick, gooey caramel.

    This creamy, caramel-kissed liquid transforms an ordinary cup of coffee into a decadent, café-inspired luxury without any fuss. I can practically smell the intoxicating aroma wafting from the cup as I write this! Seriously, do yourself a favor and make a batch, STAT.

    45 degree angle shot of a clear pint sized mason jar filled with ecru-colored homemade caramel macchiato coffee creamer on a white table with a small har of caramel sauce and a spoon with some caramel sauce puddling on the table.

    Why You’ll Love This Caramel Coffee Creamer Recipe

    • Quick & Easy - All it takes is 5 minutes, 4 ingredients, and 1 pan. It’s so easy, even a 2nd grader could make it!
    • Prepped & Ready - Rather than having to build one-off barista-style drinks from scratch every time, making a batch of this DIY caramel creamer keeps your coffee tasting deliciously salty-sweet and creamy all week long.
    • Budget-Friendly & Better-For-You - A bottle of Starbucks or Chobani caramel creamer will easily set you back $5-6, while my homemade version can be made for about half as much. As a bonus, when you DIY your own creamer, you get to skip out on less-than-savory ingredients like vegetable oil, artificial flavors, and preservatives. I’ll call that a big win-win!

    Ingredients Needed

    • Half & Half - Starting with half & half means our homemade creamer is going to be deliciously decadent.
    • Heavy Cream - Adding even more heavy cream to the half & half mix ensures it’s even creamier than your favorite store-bought creamers.
    • Granulated Sugar - White sugar has no discernible flavor other than sweetness, so the rich caramel flavor of the extract and creamy sweetness of the dairy shines brightly.
    • Caramel Extract - The easiest way to get the burnt sugar notes of homemade caramel, but without the hassle of making it yourself.
    ingredients needed to make copycat Starbucks caramel macchiato coffee creamer recipe measured out on a white table.

    Substitutions

    • Caramel Extract - Salted caramel extract will do the trick, too!
    • Half & Half - To make your own, mix equal parts of cream and whole milk. You can also swap in canned evaporated milk, full-fat oat milk (preferably a barista blend) or vegan half & half if needed.
    • Heavy Cream - Slightly lighter whipping cream works just as well. You can also swap in full-fat canned coconut milk or vegan whipping cream if you prefer a dairy-free alternative.
    • Granulated Sugar - For a less refined version, use pure cane sugar. You can also swap in brown sugar for a deeper flavored molasses-caramel twist.
    side on view of a jar of homemade iced caramel macchiato coffee creamer on a white table with a green houseplant blurred out in the background and a jar of caramel sauce blurred out in the foreground.

    How To Make Homemade Caramel Coffee Creamer

    Step 1: Gently Heat Dairy & Sugar. Add the half & half, sugar, and heavy cream to a medium saucepan and heat over low heat, whisking together until the sugar is dissolved.

    Step 2: Stir in Caramel Extract. Remove the saucepan from heat and stir in the caramel extract. Adding it off the heat ensures you’ll get the full flavor potency it offers.

    Step 3: Cool & Store. Allow the mixture to cool at room temperature for 10 minutes, then transfer it to a mason jar or other bottle and store in the fridge for up to 2 weeks. Add a splash to your favorite hot or iced coffee as needed!

    sugar, cream, and half & half added to a small saucepan.
    creamer mixture after whisking in the caramel extract off of heat.
    action shot of caramel macchiato creamer being poured into a glass mason jar on a white table.

    Optional Variations & Dietary Adjustments

    • Dairy-Free: Use full-fat canned coconut milk or vegan whipping cream in place of the heavy cream and swap out the half & half in favor of full-fat oat milk or soy milk.
    • Sugar-Free: Substitute your preferred zero-calorie sweetener (e.g. erythritol or monk fruit) for the granulated sugar to make a diabetic-friendly version.
    • Vanilla Caramel: Add a teaspoon of vanilla extract with the caramel extract for a classic vanilla-caramel flavor profile.
    • Mocha Caramel: Stir in 1-2 tablespoons of unsweetened cocoa powder along with the caramel extract, whisking until fully combined.
    • Salted Caramel: Add a pinch of sea salt or flaky Maldon salt to the finished creamer for a lovely salty-sweet balance.

    Serving Suggestions

    If you're craving a decadent coffee shop-style beverage, make a ridiculously speedy caramel macchiato by stirring in a splash to your hot or cold brew coffee. You can also froth it up into a cloud of creamy cold foam for a fun textural contrast. But, this versatile caramel macchiato creamer’s decadent flavor profile lends itself to all sorts of sweet applications. 

    Start your day on a luxurious note by drizzling a spoonful or two over a steaming bowl of plain oatmeal or mix a bit into high-protein chocolate chia pudding. For a special weekend brunch, try incorporating the creamer into your pancake or French toast batter. The caramel notes will infuse each bite with a delightful café-inspired flavor.

    You can also use it to add a hint of caramelly flavor to any dessert that calls for dairy—add a bit to your next box of cook & serve pudding, drizzle a bit into bread pudding, or keep it simple with a bowl of fresh fruit like peaches or berries.

    action shot of homemade caramel macchiato creamer being poured into a clear mug with freshly brewed black coffee; you can see the cream bubbling up from the bottom.

    Recipe Success Tips

    • Use high-quality, fresh ingredients for the best flavor. Opt for heavy cream and half-and-half from a reputable dairy, and seek out a pure, premium caramel extract. If possible, reach for organic, grass-fed dairy for the healthiest base.
    • Be mindful of the heat when cooking the creamer base. Gently heat the mixture over low heat, whisking constantly, to ensure the sugar dissolves fully without scorching the dairy.
    • Be sure to keep it tightly sealed when storing. This will lock in freshness and prevent any unwanted flavors or odors from seeping in. Gently shake or stir before each use to recombine any separation.
    • If possible, use a syrup jar or bottle with a pour spout to make it easier to use without making a mess. 

    FAQs

    What is the healthiest creamer to put in your coffee?

    In my opinion as an RDN, the healthiest creamers are made without any artificial ingredients, added oils, stabilizers, or preservatives. That’s why I love making them from scratch! Not only do I know exactly what is going into my body, I can also tailor the recipe to suit my dietary needs (e.g. by reducing the sugar, swapping in grass-fed dairy, or making it dairy-free).

    What’s the difference between milk and creamer?

    Generally speaking, coffee creamer is thicker and more viscous with a creamier consistency than regular milk. Here, my homemade caramel creamer is made with a mix of cream and half & half, so the milk-fat percentage is significantly higher than whole milk. Additionally, creamer is often flavored and sweetened, whereas most milk (unless it’s strawberry milk or chocolate milk) is just made from straight-up dairy.

    mason jar filled with homemade caramel macchiato coffee creamer on a white table with a small jar of sticky caramel sauce.

    Homemade Caramel Coffee Creamer Nutrition

    This homemade caramel macchiato coffee creamer is a rich, indulgent addition that can elevate your daily cup of coffee—but it’s best used mindfully due to its sugar and calorie content. At 168 calories per generous ¼ cup (4 tablespoon) serving, this creamer is slightly more calorie-dense than most store-bought options, largely due to the combination of real cream and half & half.

    These ingredients contribute 8 grams of fat per serving, including saturated fat, which plays a role in the creamer’s smooth, luxurious texture. While enjoyable, it’s something to keep in moderation, especially for those monitoring heart health. You can also opt for grass-fed organic dairy for a healthier fat profile.

    Carbohydrates come in at 23 grams per serving, with 22 grams of that from added sugar. This makes it a high-sugar addition to your coffee, which can add up quickly if you enjoy multiple cups per day. For those keeping an eye on blood sugar or overall added sugar intake, using a smaller pour or swapping in sugar alternatives can keep things in check.

    Protein is minimal at 1 gram per serving, so this creamer doesn’t contribute much in terms of satiety or nutritional staying power. Pairing your coffee with a balanced breakfast that includes protein and fiber can help round things out. On the plus side, sodium is quite low at just 28 mg per serving, making it a good option for those watching their sodium intake.

    Overall, this homemade creamer is a delicious, customizable alternative to store-bought versions, free from preservatives and artificial ingredients. While it leans more toward the “treat” category nutritionally, you should enjoy every creamy-salty-sweet drop. Just be sure to use it in moderation!

    Total nutritional content per serving is:

    • Calories: 168 calories
    • Total Fat: 8 grams
    • Protein: 1 gram
    • Sodium: 28 grams
    • Carbohydrates: 23 grams
    • Sugar: 22 grams

    *This nutritional information is an estimate and calculated based on the ingredients used to create the recipe. The nutritional value of your ingredients may differ slightly. Furthermore, this food is not intended to prevent, diagnose, cure, or treat any disease.

    horizontally framed hero shot of a jar of homemade caramel macchiato creamer on a white table with a silver spoon with caramel sauce to the side and a jar of caramel sauce in the front.

    Other Homemade Coffee Creamer Recipes

    • Homemade S'mores Creamer
    • Homemade Cinnamon Roll Creamer
    • Homemade White Chocolate Mocha Creamer
    • Homemade Cherry Almond Creamer
    Print Recipe
    5 from 1 vote

    Homemade Caramel Macchiato Creamer

    My quick & easy recipe for Homemade Caramel Macchiato Coffee Creamer comes together in just 5 minutes with 4 ingredients & 1 pan!
    Prep Time2 minutes mins
    Cook Time3 minutes mins
    Total Time5 minutes mins
    Course: Drinks
    Cuisine: American
    Keyword: Caramel Macchiato Creamer
    Servings: 20 servings
    Calories: 168kcal
    Author: Megan Byrd

    Equipment

    • 1 medium saucepan
    • 1 mason jar

    Ingredients

    • 1 ½ cups half & half
    • 1 cup granulated sugar
    • ½ cup heavy cream
    • 1 tablespoon caramel extract

    Instructions

    • Add the half & half, sugar, and heavy cream to a medium saucepan and heat over low heat, whisking together the sugar is dissolved.
    • Remove from heat and stir in the caramel extract. Allow to cool at room temperature for 10 minutes, then transfer to a mason jar or other bottle and store in the fridge for up to 2 weeks.

    Notes

    This makes about 2.5 cups of caramel creamer!

    Nutrition

    Serving: 0.25cup | Calories: 168kcal | Carbohydrates: 23g | Protein: 1g | Fat: 8g | Sodium: 28mg | Sugar: 22g
    Caramel macchiato creamer recipe.

    xoxo Megan
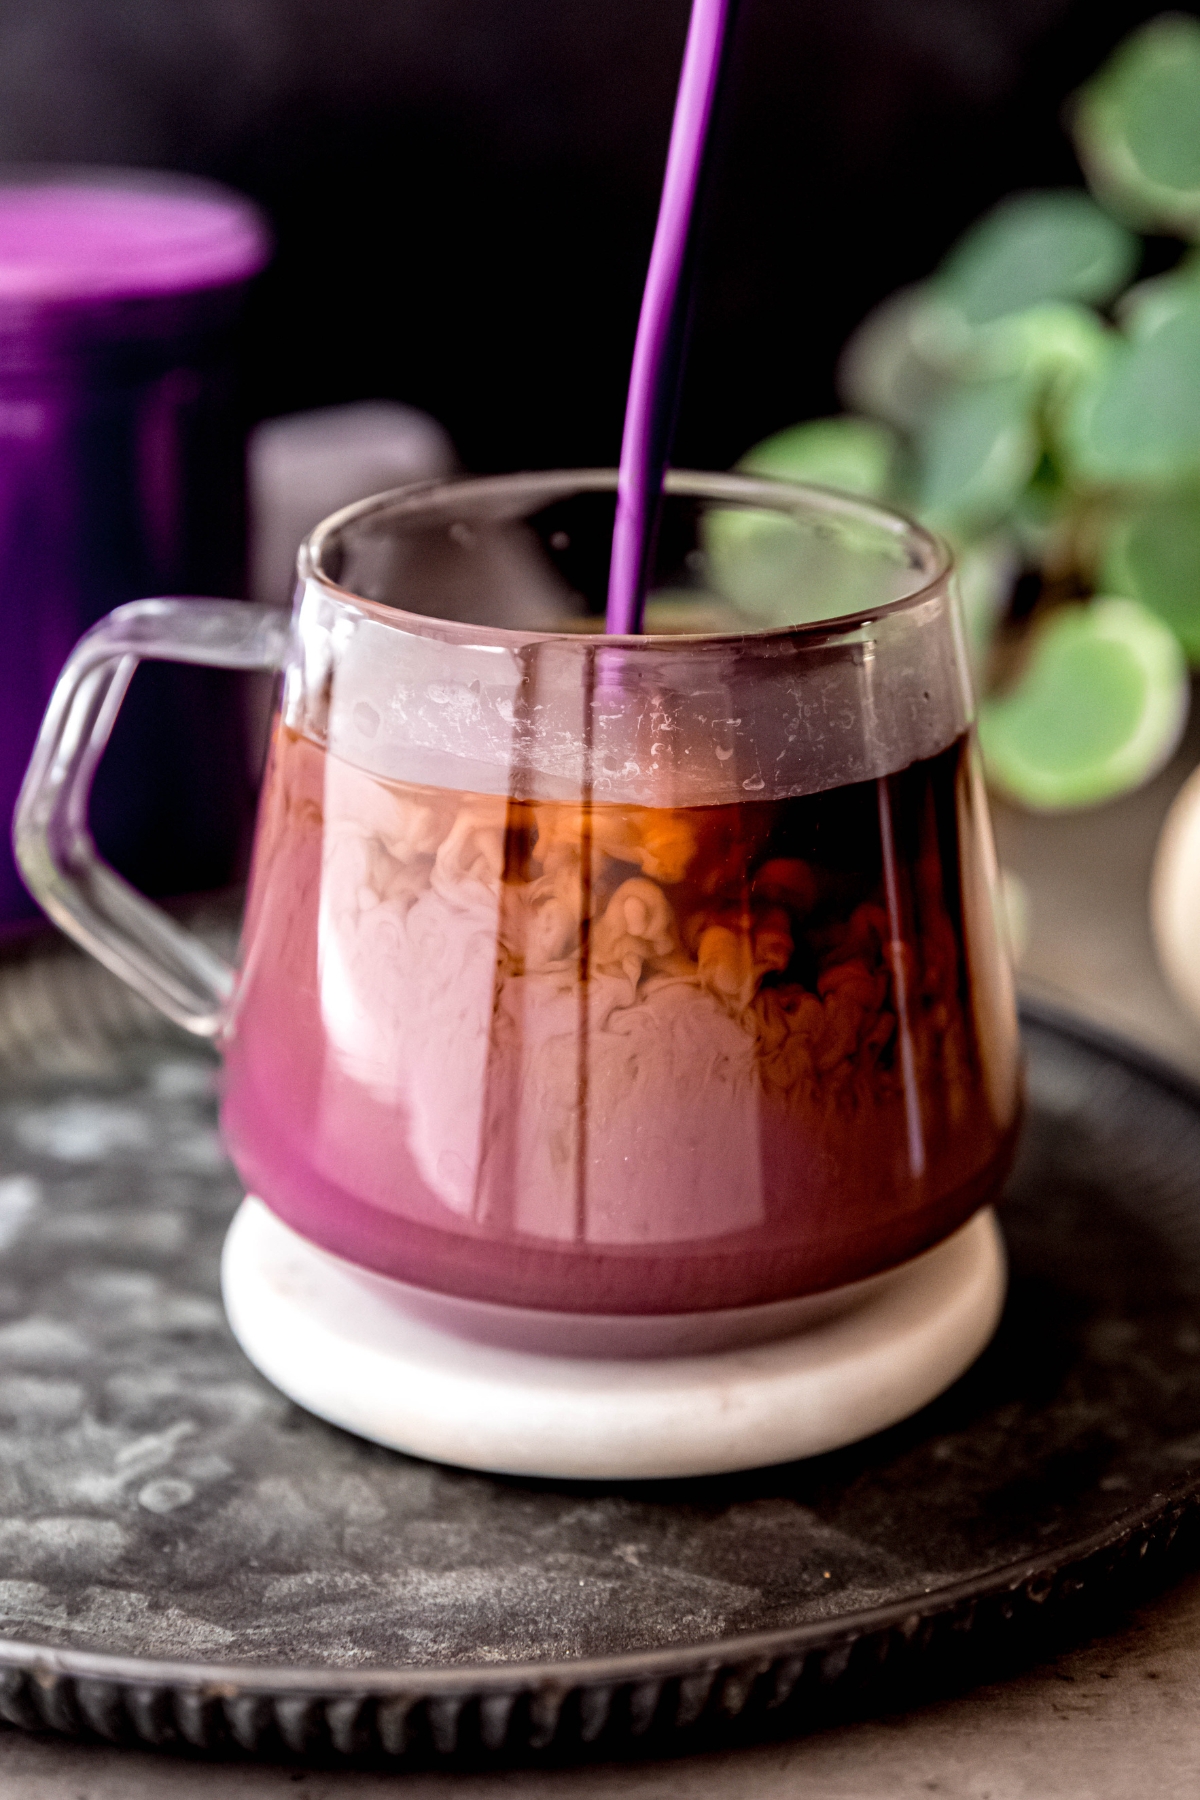
    Iced Ube Coconut Cream Shaken Espresso (Starbucks Copycat)

    April 4, 2026

    If the warmer weather has you craving tropical coffee treats, you need to try my copycat Starbucks Ube Coconut Shaken Espresso recipe! The bold, slightly bitter punch of espresso is softened with coconut syrup and creamy oat milk, then topped with a vibrant purple-hued ube coconut cold foam for a drink that practically screams summer.

    homemade iced ube coconut cream shaken espresso Starbucks copycat in a clear can-shaped glass on a white table with toasted coconut flakes and a green houseplant.

    When Starbucks debuted the brown sugar shaken espresso, it felt like a whole new world of concentrated coffee goodness had arrived. Now, a half-dozen versions later, this dreamy ube coconut shaken espresso has come onto the scene like a tropical queen. They say purple is the color of royalty, so a purple crown of fluffy ube coconut cold foam surely has to as well. 🤷🏻‍♀️

    The fantastically fresh flavor combo of vanilla-adjacent ube and tropical coconut is fast becoming a Starbucks summer favorite. You can get a similar vibe from Starbucks’ iced ube coconut macchiato or iced ube coconut latte. The difference here is that iced shaken espresso is a seriously high-octane drink with a higher espresso-to-milk ratio than the others.

    In my mind, that makes this iced ube coconut shaken espresso the perfect way to start a long day. It’s like jumpstarting your body battery, but in a sweet, creamy, and satisfying way that feels like a treat! So, next time you’re preparing for an important meeting or need to survive a marathon work day, give this frosty refreshment a try. I have a feeling you’ll love it.

    [feast_advanced_jump_to]

    What does it taste like?

    This iced ube coconut shaken espresso tastes like your favorite coffee drink took a tropical vacation. The shaken espresso base is bold and slightly frothy, with a smooth bitterness that gets mellowed out by the oat milk and sweet coconut syrup. It’s lightly nutty, subtly sweet, and super refreshing.

    Then comes the ube coconut cold foam, which is where the magic really happens. It’s silky and cloud-like, with a delicate vanilla-meets-pistachio flavor from the ube, layered with creamy coconut sweetness. The flavor is unique but approachable, with a slightly earthy, gently sweet, dessert-like flavor.

    As you sip, the foam slowly blends into the espresso, creating a beautifully balanced drink that’s equal parts bold and creamy. You get an initial hit of smooth coffee, followed by waves of coconut and ube that linger on the palate. It’s rich, aromatic, and perfectly balanced, like a cross between a shaken espresso and a coconut cream pie with a certain je ne sais quois from ube.

    action shot of a hand using a clear glass straw to slowly swirl the ube coconut cream cold foam into the coconut shaken espresso base.

    Why You’ll Love This Starbucks Shaken Espresso Recipe

    • Quick & Easy - All it takes is 5 ingredients and 5 minutes to shake one up at home, making it way more convenient than waiting in a drive-thru line.
    • Budget-Friendly - Spending $6-7 on a single drink at Starbucks feels almost criminal, especially when life is already so expensive anyway. Luckily, learning how to be your own barista will save you a ton in the long-run. As a prime example, you can make your own DIY coconut ube shaken espresso for less than $2!
    • Bold Color, Mellow Flavor - The vibrant violet hue of ube may make you reluctant to try it, but the flavor is as friendly as Barney! If you like vanilla syrup and sweet pistachio sauce in your coffee, this festive Filipino favorite is going to be right up your alley.

    Ingredients Needed

    • Heavy Cream - Cold foam needs enough fat to hold its shape, and heavy cream is as decadent as they come. Just make sure it’s nice and cold!
    • Coconut Syrup - My easy DIY is made with just 4 simple ingredients and costs way less than a bottle of Torani, but feel free to swap in store-bought if you prefer.
    • Ube Extract - This is what imparts the beautiful plum hue and nutty vanilla custard flavor. A little bit goes a long way, so a bottle should last you a long time!
    • Espresso - Because you can’t have shaken espresso without espresso.
    • Oat Milk - This is the default option if you were to get a shaken espresso from Starbucks. If possible, make sure to reach for full-fat barista-style milk for the best frothability.
    • Ice - Make sure to start with filtered water for the cleanest taste.
    ingredients needed to make a copycat Starbucks iced ube coconut cream shaken espresso recipe at home measured out on a white table.

    Substitutions

    • Heavy Cream - Slightly lighter whipping cream will do the trick. You can also use your favorite plant-based whipping cream or full-fat canned coconut milk for a dairy-free option.
    • Coconut Syrup - In a pinch, you can use vanilla syrup but you’ll miss out on the extra layer of tropical sweetness. To bring some of that flavor back, you can add a drop or two of coconut extract and/or use coconut milk instead of oatmilk.
    • Espresso - Feel free to swap in 5 ounces of cold brew espresso for a smoother, less acidic, and slightly more caffeinated alternative.
    • Oat Milk - You’re welcome to use any type of plant-based milk or any percentage of dairy milk you prefer. If you use plant-based, try to reach for a “barista blend” for the best mouthfeel.
    • Ice - Need even more gas in the tank? Swap in coffee ice cubes so it’s caffeinated to the last drop. 
    side on view showing a homemade iced coconut shaken espresso topped with vibrant purple ube coconut cream cold foam.

    How To Make Starbucks Iced Ube Coconut Shaken Espresso 

    Step 1: Make the Ube Coconut Cold Foam. In a small glass or jar, add heavy cream, coconut syrup, and a touch of ube extract. Give it a good frothing with a milk frother until it's nice and thick, creamy, and foamy. Set it aside for later.

    Step 2: Chill & Sweeten. Start by adding some ice cubes to a mason jar. Pour in your freshly brewed espresso and 2 tablespoons of coconut syrup. 

    Step 3: Shake. Seal up the jar and give it a few good shakes to combine everything and get it a little frothy.

    Step 4: Add Milk. Take the shaken iced espresso and pour it into a tall glass, ice and all. Top it off with a splash of creamy oat milk and give it a gentle stir if you'd like.

    Step 5: Top it Off. The final touch is spooning the vibrant ube coconut cold foam on top of the shaken espresso base. Now you're ready to sip and savor!

    action shot of a milk frother whipping the ube coconut cold foam mixture in a small rocks glass.
    action shot of espresso being poured into a mason jar with ice.
    hand setting down a lidded mason jar with the coconut shaken espresso base on a white table.
    action shot of milk being poured into a glass with the iced coconut shaken espresso base.
    action shot of the ube coconut cream cold foam being poured on top of the iced coconut shaken espresso.

    Optional Variations & Dietary Adjustments

    • Protein Boost - Make an ube coconut protein cold foam to add a bit more staying power. You can also mix in protein powder or collagen to the shaken espresso base.
    • Sugar-Free - Use sugar-free coconut syrup to make a diabetic-friendly version. My DIY syrup recipe has instructions!
    • Dairy-Free/Vegan - The shaken espresso base is already dairy-free and vegan if you use oat milk as suggested. To make the cold foam vegan-friendly, swap in well-shaken full-fat canned coconut milk or vegan whipping cream instead.

    Serving Suggestions

    While this iced ube coconut shaken espresso has less sugar than some other Starbucks specialty drinks, between the syrup and caffeine boost I typically need a high-fiber or high-protein snack to help keep me from wigging out. A jar of my high protein coconut chia pudding is filling enough to keep me going until lunch.

    If you’re not much of a breakfast-eater, keep it light with a blueberry protein muffin or a slice of high protein banana bread. If even that feels like too much to handle, matcha protein balls, coconut fat bombs, or any of your favorite protein ball recipes are perfect little 2-bite treats.

    45 degree overhead shot of an iced ube coconut cream shaken espresso showing the vibrant violet color and creamy consistency of the ube coconut cream cold foam topping the shaken espresso.

    Recipe Success Tips

    • Shake It Up. Don't skip the shaking step! Giving the espresso and coconut syrup a vigorous shake helps create the signature frothy texture you’d expect from a shaken espresso.
    • Get The Foam Just Right. Be sure to froth cold cream, coconut syrup, and ube extract for at least 30 seconds to get a super thick and creamy cold foam topping. The cooler the ingredients are, the quicker it should froth to perfection.
    • Adjust the Coconut Sweetness. My recipe is intended to copy the Starbucks recipe, so if theirs is too sweet for you, start with less coconut syrup and add more to taste as needed.
    • Use Fresh, High-Quality Espresso. For the best flavor, use freshly brewed espresso or very strong coffee. The better the base, the more delicious your drink will be.

    FAQs

    Is ube good with espresso?

    I sure think so! The sweet, nutty, vanilla custard-y flavor of ube is great for softening espresso’s sharp, bitter edges.

    What is the ube flavor at Starbucks?

    Ube (pronounced “ooo-bay”) is a purple Filipino yam that’s often used in desserts thanks to its nutty, vanilla-like flavor. At Starbucks, that flavor is distilled into a syrup to flavor drinks like this ube coconut shaken espresso.

    What’s the difference between a shaken espresso and a latte?

    The key difference between a shaken espresso and a latte is the preparation method and resulting texture. A shaken espresso is made by vigorously shaking the espresso together with ice and any added syrups or sweeteners, creating a frothy, chilled, and concentrated coffee drink. In contrast, a latte is prepared by combining espresso with steamed milk, resulting in a smooth, creamy, and milk-forward beverage.

    hand in a white sweater up to the knuckles grabbing a clear glass of iced ube coconut cream shaken espresso from a white table with toasted coconut flakes and a green houseplant.

    Homemade Ube Coconut Shaken Espresso Nutrition

    This iced ube coconut shaken espresso is a creamy, indulgent drink with a tropical twist. Each serving comes in at 335 calories, with 19 grams of fat largely from the cream in the ube coconut cold foam, which gives the drink its rich, velvety finish.

    Carbohydrates total 39 grams, including 32 grams of sugar from the coconut syrup. This keeps the drink pleasantly sweet without being overly heavy, especially compared to other Starbucks-style drinks. If you’re concerned about the sugar content, you can use less syrup or swap in a sugar-free alternative. Sodium is relatively modest at 85 mg.

    Protein is on the lower side at just 2 grams, as this recipe leans on cream and oat milk rather than higher-protein dairy options. You can easily boost the protein by swapping in dairy milk, making protein cold foam, or adding protein to the espresso base. 

    All in all, this drink falls into the “treat yourself” category. Make sure to balance your day with nutrient dense foods, plenty of water, and a minimum of added sugars elsewhere. Enjoy every vibrantly purple, creamy, coconutty sip!

    Total nutritional content per serving is:

    • Calories: 335 calories
    • Total Fat: 19 grams
    • Protein: 2 grams
    • Sodium: 85 mg
    • Carbohydrates: 39 grams
    • Sugar: 32 grams

    *This nutritional information is an estimate and calculated based on the ingredients used to create the recipe. The nutritional value of your ingredients may differ slightly. Furthermore, this food is not intended to prevent, diagnose, cure, or treat any disease.

    horizontally framed hero shot of a homemade iced coconut ube cream shaken espresso on white table with toasted coconut flakes scattered around with more in a small black pinch bowl and a green houseplant with yellow blooms.

    Other Starbucks Copycat Recipes

    • Lavender Cold Foam (Starbucks Copycat)
    • Pistachio Oat Milk Cortado (Starbucks Copycat)
    • Iced Dubai Chocolate Matcha (Starbucks Copycat)
    • Easy Homemade Eggnog
    Print Recipe
    5 from 1 vote

    Iced Ube Coconut Cream Shaken Espresso (Starbucks Copycat)

    This copycat Starbucks Iced Ube Coconut Cream Shaken Espresso is a snap to make at home for a fraction of the cost.
    Prep Time5 minutes mins
    Total Time5 minutes mins
    Course: Drinks
    Cuisine: American
    Keyword: Ube Coconut Shaken Espresso
    Servings: 1 drink
    Calories: 335kcal
    Author: Megan Byrd

    Equipment

    • 1 milk frother
    • 1 mason jar

    Ingredients

    Coconut Ube Cold Foam:

    • 3 tablespoon heavy cream
    • 1 ½ tablespoon coconut syrup
    • ¼ teaspoon ube extract

    Iced Ube Coconut Cream Shaken Espresso:

    • 2 oz espresso or 5 oz cold brew espresso
    • 2 tablespoon coconut syrup
    • ice
    • ½ cup oat milk or milk of choice

    Instructions

    • Make the cold foam. Add the heavy cream, coconut syrup, and ube extract to a small glass or jar and froth until thick and foamy. Set aside.
    • Add ice to a mason jar, then add the espresso and 2 tablespoon coconut syrup to the jar. Seal the jar with the lid and shake a few times.
    • Pour the iced coffee (ice and all) into a tall glass. Top with oat milk and stir if desired. Top with the ube coconut cold foam and drink up!

    Nutrition

    Serving: 1drink | Calories: 335kcal | Carbohydrates: 39g | Protein: 2g | Fat: 19g | Sodium: 85mg | Sugar: 32g
    Iced ube coconut shaken espresso.

    xoxo Megan
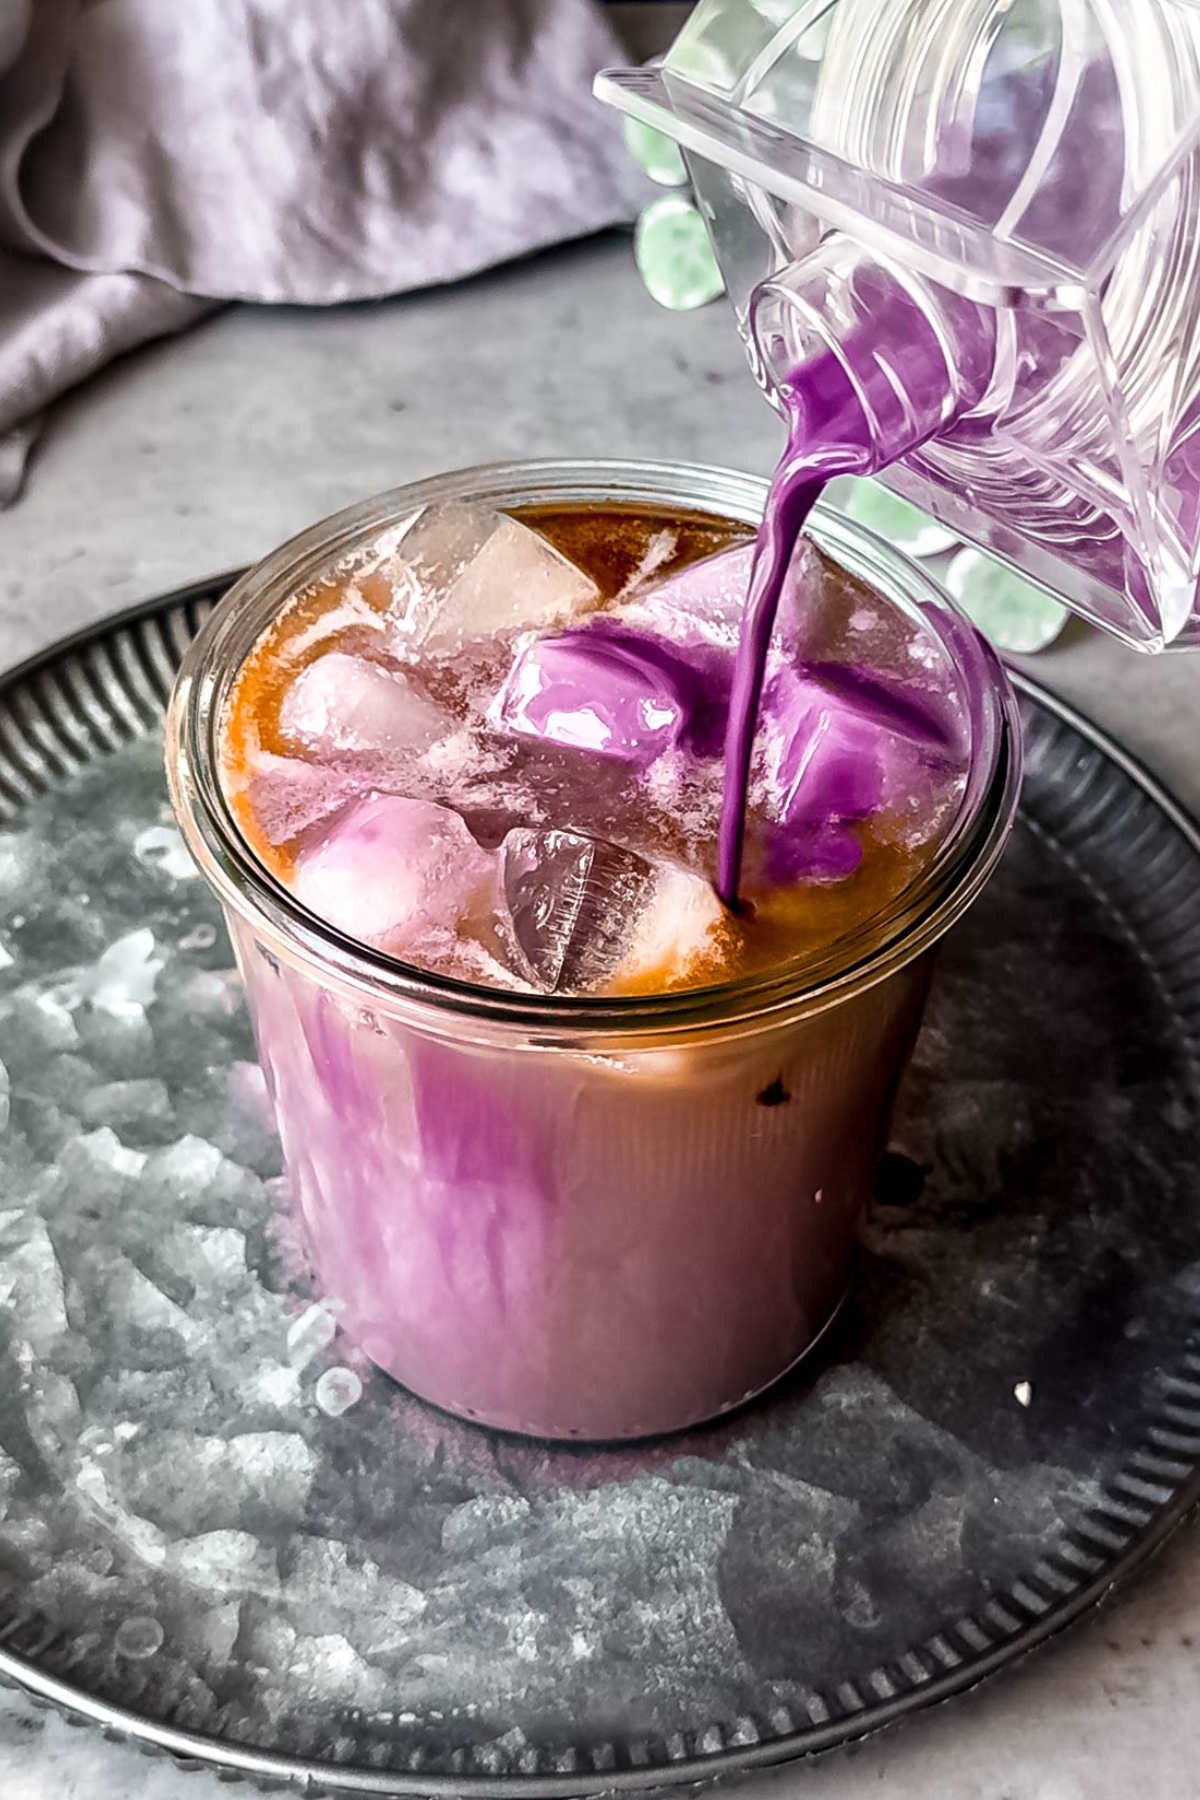
    Iced Mango Cream Matcha (Starbucks Copycat)

    April 4, 2026

    Drink in the verdant flavors of summer with my copycat Starbucks Iced Mango Cream Matcha Latte recipe! Milky green tea is topped with a dreamy mango cold foam for a sublime sipper that’s equal parts earthy, sweet, and tropically tangy. 

    homemade Starbucks iced mango cream matcha latte in a clear pint glass on a white table with fresh mango slices and a green houseplant.

    I love how creative Starbucks has gotten with matcha recipes in the past few years. While iced matcha lattes are lovely, the addition of flavored cold foams and fruity purées has opened up a whole new world of yum for me. Their newest iced mango cream matcha latte is being released with the late spring 2026 menu, but they’re confident enough to make it a permanent menu item.

    Not that I can fault them—the combination of tropical mango brightness with the subtle earthy sweetness of matcha is a match made in heaven! I have a feeling that if you liked the iced double berry matcha topped with raspberry cream cold foam, this mango number will be right up your alley. 

    Love mango-flavored drinks in the summer as much as I do? Check out my recipes for mango iced tea, iced mango cream chai latte, and Starbucks mango dragonfruit refresher next!

    [feast_advanced_jump_to]

    What does it taste like?

    This iced mango cream matcha latte is smooth, creamy, and perfectly balanced between earthy and tropical. The matcha base brings a lightly grassy, subtly bitter flavor with a clean, silky finish, while the mango cream cold foam adds a burst of juicy sweetness right on top.

    The foam is rich and airy, with bright mango flavor that tastes like ripe, sun-sweet fruit, lifted by a hint of citrusy lemon zing. As it slowly blends into the matcha, it softens the earthy notes and creates a mellow, refreshing sweetness that’s extra creamy-dreamy.

    Each sip is layered and dynamic—cool and frothy at first, then smooth and slightly vegetal, finishing with a lingering tropical fruitiness. It’s like a matcha latte-mango creamsicle mashup, with just enough depth from the tea to keep it from tasting cloyingly sweet.

    action shot of a silver spoon dolloping pale yellow mango cream cold foam on an iced matcha base.

    Why You’ll Love This Iced Matcha Latte Recipe

    • Quick & Easy - All you need are just 4-5 ingredients (depending on your milk choice) and about 5 minutes of time in the kitchen to whip one up. You can’t even order at the counter that fast—plus, you can make all the customizations you like without feeling “extra.”
    • Budget-Friendly - Starbucks specialty drinks generally fall within the $6-7 range, which, if I’m being honest, seems absolutely wild for just one drink. (There’s not even any booze in it!!!) Luckily, I can make my own DIY versions at home for a fraction of the price so I can pretend like it’s still the 90s. 😅
    • Balanced - Matcha and mango are the ideal match, with the earthy flavor of green tea being balanced out by the tangy, juicy sweetness of fruit. I also love the even energy that matcha brings to the table—it’s less zippy than espresso, but still offers a bit of caffeine and the stress-relieving qualities of L-theanine. In other words, it’s the perfect midday refresher for when you’re feeling frazzled. 

    Ingredients Needed

    • Heavy Cream & Whole Milk - Using a ratio even more decadent than half & half ensures the cold foam fluffs up and holds its shape while you enjoy your drink. 
    • Mango Syrup - Making your own at home requires just 3 ingredients, 5 minutes of prep, and a little patience, but feel free to swap in store-bought if you prefer.
    • Hot Water - Even though this is an iced drink, matcha only dissolves well into hot water. Make sure it’s a little less than boiling, since green tea flavors can become burnt at too high of temps. (140ºF-175ºF is ideal.)
    • Pure Matcha Powder - If you have the choice, reach for ceremonial grade matcha for the best flavor. Make sure to sift it first to prevent any clumps.
    • 2% Milk - This is the preferred percentage of milk in our house—creamy enough to feel indulgent, but not so creamy that it’s heavy. I also like to reach for ultra-filtered milk (e.g. Fairlife), which is extra creamy-tasting and has an extra boost of protein.
    • Ice - Start with filtered water for the cleanest taste. 
    ingredients needed to make Starbucks iced mango cream matcha recipe at home measured out on a white table.

    Substitutions

    • Heavy Cream & Whole Milk - If you have cream and half & half, simply invert the ratio—swap the cream for half & half and the cream for whole milk to achieve the same fat ratio. You can also make it dairy-free by swapping in full-fat canned coconut milk or vegan whipping cream for the cream and full-fat oat or soy milk for the dairy milk.
    • Mango Syrup - Cold foam can be made with any flavor of coffee syrup you like!
    • 2% Milk - You’re welcome to use any percentage of dairy milk or any plant-based milk you prefer, though if possible, try to stick to “barista blends” for the best frothability.
    hand grabbing a clear pint glass with a DIY iced mango cream matcha from a white table with fresh mango slices.

    How To Make Starbucks Iced Mango Cream Matcha Latte

    Step 1: Make the Mango Cold Foam. Add heavy cream, 1 ½ tablespoons of mango syrup, and a splash of whole milk to a small glass or jar. Give it a good 20-30 second whirl with a milk frother until it's all nice and foamy, then set it aside.

    Step 2: Brew the Matcha Base. Grab a microwave-safe jar or glass and add in some water. Pop it in the microwave for 30-45 seconds until the water is boiling hot. Then carefully sift in the matcha powder, whisking it together until you've got a smooth, slightly frothy matcha tea.

    Step 3: Sweeten Milk. Start by filling a tall glass up with ice cubes. Pour in the milk and 2 tablespoons of mango syrup, then give it a good stir to combine everything.

    Step 4: Add the Matcha. Now just pour the freshly whisked matcha right on top of the iced milk mixture. Give it one more quick stir.

    Step 5: Top It Off. The final touch is spooning the fluffy mango cold foam right on top. Time to dig in. Sip, sip, hooray!

    action shot of a milk frother making mango cream cold foam in a small rocks glass.
    bamboo matcha whisk in a small jar with matcha after whisking with hot water until frothy.
    action shot of milk being poured into a glass of ice with mango syrup.
    action shot of a hand stirring a silver spoon to mix the dark green matcha layer on top with the mango milk mixture below.
    action shot of a hand pouring mango cream cold foam on the mixed iced matcha latte below.

    Optional Variations & Dietary Adjustments

    • Protein-Boost - If you want your mango matcha to have a bit more staying power, try making protein cream cold foam instead. You can also whisk in some protein powder or collagen into the matcha base if you like.
    • Sugar-Free - Swap in sugar-free mango syrup to make a diabetic-friendly version. If you’re using plant-based milk, make sure it’s unsweetened.
    • Dairy-Free/Vegan - You can use any plant-based (preferably “barista blend” style) milk for the matcha base, then swap in full-fat canned coconut milk or vegan whipping cream and full-fat oat milk to make the mango cold foam.

    Serving Suggestions

    As with most coffeeshop-style drinks, this iced mango matcha is pretty sweet. To keep my blood sugar from skyrocketing and crashing, I like to pair it with high-protein and/or high-fiber snacks. My high-protein mango chia pudding or high-protein coconut chia pudding are natural matches that keep me full for hours.

    For a smaller snack, a cranberry orange protein muffin or strawberry rhubarb protein muffin is fantastic. The tangy fruit flavors pair perfectly with the mango-matcha duo. My 5-minute matcha protein balls and coconut cream fat bombs are ideal if you just need a bite or two.

    side on view of a pint glass filled with iced mango matcha latte topped with mango cream cold foam on a white table with fresh mango slices and a halved mango.

    Recipe Success Tips

    • Use Quality Matcha. For the best flavor, use a high-quality ceremonial-grade matcha powder. The better the matcha, the more vibrant the green color and fresh, grassy taste will be. Also, be sure to sift it to make sure there aren’t any chunks of dry powder to surprise you. (That’s a recipe for your drink to come out of your nose, which isn’t fun.)
    • Blend It In. Don’t just stir the matcha and water together; froth it like you mean it! A bamboo whisk is the traditional tool, but a milk frother will get the job done too. Then, when you mix it with the milk, make sure to stir until everything is fully incorporated for a nice creamy base.
    • Froth It Up. Be sure to froth the mango cold foam for a full 20-30 seconds to get it nice and airy. The longer you froth, the thicker and fluffier it will become—but don’t exceed about 40 seconds or it’ll get too stiff.
    • Chill Out. Use plenty of ice to keep your latte nice and chilled. If you’re worried about dilution, freeze extra matcha latte into ice cubes. I also like to freeze my serving glass for about 30 minutes before making my drink to ensure it stays super frosty for as long as possible.
    • Garnish for Gold. Don’t be afraid to invest a little extra time to make your tea break feel special. A slice of fresh mango, a sprig of fresh mint, or a dusting of freeze-dried mango powder will make this mango matcha perfectly Instagrammable!

    FAQs

    Does Starbucks have an iced mango matcha latte?

    As of April 7th, 2026 they will! But since you’re already here, you may as well give yourself a sneak preview. 😉

    Do mango and matcha go together?

    I sure think so! The tangy-sweet tropical flavor of mango helps to brighten up the earthy flavor of the matcha, which makes it palatable enough that even my 5 year old likes to take a sip.

    45 degree overhead shot of a starbucks copycat iced mango cream matcha latte showing the creamy mango foam top resting on a pale green matcha base.

    Homemade Iced Mango Cream Matcha Latte Nutrition

    Each serving of this iced mango cream matcha latte comes in at 431 calories, with 16 grams of fat, giving the drink its velvety texture. And, at 12 grams per serving, this drink offers a bit more staying power than your typical coffee shop beverage, especially if you’re using dairy milk or soy. Sodium remains relatively low at 109 mg.

    Carbohydrates total 63 grams, including 59 grams of sugar mostly from the mango syrup. This is what delivers the vibrant, tropical sweetness that balances the earthy matcha so well, but it can throw your blood sugar off if you’re sensitive. To combat this, either swap in sugar-free syrup and/or pair the drink with a fiber- or protein-packed snack.

    Overall, I’d consider this mango iced matcha to be more of a special treat than a daily indulgence. Just make sure to balance out the rest of your day with plenty of water, nutrient-dense foods, and avoid any extra added sugars. Enjoy every tropical sip!

    Total nutritional content per serving is:

    • Calories: 431 calories
    • Total Fat: 16 grams
    • Protein: 12 grams
    • Sodium: 109 mg
    • Carbohydrates: 63 grams
    • Sugar: 59 grams

    *This nutritional information is an estimate and calculated based on the ingredients used to create the recipe. The nutritional value of your ingredients may differ slightly. Furthermore, this food is not intended to prevent, diagnose, cure, or treat any disease.

    horizontally framed hero shot of a DIY starbucks copycat iced mango matcha with mango cream cold foam on a white table with fresh mango slices and a green houseplant with yellow blooms.

    Other Matcha Recipes

    • Iced Blueberry Matcha Latte
    • Iced Strawberry Matcha Latte
    • Matcha Latte Recipe (Starbucks Copycat)
    • closeup hero shot of an iced lavender cream oatmilk latte with the purple lavender cold foam starting to make streaks in the green matcha.
      Iced Lavender Cream Oat Milk Matcha (Starbucks Copycat)
    Print Recipe
    5 from 1 vote

    Iced Mango Cream Matcha (Starbucks Copycat)

    Save yourself a fortune by learning how to make Starbucks Iced Mango Cream Matcha at home.
    Prep Time5 minutes mins
    Total Time5 minutes mins
    Course: Drinks
    Cuisine: American
    Keyword: Mango Cream Matcha
    Servings: 1 drink
    Calories: 431kcal
    Author: Megan Byrd

    Equipment

    • 1 milk frother
    • 1 small fine mesh strainer
    • 1 matcha whisk

    Ingredients

    Mango Cold Foam:

    • 2 tablespoon heavy cream
    • 1 ½ tablespoon mango syrup
    • 1 tablespoon whole milk

    Iced Mango Cream Matcha:

    • 3 tablespoon hot water
    • 1 ½ teaspoon pure matcha powder sifted
    • 1 cup milk of choice (I used 2%)
    • 2 tablespoon mango syrup (or vanilla syrup)
    • ice

    Instructions

    • Make the cold foam. Add the heavy cream, 1 ½ tablespoon mango syrup, and whole milk to a small glass or jar and froth with a milk frother for 20-30 seconds until foamy. Set aside.
    • Add the water to a small microwave-safe jar or glass, and heat until boiling (30-45 seconds in the microwave). Sift the matcha into the hot water, removing any large clumps. Whisk the matcha and water together until smooth and slightly foamy. Set aside.
    • Add ice to a tall glass, then top with the milk and 2 tablespoon mango syrup. Stir to combine. Add the matcha and stir again.
    • Top the matcha with your mango cold foam. Drink up!

    Nutrition

    Serving: 1drink | Calories: 431kcal | Carbohydrates: 63g | Protein: 12g | Fat: 16g | Sodium: 109mg | Sugar: 59g
    Iced mango cream matcha.

    xoxo Megan

    Iced Mango Cream Chai (Starbucks Copycat)

    April 4, 2026

    Tangy-sweet tropical fruit and warming spices work in beautiful harmony in this copycat Starbucks Iced Mango Cream Chai Latte recipe. Featuring a classic iced chai topped with a fluffy, cloud-like crown of mango cream cold foam, this new seasonal treat is certain to become a summer favorite!

    homemade iced mango cream chai latte in a clear pint glass on a white table with fresh mango slices.

    I’ve always loved the refreshing-but-cozy balance of an iced chai latte, particularly when it’s dressed up for whatever season we’re in. From iced pumpkin cream chai in the fall and iced gingerbread oatmilk chai in the winter to iced lavender cream chai in the spring and this iced mango cream chai in the summer, there’s no shortage of ways to enjoy this Indian tea latte!

    Chai is the perfect beverage for overcoming the midday slump, offering just enough caffeine to push you through without giving you the jitters. The sweet, ginger-cardamom-cinnamon flavor profile adds a comforting vibe, while black tea provides the perfect tannic backdrop to keep it from tasting cloying and creamy milk softens the edges. Served hot or cold, it’s always a winner.

    But in this deliciously summery version, it’s the mango cream cold foam that takes chai over the edge. The bright, sunshiney flavor of real mango gets whipped into a dreamy topper that can be swirled into the latte or left floating on top for a burst of tropical yum. If you’re a fan of mango lassi and spiced black tea, I have a feeling this mango chai will be right up your alley.

    [feast_advanced_jump_to]

    What does it taste like?

    Think of your favorite iced chai latte—but brighter, fruitier, and a little more indulgent. The base is warm and spiced, with classic chai notes of cinnamon, clove, and black tea bringing a cozy depth. But it’s the mango foam that transforms this chai into something new.

    As you sip, the cool, frothy foam hits your tongue first. It’s silky, lightly sweet, and bursting with juicy, sun-ripened mango flavor, with just a hint of citrusy lift. As you sip, the fluffy foam melts into the chai, creating a dreamy balance of creamy spice with pops of tropical sweetness. It’s smooth and refreshing, almost like a cross between a spiced milk tea and a mango creamsicle.

    hand dipping a slice of fresh mango into the mango cold foam topper of an iced mango cream chai latte.

    Why You’ll Love This Seasonally Inspired Iced Chai Recipe

    • Quick & Easy - With just 4-5 ingredients (depending on your preferred milk) and 5 minutes of effort, you can whip up this Starbucks copycat at home. It’s even faster to make than ordering from the counter!
    • Budget-Friendly - Considering most specialty Starbucks drinks range from $5.95-7.25 apiece, this easy DIY is a gee dang steal! For the cost of just one in-store beverage, you can make enough chai concentrate and mango syrup to make at least a week’s worth of yum—and you don’t even have to tip when you’re done.
    • Sweet & Spicy - Tropical fruit and spice might sound like a strange pairing, but anyone who has ever had Tajin-seasoned pineapple or mango knows it’s a stellar combo. While chai spices are different, the concept remains the same. If you’re looking to shake up your drink routine, give this mango chai a try!

    Ingredients Needed

    • Heavy Cream & Whole Milk - A ⅔ - ⅓ blend of cream and milk offers the perfect consistency for fluffing up into cold foam. 
    • Mango Syrup - My homemade mango syrup is made with just 3 real ingredients (mangoes, sugar, and lemon juice), but you’re welcome to use store-bought if you prefer.
    • Chai Tea Concentrate - Making homemade chai concentrate is a snap and will save you some serious money, but store-bought works too!
    • 2% Milk - My preferred milk for lattes. If possible, reach for an ultra-filtered variety like Fairlife for an added boost of protein and an exceptionally creamy texture.
    • Ice - Start with filtered water for the cleanest taste.
    ingredients needed to make a copycat Starbucks iced mango cream chai tea latte recipe measured out on a white table.

    Substitutions

    • Heavy Cream & Whole Milk - If you have half & half instead of whole milk on hand, just flip the ratio—use half & half for the cream portion and cream for the milk portion to get the same ratio of fat. For a dairy-free option, use full-fat canned coconut milk or vegan whipping cream for the cream and full-fat oat milk or soy milk for the milk portion.
    • Mango Syrup - Any coffee syrup can be used to make cold foam, so have fun experimenting. For another fun, fruity option, consider using nectarine syrup or peach syrup.
    • 2% Milk - Swap in any percentage of dairy milk you prefer, or use your favorite plant-based (preferably barista blend) milk you like.
    hand grabbing a pint glass filled with iced mango chai with mango cream cold foam from a white table with fresh mango slices and a green houseplant.

    How To Make Starbucks Iced Mango Cream Chai Latte At Home

    Step 1: Make the Mango Cold Foam. Add heavy cream, mango syrup, and milk to a little jar or container. Give it a quick 10-20 second whirl with a milk frother until it's nice and foamy and thickened up. Set the creamy, dreamy topping aside for now.

    Step 2: Iced Chai Base. Start by filling a tall glass up with some ice cubes, then pour the chai concentrate over top.

    Step 3: Make It Creamy. Add in your milk of choice, whether that's dairy, oat, almond, or anything else you like. Give it a quick stir to combine everything together.

    Step 4: Top It All Off. The final step is to spoon the fluffy mango cold foam right on top. Sip and savor immediately!

    action shot of a milk frother making mango cream cold foam in a small rocks glass.
    action shot of chai concentrate being poured into a glass of ice.
    action shot of milk being poured into the glass with the chai concentrate.
    action shot of mango cream cold foam being poured onto the iced chai latte.

    Optional Variations & Dietary Adjustments

    • Protein-Boost - Make mango-flavored protein cold foam for an extra bit of staying power.
    • Sugar-Free - Use (or make) sugar-free chai concentrate and sugar-free mango syrup to make a diabetic-friendly version you can’t get in stores.
    • Dairy-Free/Vegan - Use your favorite plant-based (preferably “barista blend”) milk in the iced chai base. To make vegan cold foam, swap in full-fat coconut milk or vegan whipping cream with full-fat oat milk. Vegan iced mango cream chai coming right up!

    Serving Suggestions

    Considering this iced mango chai latte is pretty sweet, I like to pair it with high-fiber and/or high-protein snacks to keep my blood sugar in check. Protein mango chia pudding or protein coconut chia pudding, whole wheat Hawaiian banana bread, or flourless chocolate protein balls are all excellent options if you’re craving something sweet.

    For savory options, cottage cheese flatbread, one pot potato curry, or butternut squash protein soup are all fantastic, too. Basically, anything with a tropical flavor profile or an Indian-inspired flavor profile are solid choices. Have fun finding your favorite afternoon teatime snacks! 

    action shot of a silver spoon dolloping mango cream cold foam on top of an iced chai latte.

    Recipe Success Tips

    • Customize the Sweetness. Adjust the amount of mango syrup and chai concentrate to your personal taste preferences. Start with a couple tablespoons and add more if you want an extra sweet and spicy base or sweet and fruity foam topping.
    • Chill Out. Make sure to use plenty of ice in the glass to keep your iced chai base nice and cold. You can even freeze your serving glass for about 30 minutes in advance to keep it extra frosty to the last drop.
    • Prep Ahead. The mango cold foam ingredients can be mixed in advance and stored, covered, in the fridge for 2-3 days. That way you can quickly assemble your iced latte whenever the craving strikes by quickly fluffing it up with a milk frother.
    • Garnish it Up. To make your iced mango cream chai feel extra special, try garnishing it with a fresh mango slice, a sprinkle of cinnamon, and/or a sprinkle of crushed freeze-dried mango on top of the foam.

    FAQs

    Does Starbucks have an iced mango cream chai latte on the menu?

    They will starting April 7th, 2026! But there’s no need to wait—with my easy DIY you can preview the mango chai deliciousness before the crowds. 

    Is iced mango cream chai a seasonal drink?

    While it’s being released as part of the late spring 2026 menu, Starbucks has announced that both the mango cream chai and mango cream matcha will be available year-round. That said, my homemade versions are way cheaper to make than buying in stores, so give DIYing a shot!

    closeup shot of a DIY Starbucks iced mango cream chai latte in a clear pint glass.

    Homemade Iced Mango Cream Chai Nutrition

    This iced mango cream chai latte is definitely a treat—rich, refreshing, and a little indulgent. Each serving comes in at about 350 calories, with 14 grams of fat, mostly coming from the cream in the mango cold foam, which gives it an ultra-smooth, velvety texture. You can reduce the fat slightly by swapping in nonfat milk for the chai base.

    Carbohydrates sit at 53 grams, with 52 grams of sugar mostly thanks to the chai concentrate and homemade mango syrup. This is what gives the drink its signature sweetness and vibrant, fruity flavor. If you’re concerned about added sugars, consider using sugar-free syrup and concentrate, or reduce the amount you use.

    Protein is relatively low at 5 grams, though you can easily boost that by swapping in protein cold foam and mixing protein powder or collagen into the chai base. Sodium is minimal at just 61 mg, making it a lighter option in that regard.

    Overall, this mango chai leans more toward a dessert-like treat—perfect for an afternoon pick-me-up or a fun coffee shop drink you can make at home. So long as you balance out the rest of your day with high-fiber, high-protein foods and avoid added sugars, it should fit into most any diet. Enjoy every sweetly spiced sip!

    Total nutritional content per serving is:

    • Calories: 350 calories
    • Total Fat: 14 grams
    • Protein: 5 grams
    • Sodium: 61 mg
    • Carbohydrates: 53 grams
    • Sugar: 52 grams

    *This nutritional information is an estimate and calculated based on the ingredients used to create the recipe. The nutritional value of your ingredients may differ slightly. Furthermore, this food is not intended to prevent, diagnose, cure, or treat any disease.

    horizontally framed hero shot of a DIY iced mango cream chai tea latte on a white table with fresh mango slices and a green houseplant with yellow buds.

    Other Chai Recipes

    • Eggnog Chai Latte (Hot or Iced)
    • Homemade Chai Concentrate (From Tea Bags)
    • A side shot of a glass of apple cream chai latte on a coaster with apples.
      Iced Apple Crisp Non-Dairy Cream Chai (Starbucks Copycat)
    • Iced Chai Tea Latte (Starbucks Copycat)
    Print Recipe
    5 from 1 vote

    Iced Mango Cream Chai (Starbucks Copycat)

    My easy DIY Iced Mango Cream Chai Latte gives you all the Starbucks yum at a fraction of the price.
    Prep Time5 minutes mins
    Total Time5 minutes mins
    Course: Drinks
    Cuisine: American
    Keyword: Mango Cream Chai
    Servings: 1 drink
    Calories: 350kcal
    Author: Megan Byrd

    Equipment

    • 1 milk frother

    Ingredients

    Mango Cold Foam:

    • 2 tablespoon heavy cream
    • 1 ½ tablespoon mango syrup
    • 1 tablespoon whole milk

    Iced Mango Cream Chai:

    • ½ cup chai tea concentrate
    • ½ cup milk of choice (I used 2%)
    • ice

    Instructions

    • Make the mango cold foam: Add the heavy cream, mango syrup, and milk to a small jar or container. Froth for 10-20 seconds with a milk frother, until foamy and thickened. Set aside.
    • Make the iced chai: Pour ice into a tall glass, then top with the chai concentrate. Add the milk of choice, then stir.
    • Top with the mango cold foam, then drink up!

    Nutrition

    Serving: 1drink | Calories: 350kcal | Carbohydrates: 53g | Protein: 5g | Fat: 14g | Sodium: 61mg | Sugar: 52g
    Iced mango cream chai.

    xoxo Megan
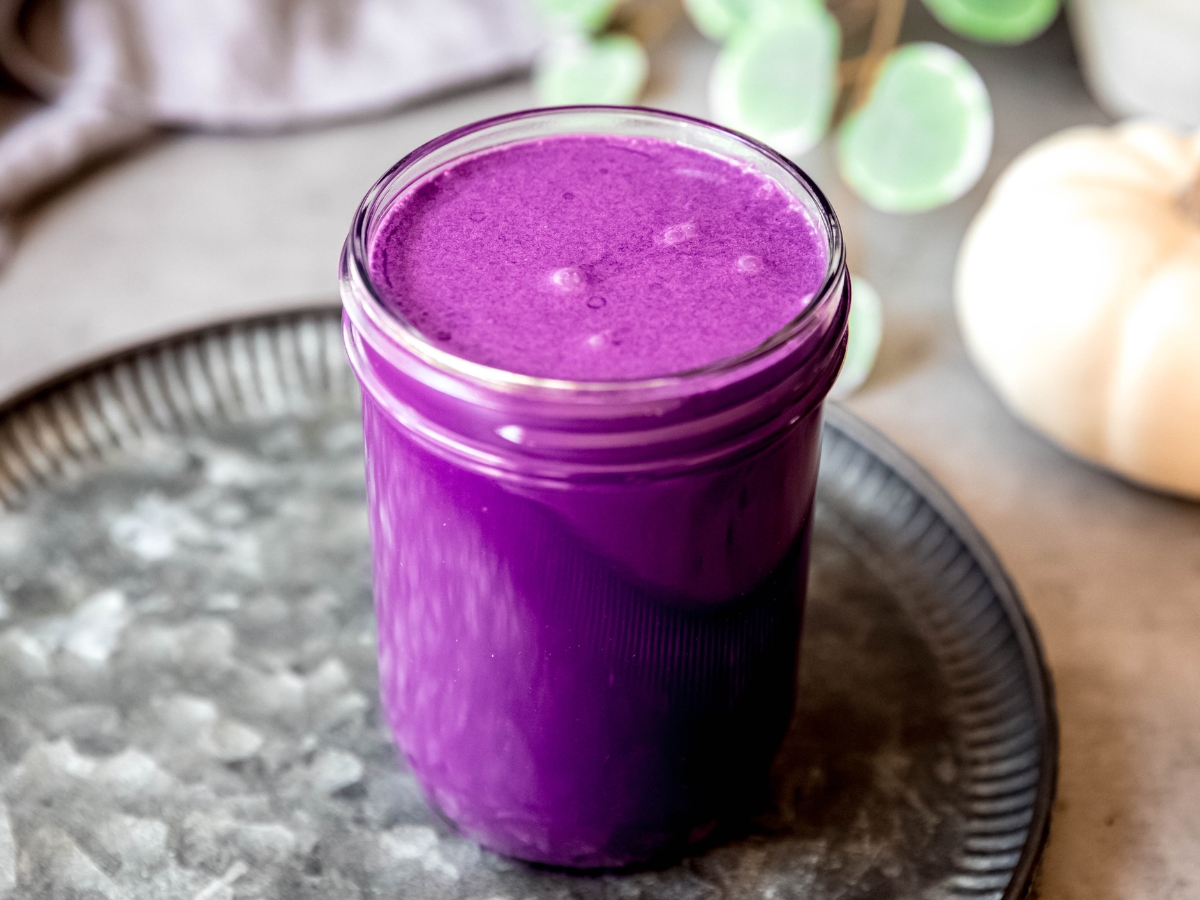
    Fresh Mango Syrup (Starbucks Copycat)

    March 27, 2026

    Add some tropical brightness to your drinks and desserts with my easy, 3-ingredient Mango Syrup recipe! This sunshiny elixir is made with just mangoes, sugar, and lemon juice, making it a better-for-you alternative to store-bought syrups.

    collins glass of homemade mango syrup on a white table in front of a window with green outdoors.

    I love making homemade coffee syrups—they’re easy to make, require only a few real ingredients, and are typically way cheaper than buying a bottle of Torani. This yummy mango simple syrup is my newest addition the lineup, and it’s right in time for warmer weather!

    Similar to my strawberry syrup, watermelon syrup and other fruit-flavored yums, this easy recipe relies on a process known as maceration. The idea is simple: toss fresh cut fruit with sugar, which then draws out all the juicy goodness. Not only do you not even have to turn on the stovetop, you also get to avoid weird ingredients like sodium benzoate or Rebaudioside A.

    Aside from cutting your fruit and stirring it up, the process is hands-off. You just need to let time do the work! Don’t worry—your patience will be handsomely rewarded. The end result is a spectacularly flavorful mango syrup with the perfect balance of sweet, tart, and tropical flavors that you can use in all kinds of recipes! 

    [feast_advanced_jump_to]

    What does it taste like?

    Imagine a spoonful of the juiciest, ripest mangoes you've ever tasted. That's exactly what this mango simple syrup delivers! When you macerate the fresh fruit with sugar and lemon juice, the natural sugars are drawn out, resulting in a thick, silky, concentrated elixir that's bursting with bold, tropical flavor.

    The lemon adds a lovely brightness that balances the sweetness of the mango perfectly. Every spoonful is a flavor explosion—ripe, juicy mango with just the right amount of tart citrus. It's the taste of summer in a bottle. Plus, the vibrant golden-orange hue is just as enticing as the flavor!

    45 degree overhead closeup shot of a collins glass of DIY Starbucks mango syrup on a white table with a halved mango.

    Why You’ll Love This Mango Simple Syrup Recipe

    • Just 3 Ingredients - No need to seek out any obscure ingredients you can only find on the internet for this one. Just fresh fruit and sugar!
    • Quick & Easy - Just slice, toss, and let time do the rest. Your active time in the kitchen is just 5-10 minutes, max.
    • All-Natural - Bottled syrups are convenient, but they’re also loaded with a bunch of artificial ingredients that sound like they belong on an AP Chem test. With this easy DIY, you can rest assured you’re getting nothing but fresh, fruity goodness.

    Ingredients Needed

    • Fresh, Ripe Mangoes - I’m a Kent kinda girl, but you’re welcome to use any variety you prefer. When ripe, they should give under a gentle squeeze from your thumb, much like an avocado.
    • Granulated Sugar - White sugar has no discernible flavor other than pure sweetness so pure mango flavor is what shines.
    • Fresh Lemon Juice - A touch of acidity helps to balance out the sweetness. Make sure it’s fresh though, since bottled lemon juice can taste bitter and flat. 
    mangoes, sugar, and lemon juice measured out for making homemade mango syrup for drinks.

    Substitutions

    • Fresh, Ripe Mangoes - If you don’t want to deal with slicing the mangoes yourself, you’re welcome to use defrosted frozen mango chunks.
    • Granulated Sugar - Pure cane sugar is a less-refined alternative that has minimal impact on flavor. You can also swap in a cup-for-cup sweetener like monkfruit if you prefer.
    • Fresh Lemon Juice - Fresh lime juice adds a slightly tropical twist that’s equally delightful.
    closeup shot of a silver spoon drizzling mango simple syrup into a mason jar showing how viscous it is.

    How To Make Mango Syrup

    Step 1: Prepare the Mangoes. Begin by peeling and slicing your ripe, juicy mangoes into ½-inch thick pieces. Place the mango slices in a large bowl, then toss them with granulated sugar and freshly squeezed lemon juice until the fruit is evenly coated and the sugar is fully moistened.

    Step 2: Macerate the Mixture. Allow the mango-sugar mixture to sit at room temperature for 2 full hours, tossing it halfway through to ensure even maceration. This process will draw out the natural sugars from the mangoes, creating a rich, concentrated syrup.

    Step 3: Strain. After 2 hours have passed, it's time to strain the syrup from the mango solids. Carefully pour the entire mixture through a fine-mesh strainer, letting the syrup drip down while reserving the strained liquid. Give the solids a gentle toss halfway through the straining process to extract as much flavorful syrup as possible.

    Step 4: Store. Once the straining is complete, discard or save the leftover mango solids for another use. Transfer the vibrant, golden mango syrup to an airtight container or bottle for storage. Keep it chilled in the refrigerator, where it will stay fresh for up to 7 days.

    mango slices, lemon juice, and sugar added to a bowl.
    macerated mango slices swimming in syrup after resting.
    macerated mango slices strained from the syrup using a mesh strainer.
    action shot of all-natural mango syrup being poured into a collins glass.

    Optional Variations & Dietary Adjustments

    • Sugar-Free Mango Syrup - For a diabetic-friendly version, substitute the granulated sugar with an equal amount of your preferred zero-calorie sweetener, such as erythritol, stevia, or monk fruit.
    • Mango-Lime Syrup: Add a bright, citrusy twist by including the zest and juice of 1-2 limes along with the lemon juice. The lime will add an extra layer of refreshing tartness to the syrup.
    • Spiced Mango Syrup: For a warming, aromatic variation, try adding a pinch of ground cinnamon, ginger, or cardamom to the mango-sugar mixture before macerating. 
    • Vanilla Mango Drink Syrup: Stir in a teaspoon of pure vanilla extract after straining the syrup. The vanilla notes will create a rich, creamy depth of flavor that pairs beautifully with the vibrant mango.
    • Mango-Chili Simple Syrup: For a sweet-and-spicy twist, finely mince a small fresh chili pepper and add it to the mango-sugar mixture. It’ll taste like Tajin mango!

    Serving Suggestions

    The possibilities for using homemade mango simple syrup are endless! Start your day by drizzling it over a bowl of warm oatmeal or layering it into a creamy yogurt parfait with fresh mango chunks. The syrup's bright, tropical flavor will add a delightful sweetness to your morning routine.

    Mango adds a fruity twist to all your favorite classic thirst-quenchers. For refreshing drinks, stir a few tablespoons into freshly squeezed lemonade or unsweetened iced tea. You can even blend the syrup into your favorite smoothie recipes, pairing it with yogurt, milk, and frozen mango for a nutrient-packed treat.

    When it comes to happy hour, mango cocktail syrup is a true MVP. Mix it into rum, tequila, or vodka-based beverages to make a flavor-packed mango margarita, daiquiri, or mule. Or keep things non-alcoholic by using the syrup to make a vibrant mango cold foam topping for iced coffees.

    The syrup can be used in the kitchen, too! I like to soak cake layers, adding moisture and intense mango essence to cakes and cupcakes. It also makes a delightful topping for pancakes, waffles, and even ice cream sundaes for a little tropical pizzazz.

    hand setting a collins glass of bright orange mango simple syrup down on a white table with a halved mango.

    Recipe Success Tips

    • Ripe Mangoes are Key - Choose mangoes that are soft, fragrant, and yield slightly when gently squeezed. 
    • Slice Evenly - Cutting the mangoes into uniform ½ -inch slices will help them macerate evenly and extract the maximum amount of flavorful juices.
    • Adjust Sugar to Taste - The amount of sugar you use can be adjusted based on the natural sweetness of your mangoes. Feel free to add more to taste if a sweeter syrup is desired.
    • Don't Discard the Solids - While the strained mango solids may not be as juicy, they can still be used in other recipes. Try blending them into smoothies, using them as a topping for yogurt, or folding them into baked goods.
    • Store it Properly - Keep the mango syrup stored in an airtight container in the refrigerator for up to 7 days. The cold temperature will help preserve the fresh flavor.
    • Adjust Consistency as Needed - If the syrup is too thick, thin it out with a bit of water. For a thicker consistency, let the strained syrup simmer gently to reduce it further.

    FAQs

    Does Starbucks have mango syrup?

    Starbucks mango syrup is a seasonal item that’s expected to drop on the first week of April 2026, so you can only get it for a limited time. That said, Starbucks version is made with green coffee flavor which adds caffeine and a stevia-derivative called Rebaudioside-A. Personally, I’d rather stick to the real stuff!

    Does Torani make mango syrup?

    They do. That said, Torani mango syrup is loaded with “natural flavors” (which are made in a lab) Sodium Benzoate, Potassium Sorbate, and artificial colors. Again, I’d rather stick to my all-natural DIY, but that’s just me!

    glass of homemade mango syrup for tea and drinks on a white table  with halved mango and a green houseplant in front of a window looking out on a green yard.

    Homemade Mango Syrup Nutrition

    This DIY mango syrup is a naturally vibrant, fruit-forward sweetener that’s all about simple ingredients and bold flavor. Each serving contains 103 calories and 26 grams of carbohydrates, all of which come from sugar—both naturally occurring from the mango and added sugar for syrupy sweetness.

    With 0 grams of fat, 0 grams of protein, and 0 mg of sodium, this syrup is a light and straightforward addition to drinks, desserts, and breakfast favorites. Because it’s made with fresh mango and lemon juice, you’ll also get a lovely natural fruit character that sets it apart from store-bought syrups. 

    Keep in mind that adjusting the amount of sugar or using alternative sweeteners can change the overall carbohydrate and calorie content, making it easy to customize to your dietary preferences and needs. Enjoy every vibrant splash!

    Total nutritional content per serving is:

    • Calories: 103 calories
    • Total Fat: 0 grams
    • Protein: 0 grams
    • Sodium: 0 mg
    • Carbohydrates: 26 grams
    • Sugar: 26 grams

    *This nutritional information is an estimate and calculated based on the ingredients used to create the recipe. The nutritional value of your ingredients may differ slightly. Furthermore, this food is not intended to prevent, diagnose, cure, or treat any disease.

    horizontally framed hero shot of fresh mango syrup on a white table with a halved mango and a green houseplant.

    Other Coffee Syrup Recipes

    • Carrot Cake Syrup (for Coffee!)
    • Zucchini Bread Coffee Syrup
    • Dairy-Free Pumpkin Spice Sauce
    • Sweet Pistachio Sauce (For Coffee!)
    Print Recipe
    5 from 1 vote

    Fresh Mango Syrup (Starbucks Copycat)

    My Fresh Mango Syrup is made with just 3 simple ingredients & is bursting with bright, tropical flavor.
    Prep Time10 minutes mins
    Rest Time2 hours hrs 30 minutes mins
    Total Time2 hours hrs 40 minutes mins
    Course: Drinks
    Cuisine: American
    Keyword: Mango Syrup
    Servings: 14 servings
    Calories: 103kcal
    Author: Megan Byrd
    Equipment

    • 1 large bowl
    • 1 fine mesh strainer
    • 1 syrup bottle

    Ingredients

    • 4 ½ lbs fresh, ripe mangoes peeled and sliced in ½ inch slices
    • 1 ½ cups sugar
    • 2 tablespoon fresh lemon juice (or fresh lime juice)

    Instructions

    • Peel and slice your mangoes in ½ inch slices and place in a large bowl.
    • Toss with sugar and lemon juice until well coated and the sugar is completely moistened.
    • Allow the mango mixture to sit at room temperature for 2 hours, tossing halfway through.
    • After 2 hours, strain the mango syrup from the mango solids using a fine mesh strainer. Allow the mixture to strain for about 30 minutes, tossing halfway through to get the most syrup. Reserve the syrup, discard or save the mangoes for another use.
    • Transfer the mango syrup to an airtight container or syrup bottle, and store in the fridge for up to 7 days.

    Notes

    This recipe makes about 1.75 cups of mango syrup.

    Nutrition

    Serving: 2tablespoon | Calories: 103kcal | Carbohydrates: 26g | Sugar: 26g
    Starbucks' mango syrup.

    xoxo Megan
    Iced Ube Coconut Macchiato (Starbucks Copycat)

    March 13, 2026

    Bring the taste of Starbucks’ newest menu item home with my copycat Iced Ube Coconut Macchiato recipe. This beautifully layered drink may look like a masterpiece, but DIYing it takes just 5 minutes and 6 ingredients, and it’s way cheaper than buying it in-store!

    copycat Starbucks iced ube coconut macchiato in a clear pint glass showing the layers of coconut-sweetened milk, espresso, and purple ube cold foam topped with toasted coconut flakes.

    Part of what drove me to start Coffee Copycat was that I was tired of paying café prices for all my favorite Starbucks drinks. Back then, they ran a little over $5 for most grande drinks, but now they’re creeping into the $6-7 range—way too rich for my blood! This iced ube coconut macchiato has all the bold flavor you’d find at your local store, but for just a fraction of the price.

    If you were a fan of my iced coconut ube latte, this will be right up your alley. It’s basically made with the same ingredients, but with more layers and textures to keep it interesting. And, if you’re unfamiliar with ube, you’re in for a treat. This bright purple Filipino yam tastes like a combination of vanilla, toasted nuts, and coconut, making it the perfect companion to coconut. 

    Love tropical-inspired coffee drinks? Check out my toasted coconut cream cold brew, coconut whipped coffee, and white chocolate macadamia cream cold brew next!

    [feast_advanced_jump_to]

    What does it taste like?

    This iced ube coconut macchiato is creamy, lightly sweet, and full of tropical dessert vibes. The base of milk and coconut syrup gives the drink a mellow coconut flavor, while the espresso adds a bold coffee kick that balances the sweetness. 

    When the espresso is poured over the milk, it creates classic macchiato layers—so your first sip is bright and coffee-forward, followed by the creamy sweetness underneath.The real star, though, is the ube coconut cold foam. Imagine a thick, velvety topping with a subtle nutty sweetness and a hint of vanilla-like flavor that ube is known for. 

    As the foam slowly melts into the drink, it adds an almost milkshake-like texture that makes each sip richer and more indulgent. The toasted coconut chips on top bring a final layer of flavor and texture. They add a light crunch and a warm, toasty coconut aroma that pairs beautifully with the earthy coffee and sweet coconut milk below. Delightful!

    hand grabbing a homemade iced ube coconut macchiato from a white table with a white earthenware pinch bowl of toasted coconut flakes.

    Why You’ll Love This Starbucks Copycat Recipe

    • Quick & Easy - All you need are 2 glasses, 5 ingredients, and 5 minutes to whip one up. You’ll be done in less time than it’d take to order!
    • Budget-Friendly - While there’s a bit more upfront cost to buying all the ingredients, the number of drinks you can make means each serving costs around $1 per serving. When you compare that to Starbucks prices (not even including tip!), you’re still coming out on top.
    • Summer-Ready - As the frost recedes and the days get longer, I find myself longing for a beach vacation. While we don’t have one planned for a few months, drinks like this iced ube coconut macchiato will help tide me over till we get there!

    Ingredients Needed

    • Heavy Cream - Fat is your friend when it comes to whipping up sweet cream cold foam, and heavy cream has the highest fat percentage of them all.
    • Coconut Syrup - You’re welcome to use store-bought, but my homemade version is a snap to make and will save you even more $$$.
    • Ube Extract - This is what gives our cold foam that gorgeous amethyst hue and its nutty-vanilla flavor. A little bit goes a long way, so one bottle will last you a long time.
    • 2% Milk - This is the preferred milk in my house, particularly ultra-filtered varieties that are lactose-free.
    • Espresso - Remember you don’t need a fancy espresso machine; you can make espresso in a French press if you need!
    • Toasted Coconut Chips - Optional, but lovely for a little crunch on top.
    ingredients needed to make a copycat version of Starbucks iced ube coconut macchiato recipe measured out on a white table.

    Substitutions

    • Heavy Cream & Coconut Syrup - Feel free to swap in my homemade coconut creamer instead. It’ll be a little less of a tight structure since it’s made with both cream and half & half, but it’ll still foam up nicely!
    • Espresso - Strongly brewed cold brew or strong conventional coffee that has been chilled can be used instead.
    • 2% Milk - You can also use any percentage of dairy milk or any plant-based milk (preferably a barista blend) that you prefer.
    • Toasted Coconut Chips - You’re welcome to omit these, or swap in the coffee toppers of your choice (e.g. pearl sugar, toffee bits, a sprinkle of cinnamon sugar, etc.).
    silver spoon taking a spoonful of ube cold foam with toasted coconut flakes from the top of the iced coconut ube macchiato glass.

    How To Make Starbucks Iced Ube Coconut Macchiato At Home

    Step 1: Make the Ube Coconut Cold Foam. Add the heavy cream, coconut syrup, and ube extract to a small glass or jar. Froth with a handheld milk frother for about 15-20 seconds until the mixture becomes thick, creamy, and fluffy. Set aside while you assemble the drink.

    Step 2: Sweeten Milk. Fill a tall glass with ice, then pour in the 2% milk and coconut syrup. Give it a quick stir so the syrup fully dissolves into the milk.

    Step 3: Layer. Slowly pour the espresso over the sweetened milk to create that classic layered macchiato look. Spoon the ube coconut cold foam over the top, then finish with a sprinkle of toasted coconut chips if desired. Enjoy right away!

    action shot of ube cold foam being frothed in a short rocks glass with a wand style milk frother.
    action shot of espresso being poured over the coconut-flavored sweetened milk layer.
    action shot of purple ube cold foam being poured on top of the iced coconut macchiato.

    Optional Variations & Dietary Adjustments

    • Make It Dairy-Free. To keep the tropical coconut vibe while avoiding dairy, swap the heavy cream for full-fat canned coconut cream and use your favorite plant-based milk—like oat, almond, or coconut milk—in place of the 2% milk. 
    • Lower the Sugar. If you prefer a less sweet drink, reduce the amount of coconut syrup in the milk base and/or foam, or use a sugar-free coconut syrup. 
    • Extra Coconut Flavor. If you’re a big coconut fan, add a splash of coconut milk along with the regular milk or increase the toasted coconut chips on top. 
    • Make It an Iced Latte Instead of a Macchiato. Prefer everything fully mixed? Simply pour the espresso into the milk and coconut syrup and stir before adding the cold foam. The flavor will be the same, but the drink will be more evenly blended rather than layered.
    • Add Vanilla. A drop or two of vanilla extract or a small splash of vanilla syrup can add a cozy bakery-like sweetness.

    Serving Suggestions

    This iced ube coconut macchiato is best enjoyed freshly made while the cold foam is thick and fluffy. Serve it in a tall glass so you can see the beautiful layers of milk, espresso, and purple-tinted foam on top. A clear glass makes it snap-worthy for Instagram and makes the drink feel a little extra special.

    Because of its creamy coconut flavor and lightly sweet profile, this drink pairs wonderfully with buttery pastries and breakfast-y treats. I love serving it alongside matcha muffins with coconut buttercream, Hawaiian banana bread, or coconut protein chia pudding to double down on the coconutty goodness!

    closeup 45 degree overhead shot of a homemade iced ube coconut macchiato showing the distinct layers of cold foam, espresso, and milk, all topped with toasted coconut.

    Recipe Success Tips

    • Use strong espresso or concentrated coffee. Since this drink is served over milk and ice, a bold shot of espresso helps the coffee flavor stand out. If you’re using a home espresso machine, pull a fresh shot right before assembling the drink so it has the best aroma and crema.
    • Froth the cold foam until it’s thick but pourable. You’re looking for a texture similar to melted ice cream—creamy and fluffy, but still able to gently cascade over the drink. If it’s too thin, froth for another few seconds; if it’s too thick, stir in a splash of milk to loosen it.
    • Pour the espresso slowly for the layered look. To create classic macchiato layering, pour the espresso slowly over the back of a spoon or gently down the inside of the glass. This helps the espresso float above the milk before the foam goes on top.
    • Start with a light hand on the ube extract. Ube extract can vary in strength depending on the brand. Begin with a small amount, taste the foam, and add a drop more if you want a stronger ube flavor or a deeper purple color.
    • Toast the coconut chips for extra flavor. If your coconut chips aren’t already toasted, quickly warm them in a dry skillet for 2-3 minutes until fragrant and lightly golden. This brings out their natural sweetness and adds a wonderful nutty aroma to the drink.
    • Stir before drinking if you want a balanced flavor. While the layered presentation looks beautiful, giving the drink a quick stir after admiring it blends the espresso, coconut milk, and foam together for the most evenly flavored sip.

    FAQs

    Is the iced ube coconut macchiato good?

    I sure think so! If you’re a fan of coffee and coconut, I have a feeling you’ll love it.

    What is the ube Starbucks drink?

    You’re probably thinking of the new Iced Ube Coconut Macchiato, a layered iced coffee beverage that combines espresso with coconut milk and an ube-flavored purple cold foam topper.

    side on view of an iced ube coconut macchiato in a clear pint glass showing the distinct layers of sweetened milk, espresso, and ube cold foam with toasted coconut flakes.

    DIY Iced Coconut Ube Macchiato Nutrition

    Each serving of this iced ube coconut macchiato contains about 352 calories, with 20 grams of fat, 38 grams of carbohydrates, and 7 grams of protein. Much of the fat comes from the heavy cream used in the cold foam, which is what gives the drink its rich, velvety texture. The milk also contributes a bit of protein and helps balance the bold flavor of the espresso.

    The 38 grams of carbohydrates—34 grams of which come from sugar—mainly come from the coconut syrup. If you’d like to lighten things up, feel free to use less syrup and/or swap in sugar free coconut syrup instead.

    With 104 milligrams of sodium, the drink remains relatively moderate. Overall, this iced ube coconut macchiato is best enjoyed as an occasional treat or afternoon pick-me-up. Making it at home also gives you flexibility—you can easily adjust the amount of coconut syrup or foam to customize the sweetness and richness to your taste. Enjoy every tropical sip! 🏖️🌴

    Total nutritional content per serving is:

    • Calories: 352 calories
    • Total Fat: 20 grams
    • Protein: 7 grams
    • Sodium: 104 grams
    • Carbohydrates: 38 grams
    • Sugar: 34 grams

    *This nutritional information is an estimate and calculated based on the ingredients used to create the recipe. The nutritional value of your ingredients may differ slightly. Furthermore, this food is not intended to prevent, diagnose, cure, or treat any disease.

    horizontally framed shot of a DIY iced ube coconut macchiato in a clear pint glass on a whtie table with a green houseplant and a white earthenware jug blurred out in the background and a pinch bowl of coconut flakes to the side.

    Other Starbucks Copycat Recipes

    • Protein Cold Foam (Starbucks Copycat)
    • Pecan Oat Milk Cortado (Starbucks Copycat)
    • Pumpkin Spice Sauce (For Coffee!)
    • Raspberry Cold Foam (Starbucks Copycat)
    Print Recipe
    5 from 2 votes

    Iced Ube Coconut Macchiato (Starbucks Copycat)

    Learn how to make a Starbucks-style iced ube coconut macchiato at home with espresso, coconut syrup, and dreamy ube coconut cold foam.
    Prep Time5 minutes mins
    Total Time5 minutes mins
    Course: Drinks
    Cuisine: American
    Keyword: Iced Ube Coconut Macchiato
    Servings: 1 drink
    Calories: 352kcal
    Author: Megan Byrd
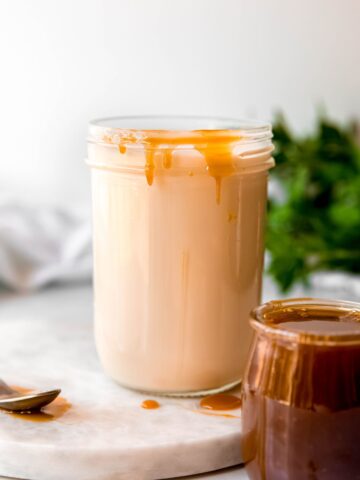
    Equipment

    • 1 milk frother

    Ingredients

    Coconut Ube Cold Foam:

    • 3 tablespoon heavy cream
    • 1 ½ tablespoon coconut syrup
    • ¼ teaspoon ube extract

    Iced Ube Coconut Macchiato:

    • ¾ cup milk of choice (I used 2%)
    • 1 ½ tablespoon coconut syrup
    • 2 oz espresso
    • ice
    • toasted coconut chips optional for garnish

    Instructions

    • Make the cold foam. Add the heavy cream, coconut syrup, and ube extract to a small glass or jar and froth until thick and foamy. Set aside.
    • Add ice to a tall glass, then pour in the milk and coconut syrup. Stir.
    • Pour the espresso over the sweetened milk slowly to create a layered look, then top with the cold foam. Garnish with toasted coconut chips if desired, then drink up!

    Nutrition

    Serving: 1drink | Calories: 352kcal | Carbohydrates: 38g | Protein: 7g | Fat: 20g | Sodium: 104mg | Sugar: 34g
    Ube coconut macchiato.

    xoxo Megan
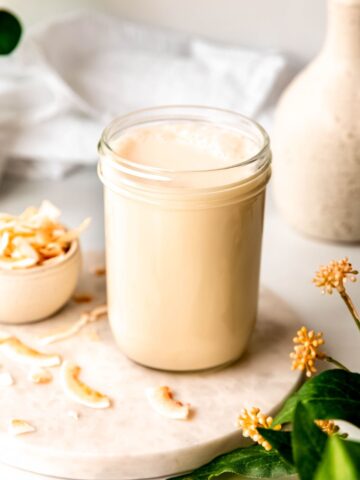
    Homemade Vanilla Coconut Creamer

    March 13, 2026

    Instantly transport yourself to the tropics with my deliciously simple Vanilla Coconut Creamer recipe. This yummy coffee add-in tastes like melted coconut ice cream, providing sweetness, fruity flavor, and creamy-dreamy texture all in one splash.

    pint sized mason jar filled with homemade coconut coffee creamer on a marble round on a white table with a pinch bowl of toasted coconut chips to the side and a houseplant with yellow blooms in the front.

    As a working mom with two littles, mornings can get hectic. I generally don’t have time to make myself a fancy Starbucks copycat drink until after the kiddos are at school, but coffee is a necessity. That’s where homemade coffee creamers like this delightful coconut creamer come into play!
    It’s so easy to make, requiring just 5 ingredients, 5 minutes, and a single saucepan. And one batch is enough to set me up for a week’s worth of (sadly temporary) beach vacation vibes! That means I can program my coffee maker to brew the night before, groggily stumble downstairs in the morning, and easily make myself a comforting cuppa before the kids get up.
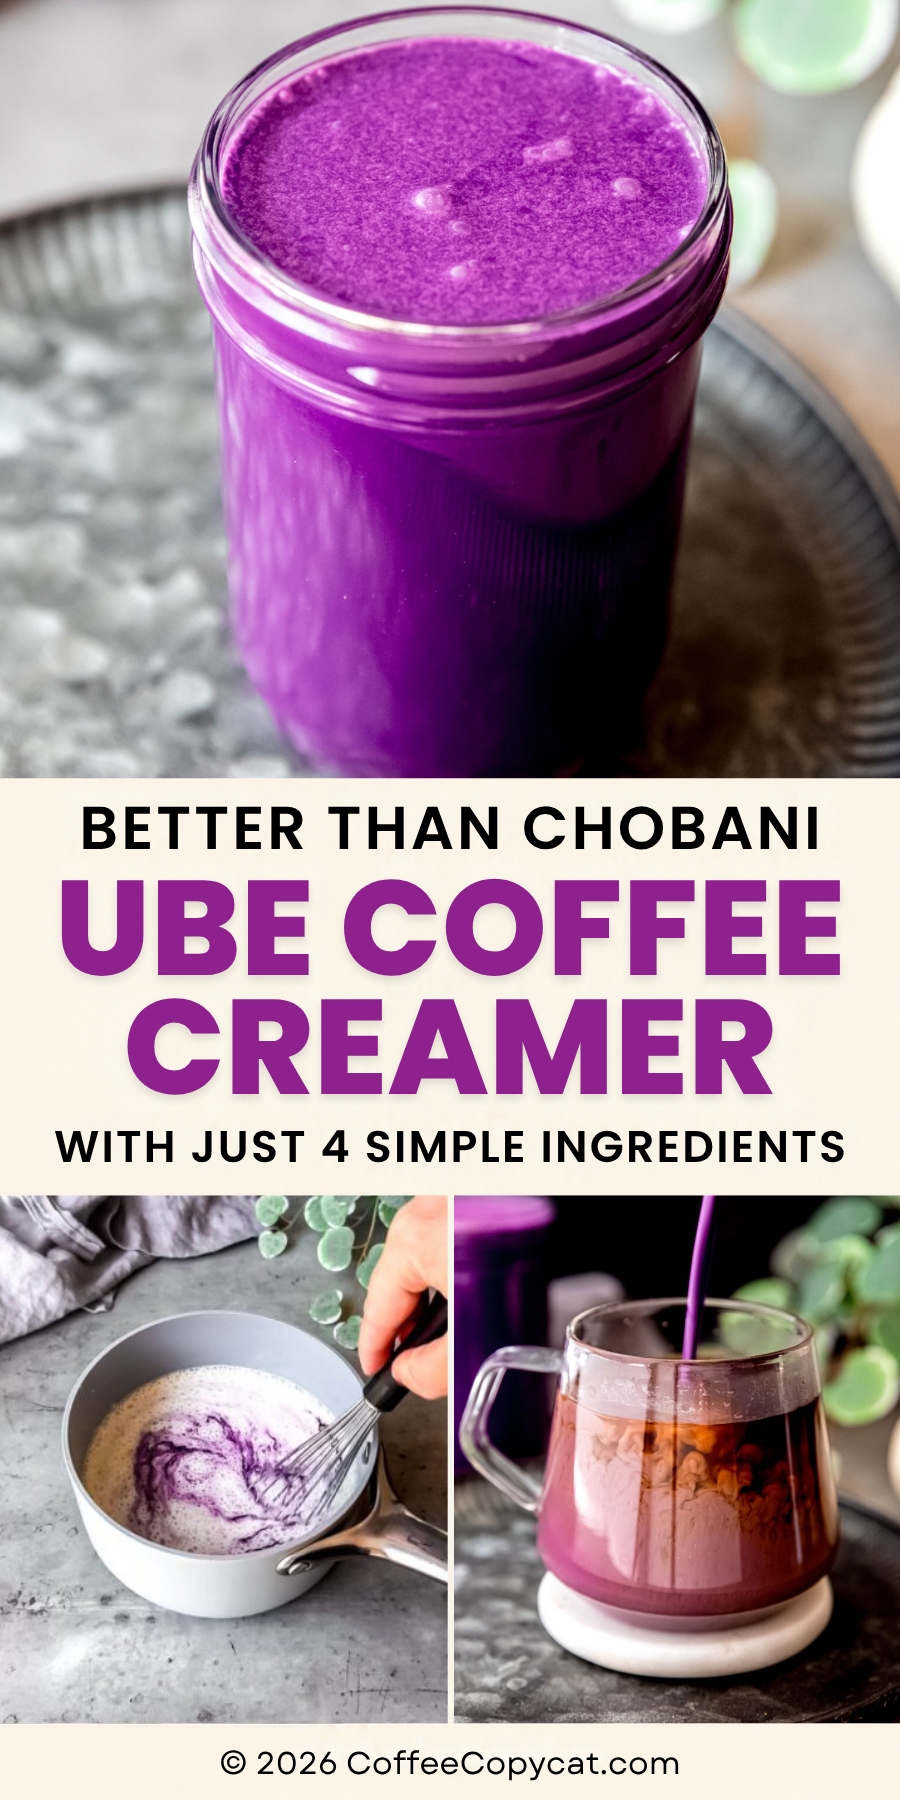
    If you love the idea of homemade creamers as much as we do, try making a few to keep in the fridge at once. Classic sweet cream coffee creamer is a perennial favorite, as are sugar cookie creamer and birthday cake creamer. They all play pretty well together, so have fun mixing and matching to your hearts’ content! 

    [feast_advanced_jump_to]

    What does it taste like?

    If you love coconut desserts or tropical drinks, this coconut coffee creamer makes your morning cup taste a little more indulgent—almost like a coconut cream pie in liquid form. The half & half and heavy cream create a luxuriously velvety texture that melts beautifully into hot or iced coffee, while the sugar adds just enough sweetness without making it cloying.

    The coconut extract brings an unmistakable coconut aroma and flavor, giving the creamer a subtle island-inspired vibe. It’s not overpowering or sunscreen-like—just a gentle, sweet coconut note that pairs perfectly with the warm, slightly bitter flavor of coffee. The vanilla extract ties everything together, adding a soft bakery-like sweetness. YUM!

    side on view of DIY coconut creamer in a pint sized mason jar on a table with a pinch bowl of toasted coconut chips (with some chips scattered around) and a green houseplant in the foreground blurred out.

    Why You’ll Love This Homemade Coffee Creamer Recipe

    • Quick & Easy - Measure out your ingredients, mix the liquids and sugar in a saucepan until the sugar dissolves, then add the extracts. That’s the whole recipe! You’ll be done in just 5 minutes.
    • One & Done - Lattes and toasted coconut cream cold brews are lovely, but you have to make them one at a time—not always easy when the schedule is busy. Homemade coconut creamer, on the other hand, will power you up with enough sweet, tropical flavor to last the entire week!
    • Better-For-You - Store-bought options like Coffee Mate Coconut Creamer are loaded with artificial stuff like stabilizers and flavors, and they don’t even have any real milk or cream in them! (Seriously, it’s mostly water, sugar, and soybean oil. 😳) My homemade version, though, is made with only real ingredients that you can easily find—not micellar casein or dipotassium phosphate, whatever they are.

    Ingredients Needed

    • Vanilla Extract - Again, real vanilla extract tastes much better than imitation vanillin, so make sure you’re getting the good stuff.
    • Half & Half - As the name implies, this popular coffee addition is made with half whole milk and half heavy cream, so we’re starting on a nice, rich foot.
    • Heavy Cream - Adding extra cream turns our half & half into more of a ⅔ & ⅓ situation, making it extra silky in your cup. (It also froths up into a quasi cold foam if you’re into that!)
    • Granulated Sugar - White sugar has no flavor other than pure sweetness, letting the coconut and vanilla shine. 
    • Coconut Extract - For the best results, make sure you’re getting real coconut extract (which comes from actual coconuts) rather than imitation coconut flavor.
    ingredients needed to make coconut coffee creamer recipe measured out on a white table.

    Substitutions

    • Half & Half - If you’d like a dairy-free version that’s extra coconutty, swap in light canned coconut milk.
    • Heavy Cream - Coconut cream is a great substitute and will double down on the coconut flavor. Make sure you’re reaching for canned coconut cream (or using the solids that float to the top of canned coconut milk) rather than pre-sweetened squeeze bottles of “cream of coconut” that you can find near the bar mixers.
    • Granulated Sugar - Pure cane sugar is a great alternative if you want something less processed. You can also use brown sugar for a bit of a caramelly undertone. 
    • Vanilla Extract - Vanilla paste works just as well, but note that your creamer will have little black flecks of vanilla bean if you use it.
    45 degree overhead shot of a jar of homemade vanilla coconut creamer on a white round of marble with toasted coconut chips scattered around and a few yellow blooms poking into the bottom right of the frame.

    How To Make Coconut Creamer For Coffee

    Step 1: Warm the Cream and Dissolve the Sugar. Add the half & half, heavy cream, and granulated sugar to a medium saucepan set over low heat. Whisk gently as the mixture warms, continuing until the sugar has completely dissolved and the liquid is smooth.

    Step 2: Stir in the Flavorings. Remove the saucepan from the heat and stir in the coconut extract and vanilla extract. Give everything a quick whisk so the flavors are evenly distributed.

    Step 3: Cool and Store. Let the creamer cool at room temperature for about 10 minutes, then transfer it to a mason jar or airtight bottle. Store in the refrigerator for up to 2 weeks and give it a quick shake before using.

    sugar, cream, and half & half added to a saucepan.
    sweetened cream mixture after dissolving the sugar and adding the coconut and vanilla extracts.
    action shot of cooled coconut coffee creamer being poured into a mason jar.

    Optional Variations & Dietary Adjustments

    • Non-Dairy Coconut Creamer - Coconut milk creamer is delicious, particularly when you’re making coconut-flavored creamer! Simply swap in the coconut milk and cream as described in the “substitutions” section. But you don’t have to make non-dairy coffee creamer with coconut milk—feel free to swap in full-fat oat milk for the half & half and vegan whipping cream instead.
    • Coconut and Almond Creamer - Replace ½ of the vanilla extract with almond extract for a yummy, chocolate-free Almond Joy vibe. (P.S. It pairs well with my mocha sauce, if you’re going for the full effect.)
    • Sugar Free Coconut Creamer - Swap in your favorite cup-for-cup sweetener like monk fruit or Splenda for a diabetic friendly alternative. 

    Serving Suggestions

    One of the easiest ways to enjoy this coconut creamer is simply stirred into your morning coffee. It adds a smooth, lightly sweet coconut-vanilla flavor that turns an everyday cup into something special. It’s especially delicious with iced coffee, cold brew, or even a bold dark roast where the creamy coconut notes can really shine.

    Because it contains both half & half and heavy cream, it froths beautifully into a silky cold foam. Just add a few tablespoons to a small jar or frothing pitcher and use a handheld frother for 10-15 seconds. Spoon the fluffy coconut foam over iced coffee, iced matcha lattes, or cold brew for a slightly fancier drink that feels straight out of a coffee shop.

    This creamer also works wonderfully outside of coffee. Try pouring a splash over a bowl of oatmeal or overnight oats for a hint of tropical sweetness. It pairs especially well with oats topped with banana, pineapple, toasted coconut, and/or macadamia nuts for a bit of texture. 

    You can also incorporate it into recipes anywhere you might use milk or cream. Stir it into chia pudding, blend it into smoothies, or use it as a creamy base for homemade lattes, matcha drinks, or hot cocoa. The gentle coconut and vanilla flavors make it a surprisingly versatile ingredient for adding richness and tropical warmth to both drinks and breakfast recipes!

    action shot of coconut creamer being poured into a clear mug of black coffee; the creamer is bubbling up from the bottom making pretty swirls in the black coffee.

    Recipe Success Tips

    • Use low heat when warming the creamer. The goal is simply to dissolve the sugar and gently warm the dairy—not to simmer or boil it. Keeping the heat low helps prevent the cream from scorching or developing a burnt flavor.
    • Whisk until the sugar fully dissolves. Take a moment to whisk thoroughly while the mixture warms so the sugar melts completely into the cream. This ensures your finished creamer is silky smooth with no gritty texture.
    • Start with a small amount of coconut extract. Coconut extract can be quite potent, so a little goes a long way. If you prefer a stronger coconut flavor, you can always add another drop or two after tasting once the creamer cools.
    • Let the creamer cool slightly before refrigerating. Allowing the mixture to rest for about 10 minutes at room temperature helps prevent condensation inside your storage jar.
    • Shake before each use. Because this homemade coconut creamer is made without stabilizers or emulsifiers, the ingredients may separate slightly as it sits in the fridge. A quick shake or stir brings it right back to its creamy consistency.
    • Taste and adjust the sweetness. If you prefer a sweeter coffee creamer, you can add an extra teaspoon or two of sugar while the mixture is still warm so it dissolves easily.

    FAQs

    Is coconut coffee creamer healthy?

    Coconut coffee creamer is a tasty way to add flavor and richness to your morning cup, but I wouldn’t consider it “healthy.” This homemade version is made with simple ingredients—cream, half & half, sugar, and natural extracts—so it avoids the additives and stabilizers often found in store-bought creamers. Because it contains a decent amount of fat and sugar, it’s best enjoyed in moderation. For a full look at calories, fat, and other nutrients, check out the detailed nutritional breakdown in the section below.

    What is the healthiest creamer to have in your coffee?

    The healthiest coffee creamer is usually the one with the fewest ingredients, minimal added sugar, and moderate fat. That’s why I love my easy DIY creamers—they’re made with real ingredients, and it’s easy to tweak the recipe to become sugar free if needed!

    What is the unhealthiest creamer?

    In general, the unhealthiest coffee creamers are highly processed non-dairy or flavored creamers loaded with sugar, hydrogenated oils, and artificial additives. Many popular grocery-store creamers fall into this category. 

    mason jar of homemade coconut coffee creamer on a white table with a white earthenware jug, a pinch bowl of toasted coconut flakes, and a green houseplant with yellow blooms.

    DIY Coconut Coffee Creamer Nutrition

    This homemade coconut creamer adds a touch of sweetness and richness to your coffee without relying on the stabilizers, gums, or artificial flavorings often found in store-bought creamers. Each ¼ cup (4 tablespoon) serving contains about 155 calories, along with 8 grams of fat, which comes primarily from the heavy cream and half & half. 

    The recipe also provides 20 grams of carbohydrates—all from sugar—which is what gives the creamer its lightly sweet, dessert-like flavor. While that sweetness is indulgent, you might get away with just using 1-2 tablespoons per cup of coffee, meaning the actual calories and sugar per serving of coffee will usually be much lower. You’re also welcome to use a cup-for-cup sugar replacement if you prefer a lighter mix.

    In terms of other nutrients, each serving contains 1 gram of protein and 23 milligrams of sodium, keeping it relatively low in sodium compared to many commercial creamers. Enjoying a small splash in your daily cup is a simple way to add coconut-vanilla flavor while keeping ingredients straightforward and recognizable. Enjoy every tropical splash!

    Total nutritional content per serving is:

    • Calories: 155 calories
    • Total Fat: 8 grams
    • Protein: 1 gram
    • Sodium: 23 mg
    • Carbohydrates: 20 grams
    • Sugar: 20 grams

    *This nutritional information is an estimate and calculated based on the ingredients used to create the recipe. The nutritional value of your ingredients may differ slightly. Furthermore, this food is not intended to prevent, diagnose, cure, or treat any disease.

    horizontally framed shot of a mason jar of coconut creamer on a table with a pinch bowl of toasted coconut flakes to the left, a green houseplant and white earthenware jug blurred in the background, and a yellow and green houseplant in the foreground.

    Other Homemade Creamer Recipes

    • Homemade Lavender Creamer
    • Sweet Cream Coffee Creamer
    • Homemade French Vanilla Creamer
    • Homemade Peppermint Mocha Creamer
    Print Recipe
    5 from 2 votes

    Homemade Vanilla Coconut Creamer

    This homemade coconut coffee creamer is rich, creamy, and lightly sweet with coconut and vanilla—perfect for coffee, cold brew, or lattes.
    Prep Time2 minutes mins
    Cook Time3 minutes mins
    Total Time5 minutes mins
    Course: Drinks
    Cuisine: American
    Keyword: Coconut Creamer
    Servings: 11 servings
    Calories: 155kcal
    Author: Megan Byrd

    Equipment

    • 1 medium saucepan
    • 1 mason jar

    Ingredients

    • 1 ½ cups half & half (or light coconut milk)
    • 1 cup granulated sugar
    • ½ cup heavy cream (or coconut cream)
    • 1 tablespoon coconut extract
    • 1 teaspoon vanilla extract

    Instructions

    • Add the half & half, sugar, and heavy cream to a medium saucepan and heat over low heat, whisking together the sugar is dissolved.
    • Remove from heat and stir in the coconut extract and vanilla extract. Allow to cool at room temperature for 10 minutes, then transfer to a mason jar or other bottle and store in the fridge for up to 2 weeks.

    Notes

    This makes about 2.75 cups of coconut creamer!

    Nutrition

    Serving: 0.25cups | Calories: 155kcal | Carbohydrates: 20g | Protein: 1g | Fat: 8g | Sodium: 23mg | Sugar: 20g
    Coconut coffee creamer.

    xoxo Megan

    Iced Lavender Cream Chai (Starbucks Copycat)

    February 26, 2026

    Featuring a gorgeous lavender-tinted cold foam and a creamy, spiced iced chai base, this Iced Lavender Cream Chai is almost too pretty to drink. Almost. The balance of warm chai spices and delicate floral notes, layered with silky foam, makes it just as delicious as it is stunning.

    A side shot of a glass of Iced Lavender Cream Chai on the counter with fresh and dried lavender.

    The Starbucks spring 2026 menu release is quickly approaching, and I am here for it! Like almost all the seasonal releases, I've been TikTok barista-stalking and recipe-testing for weeks. I'm confident in saying this Iced Lavender Cream Chai recipe is on point.

    If you’ve never had lavender in tea or coffee, you’re in for a treat. Its lightly floral flavor perfectly complements spicy, robust chai and deep, bold coffee. This iced chai is no exception: lightly sweetened lavender syrup whips with heavy cream and tops creamy, spiced chai, creating a dimensional, refreshing drink that I’m just as excited to admire as to sip.

    The icing (or should I say cold foam?) on this proverbial cake is its easy, affordable prep. With common, budget-friendly ingredients (and no need to sit in the drive-thru line), it's doable any day. Let's get sipping!

    For more lip-smacking iced tea recipes, check out my Iced Chai Tea Latte, Iced Banana Bread Matcha, and Iced Dubai Chocolate Matcha.

    [feast_advanced_jump_to]

    What Is Iced Lavender Cream Chai?

    An iced lavender cream chai is a floral twist on a classic iced chai latte. It starts with a base of spiced chai tea and milk poured over ice, then is topped with a lightly sweetened (and optionally purple-tinted) lavender cold foam for a creamy, aromatic finish.

    If you’ve ever ordered an iced chai with cold foam, this recipe follows the same idea — but adds a subtle lavender note that makes the drink feel seasonal and special. Like other cold foam drinks, the foam slowly melts into the chai, creating layers of flavor in every sip.

    What Does it Taste Like?

    Iced lavender cream chai tastes like a classic iced chai latte topped with a sweet, creamy lavender cold foam. The drink is smooth, lightly sweet, and beautifully balanced. The chai brings warm notes of cinnamon, cardamom, and clove, while the lavender adds a soft floral brightness that doesn't feel overpowering.

    The cold foam gives it a silky, almost dessert-like finish, while the bold iced chai base keeps it refreshing and crisp. This iced chai with lavender cream cold foam is cozy and uplifting all at once — creamy, spiced, springy, and just the right amount of special.

    Love lavender? Then, you'll also drink up my Lavender Latte, Lavender Cremé Frappuccino, Lavender Creamer, and Iced Lavender Oat Milk Latte recipes.

    Scopping the Iced Lavender Cream Chai off a tall glass of it.

    Why You'll Love Iced Lavender Cream Chai

    This chai is a showstopper — and so much more. Here are a few reasons you’ll adore it:

    • Surprisingly Simple — If homemade syrup sounds intimidating, I promise it’s not. It comes together quickly, and the whole drink takes just three easy steps to assemble.
    • Spring Forward — Lavender just feels like spring in a glass. It’s light, floral, and a fun way to shake up your usual routine. If you haven’t tried adding it to your drinks yet, consider this your sign.
    • Moderate Caffeine — While I’m firmly in camp caffeine, this drink is perfect for when you want a gentle energy boost without the full coffee buzz.
    • Easy on the Wallet — Those coffee shop runs add up quickly. Make this copycat version at home for a fraction of the cost — and enjoy a drink that tastes just as good (if not better).

    Ingredients

    Heavy Cream — Also known as whipping cream, this forms the base of the cold foam topping, making it rich yet light and silky. For the best whip, use extra-cold cream. You will need 2 tablespoons.

    Whole Milk — Just a tablespoon whips with the heavy cream to lightly cut the richness, make the cold foam pourable, and help it melt into the tea. Grab this fresh from the fridge, too — the colder, the better.

    Purple Food Coloring (Optional) — A drop or two gives the cold foam a gorgeous purple lavender hue, taking presentation to the next level.

    Lavender Syrup — This easy-to-make syrup adds signature lavender notes and a touch of sweetness.

    Chai Concentrate — The bold, spiced base of the drink. Make my homemade version for the best flavor or use your favorite store-bought concentrate for convenience.

    Milk — Choose your milk of choice — such as dairy, oat milk, almond, or soy — to mix with the concentrate and create a creamy, balanced chai.

    All the ingredients to make Iced Lavender Cream chai on the counter.

    Substitutions

    Don’t have everything listed above? No worries! These simple swaps will still help you whip up a delicious lavender chai.

    Cream and Milk — Substitute 3 tablespoons of half-and-half for the heavy cream and whole milk for an easier, one-ingredient option. For a dairy-free alternative, use coconut cream or a non-dairy whipping cream in place of the heavy cream, and swap in coconut milk or full-fat oat milk for the whole milk.

    Lavender Syrup — Store-bought syrup is a convenient substitute for homemade. For the best flavor, choose a high-quality brand such as Monin or Portland Syrups.

    Chai Concentrate — Don’t want to fuss with making a full pitcher of concentrate? Make just enough for one serving: pour ½ cup of boiling water over 2 chai tea bags, steep for 8–10 minutes, chill in the fridge for 5–10 minutes, then assemble your drink!

    Food Coloring — For an artificial color–free alternative, use a drop of ube extract instead. The drink will take on a lightly nutty ube flavor, which complements the lavender beautifully.

    A side shot of a hand grabbing a tall glass of Iced Lavender Cream Chai.

    How to Make Iced Lavender Cream Chai

    It’s easy to embrace your inner barista! Make this purple-hued beverage in just a few, anyone-can-do-it steps:

    Step 1: Make the lavender cold foam. Add the heavy cream, milk, lavender syrup, and food coloring (if using) to a small jar or container. Froth for 10-20 seconds with a milk frother until foamy and thickened. Set aside.

    Step 2: Make the iced chai. Pour ice into a tall glass, then top with the chai concentrate. Add your milk of choice, then stir.

    Step 3: Assemble and enjoy. Top the chai with the lavender cold foam, then drink up!

    Whipping the lavender cold foam in a small glass with a milk frother.
    Pouring milk into a glass of chai concentrate.
    Topping the iced chai with the lavender cream cold foam.

    Optional Variations & Dietary Adjustments

    • Add Fruit — Stir in 1–2 tablespoons of your favorite fruit simple syrup — such as strawberry, cherry, blackberry, or blueberry — for a delicious jammy twist.
    • Coconut Chai — Coconut and lavender make a beautiful pairing. Mix the chai concentrate with refrigerated coconut milk, and prepare the lavender cold foam with coconut cream and coconut milk for a lightly tropical take.
    • Ube Lavender Chai — Tint the cold foam with a drop or two of ube extract, and add another drop to the chai if desired. Ube and lavender are surprisingly delicious together!
    • Make it Dirty — For an extra caffeine boost and rich coffee undertones, add a shot of freshly pulled espresso to the chai.
    • Spiked — Turn this latte into a happy-hour treat by stirring in 1 ½ ounces of vanilla vodka or elderflower liqueur. Cheers!
    • Power Up the Protein — Increase the staying power and chip away at your daily protein goals by making the chai with ultra-filtered milk, or shaking the milk with ½ scoop of vanilla protein powder before assembling.
    • Dairy-Free — Use your favorite non-dairy milk for the chai base, and swap in non-dairy whipping cream or coconut cream for the heavy cream. Coconut milk makes the best substitute for whole milk in the cold foam, though full-fat oat milk works in a pinch.
    • Reduced-Sugar — Cut back on added sugar by preparing the lavender syrup with monk fruit or stevia sweetener instead.

    Serving Suggestions

    Need some inspiration for getting your tea-on? Consider one of the following suggestions for optimal enjoyment:

    • Morning Moment — Who says warm drinks are only for early mornings? This lightly caffeinated, ultra-refreshing, and flavorful drink is a guaranteed great way to start the day.
    • On-the-Go Sipping — Whether you’re running errands, taking the kids to sports practice, or commuting, this iced cream chai is perfect for enjoying in your favorite insulated travel mug. Singing along to your favorite songs is encouraged!
    • Book Club Beverage — Switch up the usual routine by serving a large pitcher of chai tea base at a drink station with ice and lavender cream cold foam. Let guests assemble their own drinks for fun and easy entertaining.
    • Spring Brunch Sipper — Enjoy it alongside Strawberry Rhubarb Protein Muffins, quiche, Millionaire Bacon, Protein Pancakes, or fruit salad for rave reviews.
    A close-up angled shot of a glass of Iced Lavender Cream Chai.

    Recipe Success Tips

    • Use cold ingredients. Not only does cold cream and milk whip into better foam, but using chilled chai concentrate and milk also prevents the ice from melting too quickly — keeping the drink rich, spicy, and flavorful.
    • Make to serve. While you can prepare the syrup and combine the chai and milk in advance (store them separately in the refrigerator), the lavender cream cold foam is best made fresh just before serving.
    • Don't over-froth. Whip the cold foam until it is light and foamy but still pourable. Overwhipping it will make it stiff and heavy—not ideal for topping a drink.
    • Watch the lavender. It is lovely but powerful. Add only the directed amount, then adjust to taste if you prefer a stronger floral note.
    • Layer for a pretty presentation. Gently spoon the lavender cold foam over the iced chai without stirring for that true coffeehouse look. For even more dimension, skip stirring the milk and chai together before topping.
    • Make the syrup ahead of time. For quick, easy prep, make the lavender syrup ahead of time. It keeps well covered in the fridge for up to 2 weeks.

    Iced Lavender Cream Chai FAQs

    Can I make lavender cream chai in advance?

    Partially! You can prepare the lavender syrup and chai base ahead of time and store them separately in the refrigerator. The syrup will keep for up to 2 weeks, and the chai base for about 2 days. For the best texture and presentation, whip the cold foam just before assembling and serving.

    Is iced lavender chai very sweet?

    Because the only sweetener comes from the lavender cream cold foam topping, this drink is moderately sweet. Start with the amounts as directed, then add more classic or vanilla simple syrup to taste — this helps adjust sweetness without overpowering the lavender flavor.

    Do lavender and chai go together?

    Yes, lavender and chai pair beautifully. The warm, sweet spices in the tea balance the floral notes of lavender, creating a layered and delicious combination.

    Why is my cold foam not thickening?

    Your milk and cream likely aren’t cold enough. For thick, light foam, use heavy cream and whole milk straight from the fridge — the colder, the better.

    How much caffeine is in iced lavender cream chai?

    It depends on the strength of your chai concentrate, but most brands and methods yield about 40-60mg of caffeine per ½ cup.

    A close-up side shot of a glass of Iced Lavender Cream Chai.

    Nutritional Info

    With each serving delivering 301 calories, 13 grams of fat, 5 grams of protein, 40 grams of carbohydrates, 40 grams of sugar, and 61 mg of sodium, this lavender cream iced chai falls more into the treat-drink category than an everyday sipper.

    While it’s not as indulgent as many Starbucks specials, it is higher in sugar and carbs than plain iced or hot chai. That said, it’s one I feel good about enjoying occasionally (hello, #balance) — and it’s easy to modify for everyday sipping or to suit specific dietary needs.

    To lower the sugar, make the lavender syrup with monk fruit or stevia. For a lighter option, mix the chai with almond milk or skim milk. You can also prepare the cold foam with coconut cream and coconut milk for a dairy-free alternative. For more staying power and protein, use ultra-filtered milk or whisk a few tablespoons of vanilla protein powder or collagen into the milk before assembling.

    Total nutritional content per serving is:

    • Calories: 301 calories
    • Total Fat: 13 grams
    • Protein: 5 grams
    • Sodium: 61 mg
    • Carbohydrates: 40 grams
    • Sugar: 40 grams

    *This nutritional information is an estimate and calculated based on the ingredients used to create the recipe. The nutritional value of your ingredients may differ slightly. Furthermore, this food is not intended to prevent, diagnose, cure, or treat any disease.

    A horizontal shot of a glass of Iced Lavender Cream Chai on the counter with dried lavender.

    Other Chai Recipes

    • A gingerbread chai latte with a gingebread cookie in the cold foam.
      Iced Gingerbread Oat Milk Chai Tea Latte (Starbucks Copycat)
    • wooden try with a glass of iced pumpkin cream chai latte with whole star anise and a mini white pumpkin.
      Iced Pumpkin Cream Chai Tea Latte (Starbucks Copycat)
    • overhead shot of a mug of hot dirty chai garnished with chai spice and a star anise pod.
      Dirty Chai Latte (Hot or Iced!)
    Print Recipe
    5 from 3 votes

    Iced Lavender Cream Chai (Starbucks Copycat)

    Skip the coffee shop line and make this Iced Lavender Cream Chai at home. Creamy, spice-forward chai meets a dreamy lavender cold foam for a drink that’s just as beautiful as it is delicious — and surprisingly simple to whip up.
    Prep Time5 minutes mins
    Total Time5 minutes mins
    Course: Drinks
    Cuisine: American
    Keyword: Lavender Cream Chai
    Servings: 1 drink
    Calories: 301kcal
    Author: Megan Byrd

    Equipment

    • 1 milk frother

    Ingredients

    Lavender Cold Foam:

    • 2 tablespoon heavy cream
    • 1 tablespoon whole milk
    • 1 tablespoon lavender syrup
    • 1-2 drops purple food coloring (optional for purple color)

    Iced Lavender Cream Chai:

    • ½ cup chai tea concentrate
    • ½ cup milk of choice (I used 2%)
    • ice

    Instructions

    • Make the lavender cold foam: Add the heavy cream, milk, lavender syrup, and food coloring (if using) to a small jar or container. Froth for 10-20 seconds with a milk frother, until foamy and thickened. Set aside.
    • Make the iced chai: Pour ice into a tall glass, then top with the chai concentrate. Add the milk of choice, then stir.
    • Top with the lavender cold foam, then drink up!

    Nutrition

    Serving: 1drink | Calories: 301kcal | Carbohydrates: 40g | Protein: 5g | Fat: 13g | Sodium: 61mg | Sugar: 40g
    Iced lavender cream chai.

    xoxo Megan

    Toasted Coconut Cream Cold Brew (Starbucks Copycat)

    February 24, 2026

    Skip the rush for the Starbucks spring menu release and make my Toasted Coconut Cream Cold Brew instead — dare I say it, it’s worlds better. Nutty-sweet coconut syrup flavors bold, deep cold brew and light, creamy cold foam, creating a refreshing, caffeinated drink you’ll want to sip all spring and summer long. Your home barista era starts now.

    An up-close angled shot of a tall glass of coconut cream cold brew topped with toasted coconut.

    Cold brew is a staple of my weekly routine — not only does it wake me up, but it helps me power through the post-lunch slump. It fuels photo shoots, recipe development sessions, TikTok filming, and social media posting. Given how much I drink it, I’m always excited to try new variations. This week’s take: a coconut cream cold brew you can easily make at home.

    Inspired by Starbucks’ soon-to-launch spring menu, I couldn’t wait to play around with nutty, tropical coconut and recreate my own copycat version. Though it’s been overcast and rainy here in Oregon, a little taste of sunshine is more than welcome.

    I’m happy to report that the flavors don’t disappoint. Creamy, luxurious cold foam whipped with coconut syrup pairs beautifully with bold, deep cold brew. My recommendation? Make a full batch of cold brew and syrup so you can sip these all week long. If you’re like me, one glass won’t be enough!

    For more dreamy coconut-infused drinks, check out my Coconut Whipped Coffee and Iced Coconut Ube Latte.

    [feast_advanced_jump_to]

    What is Coconut Cream Cold Brew?

    Also known as coconut cold brew, coconut cream cold brew is a cold brew drink made by flavoring cold brew coffee with coconut syrup, pouring it over ice, and topping it with coconut cold foam. Starbucks has announced that it’s launching a coconut cold brew in spring 2026. This recipe is my easy and delicious at-home interpretation, making it a doable and budget-friendly drink you can enjoy any time of day — no need to hit the drive-through or spend a small fortune.

    What Does It Taste Like?

    Coconut cream cold brew tastes like classic cold brew took a tropical vacation. The rich, chocolatey, malty coffee pairs beautifully with sweet, creamy, nutty coconut cold foam. Lightly sweet and well-balanced, the coconut syrup softens the coffee’s natural bitterness without overpowering it. The contrast between the icy cold brew and the pillowy foam makes each sip refreshing yet indulgent.

    Together, the flavors deepen and complement one another, adding complexity that takes this from basic caffeination to a true treat for the taste buds. The silky foam laces the smooth, bold cold brew, coating your tongue and turning every sip into a little feast for the senses.

    Loving creative twists on cold brew lately? You'll also love my Salted Pecan Crunch Cold Brew, White Chocolate Macadamia CreamCold Brew, Pistachio Cream Cold Brew, and Irish Cream Cold Brew.

    Taking a spoonful of the rich and velvety coconut cold foam from the top of the glass.

    Why You'll Love Coconut Cream Cold Brew

    Oh, the reasons I swoon for this nutty, creamy cold coffee run deep and wide. Here are a few of its biggest selling points:

    • Beautifully Buzzy — Cold brew is my favorite pick for early morning starts and afternoon pick-me-ups, and this recipe is no exception.
    • Seriously Simple — So easy you can make it bleary-eyed. If you can measure, froth, and pour, this recipe is for you.
    • Budget-Friendly — Save yourself the $7 (or more) per coffee at the coffee shop by embracing your inner barista. Each serving of this recipe costs about $2 per glass, depending on the specific brands used — a major savings!
    • Always Adaptable — Don’t need the caffeine boost? Use decaf cold brew. For a dairy-free drink, swap in non-dairy alternatives. Double the recipe for extra-sleepy mornings, or experiment with any of my favorite variations shared below.

    Ingredients

    You only need a handful of easy-to-find ingredients to make this delightfully refreshing and buzzy drink. Here’s what you’ll want to grab:

    Heavy Cream — The base of this coconut cold foam recipe, heavy whipping cream gives the coffee topper a rich, luxurious consistency while helping it whip up light and fluffy. Use cold cream straight from the fridge for the best results. You will need 2 tablespoons.

    Whole Milk — Just one tablespoon cuts the cream’s heaviness, making it lighter and more pourable. Cold milk works best.

    Coconut Syrup — Added to both the cold brew and the cold foam, this gives the coconut cold brew its signature sweet, nutty, tropical flavor. It's easy to make homemade with my easy, reader-favorite recipe.

    Cold Brew Coffee — Essential to any cold brew recipe, this coffee is brewed slowly in cold water, which increases its depth of flavor and caffeine content, making it a great pairing with nutty coconut. Make homemade cold brew coffee using one of my four easy methods or use store-bought (I recommend STōK, Califia Farms, and Bizzy Cold Brew).

    Toasted Coconut Chips (Optional) — Add a textural, crunchy contrast and a fresh, nutty finish. Buy toasted coconut chips or make them from scratch.

    All the ingredients needed to make coconut cold brew on the counter.

    Substitutions

    Cream and Milk — Swap in half-and-half for the cream and milk for an easy one-ingredient substitute. For dairy-free coconut foam with more pronounced coconut notes, use coconut milk instead of whole milk and coconut cream in place of the heavy cream.

    Coconut Syrup — Use store-bought syrup for ultimate convenience.

    Cold Brew — Didn’t plan ahead or don’t have pre-made cold brew? Swap in an iced Americano by combining 2 shots of espresso with 6 ounces of water and the coconut syrup before pouring over ice.

    A hand grabbing a tall glass of coconut cream cold brew from the counter.

    How to Make Coconut Cream Cold Brew

    Ready in a few simple steps with just a coffee frother, this drink is an anytime delight! Here's how to make it:

    Step 1: Make the coconut cold foam. Add the heavy cream, coconut syrup, and whole milk to a small glass or mason jar. Froth with a milk frother for 20-30 seconds or until foamy. Set aside.

    Step 2: Assemble cold brew. Add ice to a tall glass. Stir the coconut syrup into the cold brew, then pour it over ice.

    Step 3: Top with cold foam. Top the cold brew with the coconut cream cold foam and garnish with toasted coconut chips if desired. Drink up!

    Whipping up the coconut cream cold foam in a small glass.
    Pouring the coconut cold brew into a tall glass with ice.
    A tall glass of my coconut cream cold brew recipe sitting on the counter before enjoying.

    Optional Variations & Dietary Adjustments

    • Reduced-Sugar — Make the coconut syrup with monk fruit or stevia sweetener for a lower-sugar variation that’s just as tasty.
    • Dairy-Free — Use cold coconut milk instead of whole milk and coconut cream in place of the heavy cream for extra creamy, nutty notes — no dairy required!
    • Shot in the Dark — Add 1 shot of freshly pulled espresso to the cold brew before adding the coconut syrup for late shifts, short nights, and extra-busy days when you need a little something extra to power through.
    • Spiked — Substitute coconut rum for the syrup in the coffee, then top with coconut cold foam for a refreshing spring sipper, perfect for weekend brunches and happy hours al fresco.
    • Decaf — Who says cold brew is only for the morning or afternoon? Enjoy your favorite flavors as you wind down in the evening by using decaf cold brew.
    • Chocolate Coconut Cold Brew — Follow my recipe for Chocolate Cream Cold Brew, sweetening the cold brew with coconut syrup instead of vanilla and topping it with chocolate cream cold foam. A true treat!

    Serving Suggestions

    Just like there are endless ways to spiff up cold brew, there are myriad ways to enjoy it. A few fun ways to get your coconut cold brew on:

    • Early Morning Magic — Prep the cold brew and coconut syrup ahead of time. Come morning, froth the milk, assemble, and enjoy!
    • Weekend Brunch Bae — Make drinks to pass, or set out pitchers of coconut cold brew and whipped cold foam, a dish of toasted coconut chips, a stack of glasses, and a wine chiller full of ice so guests can build their own.
    • Afternoon Pick-Me-Up — Midafternoon slump, who? It doesn’t stand a chance when this cold brew is in hand. For more protein and no sugar crash, use sugar-free syrup and stir a few tablespoons of collagen powder into the cold brew base.
    • Book Nook Beverage — I’m a firm believer that every book is better enjoyed with a cup of joe in hand, and this one always delivers.
    • Espresso Martini Swap — Love espresso martinis? You’ll adore this twist: mix 1½ tablespoons of coconut rum into the cold brew instead of the syrup, top with coconut cold foam, and enjoy!
    A close up shot of pouring the freshly whipped coconut cream cold foam over the coconut cold brew.

    Recipe Success Tips

    • Use cold ingredients. The heavy cream and milk will foam the best when pulled straight from the fridge. Similarly, extra-cool cold brew and refrigerated coconut syrup won't melt the ice as quickly, preventing dilution.
    • Don't overfroth. Whip the coconut milk foam until thickened but still light and pourable. Overwhipping it will make it stiff, similar to whipped cream.
    • Sweeten to taste. Cold drinks can dull sweetness slightly. Start with the recommended amount of coconut syrup and add more if needed.
    • Make it extra bold. If the cold brew's richness weakens when poured over ice (or for extra tired mornings), use all or part cold brew concentrate instead.

    Coconut Cream Cold Brew Recipe FAQs

    Can I make coconut cold brew ahead of time?

    You can brew the cold brew and make the syrup ahead of time, but the drink itself is best assembled just before serving. Store the cold brew and syrup separately in the fridge. The cold brew keeps for up to 7 days, and the syrup for up to 2 weeks.

    Can I make the coconut cold foam dairy-free?

    Certainly! Swap coconut milk for the whole milk and coconut cream for the heavy cream — not only will the foam be dairy-free, but it will also have an extra layer of coconut flavor.

    How sweet is coconut cream cold brew?

    This drink is lightly sweetened and well-balanced. The coconut cold foam softens the boldness of the coffee without overpowering it. If desired, you can adjust the sweetness to taste.

    A side shot of a glass of coconut cream cold brew on the counter with toasted coconut chips.

    Nutritional Info

    Coming in at 203 calories, 11 grams of fat, 1 gram of protein, 23 grams of carbohydrates, and 21 grams of sugar, this coconut cold brew’s macro breakdown leans more toward the treat or dessert category than a regular cup of black coffee.

    Life is about balance, and drinks are about more than just energy and sustenance, so there’s room for this recipe as written in many lifestyles. But if you’d like to adjust it to better fit your goals or feel good about enjoying it more regularly, there are several easy ways to boost its wholesomeness.

    Here are a few ideas to consider: Reduce the sugar and calories by making the syrup with monk fruit or stevia. Add more protein and staying power by stirring 2–3 tablespoons of collagen powder into the cold brew along with the syrup. For a reduced-fat version, make a half batch of cold foam. For a different fat profile (and a dairy-free option), substitute coconut milk and coconut cream for their dairy counterparts.

    Like many of the drinks on Coffee Copycat, there are plenty of ways to adapt them to your life so you can enjoy more cozy, caffeinated moments — and this coconut cold brew is no exception. Drink up!

    Total nutritional content per serving is:

    • Calories: 203 calories
    • Total Fat: 11 grams
    • Protein: 1 gram
    • Sodium: 23 mg
    • Carbohydrates: 23 grams
    • Sugar: 21 grams

    *This nutritional information is an estimate and calculated based on the ingredients used to create the recipe. The nutritional value of your ingredients may differ slightly. Furthermore, this food is not intended to prevent, diagnose, cure, or treat any disease.

    A landscape shot of a slightly angled shot of a glass of coconut cream cold brew on the counter with toasted coconut chips and a plant.

    Other Cold Brew Recipes

    • Raspberry Cream Cold Brew (Starbucks Copycat)
    • Eggnog Cold Foam
    • Salted Pecan Crunch Cold Brew (Starbucks Copycat)
    • Elphaba's Cold Brew (Starbucks Copycat)
    Print Recipe
    5 from 1 vote

    Toasted Coconut Cream Cold Brew (Starbucks Copycat)

    Skip the coffee shop line and make this Toasted Coconut Cream Cold Brew at home. Nutty-sweet coconut syrup flavors bold cold brew and creamy cold foam for a refreshing, lightly sweet drink, perfect for enjoying as the days get warmer and longer. It’s simple to make and easy to love. ❤️
    Prep Time5 minutes mins
    Total Time5 minutes mins
    Course: Drinks
    Cuisine: American
    Keyword: Toasted Coconut Cream Cold Brew
    Servings: 1 drink
    Calories: 203kcal
    Author: Megan Byrd

    Equipment

    • 1 milk frother

    Ingredients

    Coconut Cold Foam:

    • 2 tablespoon heavy cream
    • 1 ½ tablespoon coconut syrup
    • 1 tablespoon whole milk

    Toasted Coconut Cream Cold Brew:

    • 1 ½ cups cold brew coffee
    • 1 tablespoon coconut syrup (or vanilla syrup)
    • ice
    • toasted coconut chips optional for garnish

    Instructions

    • Make the cold foam. Add the heavy cream, coconut syrup, and whole milk to a small glass or mason jar and froth with a milk frother for 20-30 seconds or until foamy. Set aside.
    • Add ice to a tall glass, then stir together the cold brew and coconut syrup and pour over the ice. Top with coconut cold foam, then garnish with toasted coconut chips if desired. Drink up!

    Nutrition

    Serving: 1drink | Calories: 203kcal | Carbohydrates: 24g | Protein: 1g | Fat: 11g | Sodium: 23mg | Sugar: 21g
    Toasted coconut cream cold brew.

    xoxo Megan

    Lavender Cold Foam (Starbucks Copycat)

    February 14, 2026

    My delightfully simple Lavender Cold Foam recipe is an easy way to add a lovely, sunshiney twist to all your favorite coffee and tea drinks. Made with just 4 ingredients in fewer than 5 minutes, this fluffy, sweetly floral drink topper is certain to add a little “spring” to your step.

    silver spoon dolloping lavender cold foam on an iced latte.

    If you’re as ready as I am to leave winter behind, my lavender cold foam recipe is a fantastic place to start. This pale pastel cloud is what makes the Starbucks iced lavender cream oat milk matcha so special, and now I want to add it to everything. Iced lavender latte with lavender cold foam? Sign me up for a double dose of yum!

    Best of all, it’s a snap to make. Just add 4 ingredients to a glass, give it a whiz with your milk frother, and boom! Flower power for your favorite chilled drinks. I feel like it’d be fantastic on top of an iced London fog, melted into a white hot chocolate, or layered on top of the already gorgeous iced blueberry matcha latte. Excuse me while I go experiment!

    If you love floral flavors, give my homemade lavender creamer, iced lavender oat milk latte, and lavender creme frappuccino recipes a try next! 

    [feast_advanced_jump_to]

    What does it taste like?

    Lavender cold foam tastes like a floral, lightly sweet cloud that melts into your drink. The heavy cream gives it a rich, velvety body, while the whole milk keeps it light enough to stay airy and pourable. As it sits on top of an iced coffee or matcha, it slowly cascades down in silky ribbons, adding a creamy sweetness to every sip.

    Flavor-wise, the lavender is soft and aromatic—not soapy or overpowering. It has a delicate, vanilla-floral note thanks to the homemade lavender syrup. Think of the calming scent of lavender in drink-meets-dessert form: elegant, slightly herbaceous, and subtly sweet.

    action shot of a milk frother frothing homemade lavender cold foam in a clear glass on a white table with dried lavender sprigs.

    Why You’ll Love This Starbucks Cold Foam Recipe

    • Quick & Easy - Lavender cold foam comes together in just a minute or two with a handheld frother or blender—no special barista skills required. Simply add everything to a glass, froth until fluffy, and it’s ready to pour over your favorite iced drink.
    • Spring-y & Celebratory - With its delicate lavender flavor and soft pastel purple color, this cold foam instantly makes any drink feel seasonal and special. It’s perfect for spring brunches, Easter gatherings, Mother’s Day, baby showers, or anytime you want your morning latte to feel a little more fun and festive. It looks beautiful in the glass and tastes just as lovely.
    • Budget-Friendly - Skip the daily Starbucks run and make this at home for a fraction of the cost. You only need a few simple ingredients, and one batch of lavender syrup will give you enough for several weeks worth of drinks.

    Ingredients Needed

    • Heavy Cream & Whole Milk - We need a mixture that’s even richer than half-and-half for the proper texture. Heavy cream is the most decadent dairy of them all! Starting with plenty of fat ensures a super fluffy cold foam. Make sure it’s chilled well so it can hold the air pockets well. 
    • Lavender Syrup - My easy DIY recipe is made with just 4 ingredients—sugar, water, lavender buds, and vanilla extract—but feel free to use store-bought instead.
    • Purple Food Coloring - Optional, but fun.
    ingredients needed to make homemade lavender cold foam recipe measured out in white bowls on a white table.

    Substitutions

    • Heavy Cream - Vegan whipping cream or well-shaken full-fat canned coconut milk can be used instead.
    • Whole Milk - Full-fat oat milk is a great dairy-free alternative.
    • Lavender Syrup - In a pinch, you can use plain simple syrup and add a drop of culinary grade lavender essential oil or a few drops of lavender extract. Or, swap in your favorite flavored coffee syrup instead.
    • Purple Food Coloring - Feel free to omit it, or swap in a natural alternative like butterfly pea flower powder instead.
    45 degree overhead shot of a silver spoon taking some homemade lavender cream cold foam from the glass after frothing.

    Instructions

    How To Make Lavender Cold Foam

    Step 1: Combine Ingredients. Add the heavy cream, whole milk, lavender syrup, and purple food coloring (if using) to a small jar or glass. 

    Step 2: Froth & Serve. Use a handheld milk frother to blend for about 10-20 seconds, or until the mixture is well combined and thick, airy, and pourable. You’re looking for a silky foam that sits on top of your drink without being stiff. Slowly pour the lavender cold foam over your favorite iced coffee, matcha, or tea and watch it cascade into creamy, floral swirls. Serve immediately and enjoy!

    action shot showing the lavender cold foam ingredients as the milk frother starts to froth it.

    Optional Variations & Dietary Adjustments

    • Naturally Colored - Skip the food coloring and let the foam stay its creamy white, or add a tiny splash of blueberry juice, butterfly pea flower tea, or a pinch of powdered freeze-dried berries for a soft, natural purple hue.
    • Sugar-Free - Swap in sugar-free lavender syrup for a diabetic-friendly version.
    • High-Protein - Make a lavender-flavored protein cold foam following my easy recipe, but swapping in lavender syrup.

    Serving Suggestions

    I suggest starting with the classics. Spoon or pour it over an iced latte or cold brew and let it slowly cascade into the coffee for a beautiful layered look. It’s also incredible on an iced matcha latte, where the earthy matcha and light lavender create a soft, spring-inspired flavor combination. (Plus, the green-and-purple contrast is stunning in the glass!)

    For a brunch or spring gathering, serve it over iced vanilla lattes in clear glasses so the pastel purple foam can really shine. You can even garnish with a light sprinkle of dried culinary lavender or a dusting of vanilla powder for a professional-looking finish. 

    Try adding it to an iced white chocolate mocha, iced honey almond milk cold brew, or an iced strawberry latte for a fun flavor mashup. And for a kid-friendly drink my daughter loves, spoon it over a glass of chilled milk!

    45 degree closeup shot of a creamy iced coffee topped with lavender cold foam.

    Recipe Success Tips

    • For the fluffiest texture, use cold ingredients straight from the fridge. Cold heavy cream whips much better than room-temperature dairy and gives you that thick, stable foam that sits beautifully on top of your drink.
    • Choose a lavender syrup with a balanced flavor. Too much can taste perfumey, so start with a smaller amount and adjust to taste.
    • Froth just until the mixture is thick, airy, and pourable, not stiff like whipped cream. You’re looking for a silky foam that slowly melts into the drink rather than sitting in a solid mound on top.
    • If you don’t have a handheld frother, you can shake everything in a tightly sealed jar for 20-30 seconds or blend it briefly. 
    • For the most vibrant color, add the food coloring a drop at a time. A little goes a long way, and you can control whether you want a soft pastel or a deeper purple.
    • Taste before pouring. Depending on what you’re serving it with, you may want the foam slightly sweeter or more lightly flavored so it complements rather than overpowers your drink.
    • If you’re making multiple drinks, froth the foam just before serving. 
    • For a true-to-Starbucks look, pour slowly over the back of a spoon so the foam floats on top and creates beautiful layered swirls.

    FAQs

    What is in the lavender cold foam at Starbucks?

    Starbucks lavender cold foam is basically their classic sweet cream cold foam flavored with their lavender powder. The lavender powder itself is made from sugar, natural lavender flavor, a little salt, and natural color from fruit & vegetable juices (like carrot and black currant). Here we use lavender syrup since it’s easy to replicate at home!

    What is the 3-2-1 rule for cold foam?

    The 3-2-1 rule for cold foam is a simple ratio that makes it easy to get the right texture every time. It means using three parts heavy cream, two parts milk, and one part flavored syrup or sweetener. The heavy cream provides the fat needed for a thick, stable foam, the milk keeps it light and pourable instead of turning into whipped cream, and the syrup adds just enough sweetness and flavor.

    Is lavender cold foam good?

    I sure think so! When done right, the lavender tastes soft and lightly aromatic, not soapy or overpowering. It adds a delicate, almost vanilla-like floral sweetness that pairs beautifully with bold coffee, earthy matcha, or black tea. The creamy texture from the sweet cream base balances the herbal notes, making it feel like a sweet treat rather than perfumey.

    closeup shot of pale purple lavender cold foam on an iced vanilla latte with a few dry lavender sprigs popping into view.

    Lavender Cream Cold Foam Nutrition

    This lavender cold foam adds a touch of creamy sweetness without blowing your calorie budget. Each serving contains 137 calories, with most of those coming from the 11 grams of fat in the heavy cream, which is what gives the foam its rich texture and that signature coffeehouse mouthfeel.

    With 9 grams of carbohydrates—all from sugar in the lavender syrup—this topping provides a light sweetness without making your drink overly sugary. The foam contains 1 gram of protein and just 13 milligrams of sodium, keeping it very low in salt and contributing minimally to your daily intake.

    From a nutritional perspective, this is more of a flavor and texture upgrade than a major source of nutrients. Pairing it with a higher-protein drink like an iced latte or adding it to unsweetened coffee or tea can help create a more satisfying, well-rounded beverage. And we all deserve a little something special these days, so enjoy it with gusto!

    Total nutritional content per serving is:

    • Calories: 137 calories
    • Total Fat: 11 grams
    • Protein: 1 gram
    • Sodium: 13 mg
    • Carbohydrates: 9 grams
    • Sugar: 9 grams

    *This nutritional information is an estimate and calculated based on the ingredients used to create the recipe. The nutritional value of your ingredients may differ slightly. Furthermore, this food is not intended to prevent, diagnose, cure, or treat any disease.

    closeup horizontally framed hero shot of a silver spoon dolloping lavender cream cold foam on an iced drink.

    Other Cold Foam Recipes

    • Banana Bread Latte (w/Banana Cold Foam)
    • Carrot Cake Latte (with Cream Cheese Cold Foam!)
    • Salted Pecan Cream Cold Foam (Starbucks Copycat)
    • An up-close elevated shot of a spoon scooping pumpkin cold foam from a class of cold brew coffee.
      Pumpkin Cold Foam (Starbucks Copycat)
    Print Recipe
    5 from 1 vote

    Lavender Cold Foam (Starbucks Copycat)

    This quick & easy Starbucks copycat Lavender Cold Foam is the perfect way to add a sweet, floral twist to your favorite drinks.
    Prep Time3 minutes mins
    Total Time3 minutes mins
    Course: Drinks
    Cuisine: American
    Keyword: Lavender Cold Foam
    Servings: 1 serving
    Calories: 137kcal
    Author: Megan Byrd

    Equipment

    • 1 milk frother

    Ingredients

    • 2 tablespoon heavy cream
    • 1 tablespoon whole milk
    • 1 tbsp lavender syrup
    • 1-2 drops purple food coloring (optional for color)

    Instructions

    • Add the heavy cream, milk, lavender syrup, and food coloring (if using) to a small jar or container. Froth for 10-20 seconds with a milk frother, until the mixture is well combined and frothy.
    • Pour over your favorite iced coffee, matcha, or tea and drink up!

    Nutrition

    Calories: 137kcal | Carbohydrates: 9g | Protein: 1g | Fat: 11g | Sodium: 13mg | Sugar: 9g
    Lavender cold foam.

    xoxo Megan

    Iced Banana Bread Matcha (Starbucks Copycat)

    January 24, 2026

    This creamy-dreamy, warmly spiced, Starbucks copycat Iced Banana Bread Matcha Latte is the perfect mashup of earthy green tea and classic bakery flavors in a refreshing beverage. If you’re in the market for a gentle pick-me-up with serious cozy vibes, this yummy drink is for you!

    homemade starbucks iced banana bread matcha latte in a clear pint glass on a white table with sliced bananas and cinnamon sticks.

    While I’ve been a fan of iced matcha lattes for nearly a decade, it’s only been in the last year or so that I started seeing what an amazing chameleon they are! From iced double berry matcha lattes and this iced banana bread matcha to iced Dubai chocolate matchas and iced lavender cream oatmilk matchas, matcha consistently plays well with other flavors. 

    But of all the many matcha options to choose from, I think I’m most obsessed with this banana cream matcha latte. It takes all the sweet, cinnamon spiced, and very banana-y flavors of my favorite high protein banana bread, and layers them into a classic matcha latte by way of a banana bread flavored cold foam. 

    So, if you enjoy other dessert-inspired café drinks like my banana bread latte, iced carrot cake latte, or zucchini bread latte, but need something with a little less oomph than cold brew, give this new Starbucks copycat iced banana bread matcha a try!  

    [feast_advanced_jump_to]

    What does it taste like?

    This iced banana bread matcha latte tastes like a chilled, sippable version of your favorite bakery treat. The earthy, slightly grassy matcha is gently sweetened with rich brown sugar syrup, giving it warm, caramel-like notes that pair beautifully with the green tea.

    On top, the banana bread cold foam is creamy, lightly spiced, and unmistakably nostalgic—think ripe banana, vanilla, and soft baked-good flavor. As the foam melts into the drink, it turns the latte extra smooth and dessert-like. Delightful!

    silver spoon dunking into the banana cream cold foam on top of the iced matcha latte showing the thick, frothy consistency.

    Why You’ll Love This Iced Matcha Latte Recipe

    • Cozy & Cold - My natural inclination is to reach for iced drinks in the afternoon, since warm ones can make me feel sleepy (even with caffeine!). But, sometimes I’m still craving something comforting. This iced banana bread matcha toes the line between perky and cuddly—just what I’m looking for on a cold day.
    • Sweetly Refreshing - The earthy, grassy flavor of matcha can be a little off-putting for some, but let me tell you: banana bread cold foam is here to convert the skeptics. The cinnamon-spiced, nutty-sweet flavor blends beautifully with the matcha, much like a little cream and sugar can turn a cup of joe from a bitter, bracing bite to a dreamy treat.
    • Budget-Friendly - I’m sorry, but spending $6-7 on a single iced matcha is, in a word, bananas. And that’s before tax and tip! Luckily, I’ve cracked the code on how to copy this new Starbucks star so you can replicate all the yumminess at home for a fraction of the price.

    Ingredients Needed

    • Heavy Cream & Whole Milk - We need a mix that’s a little fattier than regular half & half to get our cold foam to hold its frothy structure.
    • Banana Bread Syrup - While you’re welcome to use store-bought, making your own is easy and will likely save you money.
    • Hot Water - Even though this is an iced matcha, we need hot water to get the matcha powder to properly dissolve. 
    • Pure Matcha Powder - Any culinary grade matcha will work, but ceremonial grade matcha is worth the splurge if you can afford it.
    • 2% Milk - This is the milk of choice in our house. For an extra creamy mouthfeel and an extra boost of protein, use an ultra-filtered variety like Fairlife.
    • Brown Sugar Syrup - Again, you’re welcome to use store-bought, but this simple recipe comes together in just a few minutes using pantry basics.
    • Crushed Maple Sugar - Optional, but yummy for a crunchy topping.
    ingredients needed to make a copycat version of starbucks iced banana bread matcha latte measured out on a white table.

    Substitutions

    • Heavy Cream & Whole Milk - You’re welcome to use slightly lighter whipping cream and half & half to get a similar mixture. You can also use your favorite dairy-free alternatives.
    • Banana Bread Syrup - Feel free to swap in the flavored coffee syrup of your choice. For a similarly warm vibe, zucchini bread syrup, carrot cake syrup or pecan syrup are your best bet.
    • 2% Milk - You’re welcome to customize your iced matcha using any percentage of dairy milk or any variety of plant-based milk you prefer.
    • Brown Sugar Syrup - Brown sugar adds a caramelly richness that I love, but you could use toasted vanilla syrup or toffee nut syrup to get a similar vibe.
    • Crushed Maple Sugar - Feel free to omit the topping, or swap in another garnish like cinnamon sugar or crushed biscoff cookies.
    45 degree angle overhead shot of an iced banana cream matcha latte topped with banana bread cold foam and crushed maple sugar on a white table with sliced banana and whole cinnamon sticks.

    How To Make Starbucks Iced Banana Bread Matcha 

    Step 1: Make the Banana Bread Cold Foam. Add the heavy cream, banana bread syrup, and whole milk to a small glass or jar. Froth for 20-30 seconds, until thick and foamy. Set aside.

    Step 2: Sift. Pour the water into a small microwave-safe jar or glass and microwave until boiling (about 30-45 seconds). Sift the matcha into the hot water to remove any clumps.

    Step 3: Whisk the matcha and hot water together until smooth and slightly frothy. Set aside.

    Step 4: Build the Base. Fill a tall glass with ice, then pour in the milk and brown sugar syrup. Stir well to combine.

    Step 5: Add Matcha. Pour the matcha into the glass and give it another quick stir.

    Step 6: Top & Enjoy! Spoon the banana bread cold foam on top and finish with a sprinkle of crushed maple sugar (if using). Drink up!

    hand using a stick style milk frother to make the banana bread cold foam.
    small mesh sieve sifting the matcha powder into a small jar with hot water.
    bamboo matcha whisk in the jar with the frothed matcha after mixing with hot water.
    action shot of milk being poured into a glass of ice.
    hand using a silver spoon to mix the matcha with the brown sugar milk mixture.
    action shot of the banana bread cold foam being poured on top of the sweetened iced matcha base.

    Optional Variations & Dietary Adjustments

    • Dairy-Free/Vegan - Use barista-style oat milk, almond milk, or soy milk and swap the heavy cream for a plant-based heavy whipping cream or coconut cream.
    • Reduced Sugar/Sugar-Free - Use less brown sugar syrup and banana bread syrup, or swap it for sugar-free alternatives. 
    • Higher Protein - Blend a scoop of vanilla protein shake (or a splash of high-protein milk) into the latte base for a more filling drink that feels like breakfast in a cup.
    • Make it Dirty - Add 1 shot of espresso for a coffee-meets-matcha twist. The espresso + brown sugar + banana bread foam combo is so good.

    Serving Suggestions

    • Serve right away for the best foam. The banana bread cold foam is thickest and fluffiest right after frothing, so this iced matcha is best enjoyed fresh.
    • Use a clear glass for the full café look. The layered matcha latte with the creamy foam on top looks pretty in a tall clear glass—very Starbucks-at-home vibes.
    • Sip it layered or stir it up. Drink it as-is for a creamy “foam-first” taste, or give it a gentle stir to blend the banana bread flavor into every sip.
    • Pair it with a breakfast treat. This latte is amazing with a warm slice of strawberry banana bread, high protein cinnamon roll overnight oats, or chocolate chip waffles for a cozy morning combo.
    closeup side on view of a homemade copycat starbucks iced banana bread matcha latte showing the layer of creamy banana bread cold foam melting down into the pale green matcha base.

    Recipe Success Tips

    • Sift your matcha to avoid clumps. Matcha can get lumpy fast, so sifting it into the hot water makes the latte smoother and less gritty.
    • Use hot water (not boiling-hot if you can help it). Super hot water can make matcha taste bitter. Aim for hot enough to dissolve the powder, but not aggressively boiling.
    • Whisk until fully smooth and slightly foamy. A matcha whisk is great, but a handheld frother works even faster and gives that café-style texture.
    • Let the matcha cool for a minute before adding to ice. Pouring piping hot matcha over ice can water down the drink quickly, so giving it a short cool-down helps keep the flavor strong.
    • Stir the milk + brown sugar syrup first. Mixing the syrup into the milk before adding matcha helps it blend evenly so you don’t end up with syrup sitting at the bottom.
    • Use cold ingredients for thicker foam. Cold heavy cream and cold milk froth up the best. If your foam seems thin, chill the mixture and froth again.
    • No frother? No problem. Shake the cold foam ingredients in a jar with a lid until frothy, or whisk vigorously. It won’t be quite as thick, but it still gives you that creamy foam layer.
    • Adjust sweetness to taste. Banana bread syrup and brown sugar syrup can vary by brand, so start with a little, taste, and add more if needed. (These recipes are made with my homemade syrups.)
    • For extra “banana bread” flavor, add a pinch of spice. A tiny sprinkle of cinnamon or pumpkin pie spice in the foam makes it taste even more like a bakery treat.

    FAQs

    Do banana and matcha go together?

    Yes! Banana adds a naturally sweet, creamy flavor that softens matcha’s earthy bite, so the combo tastes smooth, cozy, and almost dessert-like (especially with brown sugar or vanilla).

    Is the banana bread matcha good?

    I sure think so! The earthy matcha keeps it from tasting too sugary, while the banana bread cold foam adds that warm, bakery-style vibe (think banana, vanilla, a little caramel-y sweetness).

    What should you not mix with matcha?

    Matcha is pretty versatile, but it doesn’t always play nicely with super acidic ingredients (like straight lemon or orange juice), which can make it taste extra bitter. It can also get overpowered by very strong bitter flavors.

    hero shot of a homemade iced banana bread matcha latte in a clear pint glass on a table with cinnamon sticks and sliced bananas; the banana cream cold foam is melting down into the matcha layer, causing pretty streaking.

    Homemade Iced Banana Cream Matcha Latte Nutrition

    This copycat Starbucks iced banana bread matcha latte is definitely a treat-style drink, but it also has a few nutrition wins. With 443 calories, it’s more filling than a basic iced coffee, and the 12 grams of protein can help keep you satisfied longer (especially if you’re enjoying it as a snack or quick breakfast on the go). 

    The 21 grams of fat—mostly coming from the creamy cold foam—adds richness and helps slow digestion, which can make the drink feel more satisfying overall. That said, it is fairly sweet, with 53 grams of carbs and 50 grams of sugar, so it’s best enjoyed as an occasional indulgence or paired with a higher-protein, higher-fiber food to balance out your energy levels. 

    The good news is the sodium stays reasonable at 152 mg, and making it at home gives you easy ways to lighten it up by using less syrup or choosing lower-sugar options. Enjoy every bakery-inspired sip!

    Total nutritional content per serving is:

    • Calories: 443 calories
    • Total Fat: 21 grams
    • Protein: 12 grams
    • Sodium: 152 mg
    • Carbohydrates: 53 grams
    • Sugar: 50 grams

    *This nutritional information is an estimate and calculated based on the ingredients used to create the recipe. The nutritional value of your ingredients may differ slightly. Furthermore, this food is not intended to prevent, diagnose, cure, or treat any disease.

    horizontally framed hero of a DIY Starbucks iced banana bread matcha latte topped with banana cream cold foam and a sprinkle of crushed maple sugar.

    Other Matcha Recipes

    • 45 degree angle shot of an ombre glass of homemade iced matcha latte.
      Iced Matcha Latte (Starbucks Copycat)
    Print Recipe
    5 from 4 votes

    Iced Banana Bread Matcha (Starbucks Copycat)

    This deliciously simple Iced Banana Bread Matcha recipe has all the yummy flavor of Starbucks for a fraction of the price.
    Prep Time5 minutes mins
    Total Time5 minutes mins
    Course: Drinks
    Cuisine: American
    Keyword: Iced Banana Bread Matcha
    Servings: 1 drink
    Calories: 443kcal
    Author: Megan Byrd

    Equipment

    • 1 milk frother
    • 1 small fine mesh strainer
    • 1 matcha whisk

    Ingredients

    Banana Bread Cold Foam:

    • 3 tablespoon heavy cream
    • 1 ½ tablespoon banana bread syrup
    • 1 tablespoon whole milk

    Iced Banana Bread Matcha:

    • 3 tablespoon hot water
    • 1 ½ teaspoon pure matcha powder sifted
    • 1 cup milk of choice (I used 2%)
    • 2 tablespoon brown sugar syrup
    • ice
    • crushed maple sugar (optional for topping)

    Instructions

    • Make the cold foam. Add the heavy cream, banana bread syrup, and whole milk to a small glass or jar and froth with a milk frother for 20-30 seconds until foamy. Set aside.
    • Add the water to a small microwave-safe jar or glass, and heat until boiling (30-45 seconds in the microwave). Sift the matcha into the hot water, removing any large clumps. Whisk the matcha and water together until smooth and slightly foamy. Set aside.
    • Add ice to a tall glass, then top with the milk and brown sugar syrup. Stir to combine. Add the matcha and stir again.
    • Top the matcha with your cold foam and crushed maple sugar (if using). Drink up!

    Nutrition

    Serving: 1drink | Calories: 443kcal | Carbohydrates: 53g | Protein: 12g | Fat: 21g | Sodium: 152mg | Sugar: 50g
    Iced banana bread matcha.

    xoxo Megan

    White Chocolate Strawberry Cream Cold Brew (Starbucks Copycat)

    January 24, 2026

    Give your morning brew a hint of romance with this copycat Starbucks White Chocolate Strawberry Cream Cold Brew recipe! Vanilla-sweetened cold brew gets a creamy dreamy white chocolate strawberry cream cold foam crown for a drink that’s better than a box of chocolates.

    homemade white chocolate strawberry cream cold brew in a clear pint glass topped with mini chocolate chips on a white table with fresh strawberries and white chocolate chips scattered around.

    If you loved the Starbucks raspberry cream cold brew that debuted last year, you’re going to flip for this year’s newest white chocolate strawberry cream cold brew. Imagine the rich, bold flavor of lightly sweetened cold brew with the cozy warmth of vanilla syrup topped off with a white chocolate-dipped strawberry cold foam.

    The balance here is remarkable—roasty-toasty coffee with jammy berry sweetness; creamy white chocolate whipped into a frothy cloud atop ultra dark java. Every sip is brimming with “first date at a coffee shop” vibes.

    Love adding berry sweetness to your morning cuppa? Try my white chocolate raspberry creamer, raspberry mocha, and iced strawberry latte next!  

    [feast_advanced_jump_to]

    What does it taste like?

    This copycat Starbucks white chocolate strawberry cream cold brew tastes like a fruity, creamy coffeehouse treat with the perfect balance of bold and sweet. The cold brew itself is smooth and slightly chocolatey with a classic coffee bite, while the vanilla syrup adds a soft, warm sweetness that rounds everything out. 

    On top, the white chocolate strawberry cream cold foam is thick, fluffy, and dessert-like—think strawberries-and-cream meets white chocolate truffle—so every sip starts sweet and creamy before melting into the rich, chilled coffee underneath. Consider it the rom-com of coffee drinks!

    closeup shot of a silver spoon dipping into the strawberry white chocolate cold foam atop the cold brew, showing how thick and foamy it is.

    Why You’ll Love This Starbucks Cold Brew Recipe

    • Quick & Easy - All you need is 5 minutes to whip up this Valentine’s inspired drink at home—less time than it takes to wait in the drive-thru line.
    • Just 5 Ingredients - Unlike some other Starbucks copycat recipes that have a laundry list of ingredients, this strawberry white chocolate cold brew can be made with just a handful. Don’t you love to keep it simple?!?
    • Budget-Friendly - $7 for a single drink? I’m good, thanks! 😅 Making your own Starbucks drinks at home costs a fraction of the price, plus you don’t have to get out of your PJs to get it!

    Ingredients Needed

    • Heavy Cream - The base of our exceptionally fluffy cold foam topper. 
    • Strawberry Syrup - My homemade version is made with real strawberries which makes the cold foam extra jammy tasting, but feel free to swap in store-bought if needed.
    • White Chocolate Sauce - Another easy DIY made with white chocolate chips and just a few pantry staples.
    • Cold Brew Coffee - My easy instructional gives 4 different ways to make cold brew at home—no fancy equipment required. Stop wasting money on store-bought!
    • Vanilla Syrup - Again, you’re welcome to use store-bought, but making it at home will save you major dough! All you need is sugar, water, and vanilla extract.
    • Mini Chocolate Chips - Optional, but fun for a decadent garnish. If you’re looking for real “truffle” vibes, this is a pro move.
    ingredients needed to make a copycat starbucks white chocolate strawberry cream cold brew at home measured out on a white table.

    Substitutions

    • Heavy Cream - You’re welcome to use slightly lighter “whipping cream” if needed. Vegan whipping cream or coconut cream also work.
    • Strawberry Syrup - Feel free to swap in another berry flavored coffee syrup that’ll pair well with white chocolate. Raspberry syrup would probably be my top choice, but you do you!
    • White Chocolate Sauce - Swap in dark chocolate sauce for more of a mocha-cream vibe.
    • Cold Brew Coffee - In a pinch, you can use strongly brewed conventional coffee that has been chilled. Just note that it’ll be more acidic than cold brew, so you may want to add an extra splash of vanilla syrup or use a little extra cold foam to balance it out.
    • Vanilla Syrup - Toasted vanilla bean syrup would also be fantastic.
    • Mini Chocolate Chips - You’re welcome to skip these, or swap in another fun topper like chocolate sprinkles or pearl sugar.
    hand in a pink sweater grabbing a strawberry cream white chocolate cold brew from the table with fresh strawberries and white chocolate chips.

    How To Make White Chocolate Strawberry Cream Cold Brew

    Step 1: Make the Cold Foam. Add the heavy cream, strawberry syrup, and white chocolate sauce to a small glass or mason jar. Froth with a milk frother for 20-30 seconds, until thick and foamy. Set aside.

    Step 2: Assemble. Fill a tall glass with ice. Stir the cold brew and vanilla syrup together, then pour it over the ice. Spoon the white chocolate strawberry cold foam on top and finish with mini chocolate chips (if using). Drink up! ☕🍓🍫

    wand-style milk frother frothing up the strawberry white chocolate cream cold foam.
    action shot of the white chocolate strawberry cream cold foam being poured over a glass of sweetened cold brew.

    Optional Variations & Dietary Adjustments

    • Dairy-Free/Vegan - Swap the heavy cream for a non-dairy creamer or plant-based heavy whipping cream (oat or coconut-based usually froths best) and use dairy-free white chocolate sauce (or a vegan white chocolate syrup).
    • Reduced Sugar - Use less vanilla syrup in the cold brew, cut back on the strawberry syrup in the foam, and/or choose sugar-free syrups. 
    • Decaf/Caffeine Free - Make your cold brew with your favorite decaf roast. For a fully caffeine-free option, swap in a coffee alternative like roasted chicory or Dandy Blend.
    • Mocha Twist - For a chocolate-covered-strawberry vibe, stir 1-2 teaspoons chocolate syrup into the cold brew, then top with the white chocolate strawberry foam.

    Serving Suggestions

    • Serve immediately for the best foam. The white chocolate strawberry cold foam is thickest and fluffiest right after frothing, so this drink is best enjoyed fresh.
      Use a clear glass for the full coffeehouse look. TikTok users rejoice—the creamy pink foam on top of the dark cold brew is picture perfect.
    • Dress it up for guests. Sprinkle mini chocolate chips, add a drizzle of white chocolate, or garnish with a few freeze-dried strawberries for a cute, café-style finish.
    • Sip it layered or stir it together. Drink it as-is for a sweet, creamy “foam-first” sip, or stir it up for a smoother strawberries-and-cream flavor throughout.
    • Breakfast in bed. If you want to surprise your honey for Valentine’s day, try bringing them this white chocolate strawberry cream cold brew and a stack of chocolate chip waffles topped with strawberry chia seed jam. Love at first sip! 
    45 degree overhead shot of a white chocolate strawberry cream cold brew topped with dark chocolate mini chocolate chips.

    Recipe Success Tips

    • Use cold ingredients for the thickest foam. Cold heavy cream froths up faster and holds its texture better, so keep everything chilled before frothing.
    • Froth just until thick and spoonable. About 20-30 seconds is usually perfect. You want it fluffy and creamy, not stiff like whipped cream.
    • Mix the white chocolate sauce in well. White chocolate can be thick, so make sure it’s fully blended into the cream mixture so you don’t get syrupy clumps.
    • Stir the vanilla syrup into the cold brew first. This helps it dissolve evenly so you don’t end up with sweetness sitting at the bottom of the glass.
    • Use strong cold brew for the best balance. The foam is sweet and rich, so a bold cold brew keeps the drink from tasting too milky or overly dessert-like.
    • Don’t make the foam too far ahead. Cold foam is best right after frothing—if it sits too long, it can deflate and lose that fluffy texture.

    FAQs

    Do strawberries and coffee go together?

    Yes, they’re actually a surprisingly tasty pair. Strawberry adds a bright, fruity sweetness that balances coffee’s bold, slightly bitter flavor, especially when you pair it with creamy ingredients like milk, vanilla, and white chocolate like we use here.

    side on view of a homemade starbucks white chocolate dipped strawberry cold brew showing the white chocolate strawberry cream cold foam melting down into the dark cold brew.

    DIY White Chocolate Strawberry Cream Cold Brew Nutrition

    This copycat Starbucks white chocolate strawberry cream cold brew is a fun, sweet treat that’s lighter than many coffee shop-style drinks. One serving has 270 calories with 11 grams of fat, mostly coming from the creamy cold foam that gives it that rich, dessert-like texture. It’s also fairly low in sodium (52 mg), which is a nice bonus. 

    That said, it’s more of a quick energy boost than a filling snack since it only has 1 gram of protein, and the carbs are mostly from added sugars (42 grams of carbs and 37 grams of sugar). 

    If you want to make it more balanced, try pairing it with a protein-rich snack like flourless dark chocolate protein balls, or reduce the syrups slightly or swap in sugar-free alternatives when making it at home.

    Total nutritional content per serving is:

    • Calories: 270 calories
    • Total Fat: 11 grams
    • Protein: 1 gram
    • Sodium: 52 mg
    • Carbohydrates: 42 grams
    • Sugar: 37 grams

    *This nutritional information is an estimate and calculated based on the ingredients used to create the recipe. The nutritional value of your ingredients may differ slightly. Furthermore, this food is not intended to prevent, diagnose, cure, or treat any disease.

    horizontally framed hero shot of a homemade white chocolate strawberry cream cold brew from Starbucks topped with mini chocolate chips on a white table with halved fresh strawberries and white chocolate chips.

    Other Cold Brew Recipes

    • Apple Crisp Oatmilk Frappuccino (Starbucks Copycat)
    • Mocha Cookie Crumble Frappuccino (Starbucks Copycat)
    • Pumpkin Spice Frappuccino (Starbucks Copycat)
    • A side shot of a hand stirring a glass of pumpkin spice shaken espresso.
      Pumpkin Spice Shaken Espresso
    Print Recipe
    5 from 1 vote

    White Chocolate Strawberry Cream Cold Brew (Starbucks Copycat)

    Give your morning brew a hint of romance with this copycat Starbucks White Chocolate Strawberry Cream Cold Brew recipe! Vanilla-sweetened cold brew gets a creamy dreamy white chocolate strawberry cream cold foam crown for a drink that’s better than a box of chocolates.
    Prep Time5 minutes mins
    Total Time5 minutes mins
    Course: Drinks
    Cuisine: American
    Keyword: White Chocolate Strawberry Cream Cold Brew
    Servings: 1 drink
    Calories: 270kcal
    Author: Megan Byrd

    Equipment

    • 1 milk frother

    Ingredients

    White Chocolate Strawberry Cold Foam:

    • 2 tablespoon heavy cream
    • 2 tablespoon strawberry syrup
    • 1 tablespoon white chocolate sauce

    White Chocolate Strawberry Cream Cold Brew:

    • 1 ½ cups cold brew coffee
    • 1 tablespoon vanilla syrup
    • ice
    • mini chocolate chips optional for garnish

    Instructions

    • Make the cold foam. Add the heavy cream, strawberry syrup, and white chocolate sauce to a small glass or mason jar and froth with a milk frother for 20-30 seconds or until foamy. Set aside.
    • Add ice to a tall glass, then stir together the cold brew and vanilla syrup and pour over the ice. Top with the white chocolate strawberry cold foam and mini chocolate chips (if using). Drink up!

    Nutrition

    Serving: 1drink | Calories: 270kcal | Carbohydrates: 42g | Protein: 1g | Fat: 11g | Sodium: 52mg | Sugar: 37g
    White chocolate strawberry cream cold brew.

    xoxo Megan

    Iced Double Berry Matcha (Starbucks Copycat)

    January 24, 2026

    Spring into warmer weather with my copycat Starbucks Iced Double Berry Matcha recipe. This technicolor dream features a lightly sweetened strawberry purée, milky matcha, and a raspberry cream cold foam, all layered to create a drink that’s as pretty to look at as it is to sip.

    homemade iced double berry matcha latte in a clear pint glass showing off the distinct layers of strawberry puree, matcha latte, and raspberry cold foam on a white table with fresh berries.

    Remember last year’s raspberry cream cold brew topped with raspberry cold foam, or the iced strawberry matcha latte? Well, this year’s genius iced double berry matcha latte combines the latter two for a fantastically refreshing, cheerfully colorful drink that has just the right amount of pep to power me through the afternoon slump.

    Sure, a plain iced matcha latte is delightful, but a two-time berry glow up is always welcome. Yes, the fact that there are 3 separate layers makes it a bit more of a time investment. But, all in, you’re still only looking at about 8 minutes from start to sip. If you’ve been looking for ways to inject a little sunshine into your day, this double berry matcha should be top of your list!

    Love berry season as much as I do? Check out my iced blueberry matcha latte, white chocolate raspberry creamer and iced strawberry latte next!

    [feast_advanced_jump_to]

    What does it taste like?

    This iced double berry matcha latte tastes like a fruity, creamy café treat with a fresh green tea backbone. The lightly sweetened strawberry purée brings bright, jammy berry flavor that’s fresh and slightly tangy, while the milky matcha layer adds a smooth, earthy balance that keeps the drink from being overly sweet.

    On top, the raspberry cream cold foam is light, fluffy, and dessert-like, with a pop of tart berry flavor that melts into the drink as you sip. Every layer is cool, creamy, and refreshing—equal parts fruity refresher and cozy matcha latte, with a signature Starbucks-style sweetness that feels indulgent without being heavy.

    homemade Starbucks iced double berry matcha latte in a clear glass with a glass straw on a white table with fresh raspberries and fresh strawberries scattered around.

    Why You’ll Love This Iced Matcha Latte Recipe

    • Lightly Caffeinated - I’m all for starting my morning with some high-octane coffee, but by the time 3 o’clock rolls around, I just need something to get me across the finish line. This double berry iced matcha latte accomplishes that in fabulously fruity style! It gives me just enough of a boost to power me through without keeping me up all night.
    • Cheerfully Bright - They say we eat with our eyes first, and boy is this layered beauty a feast! Between the vibrant magenta berry purée, pale pink raspberry cold foam, and minty green matcha, just the look alone is enough to bring a smile to my face. (And once I get the first taste, I’m grinning ear to ear!)
    • Budget-Friendly - Rather than spending $6-7 on a single drink (and that’s pre-tax and pre-tip), making your own Starbucks copycats at home costs just a fraction of the price. Sure, you have to shell out more at the front end to get all the ingredients, but the cost per drink rarely exceeds $2. If you’re looking to trim your spending, becoming your own barista is a great first step!

    Ingredients Needed

    • Hot Water & Cold Water - Even though this is an iced drink, matcha powder requires hot water to dissolve properly. The cold water comes in later, just to help thin out the purée. If possible, start with filtered water for the best taste.
    • Pure Matcha Powder - As long as it’s pure matcha powder, not one doctored up with sweeteners and powdered creamers, you’re good to go. If you can swing the extra expense, ceremonial grade matcha powder is the bee’s knees.
    • 2% Milk - This is our standard milk choice. If you want a bit of a protein bump and an extra creamy mouthfeel, reach for an ultra-filtered variety like Fairlife.
    • Heavy Cream & Whole Milk - We need a ⅔ & ⅓ mixture to add enough fat for our cold foam to hold. Unfortunately half & half doesn’t quite hold up.
    • Raspberry Syrup - Feel free to use store-bought if you’d like, but my homemade version comes together in just a few minutes!
    • Fresh Strawberries - Yes, we’re adding real berry goodness to this double berry matcha. Make sure they’re deliciously fragrant—strawberries that don’t have much of an aroma tend to taste pretty watery and weak.
    • Granulated Sugar - Just a touch of white sugar helps to balance out the tart flavor of the strawberries. 
    ingredients needed to make a copycat Starbucks double berry iced matcha latte recipe measured out on a white table.

    Substitutions

    • 2% Milk - Feel free to swap in any percentage of dairy milk or any plant-based milk you prefer. If you go the vegan route, look for a barista blend for the best mouthfeel.
    • Heavy Cream & Whole Milk - Vegan whipping cream or coconut cream can replace the heavy cream, while full-fat oat, coconut, or soy milk can replace the whole milk. Make sure they’re nice and cold for the best whipping power.
    • Raspberry Syrup - Feel free to swap in the berry-flavored syrup of your choice. I think blueberry syrup, blackberry syrup, strawberry syrup, or even blood orange syrup would all taste great.
    • Fresh Strawberries - Frozen berries work just as well! Again, feel free to swap in the berries of your choice. Note that you may need to adjust the sugar to taste, as some varieties are more tart than others.
    • Granulated Sugar - Natural cane sugar, superfine/caster sugar, or the cup-for-cup sugar-free sweetener of your choice can all be used instead.
    hand grabbing a homemade glass of Starbucks iced double berry matcha latte from a white table surrounded with fresh berries.

    How To Make Starbucks Iced Double Berry Matcha Latte

    Step 1: Make the Matcha. Sift the matcha powder into your hot water (this helps prevent clumps). Whisk until smooth and a little frothy, then whisk in the milk. Set aside for now.

    Step 2: Whip Up the Raspberry Cold Foam. Use a milk frother to blend the cream, milk, and raspberry syrup until thick, fluffy, and foamy. Set it aside.

    Step 3: Blend Purée. Add the strawberries, granulated sugar, and cold water to a blender and blitz until smooth and pourable.

    Step 4: Assemble. Pour the strawberry purée into your serving glass, then fill it with ice. Slowly pour the matcha latte over the ice so you get pretty layers.

    Step 5: Top + Serve. Gently spoon the raspberry cream cold foam on top, grab a straw, and enjoy!

    small mesh filter used as a sifter for the matcha powder as it goes into the hot water.
    bamboo matcha whisk in the glass jar after whisking the hot water and matcha powder until frothy.
    hand using a wand-style milk frother to make the raspberry cold foam layer.
    personal sized blender filled with the strawberry puree after blending.
    action shot of the iced matcha latte layer being poured over the strawberry purée layer.
    action shot of the raspberry cold foam being poured on top of the matcha layer.

    Optional Variations & Dietary Adjustments

    • Vegan/Dairy-Free - Swap the 2% milk for barista-style oat milk, almond milk, coconut milk, or soy milk. For the cold foam, use a plant-based heavy cream (like oat or coconut cream) or a barista-style non-dairy creamer that froths well.
    • Reduced Sugar/Sugar-Free - Use unsweetened milk, cut the sugar in the strawberry purée (or use a sugar-free sweetener like monkfruit), and choose a sugar-free raspberry syrup (or use less syrup overall). 
    • Shortcut - Short on time? Swap the homemade strawberry purée for strawberry chia jam thinned with a little water or defrosted frozen strawberry purée. 

    Serving Suggestions

    • Serve immediately for the prettiest layers. This drink looks extra stunning right after assembling, when the strawberry purée, matcha latte, and raspberry cold foam stay nicely separated.
    • Stir it up (or sip it layered). You can enjoy it as-is for a “three flavors in one” experience, or give it a quick stir to blend everything into a creamy berry-matcha treat.
    • Use a clear glass + boba straw for the full Starbucks vibe. A tall clear glass shows off those gorgeous pink-and-green layers, and a wide straw makes it easier to sip up the strawberry purée.
    • Make it a sweet & savory snack moment. Serve it alongside something light and salty like egg bites, sheet pan huevos rancheros, or a handful of roasted pumpkin seeds for a more balanced pick-me-up.
    • Pair it with a sweet brunch bite. This latte is perfect with better-for-you bakery-style treats like a strawberry rhubarb protein muffin, high protein coconut chia pudding, fresh strawberry waffles, or a slice of high protein banana bread.
    • Top it like a café drink. Add a few freeze-dried strawberries, a sprinkle of matcha powder, or even a couple fresh raspberries on top of the foam for a pretty finishing touch.
    closeup of a silver spoon dipping into the raspberry cold foam layer on top of a double berry iced matcha showing the thick, foamy consistency.

    Recipe Success Tips

    • Sift your matcha first. Matcha loves to clump, so sifting it into the hot water helps it whisk up smooth and creamy instead of gritty.
    • Use hot (not boiling) water for matcha. Super hot water can make matcha taste more bitter. Aim for water that’s hot enough to dissolve the powder, but not rolling-boil hot.
    • Whisk until frothy for that café texture. A bamboo whisk is great, but a handheld frother works too—just whisk until the matcha looks smooth and slightly foamy.
    • Let the matcha cool slightly before layering. If your matcha is too warm, it can melt the ice fast and muddy the layers. Even 2-3 minutes of cooling helps.
    • Blend the strawberry purée until totally smooth. You want it pourable and silky so it layers nicely at the bottom (and doesn’t clog your straw).
    • Taste the strawberry layer before assembling. Strawberries vary a lot in sweetness! Add a little extra sugar if yours are tart, or reduce it if they’re super ripe.
    • Go slow when pouring to keep the layers. Pour the matcha over the ice slowly (or over the back of a spoon) so it sits on top of the strawberry layer instead of mixing right away.
    • Use cold ingredients for the best cold foam. Cold cream + cold milk froth up thicker and faster. If your foam seems thin, chill the mixture for a few minutes and froth again.
    • Don’t over-froth the cold foam. You want it thick and spoonable, but still soft and creamy—not stiff like whipped cream.

    FAQs

    Does matcha go well with berries?

    Yes! Matcha has a naturally earthy, slightly grassy, lightly bitter flavor, and berries bring bright sweetness and tangy acidity, which balances matcha beautifully. 

    Is iced matcha from Starbucks healthy?

    Starbucks iced matcha isn’t always the “healthiest” matcha option because their matcha powder is pre-sweetened, which means the drink can end up higher in added sugar and calories than people expect. Making it at home is usually better because you control everything—how much sweetener you use (or if you use any at all), what milk you choose, and how strong the matcha is.

    Why is Gen Z obsessed with matcha?

    As a Millennial myself, Gen Z’s matcha obsession makes a lot of sense—it’s the perfect mix of trendy, aesthetic, and actually enjoyable to drink. Matcha gives a smoother, more “calm energy” kind of caffeine compared to coffee, which is a big draw for anyone who wants a little boost without the jitters or crash. It also fits right into the wellness lifestyle Gen Z loves (think: self-care routines, clean ingredients, and feel-good habits), while still feeling like a fun treat. And of course, it doesn’t hurt that this double berry iced matcha is so photogenic—its bright green color and pretty layers were basically made for TikTok and Instagram. 

    45 degree angle closeup shot of a homemade iced double berry matcha latte showing the pretty, colorful layers.

    Homemade Iced Double Berry Matcha Latte Nutrition

    This copycat Starbucks iced double berry matcha latte is a fun “treat drink” that still offers some solid nutritional perks. With 384 calories and 12 grams of protein, it’s more filling than a typical flavored latte. The 15 grams of fat also helps add richness and can slow down how quickly the sugar hits your bloodstream, which may help prevent a quick energy crash. 

    That said, this drink is definitely on the sweeter side, with 50 grams of carbs and 45 grams of sugar, so it’s best enjoyed as an occasional indulgence or paired with a protein-rich snack if you’re looking for more balanced energy. 

    The good news is it’s relatively low in sodium (109 mg) and you can easily lighten it up at home by using less syrup or sugar-free syrup, reducing the sugar in the strawberry purée, and/or choosing an unsweetened milk. Enjoy every customizable sip!

    Total nutritional content per serving is:

    • Calories: 384 calories
    • Total Fat: 15 grams
    • Protein: 12 grams
    • Sodium: 109 mg
    • Carbohydrates: 50 grams
    • Sugar: 45 grams

    *This nutritional information is an estimate and calculated based on the ingredients used to create the recipe. The nutritional value of your ingredients may differ slightly. Furthermore, this food is not intended to prevent, diagnose, cure, or treat any disease.

    horizontally framed hero shot of an iced double berry matcha latte in a clear glass on a white table with fresh raspberries and strawberries scattered around and a green houseplant blurred out in the background.

    Other Matcha Recipes

    Print Recipe
    5 from 1 vote

    Iced Double Berry Matcha (Starbucks Copycat)

    My deliciously fruity copycat recipe for Starbucks Iced Double Berry Matcha is easy to make at home with just 8 ingredients.
    Prep Time8 minutes mins
    Total Time8 minutes mins
    Course: Drinks
    Cuisine: American
    Keyword: Iced Double Berry Matcha
    Servings: 1 drink
    Calories: 384kcal
    Author: Megan Byrd

    Equipment

    • 1 matcha whisk
    • 1 milk frother
    • 1 high-speed blender

    Ingredients

    Matcha Layer:

    • 3 tablespoon hot water
    • 1 ½ teaspoon pure matcha powder
    • 1 cup milk of choice (I used 2%)

    Raspberry Cold Foam:

    • 2 tablespoon heavy cream
    • 2 tablespoon raspberry syrup
    • 1 tablespoon whole milk

    Strawberry Layer:

    • ¼ cup chopped fresh strawberries
    • 1 tablespoon granulated sugar
    • 1 tablespoon cold water

    Instructions

    • Add the 3 tablespoon water to a microwave-safe jar or glass, and heat until boiling (30-45 seconds in the microwave). Sift the matcha into the hot water, removing any large clumps. Whisk the matcha and water together until smooth and slightly foamy. Stir in the 1 cup of milk, then set aside.
    • Make the cold foam. Add the heavy cream, raspberry syrup, and whole milk to a small glass or jar and froth with a milk frother for 20-30 seconds until foamy. Set aside.
    • Add the strawberries, granulated sugar, and water to a high-speed blender and blend until smooth. Pour into a glass and top with ice.
    • Slowly pour in the matcha milk to layer it on top of the strawberry puree, then top with the raspberry cold foam. Drink up!

    Nutrition

    Serving: 1drink | Calories: 384kcal | Carbohydrates: 50g | Protein: 12g | Fat: 16g | Sodium: 109mg | Sugar: 45g
    Iced double berry matcha.

    xoxo Megan

    Homemade Pistachio Creamer

    January 19, 2026

    Add a splash of rich, sweet, nutty goodness to your morning cup with my simple 5-ingredient Pistachio Coffee Creamer recipe! This spectacularly speedy recipe makes a week’s worth of “me time” moments, but is easy to whip up in just a few minutes.

    mason jar of homemade pistachio coffee creamer on a white table with whole pistachios (some in their shell some not) scattered around.

    Pistachio-flavored drinks are gearing up to have a big year at Starbucks, and this easy pistachio coffee creamer is one of the easiest ways to replicate the trend at home. With just a splash, you can turn your regular joe into a quasi-pistachio latte. Or, froth it up and spoon over iced coffee to make a dreamy shortcut version of Starbucks pistachio cream cold brew. Lovely!

    But, unlike most Starbucks copycat recipes, this homemade creamer recipe makes enough to keep you in coffee bliss for at least a week. All you need are 5 minutes, 5 ingredients, and a single pan to make more than a pint of pistachio-flavored yum.

    Want to try the whole Starbucks pistachio lineup at home? Check out my copycat recipes for their pistachio oatmilk cortado, iced Dubai chocolate mocha and iced Dubai chocolate matcha next!

    [feast_advanced_jump_to]

    What does it taste like?

    This pistachio delight creamer tastes rich, smooth, and indulgent, with a warm nutty flavor that instantly makes your coffee feel café-worthy. The combination of heavy cream and half & half gives it a silky, luxurious mouthfeel, so when it hits hot coffee it turns the whole cup creamy and comforting.

    The pistachio cream brings a naturally sweet, buttery pistachio flavor—like melted pistachio gelato—while the almond extract subtly amplifies that nuttiness and gives the creamer a cozy, finish. The sugar rounds everything out just enough, so it’s sweet without overpowering your coffee. It’s essentially a hack for making a pistachio latte, but in the easiest “pour and stir” form.

    45 degree angle shot of a jar of homemade pistachio creamer on a white table with pistachios scattered around.

    Why You’ll Love This Homemade Coffee Creamer Recipe

    • One & Done - As much as I love making myself fancy hot coffee drinks, I don’t always have time in the schedule to indulge in a multi-step process. Luckily, this pistachio latte creamer makes enough for nearly 12 generous ¼-cup servings, meaning café-worthy flavor is never far from reach.
    • Sweet & Simple - Unlike store-bought creamers that have paragraph-long ingredient lists filled with lab-grown junk like mono- and diglycerides, this deliciously simple DIY has just 5 ingredients you can find in the pantry. 
    • Quick & Easy - Just measure, mix, heat, and pour. That’s the whole recipe! You’ll have a batch ready in just 5 minutes, making it an easy upgrade for when time is tight.

    Ingredients Needed

    • Heavy Cream & Half & Half - This hard-hitting dairy duo ensures your cup ends up with a deliciously rich mouthfeel, not watery or thin.
    • Granulated Sugar - White sugar has a neutral sweetness that allows the nutty goodness of the pistachios to shine.
    • Pistachio Cream - This Italian pantry staple is akin to Nutella, except made with pistachios and white chocolate instead of hazelnuts and milk chocolate. 
    • Almond Extract - A little splash is all you need to enhance the nutty, toasty flavor of pistachios.
    ingredients needed to make homemade pistachio delight creamer recipe measured out on a white table.

    Substitutions

    • Heavy Cream - You’re welcome to use slightly lighter whipping cream, or swap in the creamy portion of full-fat canned coconut milk.
    • Half & Half - As the name suggests, you can make your own with a 50/50 mix of whole milk and cream. Alternatively, swap in evaporated milk or your preferred plant-based half & half.
    • Granulated Sugar - Cane sugar or caster/superfine sugar are perfect 1:1 swaps.
    • Almond Extract - Feel free to use another nutty extract (e.g. hazelnut), or swap in vanilla in a pinch. It won’t taste as nutty, but the extra depth and warmth is welcome.
    side on shot of a clear jar filled with pale green pistachio flavored coffee creamer on a white table with pistachio nuts and a green houseplant.

    How To Make Pistachio Coffee Creamer

    Step 1: Mix. Add the sugar, pistachio cream, heavy cream, and half & half to a small saucepan.

    Step 2: Warm & Whisk. Heat over medium-low, whisking often, until the sugar fully dissolves and the mixture is smooth. Remove it from the heat before it reaches a boil.

    Step 3: Add the almond extract off the heat.

    Step 4: Cool & Store. Let the pistachio creamer cool for about 10-15 minutes, then pour it into a mason jar with a pour spout (or a syrup bottle). Refrigerate until ready to use.

    dairy, sugar, and pistachio cream added to a saucepan.
    hand whisking the pistachio and cream mixture over heat.
    action shot of the cooled pistachio creamer being poured into a mason jar for storage.

    Optional Variations & Dietary Adjustments

    • Dairy-Free - Use vegan whipping cream or coconut cream, plant-based half-n-half or full-fat oat milk/coconut milk, and double check that your pistachio cream is vegan. (If you can’t find vegan pistachio cream, it’s easy to make at home with just a few ingredients.)
    • Reduced Sugar/Sugar-Free - Swap in your favorite cup-for-cup sweetener (e.g. monk fruit) in place of the sugar. To go fully sugar-free, you’ll need a sugar-free pistachio cream.
    • Vanilla Pistachio Creamer - Add ½–1 teaspoon vanilla extract (or use vanilla bean paste) for a softer, sweeter flavor.
    • Salted Pistachio Creamer - Stir in a tiny pinch of salt to make the pistachio flavor pop and balance the sweetness.
    • Honey-Sweetened - Swap the granulated sugar for honey for a more floral, less processed take. Start with a little less since honey is sweeter by volume.
    • White Chocolate Pistachio - Whisk in 1-2 tablespoons of white chocolate chips while the mixture is warm for a dessert-like twist.
    • Extra Nutty - Add an extra ¼ teaspoon almond extract for a stronger almond-pistachio vibe (a little goes a long way!).

    Serving Suggestions

    This pistachio coffee creamer is one of those “little jar in the fridge” recipes that ends up being way more versatile than you expect. Of course, it’s perfect stirred into hot coffee for an instant pistachio latte moment, but it’s just as good in iced coffee or cold brew. You can also froth it to make a quick pistachio-flavored cold foam for topping iced drinks. 

    Beyond coffee, try using it anywhere you’d normally add a touch of cream and sweetness—like mixing it into high protein overnight oats, stirring it into chocolate chia pudding, or even splashing a little into classic hot cocoa for a cozy pistachio twist. It’s basically a multi-use shortcut for adding creamy, nutty flavor to drinks and breakfasts all week long.

    action shot of pistachio creamer being poured into a clear mug of black coffee; you can see the creaminess bubbling up from the bottom.

    Recipe Success Tips

    • Use medium-low heat (low and slow is best). You’re just warming the mixture enough to dissolve the sugar and smooth out the pistachio cream. Keeping the heat gentle prevents burning and helps the dairy stay silky.
    • Don’t let it boil. Once dairy starts boiling, it can separate or develop a slightly “scorched” taste. Remove it from the heat as soon as the sugar is dissolved and everything looks creamy and unified.
    • Whisk constantly for a smooth texture. Pistachio cream can be thick, so whisking while it warms helps it fully blend into the heavy cream and half & half without leaving streaks or clumps.
    • Add the almond extract off the heat. Almond extract is potent and more delicate than you’d think—adding it after heating keeps the flavor bright.
    • Let it cool before refrigerating. Cooling for 10-15 minutes helps prevent condensation in the jar and keeps your creamer from warming up the fridge.
    • Shake or stir before each use. Homemade creamers can naturally separate a little as they sit. A quick shake brings everything right back together.
    • Adjust sweetness to taste. Pistachio creams vary in sweetness depending on the brand. If yours is already sweet, you can reduce the added sugar slightly.
    • Strain if needed for extra smoothness. If your pistachio cream is a bit grainy or you notice tiny nutty bits, you can strain the creamer through a fine mesh sieve for a cleaner, ultra-silky pour.
    • Use a pourable storage container. A mason jar with a pour spout or a syrup bottle makes this so much easier (and less messy) to use. Your counters and fridge will thank you.

    FAQs

    Is pistachio creamer healthy?

    Pistachio creamer can absolutely fit into a healthy lifestyle—it just depends on your portion size and overall goals. This homemade version is a more all-natural option than many store-bought creamers because it’s made with simple ingredients like dairy, sugar, and real pistachio cream (no mystery additives). For a closer look at calories, macros, and what’s in each serving, be sure to check out the nutritional overview below.

    What are the unhealthiest coffee creamers?

    The unhealthiest coffee creamers are typically highly processed, shelf-stable varieties that contain added sugars, hydrogenated oils, artificial flavors, and preservatives, which can bump up calories, unhealthy fats, and empty carbs without offering much real nourishment. Flavored creamers with long ingredient lists—especially those marketed as seasonal or dessert-inspired—often fall into this category because they rely on artificial additives and sweeteners rather than whole food ingredients. 

    Is pistachio cream good in coffee?

    Yes, pistachio cream is delicious in nearly every application, including coffee. That said, pistachio cream on its own can be pretty thick, so it doesn’t always stir in smoothly unless you really whisk it. That’s why making this pistachio coffee creamer with pistachio cream is such a great option—it blends easily, pours perfectly, and gives you pistachio latte flavor in every sip.

    overhead shot looking into a jar of homemade pistachio coffee creamer on a white table with pistachios on the table beneath.

    Homemade Pistachio Creamer Nutrition

    This homemade pistachio coffee creamer is a rich, flavorful way to add a café-style twist to your daily coffee. Each ¼ cup (4 tablespoon) serving contains 186 calories, with 9 grams of fat from the heavy cream and half & half, which gives it a smooth, velvety texture. You’ll also get 3 grams of protein per serving, plus 41 mg of sodium, which is relatively moderate.

    Carb-wise, it has 25 grams of carbohydrates and 24 grams of sugar, so it definitely falls into the “sweet treat” category. While this homemade pistachio coffee creamer is sweet and calorically dense, remember that a little goes a long way. A tablespoon or two might be all you need! (And there is a variation above to reduce the sugar content if needed.)

    As someone who likes to start her morning on a sweet foot, I encourage you to enjoy every creamy-dreamy drop without any guilt. Just pair your coffee with high-protein, high-fiber snacks like whole wheat protein powder pancakes or a slice of high-protein banana bread to keep your blood sugar steady and watch your sugar intake the rest of the day!

    Total nutritional content per serving is:

    • Calories: 186 calories
    • Total Fat: 9 grams
    • Protein: 3 grams
    • Sodium: 41 mg
    • Carbohydrates: 25 grams
    • Sugar: 24 grams

    *This nutritional information is an estimate and calculated based on the ingredients used to create the recipe. The nutritional value of your ingredients may differ slightly. Furthermore, this food is not intended to prevent, diagnose, cure, or treat any disease.

    horizontally framed hero shot of a mason jar of homemade pistachio coffee creamer on a white table with a green houseplant, a pinch bowl of shelled pistachios, and a handful of in-shell pistachios scattered around.

    Other Homemade Creamer Recipes

    • Gingerbread Coffee Creamer
    • An up-close side shot of a large glass of brown sugar oat milk creamer on a coaster.
      Brown Sugar Oat Milk Creamer
    • Homemade Pumpkin Spice Creamer
    • Homemade Blueberry Coffee Creamer
    Print Recipe
    5 from 2 votes

    Homemade Pistachio Creamer

    This quick & easy 5-ingredient homemade Pistachio Coffee Creamer is the easiest way to hack a pistachio latte at home.
    Prep Time5 minutes mins
    Cook Time5 minutes mins
    Total Time10 minutes mins
    Course: Drinks
    Cuisine: American
    Keyword: Pistachio Creamer
    Servings: 11 servings
    Calories: 186kcal
    Author: Megan Byrd

    Equipment

    • 1 small saucepan
    • 1 mason jar

    Ingredients

    • 1 ¾ cups half & half
    • 1 cup granulated sugar
    • 6 tablespoon pistachio cream
    • ¼ cup heavy cream
    • ¼ teaspoon almond extract

    Instructions

    • Add the half & half, sugar, pistachio cream, and heavy cream to a small saucepan and heat over medium-low heat. Whisk the creamer until everything is melted and well combined.
    • Remove from heat and whisk in the almond extract.
    • Allow to cool at room temperature for 15 minutes, then transfer to a mason jar or other airtight container and store in the fridge for up to 2 weeks!

    Notes

    This recipe makes about 2.75 cups of pistachio creamer!

    Nutrition

    Serving: 0.25cup | Calories: 186kcal | Carbohydrates: 25g | Protein: 3g | Fat: 9g | Sodium: 41mg | Sugar: 24g
    Homemade pistachio creamer.

    xoxo Megan

    Pistachio Oat Milk Cortado (Starbucks Copycat)

    December 21, 2025

    This sweet, nutty Starbucks Copycat Pistachio Oat Milk Cortado recipe is a snap to make with just 4 simple ingredients! It brings together the bold richness of espresso, the velvety creaminess of oat milk, and the cozy, dessert-like flavor of pistachio syrup in a small but mighty drink. 

    Pistachios have had a big year in the coffee world! From iced Dubai chocolate mochas to pistachio cream cold brews, pistachio lattes to pistachio oat milk cortados, this little green nut has made the rounds. And honestly, it’s no wonder. Who can resist their naturally sweet, buttery flavor and charming hue?

    And, while all of the nutty drinks Starbucks has unveiled (and I have dutifully copycatted 😹) this year, the pistachio cortado might be my favorite. I love its petite size and creamy, dairy-free sweetness. Plus, it’s strong, smooth, and ready in minutes—proof that fancy doesn’t have to mean complicated.

    So, if you’re looking to treat your bougie side to the latest fancy Starbucks trend, give this little guy a try. All you need is some espresso, my sweet pistachio sauce (made with just 4 ingredients in about 2 minutes), your favorite milk, and a crushed biscoff cookie for garnish. (I mean, if you’re gonna do the thing, you should really get after it, right?)

    [feast_advanced_jump_to]

    What does it taste like?

    Think: pistachio gelato meets a creamy oat-milk latte, with a Biscoff cookie riding shotgun. You get the gentle roasted notes of blonde espresso first, followed by the buttery richness of creamy pistachio sauce. The oat milk keeps everything velvety, and the Biscoff crumble on top adds a cinnamon-spiced finish. It’s rich without being heavy, sweet without being sugary, and perfectly warm and cozy—basically the coffee equivalent of a soft sweater on a chilly morning.

    45 degree angle of a homemade starbucks pistachio oat milk cortado showing the crushed biscoff topping on the foam; its on a table with a pinch bowl of shelled pistachios with some spilling out of the bowl.

    Why You’ll Love This Starbucks Copycat Recipe

    • Budget-Friendly - Considering a Starbucks cortado runs in the $5-6 range, this homemade version is a gee-dang steal. I was able to make it for just over $1—and I didn’t have to tip! If you’re looking for an easy way to trim your spending (aren’t we all?), DIYing your favorite Starbucks copycats is a great place to start!
    • Just 4 Ingredients - We’re keeping it simple, sunshine! 
    • Cozy & Caffeinated - By 3 o’clock on a wintry day, I need something that feels like a warm hug and a kick in the pants. This pistachio oat milk cortado does just that! The creamy, dreamy sweetness of the pistachio sauce and steamy milk gives the cozy, while the double shot of espresso gives mama the caffeine she so desperately needs. 😅

    Ingredients Needed

    • Blonde Espresso - A lighter roast with sweet, mellow notes of caramel and toasted sugar. It gives this cortado a smoother, brighter flavor compared to traditional dark espresso, letting the pistachio shine.
    • Pistachio Sauce - This plays double duty, adding nutty sweet flavor and making the cortado extra creamy-dreamy thanks to the sweetened condensed milk.
    • Barista Oatmilk - Reaching for a barista blend is the best way to ensure your oat milk will steam well. I’ve also heard that Aldi’s original oatmilk is a good one for frothing, but alas! I don’t have one here in Oregon. 
    • Crushed Biscoff - Optional, but luxurious. This is a little finishing touch that makes your pistachio cortado feel authentically Starbucks. In the wise words of The Devil Makes Three, “if you’re gonna do wrong, buddy, do wrong right.”
    ingredients needed to make a starbucks pistachio oatmilk cortado at home measured out on a white table.

    Substitutions

    • Blonde Espresso - Feel free to swap in regular espresso, strongly brewed drip coffee, or heated cold brew.
    • Pistachio Sauce - While it won’t be quite as creamy-dreamy, you can also use pistachio syrup.
    • Barista Oatmilk - You’re welcome to use any dang milk you please—no upcharges at home!
    • Crushed Biscoff - Omit it if you prefer fewer calories. Or, swap in crushed gingersnaps or finely chopped pistachios.
    hand clad in a green sweater to the knuckles grabbing the clear glass of pistachio cortado from the table with the pistachios scattered around.

    How To Make A Starbucks Pistachio Oatmilk Cortado At Home

    Step 1: Brew & Melt. Pull a fresh shot of blonde espresso, then whisk in the pistachio sauce while it’s still hot so it melts into a smooth, nutty base.

    Step 2: Heat & Froth. Warm the oat milk until it’s steamy, then froth it to your desired level of creaminess. A microfoam works especially well for a cortado.

    Step 3: Finish & Garnish. Gently pour the oat milk into the pistachio espresso mixture, then finish with a sprinkle of crushed Biscoff cookie on top. Sip (or gulp) and enjoy!

    espresso being poured into a clear glass with the pistachio sauce in it.
    the espresso in the glass after mixing with the pistachio sauce with a silver spoon; the color is slightly lighter than before.
    action shot of frothed milk being poured into the pistachio espresso mixture to finish the cortado.

    Optional Variations & Dietary Adjustments

    • Dairy-Free/Vegan - Make sure your pistachio sauce is made with a dairy-free sweetened condensed milk alternative (like coconut- or oat-based) and stick to oat milk or another plant-based option.
    • Gluten-Free - Skip the Biscoff cookie garnish or replace it with crushed gluten-free spice cookies or chopped pistachios.
    • Iced Pistachio Cortado - Skip heating the milk and pour everything over a handful of ice. Froth the oat milk cold for a silky mouthfeel.
    • Boozy Cortado - Stir in a tipple of pistachio liqueur, amaretto, or Frangelico for a cozy, adults-only treat.

    Serving Suggestions

    This pistachio oat milk cortado is the perfect little mid-morning or afternoon pick-me-up—small, strong, and just sweet enough to feel like a treat. Because cortados are traditionally sipped slowly and savored, you can serve this in a 4-5 oz cortado mug (yep, that’s a thing) and enjoy it while warm and fragrant. For an iced cortado, use a small rocks glass.

    It’s perfect for serving with something small and simple like a piece of dark chocolate, a fluffernutter cookie, a slice of cinnamon maple butternut squash bread, or a chewy molasses spice cookie. If you’re serving it for brunch, pair it with pastries that echo the drink’s flavors: pistachio muffins, almond croissants, or anything with warm spices to complement the Biscoff.

    closeup 45 degree angle shot of a biscoff topped pistachio cortado made with frothed oat milk.

    Recipe Success Tips

    • Recipe Success Tips
    • Use hot espresso for the smoothest blend. Whisking the pistachio sauce into freshly brewed espresso helps it melt and emulsify, preventing any graininess.
    • Froth lightly, not heavily. A cortado traditionally uses a soft microfoam—not the big, fluffy latte foam—so aim for a silky texture rather than a big volume increase.
    • Warm the oat milk gently. Oat milk can scorch quickly, which changes the flavor. Heat it until just steamy for the best taste.
    • Crush the Biscoff right before serving. This keeps the cookie topping crisp so it doesn’t turn mushy too fast in the steam.
    • Adjust sweetness to taste. Start with less and add more as needed.
    • Use a clear glass if you want café-style vibes. The layers from the blonde espresso and oat milk look pretty, and you eat drink with your eyes first.

    FAQs

    What is in a cortado?

    A cortado is a simple, balanced coffee drink made with equal parts espresso and warm, lightly steamed milk. It’s designed to “cut” the acidity and intensity of the espresso without diluting it, creating a smooth, strong, small-format drink. (Cortar = “to cut” in Spanish)

    What is the difference between a latte and a cortado?

    A latte uses much more milk and has a thick layer of foam, resulting in a larger, creamier, milder drink. A cortado, on the other hand, is small and strong, made with equal parts espresso and lightly steamed milk with less foam. It’s more espresso-forward, while a latte is milk-forward and noticeably sweeter and softer in flavor.

    Is a cortado the same as a flat white?

    A cortado is a small drink with equal parts espresso and lightly steamed milk with a nice layer of microfoam. A flat white is larger, uses more milk, and is made with a thick layer of microfoam poured over a stronger espresso base (usually a double ristretto). The flat white is creamier and slightly sweeter on account of the extra milk, while the cortado is more espresso-forward.

    Is pistachio good in coffee?

    Starbucks sure seems to think so, and I tend to agree!

    homemade pistachio oat milk cortado on a white marble round on a grey slate tile table with shelled pistachios scattered around and a green houseplant blurred out in the back.

    Homemade Pistachio Oat Milk Cortado Nutrition

    Each homemade pistachio oatmilk cortado comes in at about 217 calories, making it a petite but satisfying treat—more indulgent than a plain cortado, but much lighter than a full-sized flavored latte. It has 10 grams of fat, which gives the drink its silky, dessert-like texture. You’ll also get 6 grams of protein, which helps give the drink a little staying power. 

    With 126 mg of sodium, it stays relatively low in salt—particularly for something so nutty. Most of the energy in this recipe comes from carbohydrates—29 grams total, including 21 grams of natural and added sugars from the pistachio sauce and oat milk. 

    That sweetness is what gives the cortado its gelato-like flavor, but the small serving size keeps things balanced and portion-friendly. Overall, it’s a cozy, nutty coffee treat that delivers a lot of flavor without tipping into overly heavy territory—perfect for when you want something special without blowing your calorie budget.

    Total nutritional content per serving is:

    • Calories: 217 calories
    • Total Fat: 10 grams
    • Protein: 6 grams
    • Sodium: 126 mg
    • Carbohydrates: 29 grams
    • Sugar: 21 grams

    *This nutritional information is an estimate and calculated based on the ingredients used to create the recipe. The nutritional value of your ingredients may differ slightly. Furthermore, this food is not intended to prevent, diagnose, cure, or treat any disease.

    horizontally framed hero shot of a DIY pistachio cortado (starbucks copycat) make with oat milk.

    Other Starbucks Copycat Recipes

    • Horchata Syrup (Starbucks Copycat)
    • Iced Horchata Oatmilk Shaken Espresso (Starbucks Copycat)
    • Iced Peach Green Tea (Starbucks Copycat)
    • Blackberry Sage Refresher (Starbucks Copycat)
    Print Recipe
    5 from 1 vote

    Pistachio Oat Milk Cortado (Starbucks Copycat)

    This Starbucks Copycat Pistachio Oatmilk Cortado is packed to the brim with rich, nutty taste & plenty of caffeine. She's small but mighty!
    Prep Time3 minutes mins
    Cook Time2 minutes mins
    Total Time5 minutes mins
    Course: Drinks
    Cuisine: American
    Keyword: Pistachio Oat Milk Cortado
    Servings: 1 drink
    Calories: 217kcal
    Author: Megan Byrd

    Equipment

    • 1 milk frother

    Ingredients

    • 1.5 oz blonde espresso shots
    • 2 tablespoon pistachio sauce (or pistachio syrup)
    • ¾ cup barista-style oat milk
    • crushed Biscoff cookies optional for topping

    Instructions

    • Brew 1.5 oz blonde espresso (ristretto if possible), and pour into a 10 oz glass or mug. Stir in the pistachio sauce.
    • Heat oat milk until steaming and froth with a milk frother. Pour your steamed oat milk over your sweetened espresso.
    • Top with crushed Biscoff cookies if desired and drink up!

    Nutrition

    Serving: 1drink | Calories: 217kcal | Carbohydrates: 29g | Protein: 6g | Fat: 10g | Sodium: 126mg | Sugar: 21g
    Pistachio oat milk cortado.

    xoxo Megan

    Protein Iced Coffee (3 Flavors!)

    December 19, 2025

    Skeptics, beware—you really can have it all, and this Protein Iced Coffee is proof! Brimming with 22 grams of protein per serving and delicious, coffee shop-like blends, this protein iced coffee recipe is a winner. Try all three varieties—vanilla, chocolate, and caramel—to find your next favorite secretly healthy sipper.

    A close-up overhead shot of three tall glasses of protein iced coffee on the counter.

    I’ve been drinking protein coffee since before it was cool—like, pre-Instagram-trend cool. Back in 2018, I started blitzing protein into my morning coffee for a frothy, latte-like start to the day, and it quickly became part of my routine. It’s cozy, satisfying, and such an easy way to sneak in extra protein without feeling like you’re forcing down another shake.

    But lately, with Starbucks and other big coffee chains jumping on the protein-coffee bandwagon, I figured it was finally time to share my iced version, too—the one I’ve been making after workouts and on warm mornings: this Protein Iced Coffee recipe. It’s refreshing, lightly creamy, and feels like something you’d grab at a coffee shop… just a lot more nutritious and budget-friendly.

    Quite possibly my favorite part? It doesn’t taste like a protein shake—it tastes like a treat. Think smooth coffee, subtle sweetness, and that café-style creaminess—only it secretly packs in 22 grams of protein. It’s the kind of drink I genuinely look forward to and feel great about enjoying regularly, whether I’m easing into the morning, recovering after a workout, or need something delicious to perk up my day.

    [feast_advanced_jump_to]

    What Is Protein Coffee?

    Protein coffee is simply coffee mixed with a protein shake. While there are lots of ways to make it, this version is my go-to because it’s easy, high in protein, and endlessly customizable to fit cravings and dietary goals. It’s made by combining fresh espresso with a premade vanilla, chocolate, or caramel protein shake over ice. Add caramel or vanilla syrup or mocha sauce for extra sweetness and flavor, or keep it as-is for a nutritious, lightly sweet drink you can enjoy every day.

    What Does It Taste Like?

    Each sip of this creamy, latte-like drink starts with a bold, coffee-forward flavor. Two shots of espresso add depth and richness, while the protein shake brings a smooth, silky creaminess that blends everything together. Poured over ice, it’s refreshingly cold with a lightly frosty finish.

    From there, the flavor is totally up to you. Vanilla protein gives cozy vanilla–latte vibes, caramel adds a caramel–macchiato twist, and chocolate delivers a deeper, mocha-like experience. No matter which direction you take it, the drink feels dessert-adjacent—indulgent-tasting without being heavy, rich without being overpowering, and absolutely coffee-shop worthy.

    A side shot of a glass of caramel protein iced coffee on a marble serving tray.

    Why You'll Love High-Protein Iced Coffee

    • Protein Goal Multitasker — Tastes like your favorite iced latte but packs in 22 grams of protein per glass. Talk about killing two birds with one stone.
    • Totally Tasty — Just because you’re working toward your protein goals doesn’t mean it can’t be delicious. Each sip tastes like a treat—unsuspecting drinkers would never guess it’s high-protein coffee!
    • Stunningly Simple Prep — Three ingredients and two easy steps. It’s the kind of drink you can make when you’re still half asleep.
    • Great for Meal Prep — Make it the night before for grab-and-go convenience on busy mornings. Add the sweetened espresso and protein shake to a travel cup and refrigerate overnight. Just stir in ice and enjoy come the early a.m.!

    Ingredients

    • Espresso — For deep coffee flavor and a dependable energy boost! Make it in an espresso maker, Nespresso, or even in the French press. Always pull it fresh whenever possible for the smoothest flavor.
    • Protein Shake of Choice — Using a premade shake ensures your high-protein coffee stays smooth and drinkable with no gritty texture. Use your preferred brand and flavor for your favorite latte vibe, such as vanilla, chocolate, or caramel. I use and recommend Premiere Protein, though you can absolutely use your favorite brand.
    • Syrup or Sauce (Optional) — Two tablespoons of vanilla or caramel syrup or mocha sauce enhance the flavor and add a touch of sweetness, but they're totally optional. For added sweetness with fewer carbs, make your syrup or sauce with monkfruit sweetener.
    • Ice — Keeps the drink cool and frosty. You’ll need a large handful or enough to fill a tall glass.
    All the ingredients needed to make protein iced coffee: espresso, a premade protein shake, and caramel syrup.

    Substitutions

    • Espresso — Don't have an espresso maker? Substitute French-press espresso, strong-brewed coffee, or espresso made in a Moka pot.
    • Protein Shake — If you’d rather use protein powder you already have, simply shake it with milk to create a smooth, drinkable protein base.
    • Syrup — For ultimate convenience, add a pump or two of pre-made coffee syrup. For a less-sweet drink, just skip it.
    A close-up shot of a glass of stirred vanilla protein iced coffee on the counter.

    How to Make Protein Coffee

    Thankfully, the prep is quick and painless—perfect for bleary-eyed mornings, post-workout shaky arms, and whenever you need a protein and energy boost:

    Step 1: Brew the espresso, then stir in the syrup or sauce of choice (if using) until dissolved. Set aside.

    Step 2: Pour your protein shake of choice over a tall glass of ice.

    Step 3: Top the shake with the sweetened espresso, then drink up!

    Pouring espresso into a small glass with the flavored syrup.
    Pouring a protein shake into a tall glass with ice.
    Adding the flavored espresso to the glass of iced protein shake.

    Optional Variations & Dietary Adjustments

    • Blended — Blitz everything in a blender until smooth and frosty for a smoothie-like healthy protein coffee.
    • Decaf — Power up with protein without the buzz by using decaf espresso.
    • Vegan and Dairy-Free — Keep it plant-based and sans dairy by using a vegan protein shake.
    • Use Protein Powder — Follow the package directions to make a cup of protein shake. For many brands, it's mixing 1 scoop of powder with 1 cup of your milk of choice. Once made, continue with the recipe directions.
    • Reduced-Sugar Syrups — Enjoy a sweeter protein coffee recipe while still watching your sugar and carbs by making the syrup with monkfruit sweetener.
    • Make It a Double — For those "make it a venti" type mornings, double the ingredients and continue with the recipe as directed. A double serving boasts 44 grams of protein—talk about a great way to start your day.
    • Extra Protein Boost — Use a high-protein shake (such as Fairlife Core Power Elite) for about 30 grams of protein per serving.
    • Flavor Mix-Up — Add your own flavor twist with Cinnamon Bun, Peanut Butter Cup, Chocolate Brownie Batter, or another favorite protein powder flavor you'd enjoy with coffee.

    Serving Suggestions

    • Early Morning Power-Up — With easy prep and an impressive protein count, this drink is always a winning way to start your day.
    • Post-Workout Refuel — Sip it on its own or pair it with a healthy snack like Double Chocolate Zucchini Muffins or Monster Cookie Protein Balls to kickstart your recovery.
    • Afternoon Slump Buster — Twenty-two grams of protein is a surefire way to get your groove back before the evening’s festivities. And of course, the caffeine doesn’t hurt either!
    • Errand Energy — Assemble your DIY protein coffee in a travel cup and sip while you power through your to-do list.
    A close-up shot of a glass of chocolate iced protein coffee on the counter.

    Recipe Success Tips

    • Pull fresh espresso. For smooth, full-bodied flavor, brew the espresso just before assembling your iced protein coffee.
    • Sweeten to taste. Prefer a mildly sweet drink? Skip the syrups or sauce. Otherwise, start with 1 tablespoon and add more until you find your perfect balance.
    • Adjust the pour size and espresso shots. Need an extra pick-me-up? Add another shot of espresso. Making a bigger drink to power you through the morning? Double the ingredients and combine them in a large insulated mug.
    • Chill glasses to prevent dilution. Popping your glass in the freezer for at least 15 minutes before assembling helps slow ice melt while keeping the drink cold, preserving its richness and flavor.
    • Use coffee ice cubes. Preserve that deep coffee flavor even as the ice melts by freezing cold brew in an ice cube tray.

    FAQs

    Can I add creatine or collagen to protein coffee?

    Certainly! Shake the protein shake with a 5-gram scoop of creatine or up to 2 tablespoons of unflavored collagen powder before pouring it over ice. If you’re using creatine, give the drink a stir occasionally as you sip for the smoothest consistency.

    What kind of protein powder works best for protein coffee?

    For the easiest prep and the smoothest, grit-free texture, I recommend using a premade protein shake. Otherwise, you can shake 1 cup of milk with a scoop of your favorite protein powder until it’s fully dissolved, then use it in the recipe.

    Can I make this sugar-free or low-carb?

    Yep! Make the syrups with monkfruit sweetener, or omit it altogether for a low-sugar, low-carb sip.

    Can I use protein powder instead of a ready-made drink?

    Definitely! Just shake 1 cup of your milk of choice with a scoop of protein powder, then use it in place of the premade shake.

    Can I prep this ahead of time?

    Absolutely. Combine the sweetened espresso and protein shake in a tall glass, cover, and refrigerate overnight. In the morning, just give it a stir, add ice, and enjoy!

    Pouring the last of the sweetened espresso into the glass of iced protein shake.

    Nutritional Info

    If you’re looking for a nutritious, protein-rich drink that adds variety to your protein shake routine—and fits easily into your daily diet without feeling as heavy as a meal replacement—this high-protein coffee is a winner. Each serving comes in around 200 calories with 22 grams of protein, 2 grams of fat, 22 grams of carbohydrates, and 21 grams of sugar, landing it nicely in that “light but satisfying” sweet spot.

    While most standard coffees contain very little protein, 22 grams certainly makes an impact and can help you reach your daily protein goals, supporting muscle maintenance, recovery, and overall satiety. The 2 grams of fat are modest, offering just enough creaminess without feeling heavy.

    At 22 grams of carbohydrates per serving (21 grams of which are sugar), this is slightly higher than many low-carb protein shakes. If you’d like to cut the sugar, make the syrup with monkfruit sweetener or skip it altogether.

    Overall, this balanced, protein-packed, and genuinely tasty drink is something I feel good about enjoying regularly. It hits that coffee craving, gives a nice nutrition boost, and still feels like a little treat—without going overboard.

    Total nutritional content per serving is:

    • Calories: 200 calories
    • Total Fat: 2 grams
    • Protein: 22 grams
    • Sodium: 276 mg
    • Carbohydrates: 22 grams
    • Sugar: 21 grams

    *This nutritional information is an estimate and calculated based on the ingredients used to create the recipe. The nutritional value of your ingredients may differ slightly. Furthermore, this food is not intended to prevent, diagnose, cure, or treat any disease.

    A horizontal shot of three glasses of iced protein coffee. Going from left to right: vanilla, caramel, and chocolate.

    Other Iced Coffee Recipes

    • Iced Coconut Ube Latte
    • Iced Zucchini Bread Latte (with Maple Cold Foam)
    • Iced Peanut Butter Latte
    • Iced Blueberry Latte
    Print Recipe
    5 from 1 vote

    Protein Iced Coffee (3 Flavors!)

    A creamy, coffee shop–style Protein Iced Coffee that delivers big flavor with 22 grams of protein per glass. It comes together in minutes with simple ingredients—make it vanilla, chocolate, or caramel for a secretly healthy, energizing sip any time of day.
    Prep Time5 minutes mins
    Total Time5 minutes mins
    Course: Drinks
    Cuisine: American
    Keyword: Protein Iced Coffee
    Servings: 1 drink
    Calories: 200kcal
    Author: Megan Byrd

    Ingredients

    Vanilla Protein Iced Coffee:

    • 2 oz espresso
    • 2 tablespoon toasted vanilla syrup (optional)
    • 1 cup vanilla protein shake
    • ice

    Chocolate Protein Iced Coffee:

    • 2 oz espresso
    • 2 tablespoon mocha sauce (optional)
    • 1 cup chocolate protein shake
    • ice

    Caramel Protein Iced Coffee:

    • 2 oz espresso
    • 2 tablespoon caramel sauce (optional)
    • 1 cup caramel protein shake
    • ice

    Instructions

    • Brew espresso, then stir in the syrup or sauce of choice until dissolved. Set aside.
    • Add ice to a tall glass, then pour in the protein shake. Top with the sweetned espresso, then serve!

    Nutrition

    Serving: 1drink | Calories: 200kcal | Carbohydrates: 23g | Protein: 22g | Fat: 2g | Sodium: 176mg | Sugar: 21g
    Protein iced coffee.

    xoxo Megan

    Iced Dubai Chocolate Matcha (Starbucks Copycat)

    December 10, 2025

    Take your taste buds on an international adventure with a tall glass of the much-anticipated Iced Dubai Chocolate Matcha. Slated for release at Starbucks in January 2026, this copycat version is smooth, creamy, and indulgent—sweet pistachio-infused matcha topped with silky chocolate cold foam. A sprinkle of toasted phyllo shreds adds a crisp, buttery finish. Truly a feast for all the senses!

    A close-up angled shot of a tall glass of iced Dubai Chocolate Matcha on the counter with a Dubai chocolate.

    Yesterday, I debuted my Iced Dubai Chocolate Mocha recipe, so today it only feels right to share the second drink in the must-anticipated Starbucks winter menu release: Iced Dubai Chocolate Matcha! This drink in two words? Swoon. Worthy. 😍

    With creamy, sweet pistachio-infused matcha, silky-smooth chocolate cold foam, and buttery, toasted phyllo shreds to top, the hype surrounding these drinks is totally justified. I love the contrast of silky, creamy, and crisp textures. Nutty pistachio complements rich chocolate like a dream, and grassy matcha balances the sweetness, making this drink feel a bit lighter than its mocha counterpart.

    Although baristas are already dreading its complicated prep, at-home assembly really is, honestly, surprisingly simple. Once you've made the pistachio and mocha sauces (they keep so well!), it takes less than 5 minutes to whisk the matcha, make the pistachio milk, and froth the cold foam. From there, simply assemble, sip, and enjoy as your taste buds transport you to a posh Dubai café.

    [feast_advanced_jump_to]

    What Is an Iced Dubai Chocolate Matcha?

    Iced Dubai Chocolate Matchas are among the much-anticipated Starbucks winter menu drinks slated to release on January 6, 2026. Inspired by Dubai's café culture and the increasingly popular Dubai chocolate bars (chocolate with a creamy pistachio filling), this copycat drink layers pistachio-infused matcha with creamy chocolate cold foam and a kataifi (toasted phyllo shreds) topping. The result is an earthy, creamy, nutty, and sweet drink that feels indulgent without being overly heavy.

    What Does it Taste Like?

    This isn’t your run-of-the-mill matcha! Each sip starts with silky, indulgent chocolate cold foam before it melts into the pistachio-matcha base. The sweet, nutty pistachio sauce softens the matcha beautifully, and once it’s poured over ice, the whole drink becomes creamy, balanced, and refreshingly frosty. The light yet rich chocolate topping plays so well with the matcha, giving the drink a dessert-like vibe without feeling heavy. Buttery toasted phyllo shreds finish out the drink—adding a final hit of texture and toastiness while making homage to phyllo's role in many traditional Middle Eastern desserts.

    A side shot of a glass of Iced Dubai Chocolate Matcha on the counter with the Dubai chocolates and pistachios.

    Why You'll Love Iced Dubai Chocolate Matchas

    Let’s just say there’s a reason this drink is so highly anticipated! Here are a few reasons you’ll want to get in on the hype:

    • Indulgent, Yet Balanced — Pistachio and mocha sauces add sweet richness, and the cold foam is lick-your-lips tasty, but the grassy matcha keeps the sweetness in check so it never feels over the top.
    • DIY-Friendly — You only need a matcha whisk and a handheld frother to make this barista-style drink. It’s also super versatile, so you can easily adjust it to your taste and dietary preferences.
    • Budget-Friendly — We all know how quickly that Starbies bill can add up! 😳 Save yourself the sticker shock by making these drinks at home.
    • Balanced Energy — love sipping these chocolate matcha lattes when I need a pick-me-up but don’t want to feel wired. They’re energizing without the dreaded caffeine crash.
    • Internationally-Inspired — Perfect for satisfying a bit of wanderlust—even if it’s just through your taste buds!
    • Trendsetting — Get ahead of the Starbucks release with this well-researched copycat recipe. With high-quality ingredients, simple technique, and a bit of love, it’s worlds better than what you’ll find in stores.

    Ingredients

    Wondering what you need to make a Dubai matcha latte? Only a handful of ingredients stand between you and enjoying this beloved drink at home:

    • Matcha Powder — For the smoothest flavor, use ceremonial grade matcha. Culinary grade also works; it just delivers slightly grassier notes.
    • Hot Water — Used to dissolve the matcha before mixing it with the milk. Use hot, not boiling, water to prevent bitterness.
    • Milk — Mixes with the pistachio sauce to create a smooth, creamy drink. Use your milk of choice; I often use 2%, but whole, low-fat, or non-dairy milk all work great.
    • Pistachio Sauce — Adds sweet, nutty flavor. You only need 4 ingredients and 2 minutes to make it from scratch.
    • Ice — Cools the Dubai matcha latte, keeping it frosty and refreshing.
    • Heavy Cream — Whips with the mocha sauce and whole milk to create a light and airy yet rich cold foam. Use extra-cold heavy whipping cream for the best results—straight from the fridge is ideal.
    • Whole Milk — Just one tablespoon lightens the cold foam while keeping it cool and creamy.
    • Mocha Sauce — Adds rich chocolate notes to the cold foam. Homemade mocha sauce comes together with simple pantry staples and is one I almost always keep on hand.
    • Kataifi — This toasted, shredded phyllo dough is an optional garnish that adds a buttery, crisp texture and gives a nod to baklava and other traditional Middle Eastern desserts. You can find kataifi in Middle Eastern markets, the grocery aisle of well-stocked grocery stores, and online.
    All the ingredients needed to make Iced Dubai chocolate matcha.

    Substitutions

    Don't have every listed ingredient? No worries — this list of approved substitutions and swaps makes it accessible with other pantry staples and store-bought alternatives.

    • Pistachio Sauce — Swap in pistachio syrup for a similarly nutty matcha. The flavor will be slightly less rich, but still delicious.
    • Heavy Cream and Whole Milk — For a convenient 2-for-1 substitution, use 3 tablespoons of half-and-half in place of the heavy cream and whole milk.
    • Mocha Sauce — High-quality chocolate syrup (made with cane sugar and natural cocoa) works well in place of homemade mocha sauce. The cold foam will be a bit less thick, but still tasty.
    • Kataifi — If you can't find it, you can omit it or garnish with broken vermicelli or angel hair pasta, pan-toasted in a bit of butter. Chopped pistachios are also delicious!
    A close-up angled shot of a glass of iced Dubai chocolate matcha without the kataifi topping.

    How to Make an Iced Dubai Chocolate Matcha

    Why hit up the drive-through when at-home prep is simple, quick, and budget-friendly?! Make the pistachio and mocha sauce, and you'll be set all week. Here's how to do it:

    Step 1: Make chocolate cold foam. Add the heavy cream, whole milk, and mocha sauce to a small glass or mason jar. Froth with a milk frother for 20-30 seconds or until foamy. Set aside.

    Step 2: Make matcha. Sift the matcha powder through a fine-mesh strainer to remove any lumps. Whisk the sifted matcha into the hot water until smooth and well combined. Set aside.

    Step 3: Make pistachio milk. Add ice to a tall glass. Stir the milk and pistachio sauce until smooth and pour over the ice.

    Step 4: Assemble. Add the matcha to the milk and stir until combined. Top with the chocolate cold foam and toasted kataifi if desired. Drink up!

    A small glass with a matcha whisk and hot water mixed with matcha.
    Frothing the chocolate cold cream in a small glass.
    Pouring the pistachio milk into a glass of ice.
    Pouring the matcha mixture into the glass of iced pistachio milk.
    Topping the iced pistachio matcha with the chocolate cold foam.

    Optional Variations & Dietary Adjustments

    • Dairy-Free & Vegan — Use cold coconut milk instead of cream and milk for the cold foam, swap pistachio syrup for the sauce, and add the matcha to your favorite non-dairy milk, such as oat, almond, and coconut.
    • Decaffeinated — Swap decaffeinated matcha for traditional matcha for a low-caffeine drink. The mocha sauce will add a small amount of caffeine, but the overall effect will be much milder.
    • Dark Chocolate — For a deeper chocolate flavor that pairs beautifully with the nutty pistachio, make the mocha sauce with dark cocoa powder.
    • Dirty — Whisk a shot (or two!) of fresh-pulled espresso into the matcha for an extra boost and bolder flavor.
    • Reduced Sugar — Lighten up the latte and prevent a sugar crash by making the pistachio sauce with sugar-free sweetened condensed milk and the mocha sauce with monkfruit sweetener.
    • Pistachio Garnish — A sprinkle of crunchy pistachios adds delightful extra texture and nutty flavor.
    • Cardamom — Whisk up to ½ teaspoon of ground cardamom into the matcha for a warm, fragrant finish.
    • Rose Water — Explore more classic aromatic Middle Eastern aromatics by stirring up to ¼ teaspoon into the pistachio milk before assembling the drink. Rose can be strong, so start small and adjust to taste.
    • Tahini — Another nutty Middle Eastern staple! Replace one of the tablespoons of pistachio sauce with drippy tahini for lightly bitter, earthy undertones that beautifully complement the chocolate and pistachio.

    Serving Suggestions

    • Slow Morning Sipper — Banish bleary eyes by enjoying this Starbucks Dubai matcha with yogurt and berries, avocado toast, or High-Protein Banana Muffins for a nutritious and energizing start to the day.
    • Afternoon Boost — Sip it as a refreshing mid-afternoon lift so you have steady energy for the evening ahead.
    • Café-Worthy Pairings — Create a full Starbucks-at-home moment by enjoying the Dubai Starbucks copycat alongside Cranberry Bliss Bars, Double Chocolate Zucchini Muffins, or Vanilla Bean Scones.
    • Entertaining Extraordinaire — What's brunch without a fun specialty drink? Mix the matcha with the pistachio milk ahead of time, then set it out with the chocolate cold foam and a selection of toppings (pistachios, kataifi, or even dried coconut) so guests can customize their drinks.
    • Evening Unwind — Make it with decaf matcha for a gentler sip that helps you unwind at the end of the day.
    A close-up angled shot of a tall glass of the iced Dubai matcha topped with toasted kataifi.

    Recipe Success Tips

    • Make perfect cold foam. Use straight-from-the-fridge cold cream and milk for light, airy, and rich cold foam. Froth it until thick but pourable—overwhipping can make it thick and stiff.
    • Don't boil the water for the matcha. Boiling water can ruin the matcha's flavor, making it bitter instead of smooth and sweet. Use water that is hot, but not boiling, or about 160-175°F.
    • Whisk the matcha until frothy. Don't just mix the matcha; whisk it well with a matcha whisk until smooth and frothy.
    • Adjust the sweetness to taste. Matcha brands vary in flavor, so feel free to adjust the mocha or pistachio sauce to suit your preferences.
    • Layer carefully. For a beautiful, café-style presentation, pour the matcha mixture over ice first, then spoon the cold foam on top.

    FAQs

    Can I make this drink hot instead of iced?

    Yes! Heat the milk until steaming (but not boiling). Stir ¾ of it with the pistachio sauce until combined. Whisk the matcha powder into the remaining ¼ cup until smooth and frothy. Assemble the drink as directed, skipping the ice, and finish with the chocolate cold foam. The foam will melt slightly into the warm drink, but it will still be delicious!

    Can I make the mocha and pistachio sauce ahead of time?

    Certainly — they are both great for advanced prep and store well in the refrigerator in airtight glass jars.

    Why is my matcha clumping?

    Matcha can clump if the water is too cold or if it wasn't sifted. Be sure to sift it first and whisk it with hot (not boiling) water.

    Can I prep the drink ahead of time?

    The pistachio matcha mixture can be made 24 hours in advance, but the cold foam should be made right before serving.

    A side shot of a glass of iced Dubai matcha on a marble serving tray with Dubai chocolates.

    Nutritional Info

    Like many specialty drinks, this Starbucks matcha latte copycat recipe lands squarely in the indulgent-dessert category rather than the everyday-drink camp. Coming in at 415 calories with 20 grams of fat, 15 grams of protein, 45 grams of carbohydrates, and 39 grams of sugar, it’s fairly rich but still decently balanced for satiety.

    Fifteen grams of protein is impressive for a drink and supports muscle maintenance and fullness, but it’s outweighed by the 39 grams of sugar and 20 grams of fat. Typical recommendations for added sugar range from 25 to 36 grams per day, and much of the fat here is saturated—making this best enjoyed as an occasional part of a healthy lifestyle. Occasional indulgence, after all, is essential for sustainability.

    If you’d like to lighten up this drink, there are plenty of ways to do so. Reduce the sugar by making the pistachio sauce with sugar-free sweetened condensed milk and the mocha sauce with monkfruit sweetener. Lower the calories by using half-and-half and low-fat or skim milk. You can also boost the protein content by using filtered milk or stirring collagen powder into the pistachio milk.

    Total nutritional content per serving is:

    • Calories: 415 calories
    • Total Fat: 20 grams
    • Protein: 15 grams
    • Sodium: 165 mg
    • Carbohydrates: 45 grams
    • Sugar: 39 grams

    *This nutritional information is an estimate and calculated based on the ingredients used to create the recipe. The nutritional value of your ingredients may differ slightly. Furthermore, this food is not intended to prevent, diagnose, cure, or treat any disease.

    A horizontal shot of a glass of iced Dubai matcha on a marble serving tray with nuts and kataifi.

    Other Matcha Recipes

    Print Recipe
    5 from 1 vote

    Iced Dubai Chocolate Matcha (Starbucks Copycat)

    Experience the much-anticipated Iced Dubai Chocolate Matcha at home. This smooth and creamy drink layers sweet, pistachio-infused matcha with silky chocolate cold foam and a sprinkle of toasted phyllo for a crisp, buttery finish. Once you make the mocha and pistachio sauces, you can enjoy drinks for the weeks to come!
    Prep Time5 minutes mins
    Total Time5 minutes mins
    Course: Drinks
    Cuisine: American
    Keyword: Iced Dubai Chocolate Matcha
    Servings: 1 drink
    Calories: 415kcal
    Author: Megan Byrd

    Equipment

    • 1 milk frother
    • 1 matcha whisk

    Ingredients

    Chocolate Cold Foam:

    • 2 tablespoon heavy cream
    • 1 tablespoon whole milk
    • 1 tablespoon mocha sauce (or chocolate syrup)

    Iced Dubai Chocolate Matcha:

    • 1 ½ teaspoon pure matcha powder sifted
    • 3 tablespoon hot water
    • 1 cup milk of choice (I used 2%)
    • 2 tablespoon pistachio sauce
    • ice
    • toasted Kataifi (optional for topping)

    Instructions

    • Make the cold foam. Add the heavy cream, whole milk, and mocha sauce (or chocolate syrup) to a small glass or mason jar and froth with a milk frother for 20-30 seconds until foamy. Set aside.
    • Sift matcha powder using a fine mesh strainer, removing any clumps. Whisk the sifted matcha and hot water together until smooth and well combined. Set aside.
    • Add ice to a tall glass. Stir together your milk and pistachio sauce until no clumps remain and pour over the ice. Add the matcha and stir until combined.
    • Top with chocolate cold foam and toasted Kataifi if desired. Drink up!

    Nutrition

    Serving: 1drink | Calories: 415kcal | Carbohydrates: 45g | Protein: 15g | Fat: 20g | Sodium: 165mg | Sugar: 39g
    Dubai chocolate matcha.

    xoxo Megan

    Iced Dubai Chocolate Mocha (Starbucks Copycat)

    December 10, 2025

    Discover the Starbucks 2026 winter drink hype ahead of time! That's right, this Iced Dubai Chocolate Mocha delivers everything you'll soon be able to order in stores—only better. It's budget-friendly, customizable, and layered with rich chocolate and silky, nutty pistachio cold foam, and crispy toasted phyllo shreds. That is, heaven in a glass!

    A close-up side shot of a glass of Iced Dubai Chocolate Mocha on the counter.

    As always, I’ve got you covered when it comes to Starbucks’ newest drinks! This one was especially fun and totally unexpected. I’ll be honest—I wasn’t even sure what a Dubai mocha was when Starbucks teased their upcoming winter menu. But you can bet I quickly studied up, did a little Starbucks barista snooping (I have my methods!), and figured out all the secrets behind this delicious, indulgent, luxe-style dessert drink.

    The Middle East is renowned for its coffee culture, aromatic flavors, and love of pistachios, and this drink is a perfect example of that heavenly combination. Think rich chocolate, deep espresso, and silky pistachio cold foam—topped with a buttery crunch. One sip, and you'll understand why Dubai cafés are earning their reputation.

    The best part? You can make it long before it hits stores or goes viral. Whip up the mocha sauce and pistachio sauce once, and you’ll have everything you need for quick, decadent drinks in the weeks to come. It’s budget-friendly, customizable, indulgent, and—I dare say—even better than what Starbucks has coming.

    [feast_advanced_jump_to]

    What Is an Iced Dubai Chocolate Mocha?

    An Iced Dubai Chocolate Mocha is a specialty-style iced mocha that Starbucks is slated to release on its winter drink menu in January 2026. It starts with a classic iced mocha base and gets elevated with silky, nutty pistachio cold foam and a sprinkle of kataifi (finely shredded, toasted phyllo). The result is a creamy, chocolate-forward cool coffee drink with warm and nutty Middle Eastern notes.

    This luxurious twist on a regular mocha has gained buzz thanks to the growing love for pistachio desserts and Middle Eastern–inspired flavors. Many believe this mocha recipe was inspired by Dubai chocolate bars—rich chocolates filled with creamy pistachio—and Dubai's café culture known for luxurious, nutty, aromatic drinks.

    What Does it Taste Like?

    Each cool, robust, and aromatic sip of this iced Dubai chocolate mocha tastes like your favorite rich and chocolatey iced mocha, elevated with indulgent and nutty pistachio, that softens the bold espresso and chocolate notes, evoking the warmth of a luxurious Dubai café.

    The creamy, sweet, and nutty pistachio cold foam is rich, silky, and light all at once, balancing the deep espresso and mocha base. The ice keeps the drink forsty mad refreshing, while the kataifi adds a delicate, buttery crunch.

    Enjoy a cool glass whenever you're craving a creamy, caffeinated indulgence, a treat for the senses, or simply want to expand your repetoire with an internationally inspired drink.

    A hand reaching to grab a class of Iced Dubai Chocolate Mocha.

    Why You'll Love This Dubai Mocha

    This Starbucks winter drink is highly anticipated for good reason! A few of the many reasons I swoon over it:

    • A Festival of Flavors and Textures — With rich chocolate, nutty pistachio, bold espresso, creamy milk, a silky cold foam, and crispy Kataifi, this drink has it all.
    • Rich and Indulgent — A 2-for-1 of coffee and dessert moment, it never fails to hit all the right notes.
    • Surprisingly Simple — Just make the pistachio and mocha sauces once and you have drinks for a few weeks! It's practically meal prepping for coffee hour. 😉
    • Energizing Refreshment — Two shots of espresso provide a uplifting boost, creamy milk and frosty ice make it cool and hydrating. The perfect mix!
    • International Delight — It's inspired by Middle Eastern flavors that will transport you to your favorite café, or maybe even abroad!
    • Ahead of Trend — Pistachio coffee drinks are having a moment. This recipe allows you to experience all the hype before the Dubai mochas hit the official Starbucks menu (run, don't walk!).

    Ingredients

    Although they taste exotic, iced Dubai mochas are much easier to make at home than you might expect. Many of the key ingredients come together quickly with simple pantry staples, and even the kataifi can be ordered online. With just a little prep, you’ll have everything you need to whip up this luxurious, coffeehouse-style drink right in your own kitchen.

    • Heavy Cream — Forms the base of the pistachio cold foam. Use cold, straight-from-the-fridge heavy whipping cream for the silkiest texture and richest flavor.
    • Pistachio Sauce — This rich, nutty, and sweet sauce delivers big on indulgent Middle Eastern flavors and is surprisingly simple to make with pistachio cream, sweetened condensed milk, milk, and almond extract.
    • Espresso — It wouldn't be a proper mocha without it! Freshly pull two shots for the deepest, most robust flavor.
    • Milk — Loosens the mocha sauce and makes the drink creamy and smooth. Use your milk of choice—2%, whole, low-fat, or non-dairy options all work well.
    • Mocha Sauce — Provides deep, chocolatey richness. Homemade is simple and budget-friendly—just simmer water, sugar, cocoa powder, and vanilla.
    • Ice — Keeps the drink cool and frosty without watering it down.
    • Kataifi — If you’ve never had it, you’re in for a treat! Kataifi is phyllo dough shredded into ultra-fine strands, then baked until crisp and golden. It's light, flaky, and perfect for soaking up the pistachio and chocolate flavors. Find it at specialty grocers, in the frozen section of well-stocked grocery stores, or online.
    All the ingredients needed to make Iced Dubai Chocolate Mocha..

    Substitutions

    Can't find any of the above or want an easy, store-bought sauce swap? Consider some of these approved substitutions:

    • Cream—Though the cold foam won't be quite as aerated or rich, half-and-half still whips up nicely, making a great cold foam stand-in.
    • Pistachio Sauce—Blend pistachio syrup with heavy cream for a lighter drink topper that's still full of nutty-sweet pitaschio goodness, or purchase premade pistachio sauce for the ultimate ease.
    • Espresso—Don't have an espresso machine? Not to worry! Moka pot coffee, French press espresso, or strongly brewed coffee all work well.
    • Milk—Coconut, almond, or oat milk all make great dairy-free subs, adding a silky nuttiness that complements both the pistachio and chocolate.
    • Mocha Sauce—A high-quality chocolate syrup made with cane sugar works as a simple swap and still makes for a delicious winter coffee drink.
    • Kataifi—If you're having trouble nailing it down, you can simply omit it, use toasted Biscoff cookie crumbs, or even chopped pistachios!
    A close-up angled shot of a glass of Iced Dubai Chocolate Mocha. on the counter.

    How to Make a Iced Dubai Chocolate Mocha

    Enjoy this much-anticipated Starbucks winter drink in the comfort of your own home—before it even hits their menu—with these easy, anyone-can-master steps:

    Step 1: Make the cold foam. Add the heavy cream and pistachio sauce to a small jar or glass and whip with a milk frother for 20-30 seconds or until foamy. Set aside.

    Step 2: Prepare iced mocha. Add ice to a tall glass, then pour in the espresso. In another glass, stir together the milk and mocha sauce, then pour over the espresso. Stir if desired.

    Step 3: Assemble and enjoy. Top the iced mocha with the pistachio cold foam and toasted Kataifi if desired. Drink up!

    Blending the pistachio cream in a small glass.
    Pouring espresso into a glass with ice.
    Pouring the mocha sauce into the glass with the espresso.
    Topping the Iced Dubai Chocolate Mocha with the pistachio cream.

    Optional Variations & Dietary Adjustments

    • Hot — Whisk the milk and mocha sauce together, then heat over low until just steaming. Combine with two shots of espresso and top with pistachio cold foam — it may melt slightly, but it will still be delicious.
    • Dairy-Free and Vegan — Swap pistachio syrup for the sauce, use vegan whipping cream or coconut cream instead of the heavy cream, and your favorite non-dairy milk (I recommend coconut, oat, or almond) to make a delicious plant-based delight.
    • Decaffeinated — Enjoy a Dubai mocha any time of day by using decaffeinated espresso. There will still be a marginal amount of caffeine from the cocoa powder, but this swap greatly reduces the overall amount.
    • Reduced Sugar — Make the pistachio cream with sugar-free sweetened condensed milk and the mocha sauce with a monkfruit sweetener to cut back on added sugar.
    • Pistachio Topping — Garnish the winter drinks with crushed pistachios for a nutty crunch and enhanced pistachio flavor.
    • Rose Water — A Middle Eastern staple that pairs well with pistachios and chocolate! Stir in ½ teaspoon into the iced mocha before topping with the cold foam—just be careful to not overdo it, as rose can be overpowering in high amounts.
    • Cardamom — For a fragrant twist, whisk up to ½ teaspoon of ground cardamom into the pistachio sauce before frothing with the heavy cream.
    • Tahini — Nutty tahini pairs with pistachio and chocolate like a dream. Whisk a tablespoon or two into the mocha sauce before combining with the milk.
    • Date Syrup — Replace one tablespoon of the mocha sauce with it for an earthy, Middle Eastern-inspired sweetness.

    Serving Suggestions

    • Delicious Dessert — Drink your dessert or enjoy it alongside your favorite sweets (baklava or pistachio ice cream, anyone) for the ultimate indulgence.
    • Brunch Moment — Make a large batch by stirring the mocha base together in a pitcher and blitzing the pistachio cold foam in a blender. Add ice to glasses, assemble, and serve—brunch will never be the same!
    • Midday Mover — Nothing beats the afternoon slump like a drink that is as energizing as it is delicious. Two shots of espresso provide me a dependable pick-me-up, while chocolate and pistachio let it double as a treat. You'll be back to conquering your to-do list in no time. 💥
    • International Dreaming — Got a case of wanderlust? Take your tastebuds on a tasty little trip by frothing up a cold cup. Curl up with it while watching your favorite travel show to satisfy (almost all) your senses!
    An elevated close up shot of the Iced Dubai Chocolate Mocha before topping with the Kataifi.

    Recipe Success Tips

    • Make barista-style cold foam. Achieve that idyllic, silky and creamy texture by using cold cream and frothing it a handheld milk frother until thigh and foamy but still pourable. Be careful to not over whip.
    • Pull fresh espresso. A friend who used to worked at Starbucks says this is a core fundamental: espresso is always best when fresh. Pull it right before using for the deepest, most robust flavor.
    • Add ice to taste. Fill the glass with ice, adding more as needed to keep the drink cold and prevent dilution.
    • Warm the mocha sauce to loosen it. If your sauce has thickened in the fridge, microwave it for 10-15 seconds to help it blend smoothly.
    • Chill glasses in the freezer. Just 10-15 minutes of chilling before assembling the drinks helps keep them cool and slows melting.

    FAQs

    When does the Starbucks winter menu come out?

    According to Starbucks' official release, the winter menu is slated to release on January 6, 2026.

    What if I can't find kataifi?

    Kataifi adds a delicate, buttery crunch that nods to the textures of Middle Eastern desserts and makes the drink extra special. If you can’t find it, simply omit it, substitute butter-toasted vermicelli, or top the drink with crushed pistachios.

    Can I make this drink if I don't have an espresso machine?

    Certainly! Though an espresso machine is convenient, it isn't essential. You can make espresso in a moka pot or the French press or use strongly-brewed coffee instead.

    Can I make the drink less sweet?

    Yes — simply use less mocha or pistachio sauce and/or add more ice or milk.

    Can I make the drink lighter?

    Sure thing — use half-and-half instead of cream, sweeten the mocha sauce with monkfruit sweetener, and/or use low-fat milk to reduce the fat, calories, and sugar.

    The finished Iced Dubai Chocolate Mocha on a serving platter, ready to enjoy.

    Nutritional Info

    Clocking in at 490 calories with 23 grams of fat, 10 grams of protein, 63 grams of carbohydrate, and 52 grams of sugar, this copycat iced Dubai mocha is decidedly calorie- and sugar-dense for a single serving, making it more of a dessert than a typical beverage.

    Although the 10 grams of protein from the dairy are a positive, they don’t do much to offset the overall caloric load. For reference, 490 calories is roughly a quarter of a 2,000-calorie day, and 52 grams of sugar is close to—or even double—the recommended daily limits of 25 grams for women and 36 grams for men.

    Even though the drink sits squarely in the indulgent category, it still has a place in a balanced diet when enjoyed in moderation. After all, satisfaction is an important part of maintaining a sustainable, healthy lifestyle. Nonetheless, there are plenty of ways to lighten up the drink if you choose: sweeten the sauces with monkfruit, use half-and-half instead of cream, opt for low-fat milk, or boost the protein with collagen or filtered milk.

    Total nutritional content per serving is:

    • Calories: 490 calories
    • Total Fat: 23 grams
    • Protein: 10 grams
    • Sodium: 150 mg
    • Carbohydrates: 63 grams
    • Sugar: 52 grams

    *This nutritional information is an estimate and calculated based on the ingredients used to create the recipe. The nutritional value of your ingredients may differ slightly. Furthermore, this food is not intended to prevent, diagnose, cure, or treat any disease.

    A horizontal shot of the Iced Dubai Chocolate Mocha on a serving platter with pistachios and kataifi.

    Other Starbucks Copycat Recipes

    • Homemade Toffee Nut Syrup (Starbucks Copycat)
    • Cran-Merry Drink (Starbucks Copycat)
    • Cran-Merry Orange Lemonade Refresher (Starbucks Copycat)
    • Sugar Cookie Almond Milk Latte (Starbucks Copycat)
    Print Recipe
    5 from 2 votes

    Iced Dubai Chocolate Mocha (Starbucks Copycat)

    This Iced Dubai Chocolate Mocha delivers everything you’ll soon be able to order in stores—only better. It’s budget-friendly, customizable, and layered with rich chocolate, silky nutty pistachio cold foam, and crispy toasted phyllo shreds. Make the sauces once, and you can enjoy drinks for the weeks to come!
    Prep Time5 minutes mins
    Total Time5 minutes mins
    Course: Drinks
    Cuisine: American
    Keyword: Iced Dubai Chocolate Mocha
    Servings: 1 drink
    Calories: 490kcal
    Author: Megan Byrd

    Equipment

    • 1 milk frother

    Ingredients

    Pistachio Cold Foam:

    • 3 tablespoon heavy cream
    • 2 tablespoon pistachio sauce

    Iced Dubai Chocolate Mocha:

    • 2 oz espresso
    • ½ cup milk of choice (I used 2%)
    • 3 tablespoon mocha sauce (or chocolate syrup)
    • ice
    • toasted Kataifi (optional for topping)

    Instructions

    • Make the cold foam. Add the heavy cream and pistachio sauce to a small jar or glass and froth with a milk frother for 20-30 seconds, until foamy. Set aside.
    • Add ice to a tall glass, then pour in the espresso. Stir together the milk and mocha sauce (or chocolate syrup), then pour the chocolate milk over the espresso. Stir if desired.
    • Top with pistachio cold foam and toasted Kataifi if desired. Drink up!

    Nutrition

    Serving: 1drink | Calories: 490kcal | Carbohydrates: 63g | Protein: 10g | Fat: 23g | Sodium: 150mg | Sugar: 52g
    Dubai chocolate mocha.

    xoxo Megan

    15+ Homemade Creamer Recipes

    December 7, 2025

    If you love sweet, creamy coffee without any fuss, these 17 Recipes for Homemade Coffee Creamer are a great place to start. From year-round favorites like French vanilla and sweet cream to seasonal sensations like pumpkin spice and peppermint mocha, there’s a flavored creamer for every mood.

    While I’m all for making fancy Starbucks copycat drinks, sometimes I don’t have the time or patience. But mama still needs her coffee, and drinking it black won’t cut it. That’s where homemade coffee creamers come into play! Each batch of creamer is simply made with just a handful of ingredients in a few minutes, so a mug of coffee comfort is never far from reach. 

    And, unlike store-bought versions, these sweet treats are made with real ingredients, including actual cream! While this shouldn’t feel revelatory, coffee creamer brands like Coffee Mate don’t include any real dairy—instead, they’re made with oil and corn syrup. Seriously. It’s weird.

    Best of all, each batch of homemade coffee creamer makes enough to carry you through the week. That means you can spend 5 minutes of prep for at least 7 days of silky-sweet goodness. If that’s not a stellar reward for your efforts, I don’t know what is! 

    [feast_advanced_jump_to]

    Why You'll Love Making Homemade Coffee Creamer

    My friends, there are so many reasons to make DIY coffee creamer, but I’ll narrow it to just a few:

    • Quick & Easy - Just measure your ingredients, warm them slightly to dissolve the sugar, give everything a quick mix, and voila! Your shortcut to fancy coffee flavors is ready to go.
    • All-Natural - As an RDN, I try to keep artificial colors, preservatives, emulsifiers, and flavors as far from my kitchen as possible. While store-bought creamers typically have ingredient lists that read like lab reports, my homemade creamers are made with simple staples you likely have on hand.
    • Budget-Friendly - Last I checked, a Starbucks pumpkin spice latte ran about $7 pre-tip. But a drip coffee with homemade pumpkin spice coffee creamer can be made for about $0.50—and you still get all the cozy, festive flavor in every sip!
    • One & Done - If your week is jam-packed, the best present you can give yourself is setting yourself up for easy success. Making a batch of homemade creamer is the coffee equivalent of meal prep. If you’re a java fiend like me, it’s a smart move!

    How to Make Homemade Coffee Creamer

    With a few pantry staples and these easy DIY creamer recipes, you can recreate your favorite coffee shop flavors any day of the week. Try a new one, mix and match, or make a big batch for the week ahead! And, while each creamer recipe has slightly different ingredients, the method for making them remains the same.

    Step 1: Warm your cream, half n’ half, and sugar (or non-dairy and sugar-free alternatives) in a small saucepan until steaming. 

    Step 2: Whisk the mixture to dissolve the sugar and remove it from heat. 

    Step 3: Add flavoring extracts off the heat to keep their flavor perfectly potent. 

    Step 4: Decant into a bottle for storing in the fridge, or add a splash to your coffee right from the pan!

    Classic Coffeehouse Staples

    These are the flavors that never go out of style. Think of them as your everyday coffee companions. They’re smooth, reliably yummy, and endlessly versatile. Whether you drink your coffee hot, iced, shaken, or blended, these classic creamers are guaranteed crowd-pleasers.

    1. French Vanilla Creamer

    The forever classic. Creamy, sweet, and silky with a soft vanilla warmth that makes every cup a little more decadent.
    Get the recipe!

    2. Sweet Cream Creamer

    Inspired by Starbucks sweet cream cold foam, this one is for the “cream and sugar” types. It’s rich, milky, and lightly sweet with a velvety finish.
    Get the recipe!

    3. White Chocolate Creamer

    Smooth, mellow, and dessert-like. Perfect for making your morning mug taste like a white mocha.
    Get the recipe!

    4. Brown Sugar Oat Milk Creamer

    Expect cozy, caramelized sweetness with a subtle nuttiness from oat milk. One of my favorite vegan coffee creamers!
    Get the recipe!

    5. Caramel Macchiato Creamer

    My quick & easy recipe for Homemade Caramel Macchiato Coffee Creamer comes together in just 5 minutes with 4 ingredients & 1 pan!
    Get the recipe!

    Bakery & Dessert-Inspired Creamers

    If your love language is dessert-for-breakfast, this section is your playground. These creamers turn an ordinary cup of coffee into a treat, bringing notes of warm sugar, spice, frosting, and buttery bakery goodness.

    6. S'mores Creamer

    Toasty marshmallow, melted chocolate, and a whisper of graham cracker. It turns any cup into campfire coffee.
    Get the recipe!

    7. Birthday Cake Creamer

    Sweet, creamy, and funfetti flavored. It brings instant celebration energy to even the sleepiest Monday.
    Get the recipe!

    8. Cookie Butter Creamer

    Deeply spiced, caramelized, and toasty—like liquid speculoos cookies blended into your morning brew. Great hot or iced.
    Get the recipe!

    9. Banana Bread Creamer

    This banana bread coffee creamer is rich, creamy, and ready in just 2 minutes!
    Get the recipe!

    10. Pistachio Creamer

    This quick & easy 5-ingredient homemade Pistachio Coffee Creamer is the easiest way to hack a pistachio latte at home.
    Get the recipe!

    11. Cookie Dough Creamer

    This copycat Chobani cookie dough creamer is made from scratch with real cream and brown sugar. Ready in 10 minutes and keeps in the fridge for 2 weeks!
    Get the recipe!

    12. Cookies & Cream Creamer

    Make cookies and cream coffee creamer at home with just 4 ingredients! This copycat Chobani creamer is creamier, more chocolatey, and available year-round!
    Get the recipe!

    13. Cinnamon Roll Creamer

    Warm cinnamon, sweet icing, and a hint of buttery bakery flavor come together to mimic the swirl of a freshly baked cinnamon roll.
    Get the recipe!

    Fruit & Floral Creamers

    These flavors shine in the spring or summer, or when you want something bright and unexpected. They're refreshing, aromatic, and perfect for iced coffee lovers.

    14. Lavender Creamer

    Soft, floral, and calming. This creamer makes your coffee ritual feel spa-like and soothing.
    Get the recipe!

    15. White Chocolate Raspberry Creamer

    Sweet-tart raspberry meets creamy white chocolate for a berry dessert vibe that feels fancy without any extra effort.
    Get the recipe!

    16. Cherry Almond Creamer

    A delicate blend of marzipan-like almond and juicy cherry. It tastes like sipping a coffee version of a black forest cake.
    Get the recipe!

    17. Blueberry Creamer

    Sweet, jammy blueberry flavor that pairs surprisingly well with coffee—especially cold brew.
    Get the recipe!

    18. Coconut Vanilla Creamer

    This homemade coconut coffee creamer is rich, creamy, and lightly sweet with coconut and vanilla—perfect for coffee, cold brew, or lattes.
    Get the recipe!

    Fall & Holiday Coffee Creamers

    These are your cozy, sweater-weather, twinkle-light flavors. Rich, warming, and perfect for anyone who waits all year for red cup season to return.

    19. Sugar Cookie Creamer

    This homemade Sugar Cookie Creamer is a delightfully seasonal way to sweeten your morning coffee.
    Get the recipe!

    20. Pumpkin Spice Creamer

    Warm pumpkin, cinnamon, nutmeg, and cloves—everything you love about a PSL, but easier.
    Get the recipe!

    21. Caramel Apple Creamer

    Sweet, buttery caramel meets crisp apple flavor. It tastes like a fall festival in your morning mug.
    Get the recipe!

    22. Peppermint Mocha Creamer

    A minty, chocolatey holiday classic. It turns your coffee into a cool and cozy mocha.
    Get the recipe!

    23. Gingerbread Creamer

    Deep molasses, warm ginger, and holiday spices. Perfect for cold winter mornings (or any time you're craving something festive).
    Get the recipe!

    FAQs

    Is it healthier to make your own coffee creamer?

    Yes, homemade coffee creamer is generally healthier because you control the ingredients. Store-bought creamers often contain oils, gums, thickeners, preservatives, and lots of added sugar in the form of high-fructose corn syrup. When you make your own, you can choose real dairy or plant milk, adjust the sweetness, skip artificial flavors, and use simple ingredients you recognize.

    What are the best 3 ingredients for homemade coffee creamer?

    My base homemade coffee creamer recipe almost always starts with heavy cream, half and half, and sugar.

    How to make coffee creamer at home without heavy cream?

    Swap in vegan whipping cream, full-fat canned coconut milk, or evaporated milk instead.

    Related Recipes

    • A side shot of pouring homemade coffee creamer into a cup of coffee.
      Easy Homemade Coffee Creamer (13 Flavors!)
    Homemade coffee creamers.

    xoxo Megan

    Gingerbread Hot Chocolate

    December 4, 2025

    Who said gingerbread is just for eating? Now you can sip it, too! My Gingerbread Hot Chocolate is rich, chocolatey, and warmly spiced with classic gingerbread flavors. Made with common pantry ingredients (no packets!) and ready in a snap—it's an easy, surefire way to bring the holiday magic all season long. ✨

    A close-up shot of a glass mug of gingerbread hot chocolate on the counter with gingerbread cookies, baubles, and evergreen branches.

    You could say I have a thing for hot chocolate. Although I'm almost always up for a mocha, latte, cold brew, or macchiato (I did create a coffee website, after all!), there's definitely a time and place for a cozy, low-caffeine chocolatey drink. So this year, I am fully embracing my inner hot cocoa fangirl. In my mug today: spiced gingerbread hot chocolate!

    You may be thinking: “Gingerbread and hot chocolate? What? How? Tell me more.” Consider me here to share the gospel—warm, cozy spices make a surprisingly perfect pairing with rich chocolate (think: a festive twist on Mexican hot chocolate!). The drink comes together in just a few simple steps and uses whole-food ingredients—nary a premade mix or hard-to-find ingredient in sight.

    The result? A hot chocolate so delicious you'll wonder why you ever settled for the packet stuff. Make a mug for a cozy night in, leave one out for Santa, or scale it up and instantly become everyone’s favorite person at the holiday party. 🎄

    Alright, enough talking about it — let’s make some hot chocolate!

    [feast_advanced_jump_to]

    What Is Gingerbread Hot Cocoa?

    This gingerbread hot chocolate is a homemade cocoa that tastes like gingerbread. It is made with real dark chocolate, molasses, and warm gingerbread spices and is rich, chocolatey, and infused with cozy holiday flavor. Top it with whipped cream and dunk in a gingerbread man cookie (or two!) for the full festive effect. Kids of all ages will slurp it right up all season long!

    What Does it Taste Like?

    Quite simply: gingerbread cocoa tastes like the holidays in a mug! There are no powdery, watery hot chocolate packets here—every sip is rich, luxurious, and cozy. Real dark chocolate provides a deep, chocolatey base, molasses adds that classic caramel-toffee gingerbread depth, and ginger and cinnamon contribute sweet, spicy warmth. Creamy milk ties it all together, creating a smooth, festive holiday hot cocoa you'll want to make on repeat.

    A close-up angled shot of a glass mug of gingerbread hot cocoa with a gingerbread cookie on the side of it.

    Why You'll Love this Gingerbread Hot Chocolate Recipe

    You'll fa-la-la-la-love this Christmas hot chocolate! It's...

    • Full of Christmas Cheer — Dark chocolate and gingerbread spices create a festive, cozy pairing guaranteed to bring joy.
    • Coffee Shop Quality — Rich, silky, creamy, and indulgent — just like something your favorite barista would whip up.
    • Definitely Doable — Made with true pantry staples (no, really!) in just a few simple steps, it comes together in under 10 minutes (yet tastes like you fussed).
    • Party Perfect — Just as fitting for a cozy night in as a holiday gathering with friends. Santa has been known to enjoy it, too!

    Ingredients

    • Milk — Any milk works, so grab your milk of choice. I often use 2%, but whole, low-fat, or even non-dairy milk all work well.
    • Dark Chocolate — For melty and rich hot chocolate! For the best texture and flavor, use high-quality melting wafers or a chopped bar. Choose your preferred cocoa percentage—50% dark chocolate offers a deep yet approachable flavor, while 75% or higher will taste more intense and slightly bitter.
    • Molasses — Just one tablespoon adds that warm, caramel-like gingerbread base flavor. I recommend using dark molasses, but you can add light molasses for a milder drink.
    • Spices — Ground ginger, cinnamon, nutmeg, and cloves bring zesty, warm gingerbread vibes. For the most potent, fresh flavor, be sure to use spices with a good expiration date.
    All the ingredients needed to make gingerbread hot chocolate on the counter.

    Substitutions

    • Non-Dairy Milk — Use soy, almond, oat, or any other plant-based milk to limit dairy.
    • Chocolate — Substitute bittersweet or milk chocolate for a milder flavor (perfect for kiddos!). Use bittersweet and sweeten to taste with white or light brown sugar for deeper, bittersweet chocolate notes.
    • Molasses — Swap the same amount of maple syrup or packed dark brown sugar for a sweet warmth, though the hot cocoa won't have as much of that gingerbread depth.
    • Gingerbread Spice Mix — Have homemade spice mix leftover from cookie baking? Use a heaping ½ teaspoon of it instead of the individual spices.
    A side shot of a hand holding mug of gingerbread hot cocoa on the counter.

    How to Make Gingerbread Hot Chocolate

    As promised, this Christmas hot chocolate is ready in a handful of beginner-friendly steps:

    Step 1: Add all the ingredients to a saucepan and heat over medium-low heat.

    Step 2: Whisk and heat until the chocolate is melted, the mixture is steaming, and everything is well combined. Remove the pan from the heat.

    Step 3: Pour the hot chocolate into a mug and top with whipped cream, a small gingerbread cookie, and a dust of ground cinnamon or nutmeg if desired. Enjoy!

    A saucepan of the gingerbread hot cocoa recipe with a whisk.
    Pouring the gingerbread hot cocoa into a glass mug.

    Optional Variations & Dietary Adjustments

    • Dairy-Free and Vegan — Swap your favorite non-dairy milk (such as oat, soy, or almond) and use 70% (or higher) dark chocolate to make the recipe plant-based and dairy-free.
    • High-Protein — Add a protein boost by using filtered milk or stir in a tablespoon or two of collagen peptides before serving.
    • Cocoa Powder — Replace the chocolate with 1 ½ tablespoons of natural cocoa powder, and sweeten to taste with 1-2 tablespoons of light brown sugar. Whisk well to combine while heating.
    • Milk Chocolate — For a more mellow chocolate flavor, use high-quality milk chocolate.
    • White Chocolate — Buttery white chocolate is a dreamy complement for the gingerbread seasonings. Use 1 ½ ounces of high-quality white chocolate for the smoothest texture and best flavor.
    • Glam Garnishes — Add a seriously festive finish by topping each mug with whipped cream, a gingerbread man, and colored sanding sugar, holiday sprinkle mix, jimmies, or nonpareils.
    • Gingerbread Mocha — Stir in a shot or two of espresso to deepen the chocolate flavor and give this Christmas cocoa an energy jolt.
    • Spiked — Add a shot of spiced rum, dark rum, bourbon, or Irish cream for a decidedly merry, grown-up twist.

    Serving Suggestions

    Gingerbread cocoa is the drinkable equivalent of decking the halls—guaranteed to bring joyful cheer to any occasion!

    • Cozy Winter Sipping — Whether wrapping presents, bundling up by the fire with your favorite book or holiday movies, or needing a little pick-me-up after a day of running holiday errands, this holiday hot cocoa always does the trick.
    • Holiday Drink Dreaming — Serve gingerbread cocoa at holiday gatherings for seriously happy sippers. Multiply the ingredients by the desired amount and heat them in a large pot, stirring well as the hot chocolate cooks, until steaming. Transfer the hot cocoa to a slow cooker set to WARM for easy serving.
    • Gingerbread House Decorating Dunking — Fully embrace the gingerbread moment by sipping warm mugs while constructing your creation or decorating sugar cookies.
    • Santa's Hot Chocolate and Cookies — Step up Santa's cookie plate by serving them with milk and this holiday hot cocoa. An extra assurance to keep you off the naughty list!
    • Morning Coffee Stand-In — There's no better way to welcome the day than with warmly spiced, chocolatey sips. Add extra wake-up power with 1-2 shots of espresso!
    • Holiday Party Hero — Be the MVP of holiday gatherings by multiplying the ingredients by the desired amount, simmering them up in a large pot on the stovetop, and transferring the cocoa to a slow cooker set to WARM for easy serving.
    An up-close side shot of a glass mug of gingerbread hot chocolate on the counter with cookies.

    Recipe Success Tips

    • Use quality dark chocolate. Now is not the time to skimp! The chocolate will be one of the star ingredients, so use a bar or high-quality melting wafers that you would otherwise enjoy eating on its own.
    • Whisk regularly. This prevents burning as the chocolate melts and ensures a smooth and velvety consistency.
    • Don't overheat. You'll know the hot chocolate is ready when it steams and is well combined. Don't simmer or boil—doing so will scorch the milk, giving the hot cocoa a bitter, burnt flavor.
    • Adjust to your preference. Like it more chocolatey? Add an extra teaspoon or two of chocolate. For spicier gingerbread cocoa, whisk in more cinnamon, ginger, or cloves. An extra drizzle of molasses adds a deep gingerbread flavor.

    FAQs

    How do I store leftover hot chocolate?

    Once cooled to room temperature, cover it and refrigerate for up to 2 days. The hot chocolate can settle upon storage, so give it a good whisk before reheating it over low heat on the stovetop or gentle heat in the microwave.

    Can I make this without molasses?

    Molasses gives the hot cocoa its warm, cozy gingerbread flavor, but you can substitute 1 tablespoon of maple syrup or dark brown sugar in a pinch. The hot cocoa will be spiced and delicious, just less "gingerbread-y."

    How can I adjust the sweetness?

    To make a sweeter drink, use dark chocolate with 35-50% cocoa solids. For a less sweet, deeper, and bitter drink, use dark chocolate with 50% or more cocoa solids.

    Is gingerbread hot cocoa kid-friendly?

    Yes! Older kids will like it as-is, though you may want to keep the spice level mild for younger palates. Reduce the ginger slightly when serving it to little ones.

    Can I make it in the microwave instead of on the stovetop?

    Absolutely. Combine all the ingredients in a microwave-safe bowl and cook in 1-2 minute bursts in the microwave, stirring between intervals, until combine and steaming.

    A close-up angled shot of a mug of gingerbread hot chocolate topped with cookies.

    Nutritional Info

    Delivering 441 calories per serving with 23 grams of fat, 48 grams of carbohydrates, 37 grams of sugar, and 12 grams of protein, this Christmas hot cocoa recipe is more of a flavorful holiday, dessert-style indulgence than an everyday drink. However, there are ways to lighten it up if you choose:

    • Reduced Sugar — Cut back on the added sugar by using dark chocolate with a higher cocoa percentage (such as 70% or higher) or sugar-free chocolate.
    • Reduced Fat — Swap 1 ½ tablespoons of natural cocoa powder for the dark chocolate and sweeten to taste with 1-2 tablespoons of sugar (or monkfruit sweetener).
    • Reduced Calories — Follow the reduced-fat directions and use plant-based or low-fat milk for a lighter, yet still creamy drink.
    • Higher Protein — Filtered milk or a tablespoon or two of unflavored or chocolate collagen powder adds a nutritious protein boost.

    No matter how you choose to make it, this cozy drink brings warmth and cheer. It delivers more than just nutrition facts; it’s a reminder to enjoy the moment and keep the full picture in mind during the holiday season.

    Total nutritional content per serving is:

    • Calories: 441 calories
    • Total Fat: 23 grams
    • Protein: 12 grams
    • Sodium: 111 mg
    • Carbohydrates: 48 grams
    • Sugar: 37 grams

    *This nutritional information is an estimate and calculated based on the ingredients used to create the recipe. The nutritional value of your ingredients may differ slightly. Furthermore, this food is not intended to prevent, diagnose, cure, or treat any disease.

    A horizontal shot of gingerbread hot chocolate on the counter with evergreen, baubles, and cookies.

    Other Hot Chocolate Recipes

    • Gingerbread Hot Chocolate
    • Homemade Hot Chocolate Mix
    • Grinch Hot Chocolate
    • Mexican Hot Chocolate
    Print Recipe
    No ratings yet

    Gingerbread Hot Chocolate

    Who said gingerbread is just for eating? Now you can sip it, too! My Gingerbread Hot Chocolate is rich, chocolatey, and warmly spiced with classic gingerbread flavors. Made with common pantry ingredients (no packets!) and ready in a snap—it's an easy, surefire way to bring holiday magic all season long. ✨
    Prep Time2 minutes mins
    Cook Time3 minutes mins
    Total Time5 minutes mins
    Course: Drinks
    Cuisine: American
    Keyword: Gingerbread Hot Chocolate
    Servings: 1 drink
    Calories: 441kcal
    Author: Megan Byrd

    Equipment

    • 1 small saucepan

    Ingredients

    • 1 cup milk of choice (I used 2%)
    • 1 ½ oz dark chocolate
    • 1 tablespoon molasses
    • ¼ teaspoon ground cinnamon
    • ⅛ teaspoon ground ginger
    • ⅛ teaspoon ground nutmeg
    • pinch ground cloves

    Instructions

    • Add all ingredients to a small saucepan and heat over medium-low heat. Whisk and cook until the chocolate is melted, the hot chocolate is steaming, and everything is well-combined.
    • Remove from heat. Pour into a mug and top with whipped cream, a small gingerbread cookie, and a dust of cinnamon or nutmeg if desired. Drink up!

    Notes

    Storage Directions — Once cooled to room temperature, the hot cocoa can be stored covered in the refrigerator for up to 2 days. The hot chocolate can settle upon storage, so give it a good whisk before reheating it over low heat on the stovetop or gentle heat in the microwave. 

    Nutrition

    Serving: 1drink | Calories: 441kcal | Carbohydrates: 48g | Protein: 12g | Fat: 23g | Sodium: 111mg | Sugar: 37g
    Gingerbread hot chocolate.

    xoxo Megan

    Homemade Hot Chocolate Mix

    November 12, 2025

    Step aside, premade mix—my easy Homemade Hot Chocolate Mix is here! With deep chocolate flavor, creamy milk, and smooth powdered sugar, this beginner-friendly recipe is a surefire way to nix all your cold-weather chocolate cravings. Just stir it into hot water or milk, curl up, and sip away the chill. ❄️

    A close-up angled shot of a cup of cocoa mix with a spoon in it.

    What do you do when the days get shorter and colder, but it’s too late to grab your favorite mocha? Make a homemade hot chocolate, of course!

    Though I’ll always advocate for going richer with an Italian Hot Chocolate or Dark Hot Chocolate, today we’re covering those times when you want an easy, no-fuss mug that brings back the comfort of those premade mix packets we loved as kids. That’s right — we’re making our own hot cocoa powder.

    This homemade hot cocoa mix recipe has it all: super easy to prep, even easier to make (just add hot water or milk!), and packed with that creamy, intensely chocolatey flavor we all know and love. It’s perfect for topping with dehydrated mini marshmallows and curling up with a good book or favorite movie.

    And while I certainly won’t judge if you decide to keep it all to yourself (#selfcare, am I right?), this homemade hot cocoa powder is just as perfect for gifting as it is for cozy nights in. Pack it up in mason jars or festive holiday containers and share it with teachers, neighbors, coworkers—anyone who could use a little drinkable holiday cheer.

    Let's dive in!

    [feast_advanced_jump_to]

    What is Hot Chocolate Mix?

    This hot chocolate mix is an easy-to-make, homemade version of the store-bought powdered cocoa packets. Unlike what you find at the store, it's made with wholesome, everyday ingredients (no mystery preservatives, not-so-natural flavors, or artificial sweeteners here!) in a few simple steps and stores well for up to 3 months. It's a fantastic, better-tasting alternative! When chocolate cravings strike, add hot water or milk and drink up!

    What Does It Taste Like?

    This homemade cocoa mix tastes like the packets you grew up with—only better! When mixed with hot chocolate or water, the hot, chocolatey elixir is smooth and creamy, with a deep cocoa flavor that’s sweet but not too sweet. The dehydrated marshmallows slowly melt on top, adding a fun texture and an extra touch of sweetness. After just one mug of this delicious and easy, make-ahead mix, you’ll never go back to the store-bought kind!

    A spoonful of hot cocoa mix over the glass cup of it.

    Why You'll Love This Hot Chocolate Mix Recipe

    Where do I even start? This version isn’t even comparable to store-bought! Here are just a few reasons I adore it:

    • Seriously Simple — Just measure, sift, stir, and enjoy! It’s really that easy—promise.
    • Pantry Perfect — Skip the grocery run! This hot chocolate powder is made with simple ingredients you likely already have in your pantry.
    • Creamy and Chocolatey — Mix it with hot water, and all your hot chocolate dreams come true—no fancy coffee shop (or expensive tab) required. Each mug is so perfectly cozy, I could sip it all day.
    • Long Shelf Life — When stored in an airtight container in a cool, dark spot, the mix keeps for up to 3 months.
    • Great for Gifting — Divide the mix into mason jars, top with dehydrated mini marshmallows, and share with friends, teachers, family, new neighbors, and more. Tie it with a ribbon and include a tag with simple instructions for no-fuss enjoyment.

    Ingredients

    Dry Milk Powder — (Also called instant dry milk.) Forms the base of the homemade hot cocoa mix, making it creamy and milky when combined with hot water. You can use any variety of milk powder—whole milk powder will make it richer and creamier, while nonfat will yield a lighter result.

    Powdered Sugar — Sweetens the cocoa mix and dissolves easily into hot water, preventing grainy sips. Don’t have powdered sugar? You can make your own by blending granulated sugar in a food processor or blender until fine (see more here).

    Unsweetened Cocoa Powder — For a deep, chocolatey flavor. Use unsweetened natural cocoa powder for the best results.

    Salt — Just a touch enhances all the flavors, making them pop!

    Dehydrated Marshmallows — Just like the kind in store-bought packets! Also called marshmallow bits, these store well and melt evenly into the hot chocolate for that nostalgic, cozy touch.

    An overhead shot of all the ingredients needed to make homemade hot chocolate mix.

    Substitutions

    • Milk Powder — Swap in dried almond or oat milk powder to make this DIY hot cocoa mix dairy-free while keeping it just as delicious.
    • Cocoa Powder — Use dark cocoa powder for a deeper, more intense chocolate flavor.
    • Powdered Sugar — Substitute powdered monk fruit sweetener for a refined–sugar–free option, perfect if you’re watching your sugar intake.
    A close-up side shot of a small glass cup of homemade hot cocoa mix.

    How to Make Homemade Hot Chocolate Mix

    Are you ready to see how easy it is to make? Seriously, once your eyes are opened, you may never go back to store-bought!

    Step 1: Add the milk powder, cocoa powder, powdered sugar, and salt to a wire mesh strainer or sifter.

    Step 2: Sift the mixture into a large bowl. Discard any large clumps that didn't make it through.

    Step 3: Stir the homemade cocoa mix together until well combined.

    Step 4: Transfer the mix to a mason jar or other airtight container, top with marshmallow bits (if desired), and seal.

    Step 5: Make hot chocolate! Stir ¼ cup of the hot chocolate mix with 1 cup of hot milk or water and enjoy.

    The hot cocoa mix ingredients added to a wire mesh before sifting.
    Homemade hot chocolate mix in a mixing bowl with a stir spoon.

    Optional Variations & Dietary Adjustments

    This homemade hot cocoa mix recipe is as easy to adapt to your taste and diet preferences as it is to make! Here are a few ways to make it your own:

    • Dairy-Free — Make this mix vegan-friendly by using powdered almond or oat milk. When serving, mix with hot water or your favorite non-dairy milk.
    • Low-Sugar — Substitute powdered monk fruit sweetener for powdered sugar to cut back on added sugar without losing sweetness.
    • Dark Chocolate — Swap natural cocoa powder for dark cocoa powder for a deeper, more intense chocolate flavor—perfect for dark chocolate lovers.
    • Boozy — Stir in a shot of creme de menthe or Kahlúa after mixing with hot water or milk for an adult-friendly twist that's perfect for unwinding after a long day.
    • Extra Rich — Use whole dry milk powder and mix with hot 2% milk for an ultra-creamy, next-level cozy drink that will warm you from the inside out.
    • Make It Dirty — Like a Dirty Chai, a shot of espresso adds a jolt of energy while deepening the chocolate flavor—perfect for bleary-eyed mornings and any time of day.
    • Coffee Hot Chocolate — For a milder caffeine kick, mix the cocoa with freshly brewed coffee instead of milk or water.
    • Extra Protein — Stir in hot filtered milk for around 13 grams of extra protein per serving. For an additional boost, add a scoop (or two!) of chocolate or unflavored collagen powder.

    Serving Suggestions

    Whatever the occasion, this hot cocoa mix is always a welcome addition! It instantly takes any occasion from okay to great. Here are a few of my favorite ways to enjoy it:

    • Afternoon Warm-Up — Whether you’re coming in from a hike, running errands, shuttling kids to activities, or just needing a midafternoon pick-me-up, it’s always a good time for a warm mug!
    • Cookie Decorating Drink — The whole family will love sipping cozy hot chocolate while decorating (and dunking!) sugar cookies.
    • Late-Evening Cozy-Up — A steaming mug of cocoa is guaranteed to make your favorite show that much better.
    • Holiday Party All-Star — Make a big batch by mixing cocoa powder with hot water or milk, then keep it warm in a slow cooker on low. It’s a simple way to serve cozy drinks for a crowd!
    • Gifting Game-Changer — Pack the mix into jars with mini marshmallows on top—instant smiles all around!
    • Movie Night MVP — Make a large batch, pour it into oversized mugs, and enjoy with buttered popcorn or holiday Chex mix!
    A close-up shot of a glass mug of homemade hot chocolate with a star-shaped marshmallow in it.

    Recipe Success Tips

    • Don’t skip the sifting. Both cocoa powder and powdered sugar can contain hard clumps that don’t dissolve well. Sifting also helps evenly combine the ingredients. Use a wire-mesh strainer or flour sifter for the best results.
    • Remove large chunks. Discard any large pieces left in the sifter to ensure easy melting and smooth sipping.
    • Stir well. Use a silicone spatula or wooden spoon to stir the ingredients until the mixture looks uniform and well blended.
    • Mind the storage. Homemade hot cocoa mix with powdered milk keeps best in an airtight container—like a mason jar or zip-top bag—stored in a cool, dry, and dark place for up to 3 months. For longer storage, or if you live in a humid climate, keep it in a freezer-safe container in the freezer for up to 1 year.
    • Mix with your liquid of choice. Combine ¼ cup of the mix with 8 ounces of hot water for a classic instant hot chocolate. For a richer, creamier mug, mix it with hot milk instead.

    FAQs

    Can I make this in bulk?

    Certainly! This recipe is practically made for scaling. Simply double or triple it (or more!) and follow the directions as written, then divide the mix between storage containers for gifting or keeping on hand all winter long.

    Can I make hot chocolate mix without powdered milk?

    Yep! If you don’t have or prefer not to use dried milk powder, simply leave it out. When preparing your cocoa, use hot milk instead of water to make it rich and creamy.

    How long does homemade hot cocoa mix last?

    This homemade cocoa mix keeps for up to 3 months at room temperature when stored in an airtight container in a dark, dry spot. For more extended storage, place it in a freezer-safe container and freeze for up to 1 year.

    A close-up angled shot of a small cup of homemade cocoa mix.

    Nutritional Info

    As far as cocoa mix recipes go, this one is a sound nutritional choice! Each ¼-cup serving delivers just 118 calories, 19 grams of carbohydrates, 4 grams of protein, and a modest 100 mg of sodium.

    When made with water, the nutritional profile remains the same. To boost the protein content, make the hot chocolate with 1 or 2% milk. For an even greater boost, use filtered milk or add a scoop of collagen powder—there are so many easy options!

    If the 16 grams of sugar give you pause, it’s simple to cut back. Just swap in powdered monk fruit sweetener for the powdered sugar; the only remaining sugars will be the naturally occurring lactose.

    No matter your nutritional goals, this cocoa mix adds cozy comfort to any cool day—offering a delicious pick-me-up that nourishes both body and soul while staying flexible to fit your needs. Enjoy!

    Total nutritional content per serving is:

    • Calories: 118 calories
    • Total Fat: 4 grams
    • Protein: 4 grams
    • Sodium: 100 mg
    • Carbohydrates: 19 grams
    • Sugar: 16 grams

    *This nutritional information is an estimate and calculated based on the ingredients used to create the recipe. The nutritional value of your ingredients may differ slightly. Furthermore, this food is not intended to prevent, diagnose, cure, or treat any disease.

    A side horizontal shot of a mason jar of homemade cocoa mix topped with dehydrated marshmallows.

    More Hot Chocolate Recipes

    • Easy Frozen Hot Chocolate
    • Easy Peppermint Hot Chocolate
    • Homemade White Hot Chocolate
    • Bailey's Hot Chocolate

    Recipe

    Print Recipe
    5 from 1 vote

    Homemade Hot Chocolate Mix

    Step aside, premade mix—my easy Homemade Hot Chocolate Mix is here! With deep chocolate flavor, creamy milk, and smooth powdered sugar, this beginner-friendly recipe is a surefire way to nix all your cold-weather chocolate cravings. Just stir it into hot water or milk, curl up, and sip away the chill. ❄️
    Prep Time5 minutes mins
    Total Time5 minutes mins
    Course: Drinks
    Cuisine: American
    Keyword: Hot Chocolate Mix
    Servings: 11 servings
    Calories: 118kcal
    Author: Megan Byrd

    Equipment

    • 1 fine mesh strainer

    Ingredients

    • 1 cup dry milk powder
    • 1 cup powdered sugar
    • ¾ cup unsweetened cocoa powder
    • ¼ teaspoon salt
    • marshmallow bits optional

    Instructions

    • Sift milk powder, powdered sugar, cocoa powder, and salt together into a large bowl and discard any large clumps that didn't make it through the fine-mesh strainer.
    • Stir the sifted ingredients together, then transfer to a mason jar or other airtight container. Top with marshmallow bits if desired.
    • To make hot chocolate, stir together ¼ cup of the hot chocolate mix with 1 cup of hot milk or water.

    Notes

    This recipe makes 2.75 cups of hot chocolate mix, enough for 11 servings of hot chocolate! 

    Nutrition

    Serving: 0.25cup | Calories: 118kcal | Carbohydrates: 19g | Protein: 4g | Fat: 4g | Sodium: 100mg | Sugar: 16g
    Homemade hot chocolate mix.

    xoxo Megan

    Grinch Hot Chocolate

    November 12, 2025

    This Grinch Hot Chocolate is pure holiday magic in a mug! In the words of the Grinch himself, it comes without ribbons, it comes without tags. It comes without packages, boxes, or bags. As the nights cool down and Christmas lights go up, you’ll want to sip on this warm, mint-chocolatey goodness to stay warm, cozy, and in the festive spirit all season.

    An angled shot of a mug of Grinch hot chocolate topped with whipped cream and heart sprinkles.

    I am a sucker for hot chocolate. I’d devour this creamy cocoa goodness in gulps any time of day, during any time of year. But when November and December roll around, I get giddy thinking up creative twists to make my cocoa even more exciting and festive. This Grinch hot chocolate is a product of just that! But trust me, you’ll feel anything but a Grinch after slurping it down. In fact, all that sugary magic will wash away any and all grumpies! 

    But first, let’s address the elephant in the room: green hot chocolate?! Yes, I know it sounds and looks wild, but once you get past the vibrant color, you’ll be dying to give it a try. I promise, it’s genuinely delicious – maybe even more than your traditional holiday cocoa. 

    The secret is a white chocolate base, which really makes the vibrant green hue pop without sacrificing that smooth, velvety, and indulgent consistency we expect from our hot chocolate. Cooling mint extract complements the chocolate's sweetness, and clouds of fluffy whipped cream and bright red sprinkles top it off to create a festive masterpiece perfect for holiday parties, family movie nights, or lazy snow days with the kids. 

    Perhaps best of all, this Christmas hot chocolate recipe is 100% foolproof. The decadent drink comes together within minutes using just a handful of simple ingredients. And the results speak for themselves. So what are you waiting for? Go grab your favorite oversized Christmas mug and get ready to experience Whoville whimsy for yourself!

    For more cozy holiday drinks, check out my Dairy-Free Hot Chocolate and Healthy Eggnog Milkshake.

    [feast_advanced_jump_to]

    What Is Grinch Hot Chocolate?

    This Grinch Hot Chocolate is a true holiday treat! Made with a milk and white chocolate base, flavored with mint or peppermint extract, tinted with green and yellow food coloring, and topped with whipped cream and red hearts, this cheerful green drink is festive, fun, and charming — just like you'd find in Whoville!

    What Does It Taste Like?

    Christmas hot cocoa fanatics, you’re in luck. White chocolate is the sweetest of all the chocolates, leaning into buttery and slightly vanilla flavors as opposed to regular cocoa’s bitter notes. In the Grinch hot chocolate, white chocolate makes a luxuriously rich and creamy texture that’s only amplified with cooling mint flavor, pillows of whipped cream, and the satisfying crunch of sprinkles.

    A side shot of a glass mug of Grinch hot chocolate topped with whipped cream and sprinkles.

    Why You'll Love Grinch Cocoa

    From the start of the recipe to the last sip, Grinch hot cocoa is a holiday delight through and through!

    • Kiddo-Approved – Hand your little ones a warm mug of Grinch hot cocoa and watch their faces light up. You’ll get a front row seat to the magic of Christmas through their eyes! Make it even more special and invite them into the kitchen to help. It’s a fun and simple family activity that’ll create lasting memories! 
    • Nostalgia-Factor – Dr. Seuss’ The Grinch is a nostalgic and legendary Christmas movie equally loved by each generation. One sip of the Christmas hot chocolate and you’ll tap into those warm memories – while channeling your very own inner Cindy Loo-Who.
    • Holiday Party Statement – Christmas celebrations call for showstopping confections—and Grinch hot cocoa is here to steal the show with its picture-perfect presentation and dessert-level indulgence.  
    • Easy, No-Fuss Recipe – Making this Instagram-worthy beverage is easier than it looks. With a handful of simple ingredients and easy-to-follow directions, you’ll be surprised by how hassle-free Grinch cocoa is!

    Ingredients

    All the ingredients needed to make Grinch hot cocoa on the counter.
    • Milk – Any Christmas hot chocolate worth its weight in gold starts with a creamy milk base. I opted for 2% milk and was perfectly satisfied with the creaminess, though you can use whole or 1% milk if preferred.
    • White Chocolate – Buttery smooth and indulgently sweet, white chocolate adds a deep flavor and a rich texture to the drink. I used white chocolate wafers, but chips will work as well. But for the best results, opt for high-quality.
    • Food Coloring – To achieve that vivid Grinch-inspired green hue, we’re using a combination of green and yellow food coloring. 
    • Mint Extract – An added layer of festive flair! Choose mint extract for a creme de menthe flavor or peppermint extract to make peppermint white hot chocolate extract.
    • Red Heart Sprinkles – A finishing touch of red heart sprinkles is more for visual appeal than taste, but who doesn’t love a nice crunchy texture? Plus, we can’t forget about the Grinch’s heart that grew 3 sizes!
    • Whipped Cream – The holiday hot chocolate experience isn’t complete without a crown of billowy whipped cream! For convenience, I often use canned whipped topping.

    Substitutions

    A close-up angled shot of a mug of Grinch hot cocoa.
    • Milk – Any type of milk is fine for this recipe. For a creamier cocoa, whole milk, or a combination of milk and heavy cream, is your best bet. If you’re working with vegan diets or dairy restrictions, the milk alternative of your choice is your go-to!
    • White Chocolate – I love the easy melt of white chocolate wafers, but white chocolate in any form will do – white chocolate chips, chunks of a white chocolate bar, or white chocolate sauce. The key is quality!  
    • Food Coloring – If you want to avoid artificial food colorings, you could experiment with matcha powder. But please note that it will impact the flavor of the cocoa, though matcha and white chocolate is certainly a tasty combo! 
    • Mint Extract - In lieu of mint or peppermint extracts, toss in a candy cane or a pump of peppermint syrup. 
    • Red Heart Sprinkles – Crushed candy cane bits, jimmies or rainbow sprinkles, mini white or milk chocolate chips, and marshmallows are delicious and inviting finishing touches. 
    • Whipped Cream – Swap out regular whipped topping for coconut whipped cream, or make your own whipped cream from scratch (whisk heavy cream with a little powdered sugar until peaks form) for a fun touch.

    How to Make Grinch Hot Chocolate

    Three simple steps are all it takes to make Grinch cocoa on your very own stove!

    • Step 1: Add the milk and white chocolate to a small saucepan and heat over low, whisking until the chocolate is melted and the milk is steaming but not boiling.
    • Step 2: Remove from heat and stir in 2 drops of green and 1 drop of yellow food coloring. Add more if needed until it reaches the perfect Grinch color, then stir in the mint or peppermint extract. 
    • Step 3: Pour into a mug and top with whipped cream and red heart sprinkles. Drink up!
    Adding the milk and white chocolate to a saucepan.
    Whisking the green food coloring into the saucepan of Grinch hot cocoa.
    Pouring the green Grinch hot cocoa into the glass mug.

    Optional Variations & Dietary Adjustments

    • Fun Flavors – Not a fan of mint flavoring? Replace it with the same amount of your flavor of choice – vanilla extract, almond extract, and caramel syrup are some fun options. 
    • Grinch White Chocolate Mocha – Need an extra jolt of festive energy? Turn Grinch cocoa into a mocha by adding an espresso shot or two. It’s a mint white chocolate mocha, but Dr. Suess-style. 
    • Boozy Grinch Hot Chocolate – Add a shot of peppermint schnapps for a boozy version of this tasty drink. Perfect for adults at holiday parties!
    • Coconut Hot Chocolate – Use coconut milk instead of dairy milk and omit the mint extract for a subtle yet delicious coconut-flavored hot cocoa. A shot of Rumchata makes it boozy! 
    • Extra Sweet Decorations – Dress up your cocoa with extra garnishes, like a crushed peppermint candy rim, a chocolate or caramel sauce drizzle, a peppermint stick, a Maraschino cherry, or a hot chocolate stirring spoon.

    Serving Suggestions

    Grinch hot chocolate tastes best in your favorite oversized Christmas mug, but it’s a surprisingly versatile beverage that’ll inject some Whoville whimsy into the entire season.

    • How The Grinch Stole Christmas Movie Night – You've got to have your Grinch hot cocoa to watch this classic holiday flick! The whole family will love the immersive experience of sipping the drink inspired by the Grinch himself.
    • Christmas Party – Keep a big pot of cocoa warming on the stove or in a large slow cooker for guests to serve themselves. Set up a fun DIY drink station with sprinkles, marshmallows, whipped cream, and candy canes for guests to indulge in.
    • Cozy Winter Mornings – When you want to make breakfast feel a little extra special on lazy weekend mornings or cozy snow days, whip up some mugs of Grinch cocoa for the whole family to sip and stay warm.
    • Christmas Morning – Make Christmas morning sweeter by starting it with hot mugs of Grinch hot chocolate! It’ll make opening presents feel even more magical and festive.
    A hand reaching for a mug of Grinch hot cocoa.

    Recipe Success Tips

    • Heat Low and Slow. Avoid overheating the cocoa mixture on the stove. Using too high a heat will cause the milk to scorch on the bottom of the pan and an oily film on top. Gentle medium heat will perfectly melt the white chocolate into a rich, silky consistency. 
    • Stir Constantly. Seriously, don’t stop stirring. This ensures the ingredients melt together evenly and prevents burning.
    • High-Quality White Chocolate. Unfortunately, not all white chocolate is created equal. Look for one that lists cocoa butter as a main ingredient – this is important for a seamless, smooth melt.
    • Decorate Right Before Serving. Top off your Christmas hot cocoa with whipped cream and sprinkles just before serving to keep it crisp and fresh. Otherwise, the whipped cream will melt into the warm mixture before you get a chance to grab a photo!

    Storage Directions

    Grinch hot cocoa is best served fresh and warm, but you can refrigerate leftovers in an airtight container for 2-3 days if needed. Before re-heating, give the cocoa a good mix to incorporate the ingredients (it’s common for them to settle).. Warm in the microwave or on the stovetop slowly over medium-low heat until just steaming. 

    An angled shot of a mug of Grinch hot cocoa.

    Nutritional Info

    It should be obvious by now that Grinch hot chocolate is not an everyday type of beverage, but rather an indulgent holiday treat – but we deserve it! Between the milk, white chocolate, sprinkles, and whipped cream, one serving contains around 300-400 calories and 30-40 grams of sugar. The dairy milk base provides about 12 grams of protein per serving. 

    To make it lighter, consider using low-fat or almond milk to cut a few calories, or a dairy-free milk alternative high in protein to add a few extra grams. To lower the sugar content, use half the amount of white chocolate and skip the whipped cream and sprinkles. 

    But remember, what Grinch hot cocoa lacks in nutritional value, it makes up for in serving pure comfort and festive joy – and that offers its own value this time of year.

    Total nutritional content per serving is:

    • Calories: 361 calories
    • Total Fat: 18 grams
    • Protein: 12 grams
    • Sodium: 195 mg
    • Carbohydrates: 39 grams
    • Sugar: 37 grams

    *This nutritional information is an estimate and calculated based on the ingredients used to create the recipe. The nutritional value of your ingredients may differ slightly. Furthermore, this food is not intended to prevent, diagnose, cure, or treat any disease.

    A horizontal shot of a mug of Grinch hot cocoa on the counter with mini Christmas trees and baubles.

    Other Hot Chocolate Recipes

    • Creamy Italian Hot Chocolate
    • Easy Dark Hot Chocolate
    Print Recipe
    No ratings yet

    Grinch Hot Chocolate

     This Grinch Hot Chocolate is pure holiday magic in a mug! In the words of the Grinch himself, it comes without ribbons, it comes without tags. It comes without packages, boxes, or bags. As the nights cool down and Christmas lights go up, you’ll want to sip on this warm, mint-chocolatey goodness to keep warm, cozy, and in the festive spirit all season.
    Prep Time2 minutes mins
    Cook Time3 minutes mins
    Total Time5 minutes mins
    Course: Drinks
    Cuisine: American
    Keyword: Grinch Hot Chocolate
    Servings: 1 drink
    Calories: 361kcal
    Author: Megan Byrd

    Equipment

    • 1 small saucepan

    Ingredients

    • 1 cup milk of choice (I used 2%)
    • 1 ½ oz white chocolate
    • 2-4 drops green food coloring
    • 1-2 drops yellow food coloring
    • ¼ teaspoon mint extract or peppermint extract
    • red heart sprinkles
    • whipped cream

    Instructions

    • Add the milk and white chocolate to a small saucepan and heat over low, whisking until the chocolate is melted and the milk is steaming but not boiling.
    • Remove from heat and stir in 2 drops of green and 1 drop of yellow food coloring. Add more until it reaches the perfect Grinch color, then stir in your mint or peppermint extract.
    • Pour into a mug and top with whipped cream and red heart sprinkles. Drink up!

    Notes

    Storage Direction: Grinch hot cocoa is best served fresh and warm, but you can refrigerate leftovers in an airtight container for 2-3 days if needed. Before re-heating, give the cocoa a good mix to incorporate the ingredients (it’s common for them to settle).. Warm in the microwave or on the stovetop slowly over medium-low heat until just steaming. 

    Nutrition

    Serving: 1drink | Calories: 361kcal | Carbohydrates: 39g | Protein: 12g | Fat: 18g | Sodium: 195mg | Sugar: 37g
    Grinch hot chocolate.

    xoxo Megan

    Homemade Sugar Cookie Creamer

    November 7, 2025

    Give your morning coffee a nostalgic makeover with my dreamy Frosted Sugar Cookie Creamer recipe. Made with just 6 ingredients in 5 minutes, this sweet splash of holiday cheer is sure to warm even the Grinch-iest hearts. After all, ‘tis the season to be merry!

    pint sized mason jar filled with homemade sugar cookie creamer on a black table in front of a lit christmas tree with christmas tree-shaped sugar cookies and multicolored red, green and gold ornaments on the table.

    I’ve never been a fan of black coffee (I like it sweet and creamy), but I also hate to drink anything hyper-processed (like CoffeeMate). That’s why I started making homemade coffee creamers! All you need are a few simple ingredients to make this better-for-you copycat of International Delight’s Grinch sugar cookie creamer that tastes much better than the original.

    I mean, it isn’t even a fair competition. International Delight’s version doesn’t even have any cream in it! The primary ingredients are water, sugar, and palm oil, followed by a laundry list of things that are dang near impossible to pronounce. (Seriously. Can you confidently say your pronunciation of sodium stearoyl lactylate is correct? I can’t.)

    Meanwhile, my easy DIY is made with just 6 ingredients you can find at the grocery store. (Hint: it’s actually made with cream.) And guess what? Homemade sugar cookie creamer has just 30 more calories per serving than the store-bought stuff. I don’t know about you, but that’s a trade-off I’ll happily make!

    [feast_advanced_jump_to]

    What does it taste like?

    This frosted sugar cookie creamer tastes like a bakery-fresh cookie—sweet, buttery, and full of vanilla warmth. It has a nostalgic frosted sugar cookie flavor: a little creamy, a little rich, and just the right hint of almond to give it that classic fresh from the oven toastiness. 

    Stirred into coffee, it turns even an ordinary morning cup into something festive and comforting, like you’re sipping a quick and easy version of a sugar cookie latte in the glow of holiday lights. It’s cozy, dessert-like, and just plain happy.

    45 degree angle closeup shot of homemade sugar cookie coffee creamer on a black table with christmas tree shaped sugar cookies with red, white and green sprinkles and green, red, and gold sparkly ornaments on the table blurred out below.

    Why You’ll Love This Coffee Creamer Recipe

    • Fantastic Flavor - This sugar cookie creamer isn’t artificial-tasting because there’s nothing artificial about it. Each drop is brimming with real dairy richness and extracts made from actual food, so it honestly tastes like dipping a cookie into a milky mug of coffee.
    • Better-for-You - As an RDN, I have strong feelings about all the chemical preservatives and artificial additions store-bought coffee creamers use. We’re only using real stuff your body knows and understands, so you can feel confident about every drizzle.
    • One & Done - With the holidays approaching, this working mom of two tiny humans is long on to-do’s and short on time. That’s why making creamer is so awesome—you can mix up a batch that’ll last the whole week (or beyond!), so you can satisfy your “fancy coffee” cravings without going bespoke for each one.

    Ingredients Needed

    • Almond Extract - A little bit of toasty-tasting almond extract helps replicate the caramelly flavor of freshly baked cookies.
    • Half & Half - Starting with half and half (which is equal parts whole milk and cream) bodes well for a wonderfully creamy-dreamy consistency. 
    • Heavy Cream - Adding extra cream to the mix ensures even the littlest splash will add a delightful hit of rich dairy flavor to your cup.
    • Granulated Sugar - Actual sugar cookies use plain white sugar, so it’s a no-brainer to use it here.
    • Vanilla Extract - For sweet, aromatic depth.
    • Butter Extract - For a convincingly buttery flavor—just like a real cookie!
    ingredients needed for making homemade sugar cookie coffee creamer recipe measured out on a white table.

    Substitutions

    • Half & Half & Heavy Cream - Feel free to make your own half n’ half by mixing equal parts of whole milk and cream. You can also swap in vegan half & half and vegan whipping cream, or follow the dairy-free instructions below and use full-fat canned coconut milk and oat milk.
    • Granulated Sugar - Pure cane sugar is a less-processed alternative. You can also use an equal amount of caster/superfine sugar, which is just white sugar with a smaller grind than regular granulated sugar.
    • Vanilla Extract, Butter Extract & Almond Extract - You’re welcome to use sugar cookie extract for all three. You can also use equal amounts of vanilla paste or powder for the vanilla extract.
    jar of sugar cookie creamer on a black plate with green bottle brush trees blurred out in the background, red and green sparkly ornaments, and a sugar cookie in the shape of a christmas tree leaning up against the jar.

    How To Make Sugar Cookie Coffee Creamer

    Step 1: Heat the Base. Add the half & half, heavy cream, and sugar to a small saucepan. Warm over low heat, stirring occasionally, just until the sugar has completely dissolved. Do not let it boil! That can make it taste scorched and negatively impact the consistency.

    Step 2: Add the Cookie Goodness. Remove the pan from the heat and stir in the vanilla, butter, and almond extracts.

    Step 3: Cool & Store. Let the creamer cool for about 15 minutes, then pour it into a mason jar or airtight container. Store in the refrigerator for up to 2 weeks. Shake gently before each use.

    action shot of cream being poured into a saucepan with granulated sugar.
    action shot of a hand whisking the flavoring extracts into the warmed sweetened cream mixture.
    action shot of sugar cookie creamer being poured into a clear mason jar.

    Optional Variations & Dietary Adjustments

    • Dairy-Free - My favorite dairy-free swap is using 1 ½ cups of full-fat canned coconut milk and ½ cup of full-fat oat milk. That said, feel free to use your preferred vegan half-n-half and whipping cream alternatives.
    • Vegan - Use the instructions above to make it dairy-free, but either omit the butter extract or use vegan-friendly butter flavoring.
    • Sugar-Free - Swap in your favorite cup-for-cup sugar alternative (e.g. monkfruit) for a diabetic-friendly drink!

    Serving Suggestions

    Of course, you can stir this Sugar Cookie Creamer into your morning coffee, but don’t stop there! Use it to make a homemade cold foam by frothing a few tablespoons and spooning it over cold brew. It also works beautifully to replace a few tablespoons of milk in pancake or waffle batter, adding a subtle vanilla-almond sweetness that tastes like a weekend treat.

    Try adding it to hot chocolate, or use it to make tea lattes (it pairs especially well with black tea, cozy chamomile, or a matcha latte). You can also drizzle it on oatmeal, add it to french toast custard, or blend it into protein shakes to make breakfast taste like dessert. No matter how you use it, this frosted sugar cookie creamer is sure to add a little holiday magic to your day!

    action shot of homemade sugar cookie creamer being poured into a clear mug of black coffee; you can see the cream bubbling up from the bottom to the top.

    Recipe Success Tips

    • Heat gently and don’t boil. Warming the half & half and cream over low heat keeps the texture smooth and prevents the dairy from curdling. You just need to heat it enough to dissolve the sugar.
    • Stir until the sugar is fully dissolved. If the sugar isn’t melted, the creamer can taste gritty. Keep stirring until the mixture is completely smooth.
    • Add extracts off the heat. Stir in the vanilla, almond, and butter extracts after removing the pan from the heat to preserve their flavor.
    • Shake before using. Natural separation is normal in homemade creamers. A quick shake brings everything back together.

    FAQs

    What is the Starbucks sugar cookie creamer?

    The Sugar Cookie Latte-Inspired Creamer is a seasonal flavored non-dairy creamer. To make your own, just follow my instructions under the optional variations section above!

    What are the ingredients in sugar cookie creamer?

    It depends on the brand or recipe. This homemade sugar cookie creamer is made with just half & half, cream, sugar, and three flavoring extracts (vanilla, almond, & butter).

    What is the healthiest creamer to put in your coffee?

    I’d argue the healthiest creamer to put in your coffee is anything that’s made with real ingredients rather than a bunch of lab-designed chemicals. To make this homemade creamer a bit healthier, swap in monkfruit for the sugar. That said, it still has a decent amount of fat, so you’ll want to be moderate with your usage.

    mason jar with sugar cookie coffee creamer on a black table with a lit christmas tree in the background blurred out and sparkly red, green and gold ornaments in the front.

    Homemade Grinch Sugar Cookie Creamer Nutrition

    Each generous ¼ cup (4 tablespoon) serving of this frosted sugar cookie creamer provides about 170 calories, with 8 grams of fat, 1 gram of protein, and 22 grams of carbohydrates (nearly all coming from added sugars). Because it’s made primarily with cream, half-and-half, and sugar, this creamer is definitely a treat, but it also adds a lot of flavor and fun.

    I find that using 1-2 tablespoons in a cup of coffee will give you the cozy sugar-cookie flavor with far fewer calories than a full ¼ cup, making it easy to enjoy in moderation. The benefit of making it homemade is that it’s made from simple, familiar ingredients (no artificial flavors, preservatives, or stabilizers), and you can easily adjust the sweetness to your liking.

    As with any flavored creamer, enjoy it as a small flavor boost, but don’t stress about it! Just make sure to make solid dietary choices for the rest of your day, focusing on foods that are high in protein and fiber and low in added sugar and saturated fats. Cheers!

    Total nutritional content per serving is:

    • Calories: 170 calories
    • Total Fat: 8 grams
    • Protein: 1 gram
    • Sodium: 25 mg
    • Carbohydrates: 22 grams
    • Sugar: 22 grams

    *This nutritional information is an estimate and calculated based on the ingredients used to create the recipe. The nutritional value of your ingredients may differ slightly. Furthermore, this food is not intended to prevent, diagnose, cure, or treat any disease.

    horizontal hero image of homemade sugar cookie creamer in a pint sized mason jar with tree-shaped sugar cookies on a black plate and a lit christmas tree in the background.

    Other Homemade Creamer Recipes

    Print Recipe
    5 from 3 votes

    Homemade Sugar Cookie Creamer

    This homemade Sugar Cookie Creamer is a delightfully seasonal way to sweeten your morning coffee.
    Prep Time2 minutes mins
    Cook Time3 minutes mins
    Total Time5 minutes mins
    Course: Drinks
    Cuisine: American
    Keyword: Sugar Cookie Creamer
    Servings: 10 servings
    Calories: 170kcal
    Author: Megan Byrd

    Equipment

    • 1 medium saucepan
    • 1 mason jar

    Ingredients

    • 1 ½ cups half & half
    • 1 cup granulated sugar
    • ½ cup heavy cream
    • 1 tablespoon vanilla extract
    • ½ teaspoon butter extract
    • ½ teaspoon almond extract (or cake batter extract)

    Instructions

    • Add the half & half, sugar, and heavy cream to a medium saucepan and heat over low, stirring until the sugar is completely dissolved.
    • Remove from the heat and stir in the vanilla, butter, and almond extracts. Stir until well combined.
    • Allow to cool at room temperature for 15 minutes, then transfer to a mason jar or other airtight container and store in the fridge for up to 2 weeks!

    Notes

    Dairy-Free: Substitute 1.5 cups full-fat coconut milk and ½ cup oat milk and eliminate the half-and-half and heavy cream.
    This makes about 2.5 cups of creamer!

    Nutrition

    Serving: 0.25cup | Calories: 170kcal | Carbohydrates: 22g | Protein: 1g | Fat: 8g | Sodium: 25mg | Sugar: 22g
    Sugar cookie creamer.

    xoxo Megan

    Mexican Hot Chocolate

    November 7, 2025

    This 6-ingredient Mexican Hot Chocolate recipe strikes the perfect balance of sweet, spicy, and creamy—perfect for warming you up from the inside out! A yummy blend of rich dark chocolate, caramelly brown sugar, cozy cinnamon, and a smidge of fiery chilis makes this unlike any other hot cocoa you’ve tried.

    clear mug of homemade mexican hot chocolate topped with whipped cream and cinnamon on a black metal serving tray with two sticks of cinnamon.

    While I’m a die-hard lover of cold brew drinks, there’s something about winter that makes me crave all the hot chocolate recipes in my arsenal. This Mexican hot chocolate is particularly potent when the mercury drops below freezing, infusing an extra layer of heat you can feel with every sip.

    And, while you can certainly use Nestle’s Abuelita Mexican hot chocolate tablets, I personally find them too milky sweet, too cinnamony, and too artificial for my taste. (Why does hot chocolate need vegetable oil? And what the heck is PGPR??) This from-scratch version is far more nuanced thanks to deep, dark chocolate, ancho chili powder, and cayenne.

    Chili in chocolate? It might sound weird, but I absolutely love it. The flavors blend better than you might think, offering a more grown-up (dare I say seductive?) experience that’ll keep you coming back for more. In short, if you enjoy my dark hot chocolate recipe, you should give this Mexican spiced hot chocolate a try. At the very least, it’ll add a little excitement to your day!

    [feast_advanced_jump_to]

    What is Mexican Hot Chocolate?

    Mexican hot chocolate is a traditional drink with roots that go back thousands of years to the Mayan and Aztec cultures. It layers deep, bittersweet chocolate with warm spices like cinnamon and chili powder for a drink that’s spicier, more complex, and more aromatic than classic American hot cocoa. 

    This flavor profile comes from its roots in pre-Hispanic Mesoamerican traditions, where cacao was enjoyed as a simple ceremonial drink long before sugar and dairy was introduced. The spices don’t make it overwhelming, particularly with the addition of milk. Rather, they add warmth, depth, and a subtle tingle that lingers at the end of each sip.

    Modern Mexican hot chocolate is usually made using Mexican chocolate tablets (like Ibarra or Taza), which already contain sugar and spices ground right into the rustic-textured chocolate. I opted to use regular dark chocolate and add my own spices and sweetness to make it available to a wider audience.

    What does it taste like?

    This Mexican hot chocolate tastes warm, deep, and complex. The dark chocolate gives it a rich, bittersweet base, while the brown sugar adds a mellow, caramel-like sweetness. The cinnamon brings a comforting warmth, and the combination of cayenne and ancho chili powder adds a subtle heat that doesn’t burn, but gently lingers at the back of your throat. 

    The result is a drink that’s creamy, chocolatey, lightly spiced, and just a touch smoky, with layers of flavor that slowly unfold. Each sip feels cozy and bold at the same time: sweet, but not cloying, deeply chocolatey, lightly spiced, and kissed with a subtle heat that warms you from the inside out.

    hand in a white sweater grabbing a mug of Mexican style hot chocolate from a white coaster on a black metal serving tray.

    Why You’ll Love This Homemade Hot Chocolate Recipe

    • Simple Ingredients - You only need 6 basic ingredients, and I’d bet you already have most of them on hand already.
    • Exciting Flavor - Consider Mexican hot chocolate the warming counterpart to cool peppermint hot chocolate. It has more depth and interest than just chocolate, making each sip feel a little adventurous.
    • Quick & Easy - Just measure, warm, stir, and serve. That’s the whole shebang! You’ll be sipping on chili chocolate bliss in just 5 minutes.

    Ingredients Needed

    • 2% Milk - We’re obsessed with Fairlife 2% milk—it’s super creamy-tasting, has extra protein, and is easier to digest than conventional milk. What’s not to love?
    • Dark Chocolate - Aim for chocolate with cocoa solids of at least 60% for the richest chocolate flavor.
    • Brown Sugar - Authentic Mexican hot chocolate is made with a less-refined sweetener known as piloncillo, but brown sugar is more widely available for US shoppers. Feel free to use either light or dark brown sugar.
    • Cinnamon - If possible, opt for Ceylon/Mexican Cinnamon, which has a sweeter, less spicy, more floral flavor than regular cassia cinnamon.
    • Ancho Chili Powder - Mexican chiles vary widely in terms of flavor and heat, but ancho is ideal for this cozy drink. It has a coffee-chocolatey, almost sweet flavor without too much spice.
    • Cayenne - A hint of fiery cayenne adds the perfect amount of burn. Don’t worry—it’s not spicy enough to make my kindergartener shy away!
    • Whipped Cream/Cinnamon - While these are optional garnishes, I feel like a cup of hot chocolate doesn’t feel complete without a little something extra. 😉
    ingredients needed to make homemade mexican hot chocolate recipe measured out into white bowls on a white table.

    Substitutions

    • 2% Milk - You’re welcome to swap in any percentage of dairy milk or any variety of plant-based milk you prefer. (Note: if you go plant-based, look for “barista blends” for the creamiest mouthfeel.)
    • Dark Chocolate - If you want to get more traditional, swap in dark Mexican chocolate like Ibarra or Taza.  Only have unsweetened baking chocolate? Use that, but up the brown sugar to taste. You can also use semi-sweet or bittersweet chocolate if you like. And, while you can use Abuelita chocolate, note that it’s already quite sweet and has a prominently cinnamony flavor, so you’ll likely want to adjust the recipe to fit.
    • Brown Sugar - For a more authentic twist, swap in grated piloncillo. You can also use muscovado sugar or coconut sugar, both of which are less-processed. Alternatively, make your own brown sugar by mixing granulated sugar with molasses in a 1 cup to 1-2 tablespoon ratio.
    • Cinnamon - You can experiment with other warming spices like cloves, nutmeg, cardamom, and/or ginger in a pinch. Just note that these are typically much more potent-tasting than cinnamon, so start small.
    • Ancho Chili Powder & Cayenne - For a slightly smoky undertone, use ground chipotle instead. It has the heat of cayenne with a similar complexity to ancho.
    • Whipped Cream/Cinnamon - You’re welcome to omit these garnishes, or swap in your favorite hot chocolate toppers like marshmallows or chocolate shavings.
    closeup 45 degree angle shot of a whipped cream and cinnamon topped mug of spicy Mexican hot chocolate with a cinnamon stick swizzle stick.

    How To Make Mexican Hot Chocolate

    Step 1: Combine Ingredients. Add the milk, dark chocolate, brown sugar, cinnamon, cayenne, and ancho chili powder to a small saucepan.

    Step 2: Heat Gently. Warm over medium-low heat, stirring often, until the milk is steaming and the chocolate has completely melted. Avoid boiling to prevent scorching.

    Step 3: Whisk. Once everything is melted, whisk the mixture until it’s silky, fully combined, and slightly frothy.

    Step 4: Serve. Pour into your favorite mug, garnish as desired, and enjoy the one-two punch of warm temperature and flavorful heat.

    all Mexican hot chocolate ingredients added to a white saucepan.
    white saucepan with ingredients set over medium low heat.
    fully whisked Mexican hot chocolate in the white saucepan.
    action shot of spicy Mexican style hot chocolate being poured into a clear glass mug.
    homemade mexican hot chocolate in a clear glass mug topped with whipped cream and a dusting of cinnamon.

    Optional Variations & Dietary Adjustments

    • Dairy-Free/Vegan - Simply swap in your favorite plant-based milk (preferably a full-fat barista blend) and double check that your dark chocolate is vegan-friendly.
    • Extra Spicy Mexican Hot Chocolate - Feel free to up the burn with an extra pinch or two of cayenne pepper. You can also experiment with other Mexican chili powders if you like!
    • Reduced-Sugar - Swap out the brown sugar for your favorite cup-for-cup alternative. You can also reduce the sugar even more by choosing a darker chocolate with a higher percentage of cocoa solids, or use a sugar-free alternative like Lily’s.

    Serving Suggestions

    This Mexican hot chocolate is best served piping hot with a little flourish on top. Try a dollop of whipped cream, a cinnamon stick for stirring, a sprinkle of cocoa or chili powder, or even a few chocolate shavings for extra richness. 

    For a brunch, pair it with sheet pan huevos rancheros and your favorite pastries. (Try serving it alongside something lightly sweet and buttery, like baked apple cider donuts, homemade churros, or cinnamon sugar toast.) And if you want a bit more buzz, add a shot of espresso for a spicy Mexican mocha!

    hand in a white sweater grabbing the cinnamon stick swizzle stick from a mug of Mexican hot chocolate.

    Recipe Success Tips

    • Use gentle heat. Chocolate burns easily, so keep the heat on medium-low and stir frequently. If it starts to bubble, lower the heat immediately.
    • Whisk well. Once the chocolate melts, whisk until the mixture looks glossy and fully blended. For a more authentic vibe, keep whisking till it gets a little frothy. Feel free to use a milk frother to assist!
    • Adjust the spice level. Start with a small pinch of cayenne and taste as you go. You can always add more heat, but you can’t take it away.
    • Choose good-quality chocolate. A higher-quality bar of dark chocolate (60-70% cacao) will make the flavor deeper and smoother compared to chocolate chips.
    • Serve immediately. This hot chocolate is best enjoyed right after making. It thickens slightly as it sits and cools.

    FAQs

    What makes Mexican hot chocolate different?

    The primary difference between Mexican hot chocolate and traditional American hot chocolate is that the Mexican version is typically made with darker chocolate for a richer cocoa flavor and has the added piquancy of warming spices. 

    What is Mexican hot chocolate called?

    Mexican hot chocolate is simply called “chocolate caliente” in Spanish. You may also see it referred to as “chocolate de mesa” when talking about the Mexican chocolate tablets used to make it. 

    What is the difference between hot chocolate and champurrado?

    Mexican hot chocolate is made with milk (or water), cocoa or chocolate, sugar, and warm spices like cinnamon and chili. It’s smooth, sippable, and has a lighter, more drinkable consistency. Champurrado, on the other hand, is a traditional Mexican drink thickened with masa harina, which gives it a thicker, creamier, almost pudding-like texture with a subtle, earthy corn flavor.

    What is in a Mexican hot chocolate?

    It depends on the recipe or brand you use! Generally speaking, it’s made with milk and Mexican chocolate or dark chocolate with sugar and warm spices. This recipe for Mexican hot chocolate is made with dark chocolate, milk, a smidge of brown sugar, cinnamon, and two kinds of chili powder.

    45 degree angle downward shot into a mug of whipped cream and cinnamon topped mug of Mexican hot chocolate.

    Homemade Mexican Hot Chocolate Nutrition

    Each serving of this Mexican hot chocolate provides around 369 calories, with 20 grams of fat, 10 grams of protein, and 41 grams of carbohydrates, including 39 grams of sugar. The richness primarily comes from the dark chocolate and milk, which contribute both fat and protein, while the brown sugar brings sweetness and warmth.

    Using dark chocolate also means you’re also getting beneficial antioxidants from the cocoa solids, which is a small but lovely bonus. If you’d like to lighten it up, you can use 1% or non-fat milk, reduce the brown sugar, or choose a dark chocolate with a higher cacao percentage. 

    From a nutrition standpoint, this drink is best enjoyed as a cozy treat—something you sip slowly and savor. That said, it does bring some perks to the table, so don’t feel guilty about it. Just make sure to balance your day with high-protein, high-fiber foods and avoid other added sugar. Relish every sweet and spicy sip!

    Total nutritional content per serving is:

    • Calories: 369 calories
    • Total Fat: 20 grams
    • Protein: 10 grams
    • Sodium: 125 mg
    • Carbohydrates: 41 grams
    • Sugar: 39 grams

    *This nutritional information is an estimate and calculated based on the ingredients used to create the recipe. The nutritional value of your ingredients may differ slightly. Furthermore, this food is not intended to prevent, diagnose, cure, or treat any disease.

    horizontal hero shot of Mexican spiced hot chocolate on a metal tray with cinnamon sticks to the side.

    Other Hot Chocolate Recipes

    Print Recipe
    5 from 1 vote

    Mexican Hot Chocolate

    This deliciously spicy Mexican Hot Chocolate recipe is a snap to make with just 6 simple ingredients in 5 minutes.
    Prep Time2 minutes mins
    Cook Time3 minutes mins
    Total Time5 minutes mins
    Course: Drinks
    Cuisine: American, Mexican
    Keyword: Mexican Hot Chocolate
    Servings: 1 drink
    Calories: 369kcal
    Author: Megan Byrd

    Equipment

    • 1 small saucepan

    Ingredients

    • 1 cup milk of choice (I used 2%)
    • 1 ½ oz dark chocolate
    • 1 teaspoon brown sugar
    • ¼ teaspoon ground cinnamon
    • ⅛ teaspoon ancho chili powder
    • pinch cayenne pepper (optional)
    • whipped cream and/or cinnamon optinonal for garnish

    Instructions

    • Add milk, dark chocolate, brown sugar, cinnamon, chili powder, and cayenne pepper to a small saucepan and heat over medium-low heat. Whisk until the chocolate is melted, the hot chocolate is steaming, and everything is well-combined.
    • Remove from heat. Pour into a mug and top with whipped cream and a dust of cinnamon if desired. Drink up!

    Nutrition

    Serving: 1drink | Calories: 369kcal | Carbohydrates: 41g | Protein: 10g | Fat: 20g | Sodium: 125mg | Sugar: 39g
    Mexican hot chocolate.

    xoxo Megan

    Easy Frozen Hot Chocolate

    November 5, 2025

    Enjoy one of your favorite nostalgic drinks anytime of year with this Easy Frozen Hot Chocolate Recipe. It's creamy, frosty, and full of rich chocolate flavor—an idyllic blend of cozy and refreshing. You won't believe how easy it is to make with everyday ingredients and the whole family will slurp it up—so do everyone a favor and make a double batch!

    A close-up angled shot of a small glass of frozen hot chocolate topped with whipepd cream and shaved chocolate.

    As you might expect, my kids get very excited whenever I’m testing new hot chocolate recipes—and this frozen hot chocolate was no exception! They were (understandably) a little confused about how something could be hot and frozen at the same time, but after their first sip, they were completely sold.

    Tasting just like hot chocolate but in a cool, frosty form, they both drained their glasses faster than I could say “drink up.” My son loved that it reminded him of a milkshake, and my daughter thought it was hilarious that she could drink “hot” chocolate on a warm day. Me? I loved how quick and easy it was to make.

    I’ll definitely be blending up batches for Christmas parties and cookie-decorating nights this winter, but I’m just as sure it’ll make an appearance—right alongside my fan-favorite lemonade— at family get-togethers and pool parties next spring and summer. After all, who says hot chocolate season has to end when the weather warms up? This frosty version keeps the magic going all year long.

    [feast_advanced_jump_to]

    What Is Frozen Hot Chocolate?

    Frozen hot chocolate—also known as frozen hot cocoa, cold hot chocolate, or iced hot chocolate—is a frosty, blended twist on the classic winter drink. It’s cool, creamy, and every bit as chocolatey as the original—just served ice-cold. Made by blending milk, hot chocolate mix, and ice, it’s divine topped with whipped cream and a sprinkle of shaved chocolate.

    What Does It Taste Like?

    With its deep chocolate flavor and milky, frosty consistency, frozen hot chocolate tastes like hot cocoa and a chocolate milkshake had a baby. The milk makes it creamy, the ice gives it that refreshing chill, and the hot chocolate mix adds a nostalgic, malted chocolate twist. It’s just as perfect for sipping during the holidays as it is for cooling off poolside on a warm summer afternoon—one of my favorite ways to get creative with hot chocolate cravings!

    A hand reaching in for a glass of frozen hot chocolate on a marble surface.

    Why You'll Love Frozen Hot Chocolate

    As if the milky, chocolatey flavor and cool, frosty finish aren’t reason enough, here are a few more reasons to whip up iced hot cocoa:

    • Seriously Simple — Just measure the ingredients, blend, and sip! It's so easy you could practically make it with your eyes closed.
    • Anytime Indulgence — This cold hot chocolate is frosty and refreshing enough for warm-weather months, yet rich and chocolatey enough to satisfy your cozy hot chocolate cravings year-round.
    • Made with Everyday Ingredients — Most of which you may already have on hand.
    • Easy on the Wallet — Whip up this frozen hot cocoa when you want a cool, refreshing treat that won’t break the bank. At the time of publication, a double batch (enough for my family) costs less than $2.50!

    Ingredients

    • Milk — Use your milk of choice. I typically go with whole milk, but 2% or 1% also work if you prefer a lighter drink.
    • Hot Chocolate Mix — For a rich, milk-chocolatey flavor, measure about ½ cup of dry mix (or roughly three packets).
    • Ice — Adds an icy texture and frosty finish.
    • Toppings — Think whipped cream or chocolate shavings—but don’t let me box you in! Sprinkles, jimmies, mini chocolate chips, cocoa powder, mini marshmallows, or sanding sugar all make fun garnishes, too.
    An overhead shot of all the ingredients needed to make frozen hot chocolate on the counter.

    Substitutions

    Running low on ingredients and don't want to fuss with an extra trip to the store? I've got you! Try these easy, everyday swaps:

    • Milk — Mix powdered or evaporated milk with water for an easy milk substitution, or swap your preferred plant-based milk, such as soy, oat, or almond milk. For a rich and decadent drink, swap up to half the milk with half-and-half or cream.
    • Hot Chocolate — Don't have premade packets? It's surprisingly simple to make homemade hot cocoa mix! You can also use ¼ cup of chocolate syrup + 2 tablespoons of cocoa powder, adding extra syrup to taste.
    A close-up shot of a glass of frozen hot chocolate on the counter.

    How to Make Frozen Hot Chocolate

    Anyone (really, anyone!) can make this refreshing drink. Just grab your measuring cups and blender and follow these super simple steps:

    Step 1: Add the cocoa mix, milk, and ice to the blender.

    Step 2: Blend until smooth and frosty.

    Step 3: Serve! Pour the frozen hot cocoa into serving glasses and drink up!

    The milk, ice, and hot chocolate mix in a blender.
    A blender full of the frozen hot chocolate.
    Pouring the frozen hot chocolate into a small glass.

    Optional Variations & Dietary Adjustments

    Craving something a little different? Mix things up with one of these fun twists or dietary swaps to make your iced hot chocolate your own.

    • Double Chocolate — Use chocolate milk instead of regular milk for an extra-indulgent layer of chocolate flavor.
    • Dark Chocolate — Blend in dark chocolate dry hot chocolate mix for a deeper, richer chocolate taste.
    • Thick and Creamy — 1-2 tablespoons of powdered milk (or a splash of half-and-half or cream) gives the homemade frozen hot chocolate extra body and richness.
    • Add Extracts — For a flavor infusion, blend in a few drops of peppermint or coconut extract for a festive or tropical twist.
    • High-Protein — Add a scoop of chocolate or vanilla protein powder for extra staying power.
    • Low Sugar — Watching your sugar intake? Use 3 packets of reduced sugar or no-sugar-added hot cocoa mix. (Since the volume of sugar-free mix can vary, measure by packets rather than cups).
    • Dairy-Free — Choose a non-dairy hot chocolate mix and use your favorite plant-based milk for a frozen hot chocolate recipe that's easy on the stomach.

    Serving Suggestions

    The fun thing about iced hot cocoa is its year-round versatility! No longer reserved for chilly months, you can enjoy it anytime — and in so many delicious ways:

    • Poolside Refresher —Consider iced hot chocolate the chocolate lover's version of an iced latte. It's cool, creamy, and refreshing, perfect for sipping at pool parties and summer barbecues.
    • Frozen Mocha Moment — Blend in two shots of espresso for a caffeinated twist similar to a Frappuccino.
    • Simply Spiked — Make a special pitcher for the adults, blending in a few shots of Kahlúa, coconut rum, or Irish cream.
    • Warm Weather Christmas — Celebrating the holidays closer to the equator (or Christmas in July)? Serve tall glasses garnished with candy canes or crushed peppermint candies.
    • Hot Chocolate Popsicles — Make an extra batch or pour leftovers into popsicle molds for a cool, chocolatey treat that’s perfect for hot days.
    • Drinkable Dessert — Give it a milkshake-like twist by topping with a scoop of vanilla ice cream before garnishing with whipped cream and chocolate shavings.
    A close-up angled shot of a glass of frozen hot chocolate topped with whipped cream and shaved chocolate.

    Recipe Success Tips

    • Mind Your Blender — Most high-speed blenders work best when you add liquids first, followed by dry ingredients and ice. Start blending on low speed, then gradually increase to medium for a smooth, even texture.
    • Let It Sit — Blending aerates the cocoa, creating light bubbles. For a thick, pourable drink, let the pitcher rest for about 30 seconds before pouring to let the bubbles settle.
    • Use Quality Hot Chocolate Mix — Choose a mix made with real cocoa, sugar, and minimal fillers. The better the mix, the better the drink!
    • Keep It Cool — Chill your serving glasses in the freezer for at least 15 minutes before serving for an extra-frosty finish—perfect for warm-weather sipping.
    • Adjust to Taste — For extra chocolatey flavor, blend in more cocoa powder or a drizzle of chocolate syrup. Want it icier? Add another handful of ice. For an ultra-indulgent version, use chocolate milk instead or regular or splash in a little half-and-half or cream.

    FAQs

    Can I make this ahead of time?

    Frozen hot cocoa is best enjoyed fresh, but you can prepare the ingredients ahead. Mix the milk and hot chocolate mix together and refrigerate for up to 24 hours, then blend with ice just before serving.

    Can I make frozen hot chocolate without a blender?

    You actually can! Whisk the milk and hot chocolate mix together until smooth, then shake it in a protein shaker, cocktail shaker, or mason jar for an appliance-free version.

    How do I make it dairy-free?

    Use a dairy-free hot chocolate mix and a non-dairy milk (like oat, almond, or soy). For an indulgent, yet dairy-free finish, top with coconut whipped cream.

    Can I make it extra thick, like a milkshake?

    Certainly! Blend in a scoop of chocolate or vanilla ice cream, a few tablespoons of powdered milk or cream, or a few extra ice cubes.

    A close-up side shot of a cup of frozen hot chocolate on a marble serving tray with marshmallows.

    Nutritional Info

    Each glass of this frozen hot chocolate comes in at 224 calories (8 grams of fat, 6 grams of protein, and 37 grams of carbohydrates), making it a sweet and creamy treat that satisfies without feeling overly heavy.

    Unlike traditional milkshakes that can clock in at 600 calories or more—mostly from fat and sugar—this version gives you that same milkshake-like experience at a fraction of the calories, thanks to using ice instead of ice cream.

    Want to tweak it to your goals? It’s easy! To cut sugar and carbs, use a no-sugar-added hot chocolate mix. Lower the fat by opting for 1% or 2% milk. Or boost the protein by blending in a scoop of chocolate or vanilla protein powder.

    Total nutritional content per serving is:

    • Calories: 224 calories
    • Total Fat: 8 grams
    • Protein: 6 grams
    • Sodium: 326 mg
    • Carbohydrates: 37 grams
    • Sugar: 26 grams

    *This nutritional information is an estimate and calculated based on the ingredients used to create the recipe. The nutritional value of your ingredients may differ slightly. Furthermore, this food is not intended to prevent, diagnose, cure, or treat any disease.

    A landscape photo of a glass of frozen hot chocolate on the counter with Christmas decorations.

    Other Hot Chocolate Recipes

    • Easy Peppermint Hot Chocolate
    • Homemade White Hot Chocolate
    • Easy Dark Hot Chocolate
    • Creamy Italian Hot Chocolate
    Print Recipe
    No ratings yet

    Easy Frozen Hot Chocolate

    Enjoy one of your favorite nostalgic drinks any time of year with this Easy Frozen Hot Chocolate. Creamy, frosty, and full of rich chocolate flavor, it’s a cozy-meets-refreshing treat the whole family will slurp up—so go ahead and make a double batch!
    Prep Time5 minutes mins
    Total Time5 minutes mins
    Course: Drinks
    Cuisine: American
    Keyword: Frozen Hot Chocolate
    Servings: 2 servings
    Calories: 224kcal
    Author: Megan Byrd

    Equipment

    • 1 high-speed blender

    Ingredients

    • 1 cup milk of choice I used whole milk
    • ½ cup dry hot chocolate mix (about 3 packets Swiss Miss)
    • 1 ½ cups ice
    • whipped cream and/or chocolate shavings optional for garnish

    Instructions

    • Add the milk, dry hot chocolate mix, and ice to a high-speed blender and blend until smooth.
    • Divide between two glasses, then garnish with whipped cream and/or chocolate shavings. Drink up!

    Nutrition

    Serving: 1cup | Calories: 224kcal | Carbohydrates: 37g | Protein: 6g | Fat: 8g | Sodium: 326mg | Sugar: 26g
    Easy frozen hot chocolate.

    xoxo Megan

    Easy Peppermint Hot Chocolate

    November 1, 2025

    Deck the halls with delicious drinks! This easy Peppermint Hot Chocolate is a seasonal stunner—made with dark chocolate, pure peppermint extract, and your milk of choice, it's cozy, rich, refreshing, and a dose of pure holiday happiness. Perfect for holiday get-togethers, cozy afternoons in, Christmas movie marathons, and more.

    A glass mug of peppermint hot chocolate on a metal tray with Christmas baubles and crushed candy canes.

    By now, you probably know all about my love for Pumpkin Spice Lattes, Cold Foams, Apple Crisp Lattes and Macchiatos—but let’s get one thing straight: my love for holiday drinks runs just as deep. Exhibit A: this peppermint hot chocolate recipe! Because honestly, what's December without something warm and chocolatey in your mug? ✨

    Seriously rich and creamy, with deep dark chocolate flavor and a festive pepperminty freshness, this mint hot cocoa is everything I love in a holiday drink. It’s deceptively easy to make, comforting and cozy, and bursting with nostalgic holiday flavors that take me straight back to childhood.

    Essentially, it's the kind of drink that makes you want to throw on fuzzy socks, start a Christmas movie, and pretend your to-do list doesn't exist for a minute.

    Dress it up with a swirl of fresh whipped cream and a sprinkle of crushed peppermint candy (or a candy cane for stirring!), add a grown-up twist with a shot of peppermint vodka or schnapps, or make a large batch to share at a holiday gathering. The options are as endless as the flavor—and the memories you’ll make while sipping it with friends and family. So grab your favorite holiday mug and let's make one together!

    [feast_advanced_jump_to]

    What Is Peppermint Hot Chocolate?

    Peppermint hot chocolate is where rich, velvety cocoa meets cool, refreshing peppermint—it’s basically the holidays in a mug. To make it, milk, brown sugar, and dark chocolate (pick your favorite cocoa percentage!) simmer together until warm and steamy, then a splash of peppermint extract adds that signature minty twist. Finish it off with whipped cream and crushed candy canes if you’re feeling festive—it’s cozy, cheerful, and the sweetest way to celebrate the season.

    What Does It Taste Like?

    Each sip of this peppermint hot cocoa is rich, chocolatey, and kissed with cool minty freshness. Made with dark chocolate (not cocoa powder), a touch of brown sugar, and pure peppermint extract, it delivers bold chocolate flavor, real minty depth, and a luxuriously creamy texture—just like your favorite coffee shop version, but without the hefty pricetag. Unlike powdered hot chocolate mixes, this peppermint cocoa tastes velvety and indulgent, with melted chocolate infusing every sip with deep, satisfying richness.

    A close-up overhead shot of a glass mug of peppermint hot chocolate, topped with whipped cream, candy canes, and grated chocolate.

    Why You'll Love Peppermint Hot Chocolate

    • Simple, Yet Gourmet — Made with just four everyday ingredients in two easy steps, this rich, balanced drink tastes like something straight from a fancy coffee shop.
    • Nostalgic & Comforting — This festive favorite brings back memories of childhood holidays and cozy, simpler times.
    • Mood-Boosting — Chocolate delivers all the feel-good vibes, while peppermint adds a refreshing lift.
    • Crazy Customizable — Make it dairy-free, lower in sugar, or spike it with a shot of espresso or peppermint schnapps—it’s easy to tailor for any occasion.
    • Endlessly Versatile — A warm mug adds a cheerful touch to everything from wrapping presents to cookie swaps to cozy afternoons with your favorite book.

    Ingredients

    No fancy ingredients needed here! Everything for this peppermint hot chocolate is probably already in your kitchen—or just a quick grocery run away.

    • Milk — Forms the base of the peppermint hot chocolate recipe, giving it a creamy, drinkable texture. Use your milk of choice: I like 2%, but whole, filtered, low-fat, or plant-based options (like oat or almond) all work well.
    • Dark Chocolate — Provides a deep chocolate flavor. Choose the cocoa percentage to suit your taste—around 60% for a milder drink and up to 80% for a rich, bittersweet flavor.
    • Brown Sugar — Just one teaspoon adds the perfect touch of sweetness and a hint of molasses, balancing the bold chocolate and cool mint.
    • Peppermint Extract — A little goes a long way! Just ¼ teaspoon adds a refreshing minty lift. For the best flavor, use pure peppermint extract.
    • Toppings — Finish with whipped cream, crushed candy canes, or shaved dark chocolate for a festive presentation and additional indulgence!
    All the ingredients needed to make peppermint hot chocolate on the counter.

    Substitutions

    Simple swaps make this mint hot chocolate doable —and just as delicious— for those days you'd rather stay cozy in your sweats and slippers than make a last-minute run to the store.

    • Milk — Substitute non-dairy milk for a lighter drink or half-and-half for extra creaminess. Or make use of pantry staples by mixing equal parts evaporated milk or coconut milk with water.
    • Chocolate — Use semi-sweet chocolate chips instead of dark chocolate (adding brown sugar only to taste), chop up a bittersweet chocolate bar and stir in an extra teaspoon or two of sugar, or mix 1 ½ ounces of high-quality dark chocolate syrup into hot milk along with the peppermint extract.
    • Peppermint Extract — Stir a chopped candy cane into the hot cocoa in lieu of the extract (and skip the brown sugar) for a playful, sweet peppermint flavor.
    • Brown Sugar — For deeper caramel notes, use dark brown sugar instead of light. To cut back on refined sugar, try maple syrup or coconut sugar instead.
    An up-close side shot of a glass of peppermint hot chocolate, topped with whipped cream, crushed candy canes, and shaved chocolate.

    How to Make Peppermint Hot Chocolate

    It comes together in just a few wildly simple steps—don’t be surprised if you find yourself looking for every excuse to make a mug!

    Step 1: Add milk, dark chocolate, and brown sugar to a small saucepan and heat over medium-low heat.

    Step 2: Whisk until the chocolate is melted, the hot chocolate steams, and everything is well-combined.

    Step 3: Remove the saucepan from the heat and stir in the peppermint extract. Pour the peppermint hot chocolate into a mug and top with whipped cream and/or crushed candy canes if desired.

    Step 4: Drink up!

    Pouring the cream into a saucepan with the chocolate and brown sugar.
    An overhead shot of the melted chocolate and cream in the saucepan.
    Pouring the hot chocolate into a glass mug.

    Optional Variations & Dietary Adjustments

    Adapt your homemade peppermint hot chocolate to fit your dietary needs—or add your own twist to match your mood or the occasion!

    • Dairy Free & Vegan — Ensure your dark chocolate is vegan and use non-dairy milk (oat, coconut, or almond are delish).
    • Reduced Sugar — Choose chocolate with 70% cocoa solids or higher, and swap maple syrup, coconut sugar, or a brown sugar monkfruit replacement.
    • Peppermint Boost — For extra sweetness and minty freshness, serve the hot chocolate with peppermint sticks or candy canes to stir.
    • Extra Creamy — Replace up to ½ cup of the milk with half-and-half or cream for an extra indulgent treat.
    • Milk Chocolate —Not a dark chocolate fan? Use milk or semi-sweet chocolate instead.
    • White Chocolate — For a sippable version of peppermint bark, swap in white chocolate for dark and use granulated sugar instead of brown.

    Serving Suggestions

    Honestly, I struggle to think of an occasion where this mint hot chocolate recipe isn't a welcome addition! Serve it any (or all!) of the following ways for rave reviews every time:

    • Present Wrapping — Fuel up for marathon gift-wrapping sessions by keeping a warm mug within reach.
    • Cozy Book Nook — Curl up on a weekend afternoon with your favorite read, or make kid-sized mugs of cooled hot cocoa for family holiday story time.
    • Santa's Favorite Sipper — Put your best foot forward with Santa by setting out tall mugs alongside the cookies, perfect for dunking!
    • Seasonal Spiked — For a merry, adults-only twist, swap 1 ounce of peppermint vodka or schnapps for the extract.
    • Make it Dirty — Add a shot of espresso to deepen the chocolate flavor and give yourself an extra pick-me-up. Win-win!
    A close-up overhead shot of a glass muf of peppermint hot chocolate, topped with whipped cream and peppermint.

    Recipe Success Tips

    • Don't boil the milk. Though it can be tempting to speed things up, keep the heat on medium-low. Overheating can scorch the milk, giving it a bitter, burnt flavor. Warm it just until steamy and the chocolate has melted.
    • Whisk well. This helps the chocolate melt faster and creates a smooth, creamy texture. For a light, velvety consistency, froth the hot chocolate with a milk frother before garnishing and serving.
    • Use high-quality chocolate. The chocolate is the star here, so choose a bar or chips you’d enjoy eating on their own. Aim for 60–70% cocoa solids for a balanced flavor, or go darker if that’s your preference.
    • Add the extract last. Whisk in the peppermint right before serving—it can lose flavor when exposed to too much heat, so adding it last keeps it bright and fresh.
    • Sweeten to taste. Start with one teaspoon of brown sugar, then adjust as needed—especially if you prefer a sweeter drink or are using a darker chocolate.

    FAQs

    Can I make this ahead of time?

    Yes! Peppermint hot chocolate keeps well in the refrigerator for up to 3 days. The mixture may settle as it sits, so whisk it well while reheating on the stovetop over low heat.

    Can I make a large batch?

    You bet! Simply multiply the ingredients and prepare the peppermint hot cocoa as directed in a large pot or Dutch oven. To keep it warm for serving, transfer it to an insulated beverage dispenser or set a slow cooker to the warm setting.

    Can I make it in the microwave?

    Yes! Combine the milk, chocolate, and brown sugar in a microwave-safe mug or glass. Heat in 30-second bursts, stirring well between each interval, until the mixture is steamy and smooth. Stir in the peppermint extract just before serving.

    Can I use cocoa powder instead of chocolate?

    Yes! You can substitute 2½ tablespoons of dark cocoa powder for the solid chocolate, though the flavor and texture will be a bit less rich and creamy. Add extra brown sugar to taste to balance the bitterness.

    A close-up side shot of a glass muf of peppermint hot cocoa with a hand in a sweater grabbing the handle.

    Nutritional Info

    Coming in at 369 calories per serving (20 grams of fat, 10 grams of protein, and 41 grams of carbohydrates), this peppermint hot chocolate is admittedly rich and indulgent. As a registered dietitian who embraces balance and views food as fuel for the body and soul, my family and I happily indulge in this drink occasionally throughout the holiday season.

    If you are watching what you eat or are on a restrictive diet, there are many ways to adapt this hot cocoa to your needs.

    • Lighten it up: Reduce the calories and fat by swapping 2 ½ tablespoons of dark cocoa powder for the dark chocolate, then add a few extra teaspoons of stevia or monk fruit sweetener to taste.
    • Make it vegan or dairy-free: Uses vegan dark chocolate and your favorite non-dairy milk.
    • Cut back on the processed sugar: Choose dark chocolate that's 70% cocoa or higher and sweeten to taste with maple syrup or coconut sugar.

    Whichever direction you take it, I hope this hot chocolate nourishes both body and soul—bringing warmth, comfort, and a little extra joy to your holiday season.

    Total nutritional content per serving is:

    • Calories: 369 calories
    • Total Fat: 20 grams
    • Protein: 10 grams
    • Sodium: 118 mg
    • Carbohydrates: 41 grams
    • Sugar: 39 grams

    *This nutritional information is an estimate and calculated based on the ingredients used to create the recipe. The nutritional value of your ingredients may differ slightly. Furthermore, this food is not intended to prevent, diagnose, cure, or treat any disease.

    A horitzontal shot of a glass mug of peppermint hot cocoa on a metal tray on the counter.

    Other Hot Chocolate Recipes

    Print Recipe
    No ratings yet

    Easy Peppermint Hot Chocolate

    Deck the halls with delicious drinks! This easy Peppermint Hot Chocolate is a seasonal stunner—made with dark chocolate, pure peppermint extract, and your milk of choice, it's cozy, rich, refreshing, and a dose of pure holiday happiness. Perfect for holiday get-togethers, cozy afternoons in, Christmas movie marathons, and more.
    Prep Time2 minutes mins
    Cook Time3 minutes mins
    Total Time5 minutes mins
    Course: Drinks
    Cuisine: American
    Keyword: Peppermint Hot Chocolate
    Servings: 1 drink
    Calories: 369kcal
    Author: Megan Byrd

    Equipment

    • 1 small saucepan

    Ingredients

    • 1 cup milk of choice (I used 2% milk)
    • 1 ½ oz dark chocolate
    • 1 teaspoon brown sugar
    • ¼ teaspoon peppermint extract
    • whipped cream and/or crushed candy canes optional for garnish

    Instructions

    • Add milk, dark chocolate, and brown sugar to a small saucepan and heat over medium-low heat. Whisk until the chocolate is melted, the hot chocolate is steaming, and everything is well-combined.
    • Remove from heat and stir in the peppermint extract. Pour into a mug and top with whipped cream and/or crushed candy canes if desired. Drink up!

    Notes

    Recipe Success Tips
    • Don't boil the milk. Though it can be tempting to speed things up, keep the heat on medium-low. Overheating can scorch the milk, giving it a bitter, burnt flavor. Warm it just until steamy and the chocolate has melted.
    • Whisk well. This helps the chocolate melt faster and creates a smooth, creamy texture. For a light, velvety consistency, froth the hot chocolate with a milk frother before garnishing and serving.
    • Use high-quality chocolate. The chocolate is the star here, so choose a bar or chips you’d enjoy eating on their own. Aim for 60–70% cocoa solids for a balanced flavor, or go darker if that’s your preference.
    • Add the extract last. Whisk in the peppermint right before serving—it can lose flavor when exposed to too much heat, so adding it last keeps it bright and fresh.
    • Sweeten to taste. Start with one teaspoon of brown sugar, then adjust as needed—especially if you prefer a sweeter drink or are using a darker chocolate.
     

    Nutrition

    Serving: 1drink | Calories: 369kcal | Carbohydrates: 41g | Protein: 10g | Fat: 20g | Sodium: 118mg | Sugar: 39g
    Peppermint hot chocolate.

    xoxo Megan

    Homemade White Hot Chocolate

    November 1, 2025

    My sweet, creamy-dreamy White Hot Chocolate recipe is the perfect alternative for anyone who prefers vanilla to chocolate. Made with just 3 simple ingredients in 5 minutes, this velvety treat is just what you need when Jack Frost starts nipping at your nose.

    clear mug of homemade white hot chocolate topped with whipped cream and red and green nonpareils on a white table with white chocolate chips and green sprigs of pine trees.

    As a lifelong chocoholic, I tend to prefer deep dark hot chocolate, but my kiddos are firmly entrenched in the white hot chocolate camp. It makes sense—they also prefer funfetti cake to chocolate cake. But just because they’re not as cuckoo for cocoa puffs as their Mom doesn’t mean they should miss out on the best winter drink.

    This fantastically cozy cup is essentially a white mocha without the buzz, making it the perfect option for a nightly wind-down or for sharing with children. And the best part? You only need 5 minutes and 3 basic ingredients—milk, white chocolate and vanilla—to make it. Lovely!

    Love white chocolate as much as you love coffee? Try out my Starbucks-style merry mint white chocolate mocha, toasted white chocolate mocha, and white chocolate coffee creamer next!

    [feast_advanced_jump_to]

    What does it taste like?

    This white chocolate hot chocolate tastes like liquid vanilla-flavored velvet—sweet, creamy, and impossibly smooth. The melted white chocolate gives it a buttery richness with hints of caramel and cocoa butter, while the vanilla rounds everything out with warmth and depth.

    It’s milky and indulgent without being heavy, like sipping a melted marshmallow or vanilla frosting. It’s perfect for snowy mornings, holiday movie nights, or anytime you need to satisfy your sweet tooth.

    45 degree angle shot looking down into a mug of white mocha hot chocolate topped with whipped cream and red and green round sprinkles on a white table with green bottle brush trees and pine sprigs.

    Why You’ll Love This White Hot Chocolate Recipe

    • Quick & Easy - One pot, three ingredients, and 5 minutes is all you need. Can’t get much simpler than that!
    • Better-for-You - Unlike powdery packets of white chocolate hot cocoa that are loaded with corn syrup, emulsifiers, artificial flavors, preservatives and hydrogenated oils, this homemade version is made with just milk, white chocolate, and vanilla extract. It tastes better, too!
    • Budget-Friendly - Rather than spending $5+ on a hot white chocolate from a café, you can make the real deal at home for a fraction of the price. 

    Ingredients Needed

    • 2% Milk - This is our family’s go-to—it’s creamy enough to not feel like you’re skimping out, but with less saturated fat than whole milk. If possible, opt for Fairlife brand. I’m not affiliated with them, but I love how their milk is easier to digest, tastes creamier, and has more protein than conventional milk.
    • White Chocolate - Make sure you’re reaching for real white chocolate, which should list cocoa butter among the first ingredients. 
    • Vanilla Extract - Without it, white hot chocolate tastes a little one-dimensional. Vanilla adds depth, warmth, and an intoxicating aroma for a much more pleasing experience.
    • Whipped Cream & Sprinkles - Totally optional, but fun and festive!
    milk, vanilla, and white chocolate chips measured out a white table for making Starbucks white hot chocolate at home.

    Substitutions

    • 2% Milk - Feel free to swap in any percentage of dairy milk or your favorite plant-based milk instead.
    • White Chocolate - If you’ve made a batch of white chocolate mocha syrup, you’re welcome to use that instead.  
    • Vanilla Extract - An equal amount of vanilla paste or powder will have the same effect.
    • Whipped Cream & Sprinkles - Omit the toppings for a lighter drink, or swap in a handful of fluffy marshmallows instead.
    hand clad in a white sweater up to the knuckles grabbing the handle of a clear mug filled with white chocolate hot chocolate from a white coaster on a white table with white chocolate chips strewn about.

    How To Make White Hot Chocolate

    Step 1: Warm. Pour the milk and white chocolate into a small saucepan and set it over medium-low heat.

    Step 2: Whisk gently as the chocolate melts. Keep whisking until the mixture is smooth, creamy, and fully combined—just don’t let it boil! Remove the pan from the heat and stir in the vanilla extract.

    Step 3: Serve & Enjoy. Pour your hot white chocolate into a mug and top with whipped cream, sprinkles, or even a few mini marshmallows. Sip, sip hooray!

    milk and white chocolate added to a small saucepan.
    vanilla added to the saucepan after the white chocolate has melted.
    action shot of hot white chocolate hot chocolate being poured into a clear mug.

    Optional Variations & Dietary Adjustments

    • Dairy-Free/Vegan - Use your favorite plant-based milk (preferably a “barista blend”) and double check that your white chocolate is dairy-free.
    • Extra Protein - To give your hot chocolate a bit more staying power, stir in a scoop of vanilla protein powder.
    • Tuxedo Hot Chocolate - Replace half of the white chocolate with dark chocolate for a yummy mash-up.
    • Flavorful Mix-Ins - The delicate flavor of white chocolate plays nicely with several other flavors, so have fun experimenting. Try adding a small splash of peppermint extract, almond extract or raspberry extract for extra interest, then see where your creativity takes you. 

    Serving Suggestions

    White hot chocolate is the ultimate cozy companion for just about any winter moment. Serve it steaming hot with a swirl of whipped cream and a sprinkle of white chocolate curls for a simple, elegant treat. For a more festive take, add a dusting of cinnamon or holiday sprinkles. 

    It’s lovely on a lazy Sunday morning—especially with a shot of espresso stirred in for sleepy mommy. 🥱 In the evening, turn it into a nightcap that doubles as dessert with a splash of Bailey’s, amaretto, or vanilla vodka. You’ll feel extra cozy sipping it by the fire. It’s also perfect for toting along in a travel mug while caroling, tree hunting, or watching snow fall outside.

    closeup shot of the whipped cream and christmas sprinkles on top of a mug of white hot chocolate.

    Recipe Success Tips

    • Use high-quality white chocolate. Real white chocolate (made with cocoa butter) melts more smoothly and tastes richer than candy melts or chips made with palm oil. Look for bars labeled “white chocolate” rather than “white baking chips.”
    • Keep the heat low and slow. White chocolate scorches easily, so stick to medium-low heat and whisk often. You want gentle steam, no bubbling!
    • Whisk constantly. This helps the chocolate melt evenly and prevents a grainy texture.
    • Add the vanilla off the heat to preserve its delicate aroma and flavor.
    • Adjust sweetness to taste. Depending on the brand of chocolate you use, you might want to add a pinch of salt or a little extra vanilla to balance the sweetness.
    • Serve immediately. White hot chocolate is best enjoyed fresh while it’s hot, creamy, and frothy.

    FAQs

    Is white hot chocolate a thing?

    It sure is! Check out the recipe below to learn how to make it.

    What’s in Starbucks white hot chocolate?

    Starbucks uses white mocha syrup to sweeten the milk. Their version contains sugar, condensed skim milk, cocoa butter, coconut oil, natural flavor, salt, and preservatives like potassium sorbate. My homemade version skips all the fake stuff and just sticks to the basics—milk, white chocolate, and vanilla extract!

    Does Swiss Miss make white hot chocolate?

    They do! That said, those little packets are loaded with artificial ingredients. That’s why I love making this super simple better-for-you white hot chocolate using just 3 ingredients.

    ungarnished clear mug of white chocolate hot chocolate on a white table with white chocolate chips and green bottle brush trees with a snowy window in the background.

    Homemade White Chocolate Hot Cocoa Nutrition

    Each serving of this cozy white hot chocolate contains about 371 calories, with 18 grams of fat, 12 grams of protein, and 42 grams of carbohydrates, including 41 grams of sugar. In short, it’s basically dessert. It’s rich, creamy, and indulgent enough to satisfy any sweet tooth, but it’s also a step above store-bought mixes that are loaded with artificial stuff.

    Real milk also offers a decent amount of protein and calcium, so you’re at least getting a little something aside from just sugar—not necessarily the case with store-bought packets made with water. If you’d like to lighten things up, use a lower percentage of milk and either cut back on how much white chocolate you add or swap in a sugar-free alternative.

    All in all, I’d consider this a comforting little luxury that helps me get in the hygge spirit. Mix one up next time you’re cozying up on the couch after a long, chilly day or as a fun motivator for holiday chores. So long as you balance out the rest of your day with nutritious fiber- and protein-rich foods, you should enjoy every sip without an ounce of guilt!

    Total nutritional content per serving is:

    • Calories: 371 calories
    • Total Fat: 18 grams
    • Protein: 12 grams
    • Sodium: 211 mg
    • Carbohydrates: 42 grams
    • Sugar: 41 grams

    *This nutritional information is an estimate and calculated based on the ingredients used to create the recipe. The nutritional value of your ingredients may differ slightly. Furthermore, this food is not intended to prevent, diagnose, cure, or treat any disease.

    horizontally framed shot of a clear mug of homemade white hot chocolate on a white table with white and green bottle brush trees and a sprig of fresh pine tree in front of a snowy window.

    Other Hot Chocolate Recipes

    Print Recipe
    No ratings yet

    Homemade White Hot Chocolate

    This quick & easy recipe for Homemade White Hot Chocolate is made with just 3 ingredients in 5 minutes. Better & cheaper than Starbucks!
    Prep Time2 minutes mins
    Cook Time3 minutes mins
    Total Time5 minutes mins
    Course: Drinks
    Cuisine: American
    Keyword: White Hot Chocolate
    Servings: 1 drink
    Calories: 371kcal
    Author: Megan Byrd

    Equipment

    • 1 small saucepan

    Ingredients

    • 1 cup milk of choice (I used 2%)
    • 1.75 oz white chocolate
    • ¼ teaspoon vanilla extract

    Instructions

    • Add the milk and white chocolate to a small saucepan and heat over low, whisking until the chocolate is melted and the milk is steaming but not boiling.
    • Remove from heat and stir in the vanilla extract. Pour into a mug and serve with whipped cream, marshmallows and/or sprinkles!

    Nutrition

    Serving: 1drink | Calories: 371kcal | Carbohydrates: 42g | Protein: 12g | Fat: 18g | Sodium: 211mg | Sugar: 41g
    Homemade white hot chocolate.

    xoxo Megan

    Easy Homemade Eggnog

    November 1, 2025

    My rich, custardy, warmly spiced Homemade Eggnog recipe is a true holiday delight. If you’ve only ever had the store-bought stuff, you’re in for a very welcome surprise! Whether you serve it as is, spiked with booze, or sauced up with espresso, your Christmas is sure to be merrier with a batch of this beloved seasonal drink.

    closeup 45 degree angle shot of a clear glass of homemade eggnog topped with nutmeg and a whole star anise pod.

    Starbucks holiday drinks are always top of mind during red cup season, but the sweetly spiced yumminess of homemade eggnog is a tradition that long predates the coffee giant. In fact, the first known mention of this festive elixir goes back to 1775! Even Starbucks can’t resist the timeless trend, offering an eggnog latte alongside other Christmas drinks.

    I can remember my grandparents making the best eggnog for Christmas Eve every year when I was growing up. They always kept the booze on the side so my sister and I could partake. Our thick, milky mustaches and sugar-fueled holiday glee are imprinted on my brain like it was just yesterday.

    This cooked eggnog recipe is based on my grandma’s traditional recipe. It’s delightfully thick and creamy thanks to a hefty dose of egg yolks, whole milk, and heavy cream. The custardy consistency is like melted ice cream, making each glass as much a dessert as it is a drink. And the warm, cozy combo of cinnamon, nutmeg, vanilla and rum? Very merry, indeed!

    [feast_advanced_jump_to]

    What does it taste like?

    This homemade eggnog tastes like Christmas in a cup—luxuriously creamy, sweet, and warmly spiced. The combination of egg yolks, milk, and cream creates a silky, custard-like texture, while the blend of cinnamon, nutmeg, and vanilla gives it an unmistakable holiday vibe. If you spike it with spiced rum, it transforms into a festive nightcap with a gentle boozy warmth.

    It’s rich without being heavy, sweet but balanced, and delightfully fragrant. Each sip is nostalgic and comforting, like melted ice cream with a hint of holiday spice. In other words, this custard eggnog is just the thing to make your holiday feel extra special!

    hand clad in a white sweater up to the knuckles grabbing a glass of homemade eggnog from a white table with gold ornaments, whole star anise pods, and green bottle brush trees.

    Why You’ll Love This Christmas Eggnog Recipe

    • The Real Deal - Unlike store-bought eggnog that’s loaded with preservatives, emulsifiers, high-fructose corn syrup, and artificial flavors, this from-scratch treat is made with just 7 all-natural ingredients. So, while it’s not a health food by a long shot, homemade eggnog is what this RDN would consider a much better-for-you swap.
    • Fantastically Festive - There’s no drink that screams “Christmas” as much as this traditional treat. I’d go so far as to say no holiday season is complete without a batch (or three).
    • Vibrant & Versatile - As much as I love eggnog served chilled with nothing else, there are plenty of ways to put it to use. You can also serve it warm as a Christmas-y steamer, add a tipple of booze for a grown-up cocktail, caffeinate it with a shot of espresso, or churn it into ice cream!

    Ingredients Needed

    • Egg Yolks - To make real, honest-to-goodness eggnog, you need to use real eggs! Make sure to separate them while they are cold, which prevents the yolks from breaking.
    • Granulated Sugar - Plain white sugar has a neutral-flavored sweetness, allowing the warm spices and eggy richness to shine.
    • Whole Milk & Heavy Cream - Proper eggnog requires plenty of fat, which is why we use the most decadent dairy combo possible.
    • Cinnamon & Nutmeg - The signature spice combo for this traditional drink. If possible, freshly grate your nutmeg for the most potent flavor.
    • Vanilla Extract - A little splash of vanilla adds a huge amount of aromatic depth, preventing one-dimensional sweetness.
    • Spiced Rum - Optional, but my favorite boozy mix-in.
    ingredients for making easy homemade eggnog recipe measured out on a white table.

    Substitutions

    • Granulated Sugar - Pure cane sugar is a less-refined alternative. You can also use an equal amount of superfine/caster sugar. If you prefer a bit of caramelly undertone, brown sugar can be used.
    • Whole Milk & Heavy Cream - We’re going heavier than half-n-half, using a ratio of ⅔ cream to ⅓ milk. If you have half-n-half and cream, use ⅔ half-n-half and ⅓ cream for the right balance. You’re also welcome to use slightly lighter whipping cream if needed.
    • Cinnamon & Nutmeg - While these are classic spices for eggnog, you’re welcome to shake things up a bit with other warming spice blends that include cloves, allspice, cardamom, and/or ginger. Consider using pumpkin pie spice or apple pie spice instead.
    • Vanilla Extract - You can use an equal amount of vanilla paste or powder.
    • Spiced Rum - Feel free to omit it, or swap in your favorite liquor or liqueur. My sister swears by Bailey’s and eggnog, while my hubs prefers bourbon and eggnog. The way I see it, there’s no wrong answers when it comes to boozy eggnog!
    action shot of cinnamon being sprinkled on top of a clear glass of homemade eggnog.

    How To Make Homemade Eggnog

    Step 1: Whisk Eggs & Sugar. Add the egg yolks and sugar to a mixing bowl. Whisk until the mixture becomes pale yellow and slightly foamy, about 1 minute. Set aside.

    Step 2: Warm Dairy. In a small saucepan, combine the milk, heavy cream, cinnamon, and nutmeg. Place over medium-low heat and whisk constantly until the mixture just starts to steam and tiny bubbles form around the edges. Don’t let it boil! Remove from heat.

    Step 3: Temper the Eggs. Slowly ladle a small amount of the hot milk mixture into the egg mixture while whisking continuously to prevent curdling. Continue adding about ¼ cup at a time, whisking as you go, until the eggs and milk are fully combined.

    Step 4: Thicken & Flavor. Pour the mixture back into the saucepan. Add the vanilla extract and spiced rum (if using). Cook over medium heat, whisking constantly, until the eggnog slightly thickens and coats the back of a spoon—this should take 1-2 minutes.

    Step 5: Strain & Chill. Pour the eggnog through a fine-mesh strainer into a container with a lid. Refrigerate until well chilled.

    Step 6: Garnish & Serve. When ready to serve, pour into glasses, sprinkle with extra nutmeg or cinnamon, and enjoy!

    egg yolks and sugar in a mixing bowl.
    action shot of a hand whisking the egg yolk mixture together until thick and pale yellow.
    milk in a saucepan with spices.
    action shot of a hand whisking the egg yolk mixture with some of the hot milk mixture to temper it.
    hand whisking the homemade eggnog mixture after pouring it back into the saucepan.
    hand holding a strainer above a clear glass measuring cup to strain out any chunks from the homemade eggnog.
    action shot of eggnog being poured into a clear glass on a white table in front of a snowy window.

    Optional Variations & Dietary Adjustments

    • Dairy-Free Eggnog - Swap the milk and cream for your favorite vegan alternatives. I prefer using full-fat canned coconut milk for the richest mouthfeel and a hint of tropical flavor. You can also use vegan whipping cream and full-fat plant-based milk (e.g. oat milk or soy milk). 
    • Reduced-Sugar - Replace some or all of the granulated sugar with your favorite cup-for-cup sugar alternative (e.g. monkfruit).
    • Lightened-Up - Swap the whole milk with Fairlife 2% milk or a high-protein dairy alternative (e.g. soy milk) for slightly less saturated fat.

    Serving Suggestions

    This homemade eggnog is pure holiday comfort, perfect for sipping by the fire or serving at festive gatherings. Serve it chilled in a cute Christmas-y glass, topped with a sprinkle of nutmeg or cinnamon and a dollop of whipped cream for an extra indulgent touch. 

    If you’re entertaining, pour it into a punch bowl with a sprinkle of nutmeg and a cinnamon stick or two for a nostalgic centerpiece everyone can ladle from. Want to make it a little more grown-up? Add a splash of spiced rum, bourbon, or brandy. 

    For a cozy brunch, warm it gently and pair with pumpkin French toast, whole wheat cinnamon roll donuts, or healthier cranberry orange bread. It’s also lovely alongside whole wheat cranberry bliss bars and chewy molasses spice cookies, especially when you spike it with some French press espresso.

    glass of homemade eggnog garnished with ground spices and a small squirt of whipped cream on a white table with gold ornaments, whole star anise pods, and green bottle brush trees in front of a snowy window.

    Recipe Success Tips

    • Temper slowly. When adding the hot milk mixture to the eggs, pour it in a little at a time while whisking. This gradual process keeps the eggs from cooking too quickly.
    • Whisk constantly when heating the egg mixture. It helps prevent the eggs from scrambling and ensures a silky-smooth texture.
    • Don’t rush the heat. Use medium-low heat and be patient. Boiling can cause curdling, so remove it from the heat as soon as it reaches 160°F, the temperature at which any potential bacteria in the egg yolks are destroyed. Use an instant-read thermometer to check. 
    • Strain for smoothness. Even if your eggnog looks perfect, running it through a fine-mesh strainer removes any small bits of cooked egg for professional results.
    • Chill before serving. The flavors meld, the texture thickens slightly, and it gets beautifully creamy.
    • Add alcohol last. Stir in any booze after the mixture has cooled slightly to preserve the flavor (and the proof).

    FAQs

    Does homemade eggnog taste like store-bought?

    Homemade eggnog tastes noticeably richer and more luxurious than store-bought. It has a silky, custard-like texture and a balanced sweetness, with warm notes of cinnamon, nutmeg, and vanilla that shine through naturally. In contrast, store-bought eggnog tends to be cloyingly sweet and often leaves a synthetic aftertaste thanks to artificial extracts. 

    Is homemade eggnog healthy?

    No matter how you slice it, eggnog is a dessert, but the homemade version is often a healthier option than many store-bought versions. Made with real, whole ingredients like milk, cream, eggs, and spices, it skips the preservatives, thickeners, and artificial flavors often found in cartons. So while it’s indulgent, at least you know every sip comes from simple, wholesome ingredients.

    Do I need heavy cream for eggnog?

    You don’t have to use heavy cream in eggnog, but it’s what gives the drink its rich, velvety texture. Just keep in mind the less cream you use, the thinner and less decadent your eggnog will be.

    Can you freeze eggnog?

    Yes, you can freeze eggnog, but be prepared for a slight change in texture once it thaws. The mixture may separate a bit or turn slightly grainy due to the cream and eggs, but a good whisk or quick blend will usually smooth it out. Pour it into an airtight container, leaving a little room at the top for expansion. When you’re ready to enjoy it, thaw it overnight in the fridge and give it a good whisk or blend before serving to restore its creamy texture. Alternatively, churn it in an ice cream maker then store and serve like ice cream!

    closeup flat lay shot looking into a spice garnished glass of homemade eggnog with a whole star anise pod floating on top.

    Homemade Eggnog (Without Alcohol) Nutrition

    Each serving of this DIY eggnog contains about 290 calories, with 18 grams of fat, 5 grams of protein, and 26 grams of carbohydrates. From a nutrition standpoint, this is very much a special-occasion beverage, but a wholesome one. Most of the fat comes from the egg yolks and cream, which contribute to its velvety texture and satisfying mouthfeel. 

    But, because it’s made from scratch with eggs and dairy, it offers some nutrients like vitamin D, calcium, and choline which support bone health and metabolism. Compared to many store-bought versions, this homemade recipe is made without gums, stabilizers, or artificial flavors, making it a healthier option overall. 

    If you’d like to lighten it up, try following the instructions in the “optional variations” section for reducing the sugar and reducing the fat. Otherwise, just enjoy eggnog as it’s meant to be: a cozy, once-a-year tradition for celebrating the season. Cheers!

    Total nutritional content per serving is:

    • Calories: 290 calories
    • Total Fat: 18 grams
    • Protein: 5 grams
    • Sodium: 41 mg
    • Carbohydrates: 26 grams
    • Sugar: 26 grams

    *This nutritional information is an estimate and calculated based on the ingredients used to create the recipe. The nutritional value of your ingredients may differ slightly. Furthermore, this food is not intended to prevent, diagnose, cure, or treat any disease.

    horizontally framed 45 degree angle shot of a glass of homemade eggnog topped with ground spices and a whole star anise pod on a white table with a green sprig of pine, gold ornaments and more star anise pods scattered around.

    Other Eggnog Drinks

    • 45 degree angle image of an eggnog latte topped with whipped cream, nutmeg, and a whole star anise for garnish.
      Eggnog Latte (Starbucks Copycat)
    Print Recipe
    5 from 1 vote

    Easy Homemade Eggnog

    This Easy Homemade Eggnog recipe tastes better than any store-bought version—especially with added rum.
    Prep Time5 minutes mins
    Cook Time5 minutes mins
    Total Time10 minutes mins
    Course: Drinks
    Cuisine: American
    Keyword: Homemade Eggnog
    Servings: 7 servings
    Calories: 290kcal
    Author: Megan Byrd

    Equipment

    • 1 medium saucepan
    • 1 whisk

    Ingredients

    • 6 large egg yolks
    • ¾ cup granulated sugar
    • 2 cups whole milk
    • 1 cup heavy cream
    • ½ teaspoon cinnamon
    • ½ teaspoon nutmeg
    • 1 teaspoon vanilla extract
    • ½ cup spiced rum (optional)

    Instructions

    • Place your egg yolks and granulated sugar in a medium mixing bowl and whisk until pale yellow and foamy, about 1 minute. Set aside.
    • In a medium saucepan, add milk, heavy cream, cinnamon, and nutmeg and whisk to combine over medium heat. Continue whisking until the mixture barely reaches a simmer, then immediately remove from heat.
    • While whisking the egg mixture continuously, ladle about ¼ cup of the hot milk mixture into the bowl with the egg mixture and whisk to completely combine. Continue to do this ¼ cup at a time until you've run out of the milk mixture. Note: this is a key step that needs to be completed gradually, and if rushed, you'll end up with scrambled eggs!
    • Pour the eggnog back into the saucepan and add vanilla extract and alcohol, if using. Heat over medium heat for 1-2 minutes until slightly thickened, stirring continuously. It will continue to thicken as it cools.
    • Strain the eggnog into a large mason jar or pitcher, then store in the fridge for up to 7 days.

    Notes

    This makes about 3.5 cups of eggnog without alcohol. If adding alcohol, it makes about 4 cups. 

    Nutrition

    Serving: 0.5cup | Calories: 290kcal | Carbohydrates: 26g | Protein: 5g | Fat: 18g | Sodium: 41mg | Sugar: 26g
    Easy homemade eggnog.

    xoxo Megan

    • Go to page 1
    • Go to page 2
    • Go to page 3
    • Interim pages omitted …
    • Go to page 6
    • Go to Next Page »

    Primary Sidebar

    Recent Posts

    • Iced S'mores Chai (Starbucks Copycat)
    • S'mores Cold Brew (Starbucks Copycat)
    • 5-Minute Lime Simple Syrup
    • Blue Coconut Refresher (Starbucks Copycat)
    • Iced Blue Coconut Matcha (Starbucks Copycat)

    Recent Comments

    1. Megan Byrd on Banana Bread Syrup (for Coffee!)
    2. Megan Byrd on Brown Sugar Oat Milk Creamer
    3. Megan Byrd on Iced Blueberry Matcha Latte
    4. Megan Byrd on Iced Horchata Oatmilk Shaken Espresso (Starbucks Copycat)
    5. Lindsey H on Iced Horchata Oatmilk Shaken Espresso (Starbucks Copycat)

    Footer

    Disclosure and Privacy Policy

    Copyright © 2026 coffeecopycat.com on the Brunch Pro Theme

    Rate This Recipe

    Your vote:


    A rating is required
    A name is required
    An email is required