Celebrate Cinco de Mayo Starbucks-style with my copycat Iced Horchata Oatmilk Shaken Espresso recipe. This delightfully creamy, warmly spiced, and naturally vegan iced coffee drink is part of the new 2025 summer menu, so I wanted to make sure you had all the DIY deets before it drops!

As far as cold Starbucks recipes go, the shaken espresso drinks are definitely contenders for the top spot. They’re just so simple to make, and are bursting at the seams with crave-worthy flavor! There’s the classic brown sugar shaken espresso, which is a year-round treat. Arguably, the hazelnut shaken espresso is, too.
In the fall, there’s the iced apple crisp oatmilk shaken espresso and pumpkin spice shaken espresso. But until now, there hasn’t been a summer-specific flavor assigned to this frosty favorite—and I couldn’t be happier with the result. Pairing a beloved Mexican agua fresca with bold and buzzy espresso? BRILLIANT.
I can already tell this Starbucks horchata shaken espresso is going to become a summer staple at my house—it’s somehow creamy and light, frosty and cozy all in one sip. Best of all, it’s made with just 3 ingredients in less than 5 minutes. The way I see it, that kind of coffee break ease is reason enough to throw a fiesta!
[feast_advanced_jump_to]What does it taste like?
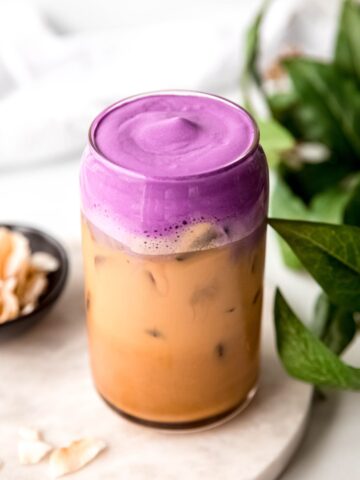
If Mexican café de olla (a sweet and spicy coffee drink) and horchata (a cinnamon-flavored sweet rice milk) made an iced coffee baby, this would be it! The espresso brings deep, dark, roasty undertones with a hint of bitterness—perfect for kicking those yawns to the curb.
The sweet horchata syrup is full of Latin flair thanks to a heady mix of spicy cinnamon, warming vanilla, and toasty rice. Finally, the creamy, dreamy oatmilk ties it all together, softening espresso’s sharpness while keeping it deliciously dairy-free—just like the classic Mexican drink.

Why You’ll Love This Starbucks Shaken Espresso Recipe
- Sweet & Summery - When the temperatures rise, my hubby and I like to hit a local taco truck—Mexican food just feels right when the sun is shining! While we change our order every time, the only thing that isn’t negotiable is a big ol’ glass of horchata to wash it all down. I love that I can bring that vibe to my morning coffee!
- Quick & Easy - All you need are 3 ingredients and 5 minutes to whip one up. So simple!
- Budget-Friendly - Making your own Starbucks-style drinks is one of the easiest ways to recession-proof your budget without giving up your favorite indulgences! Rather than spending $5 (without tax or tip) for a single shaken oat milk espresso, you can make it at home for a fraction of the price.
Ingredients Needed
As promised, you only need 3 simple ingredients to make this Starbucks horchata drink:
- Espresso - Because you can’t make a shaken espresso without it!
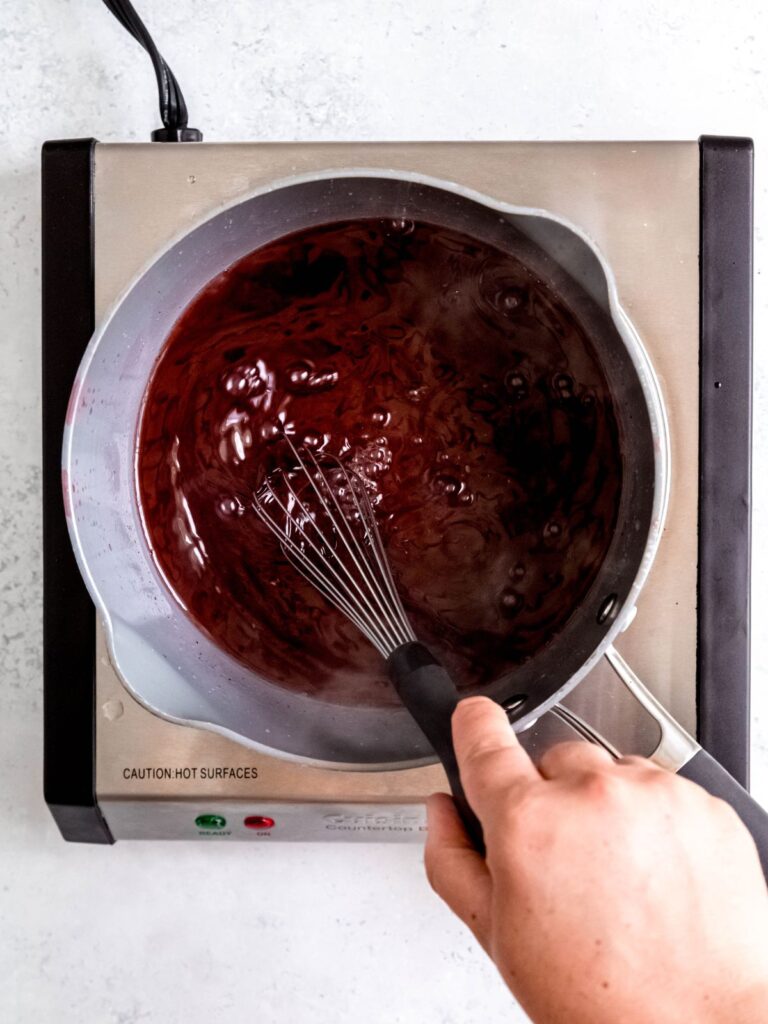
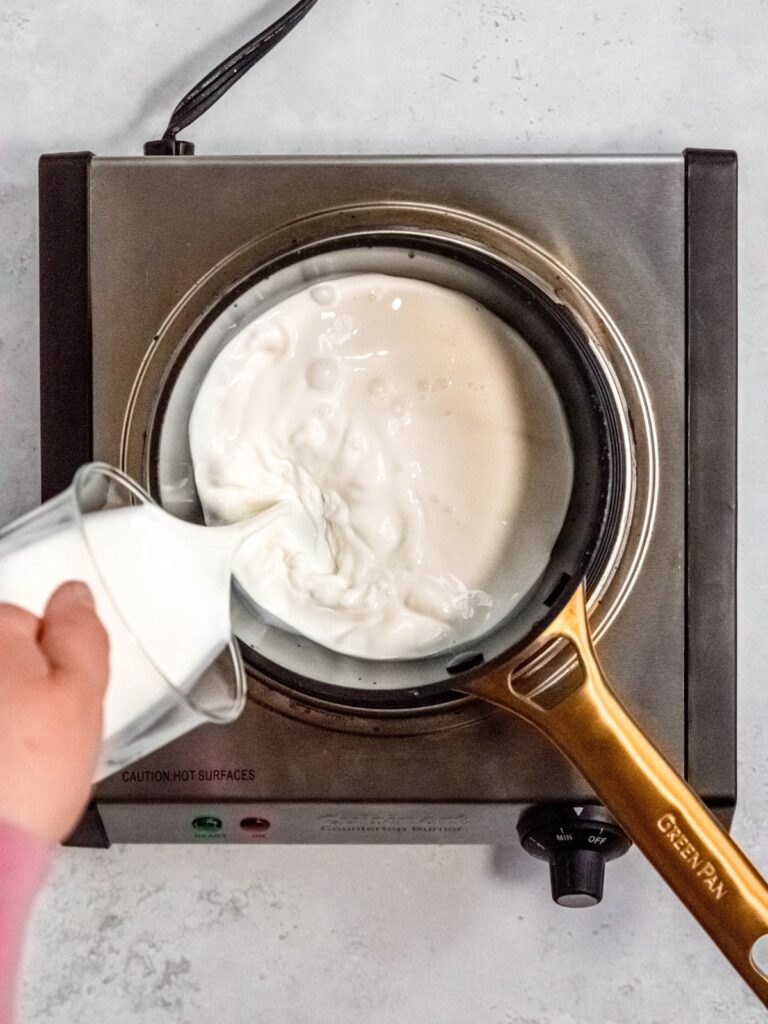
- Horchata Syrup - Feel free to use store-bought, or make my homemade version with white rice, granulated sugar, water, cinnamon, and vanilla extract.
- Oat Milk - I used Oatly Full Fat Barista Edition (which is what Starbucks uses), but feel free to swap in the brand you prefer.

Substitutions
I want you to feel empowered to tweak this Starbucks iced shaken espresso recipe as needed to make it work for you! Here are some easy swaps to try:
- Espresso - Strong cold brew is a good espresso substitute if needed.
- Horchata Syrup - While they won’t have quite the same horchata-inspired flavor, toasted cinnamon syrup, cinnamon dolce syrup, and simple cinnamon syrup are all close enough approximations.
- Oat Milk - Feel free to swap in the plant-based milk or dairy milk of your choice!

How To Make Starbucks Iced Horchata Oatmilk Shaken Espresso
You’ll be slurping down this summery sipper before you know it. Here’s how:
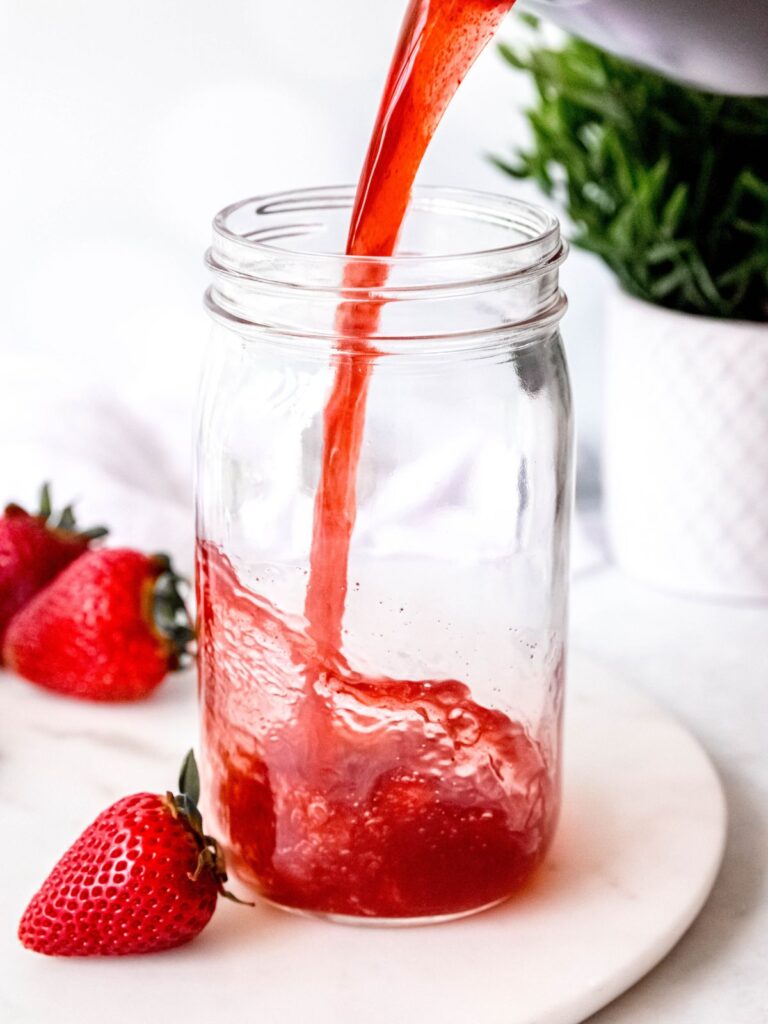
Step 1: Add horchata syrup to a mason jar or cocktail shaker.
Step 2: Brew the espresso into the jar with the syrup. Attach the lid.
Step 3: Shake the espresso and syrup together until frothy—about 45 seconds.
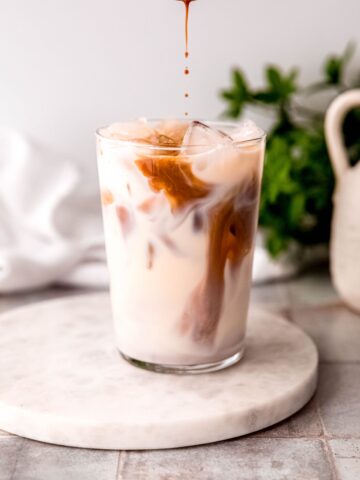
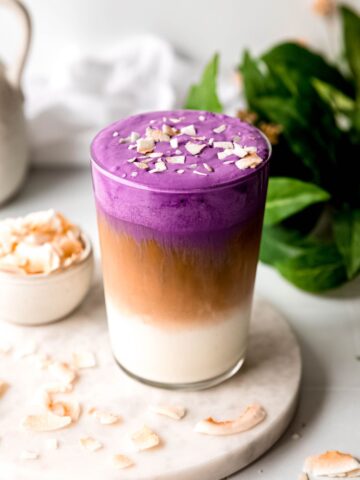
Step 4: Pour the shaken horchata espresso mixture into a glass of ice.
Step 5: Pour the oatmilk over the iced shaken espresso. Garnish with a cinnamon stick if desired, then drink up!


Optional Variations & Dietary Adjustments
- Sugar-Free - For a diabetic-friendly and lower-calorie version of Starbucks horchata shaken espresso, use your favorite cup-for-cup sugar substitute to make your horchata syrup.
- Decaf or Caffeine-Free - Feel free to swap in your favorite decaf roast to reduce the buzz. You can also use your favorite caffeine-free coffee alternative (e.g. Dandy Blend or roasted chicory) if you can’t have any caffeine.
Serving Suggestions
This warmly spiced iced horchata oat milk shaken espresso is my new favorite coffee break recipe—all that sugar, spice, and everything nice is just what the doctor ordered! While it’s lovely on its own, you can also up the flavor ante by:
- Adding yummy garnishes like whipped cream or sweet cream cold foam and a dusting of cinnamon sugar.
- Swapping in coffee ice cubes to make it extra zippy.
- Serving it with warmly spiced, secretly healthy treats like high protein cinnamon roll overnight oats, whole wheat cinnamon roll donuts, or oatmeal protein cookies.
- Going all out for brunch and serving it with Mexican breakfast dishes like egg and chorizo breakfast burritos, spicy potato chorizo tacos, or sheet pan huevos rancheros.
- Serving it for dessert alongside Mexican desserts like authentic arroz con leche or cinnamon churro sticks.

Recipe Success Tips
- Use full-fat, barista-style oat milk for the creamiest mouthfeel. Some oat milks can be kind of thin, so choosing a good one with rich texture is key.
- Make sure your milk and syrup is cold before starting to quickly cool the espresso. This will keep it from melting the ice and becoming diluted!
- Freeze your serving glass for 15-20 minutes before making the shaken espresso to keep it frosty to the very last drop.
FAQs
While they don’t offer authentic Mexican horchata, which is basically sweetened rice milk with cinnamon, Starbucks is introducing the iced horchata oatmilk shaken espresso made with horchata-flavored syrup in May of 2025.
This iced horchata oat milk shaken espresso is top of the list! You’ll likely also be able to use the syrup for sweetening cold brew, making a hot oat milk latte, blitzing up frappuccinos, or adding it to any of your other favorite Starbucks drinks!
Yes, but not overly so (in my opinion). The syrup and milk helps round out the sharp, bitter edges of the espresso, but the espresso keeps the drink from being cloyingly sweet. You can always dial the sweetness up or down by adding more or less syrup!
DIY Iced Horchata Shaken Espresso Nutrition
At 230 calories per serving, this creamy, spicy-sweet coffee drink definitely falls under “treat” territory. The majority of that comes from carbs—each serving contains 43 grams, 36 of which are from sugars. Since we’re using oat milk instead of dairy, there’s only 2 grams of protein and 5 grams of fat per drink. With a moderate 84 milligrams of sodium, it’s nothing to fret over.
There are always ways to tweak your homemade coffee drinks to help them fit your dietary needs. To reduce the calorie, carb, and sugar content, swap in sugar-free horchata syrup. To increase the protein, consider swapping in dairy milk and/or blending in some protein powder.
But, even if you drink this iced horchata shaken espresso as is, as long as you consume it in moderation, you should be fine! I would recommend pairing it with a high-fiber snack to prevent any massive fluctuations in your blood sugar, then just make sure to be mindful about the rest of your day. Enjoy every sip!
Total nutritional content per serving is:
- Calories: 230 calories
- Total Fat: 5 grams
- Protein: 2 grams
- Sodium: 84 mg
- Carbohydrates: 43 grams
- Sugar: 36 grams
*This nutritional information is an estimate and calculated based on the ingredients used to create the recipe. The nutritional value of your ingredients may differ slightly. Furthermore, this food is not intended to prevent, diagnose, cure, or treat any disease.

Other Iced Coffee Recipes


Iced Horchata Oatmilk Shaken Espresso (Starbucks Copycat)
Equipment
Ingredients
- 3 tablespoon horchata syrup
- 2 oz espresso or 5 oz cold brew espresso
- ¾ cup oat milk (I used Oatly Full Fat)
- ice
Instructions
- Pour horchata syrup into a mason jar, then top with espresso. Add ice, and shake until frothy and well-combined.
- Add ice to a tall glass, then strain the horchata espresso over the ice. Top with oat milk, stir, and drink up!
Nutrition

xoxo Megan